Adding Time Off for more than a day
I'm sure we have all, at some point, felt the urge to fill up our calendar with nothing but vacation time. While our software doesn't exactly encourage you to do this (everybody's gotta work, right?), TimeTap does make it easy to add in vacation time using the Multiple Days checkbox in adding a new Time Off.
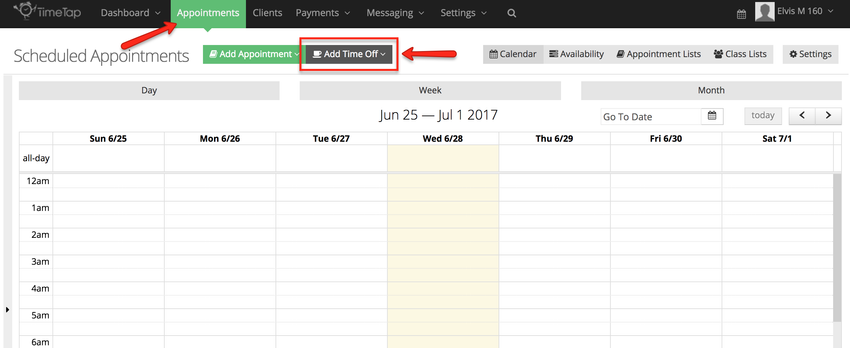
To do this, navigate to Appointments and click the "Add Time Off" button:
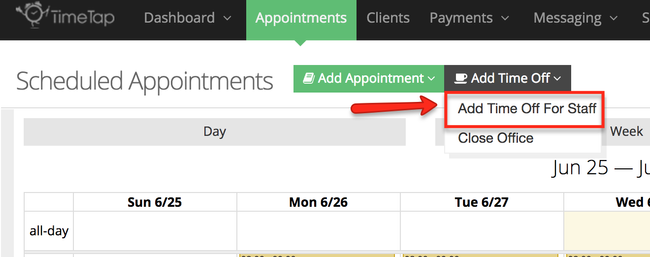
You can then select to "Add Time Off for Staff" or "Close Office". Add Time for Staff allow you to add a time for one or more staff, Close Office allows you to block the availability for all staff at specific location for a day or more. In this case we will focus on how to add a time for a single staff member, select "Add Time Off for Staff":
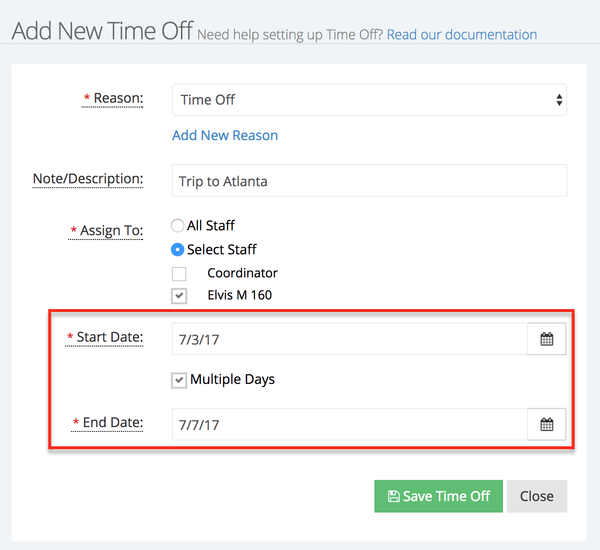
First, select an existing reason for this time off (1) or add a new one(2):
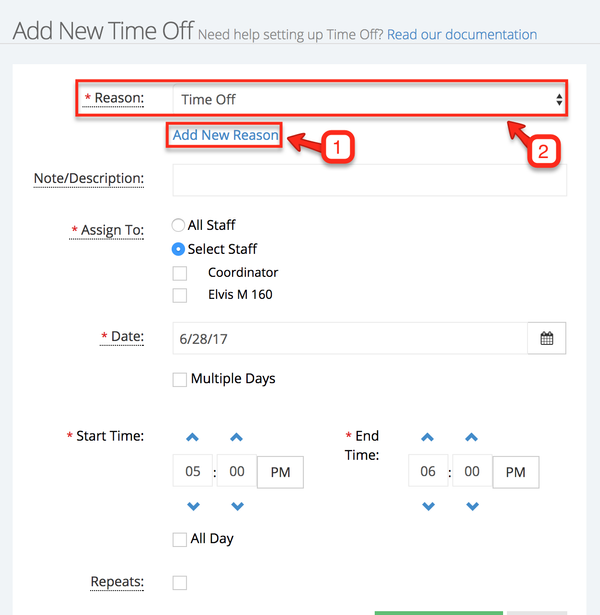
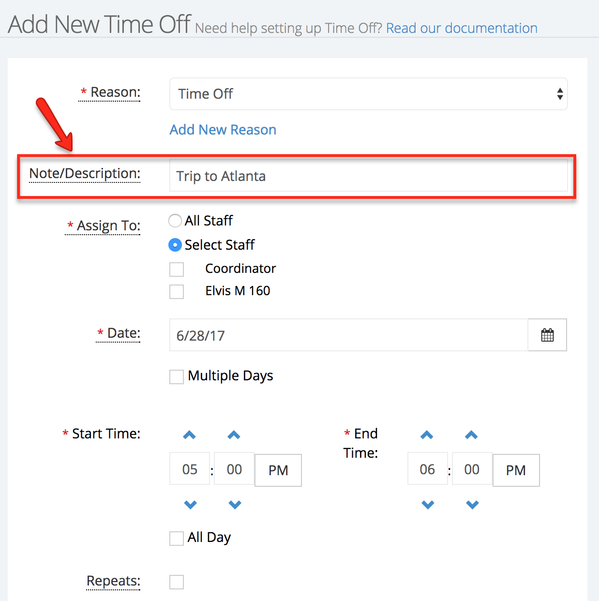
If you would like to add more details around what you're adding this time off for, you can enter this information in the Note/Description Field. The Note/Description is not displayed to clients but can only be seen on the Time Off List view for your internal reference:
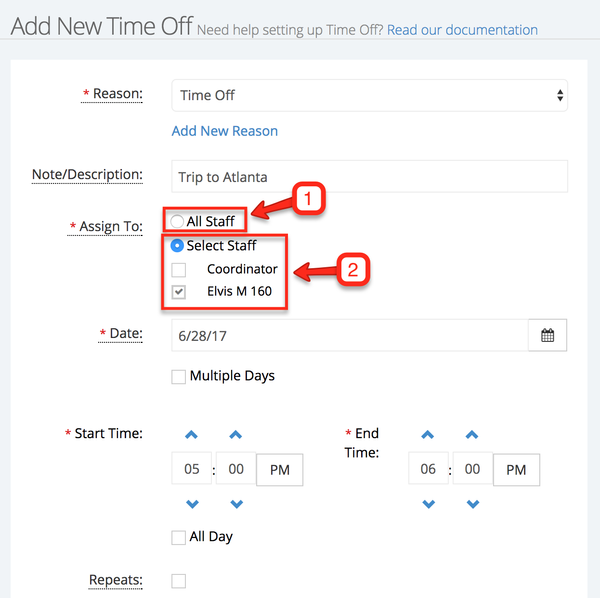
If this time off is for all your staff select the All Staff radial button (1), otherwise select the specific staff members by selecting the Select Staff radial button and checking the box next to the appropriate staff (2):
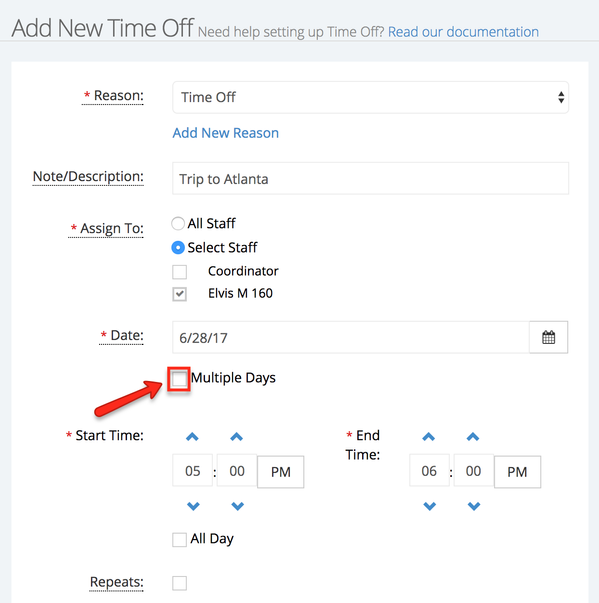
Next, check the checkbox next to "Multiple Days":
After checking the Multiple Days checkbox, you will see the start and end times go away and an end date field appear:
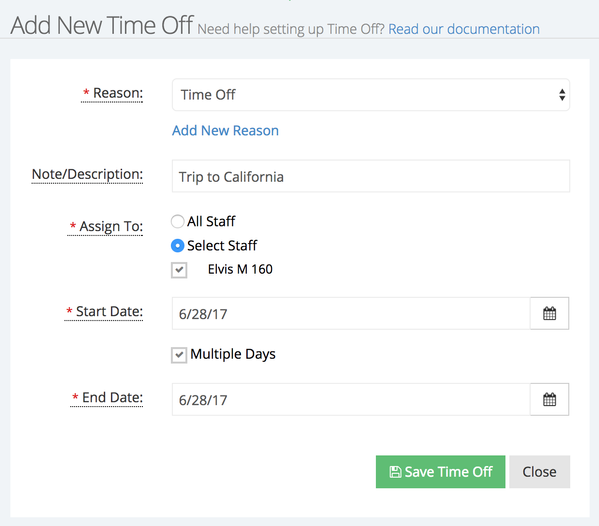
Enter in the start and end date for your multiple day time off:
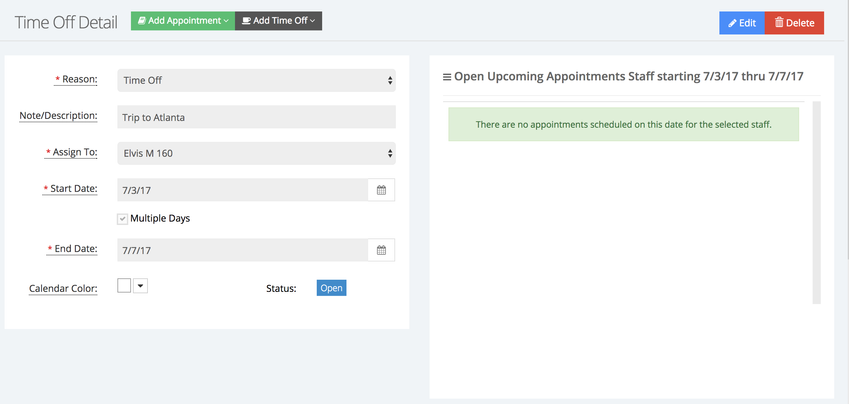
Once you've entered in a start and end date, the upcoming appointments table will update to show you if you have any appointments currently scheduled between those dates:
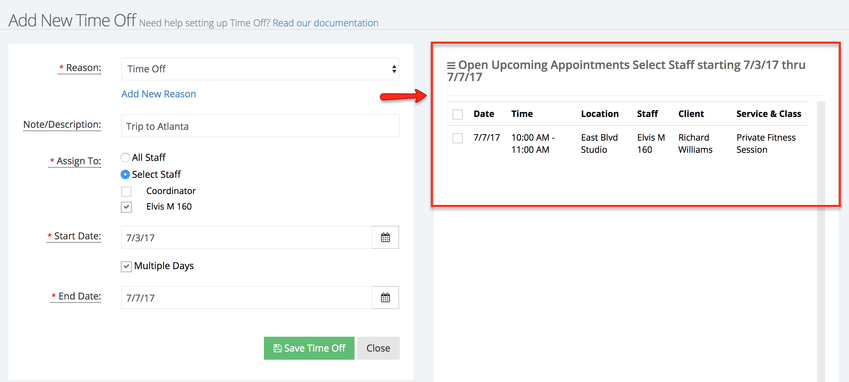
Having a list of upcoming appointments will let you know if you need to make any calls to clients to cancel or reschedule appointments. You also have the option to assign these appointments to another staff member as long as they are able to accept appointments.
Select the appointment(s) you want to assign to a different staff member and click the Reassign Select button:
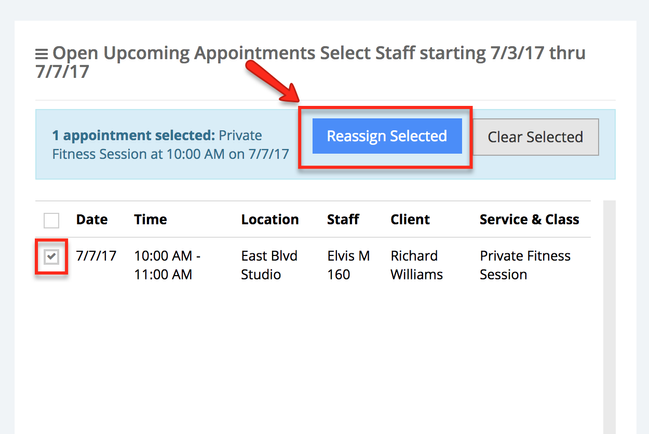
After you click the Reassign Selected button the Update Appointments window will appear. Select a staff member from the 'Staff to Reassign to" field and select if you the box next to Send Email to Staff to notify him/her about the new appointments you assigned to them, click the Update Appointments to complete this process:

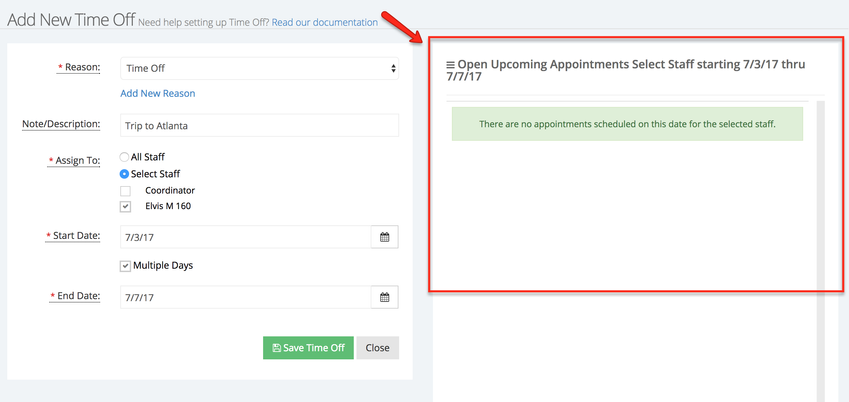
Now that you have assigned your appointments to a different staff member, you will notice that your Upcoming Appointments section is clear:
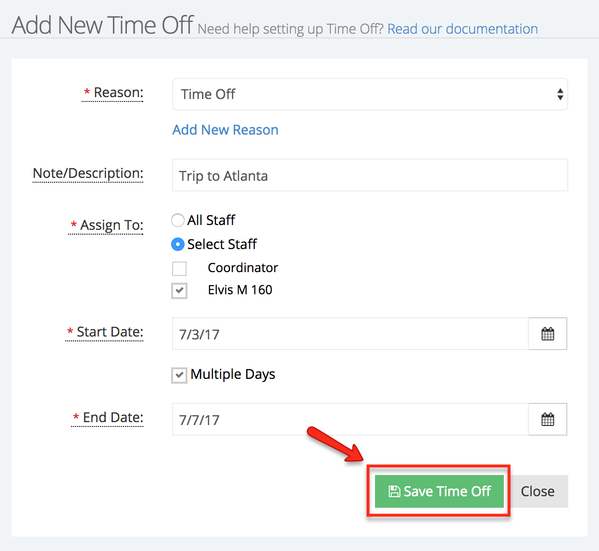
Press the "Save Time Off" button to commit the multiple day time off to your schedule and block off your availability for accepting appointments:
Once you press "Save Time Off" your screen will update to the Time Off Detail page where you will see your time off in view only mode. From here you can either edit it if you need to make adjustments or press the close button to return to the Time Off List view: