Manage Products
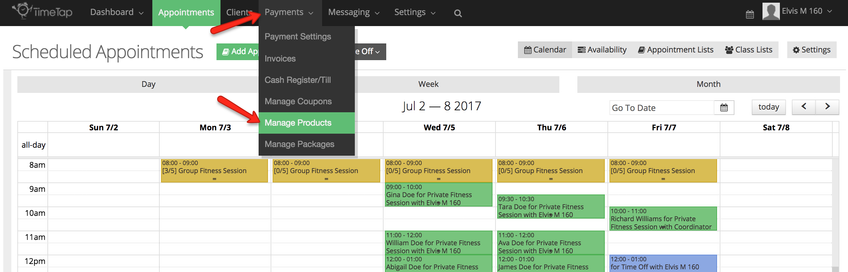
Begin by going to Payments → Manage Products:
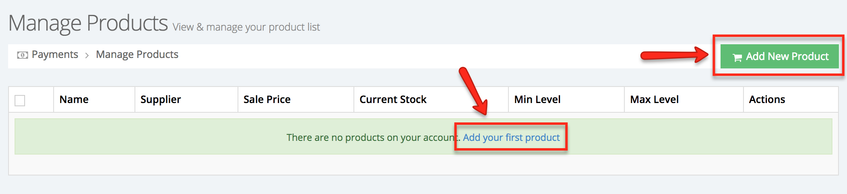
Once in the Manage Products screen click the Add New Product button or if you have not added any products yet click the link "Add your first product":
After you've clicked the Add New Product button or the"Add your first product" link you will be taken to the Add New product screen:
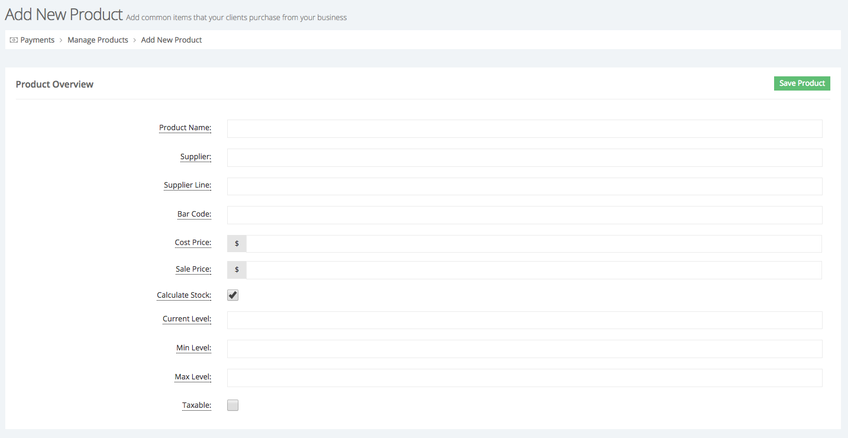
This Add New Product form is composed of multiple fields, only the Product Name is required to add a new product. The following is a list of the fields available and a brief description of they are:
- Product Name (Required): This is the name of the item that you are selling, it is what will appear as the line item in your invoices.
- Supplier: This is who supplies the product you're selling and can be used to help with sorting.
- Supplier Line: This is the line of your supplier that the product is part of.
- Bar Code: Enter a barcode for this product manually or if your device is connected to the a bar code scanner place your cursor in this field and scan the bar code.
- Cost Price: This is how much you purchased the product for. Entering this information will help us run reports on profit for products.
- Sale Price: This is what you are selling the product for. This be entered on the invoice as the rate for the product. TimeTap will use this number minus your cost price to help derive profit reports.
- Calculate Stock: Check this field if you want TimeTap to auto calculate stock when products are purchased/removed
- Current Level (applicable if Calculate Stock field is selected): This is the current amount of the product that you have in stock. You can only set this while adding a product. Afterwards we will calculate this from your sales or purchases of this product.
- Min. Level (applicable if Calculate Stock field is selected): This is the lowest amount that your stock of this product can get to before you need to reorder. By setting entering a number here, TimeTap will add an alert whenever your product reaches this level.
- Max Level (applicable if Calculate Stock field is selected):This is the highest amount that your stock should get to.
- Taxable: If your business tax rate needs to be applied on this item, then check this box and TimeTap will total it up when the product is added to an invoice
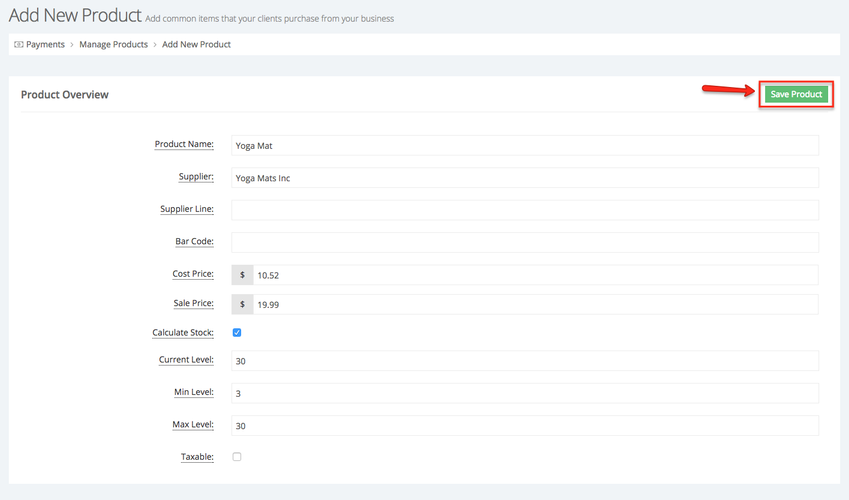
After you've filled in all the necessary field click the Save Product button to add the product:
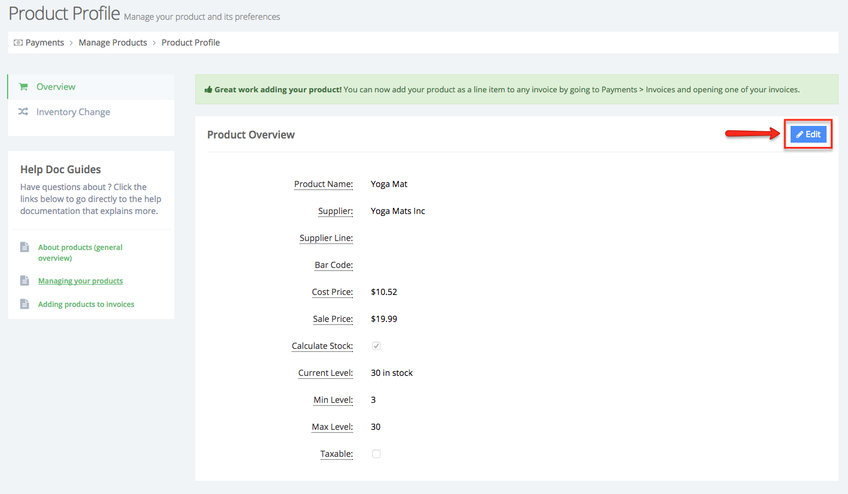
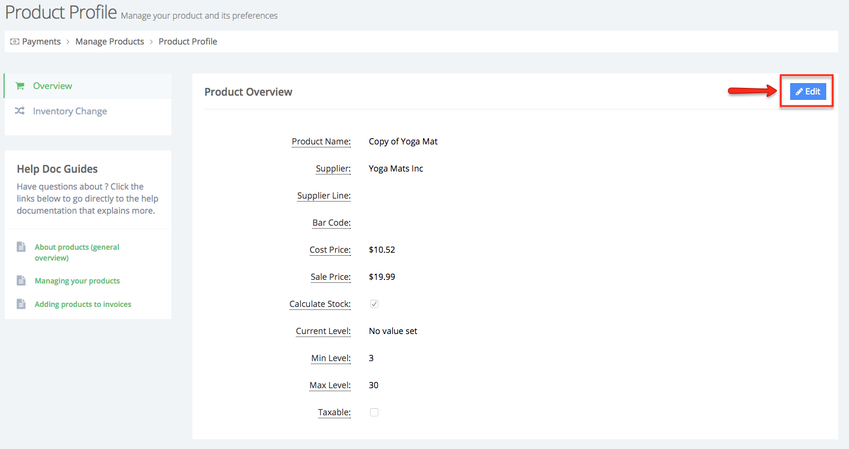
Once the product has been Saved you will be taken to the Product Profile screen, if you need to make changes to the product's profile click the Edit button:
In the following section we will cover how to clone products.
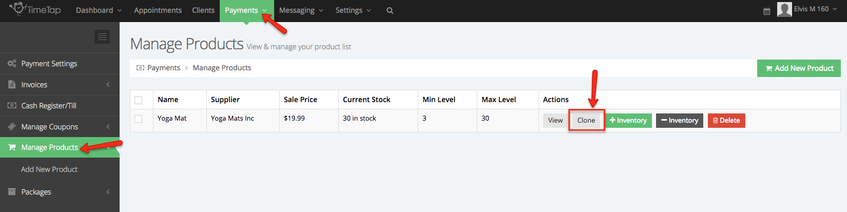
If you have added a product and would like to clone it go to Manage Products screen and click the Clone button next to the product you want to clone under the Actions column:
Once the Clone button has been clicked a copy of the product you cloned will be added to your list of products:
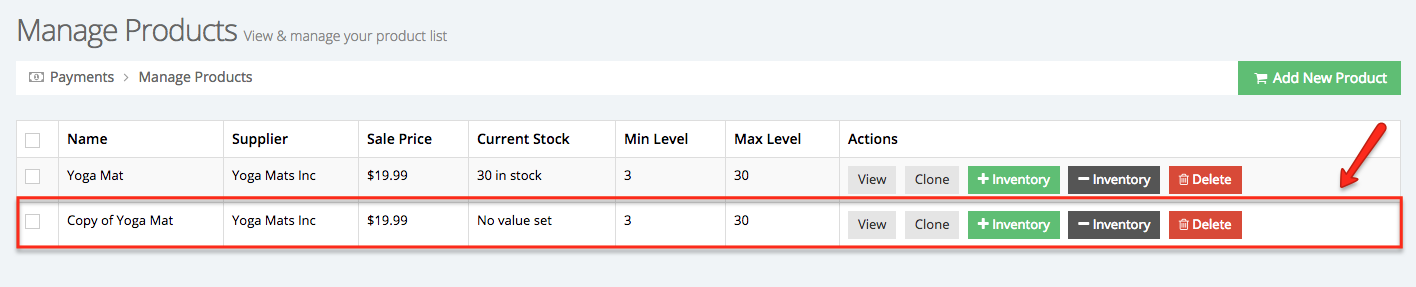
Notice that if the product you cloned had a value in the "Current Stock" field, this value will not be applied to the copy of the product. To set the Current Stock for the copy of the product you cloned inventory will have to be added:

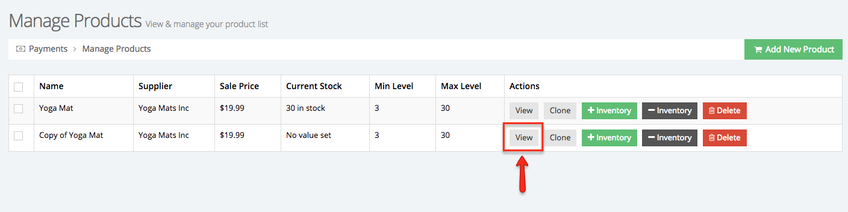
To make changes to the newly created product click the View button under the Actions column:
Once in the Product Profile screen click the Edit button in the Overview section to make changes to the product:
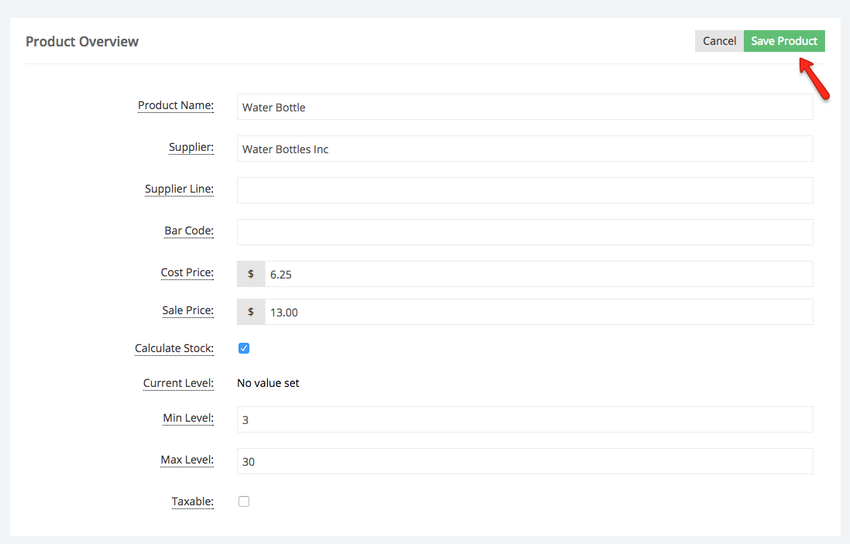
Once you have made the necessary adjustments click the Save Product button:
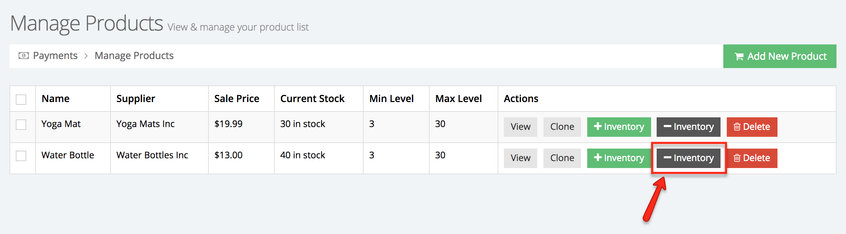
Go back to the Manage Products screen to add inventory to the cloned product. Click the "+ Inventory" button next to the product under the Actions column:

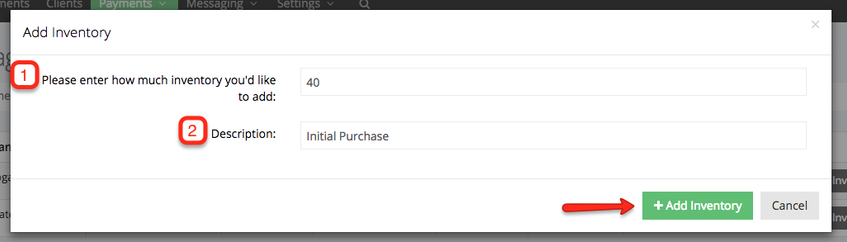
A new window will appear where you enter how much inventory you would like to add (1) and a brief description to this inventory addition (2), click the "+ Add Inventory" button when the fields have been filled in:
You will then notice that the Current Stock field for this cloned product updates based on the inventory value you added:

If you selected the option to Calculate Stock at the time you added a product then this section will be of interest to you. In this section we will cover how to add or remove inventory.
First, we will cover how to remove inventory, this function can be used to record a sale, a return of product to the supplier, a giveaway to a client, etc. Once you're in the Manage Products screen click the "- Inventory" button next to the product for which you want to remove inventory:
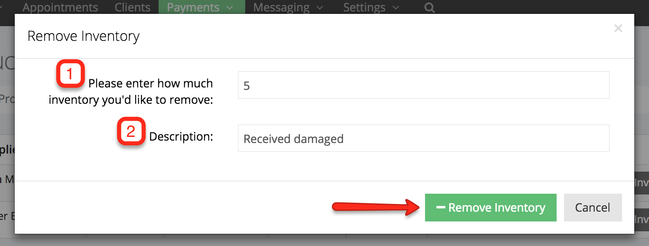
After you've clicked the "- Inventory" button the Remove Inventory window will appear, here you can enter how much inventory you'd like to remove (1) and a brief description for the reason you're removing inventory (2), click the Remove Inventory button to remove the inventory:
Once the inventory is remove the product's current stock will update:

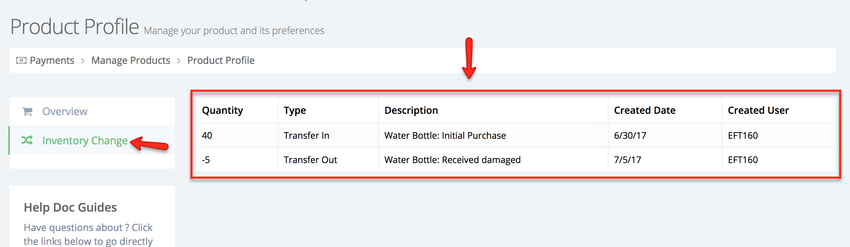
To view a history of all the inventory movement go to the products profile and select the Inventory Change tab, within this tab you will find a list of all the instances where stock was added or removed:
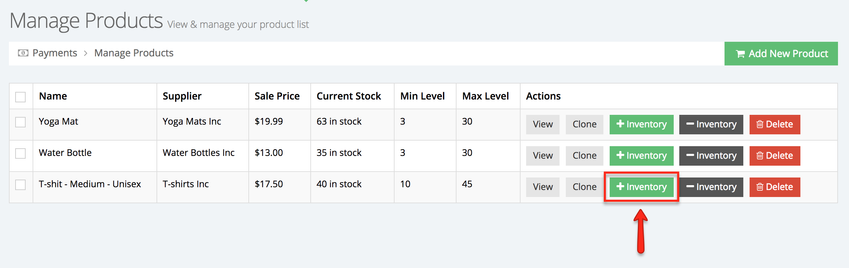
To add inventory simply click the "+ Inventory" button next to the product in the Manage Products screen:
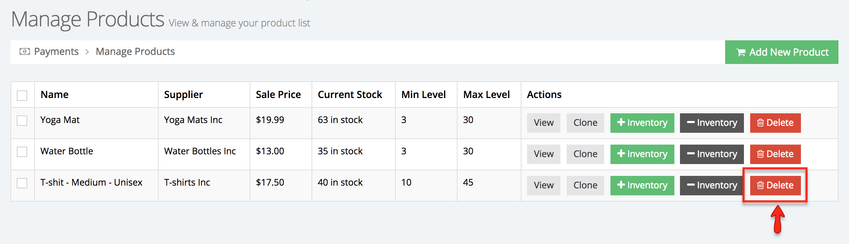
To permanently delete a product click the "Delete" button next to product you want to delete in the Manage Products screen:
After the button has been click a new window will appear where you will confirm that you want to delete the product or cancel the action:
