| Anchor | ||||
|---|---|---|---|---|
|
In this documentation we'll go through how to upload a client list with tags attached as well as how to attach tags to clients directly through the interface. We'll also look at how to sort the client list based on the tags you've applied:
You can easily add tags to clients from either the add client flow, the client list view, or the client's profile view. Once you've tagged a client with a certain tag, you'll be able to sort your client list view by that tag.
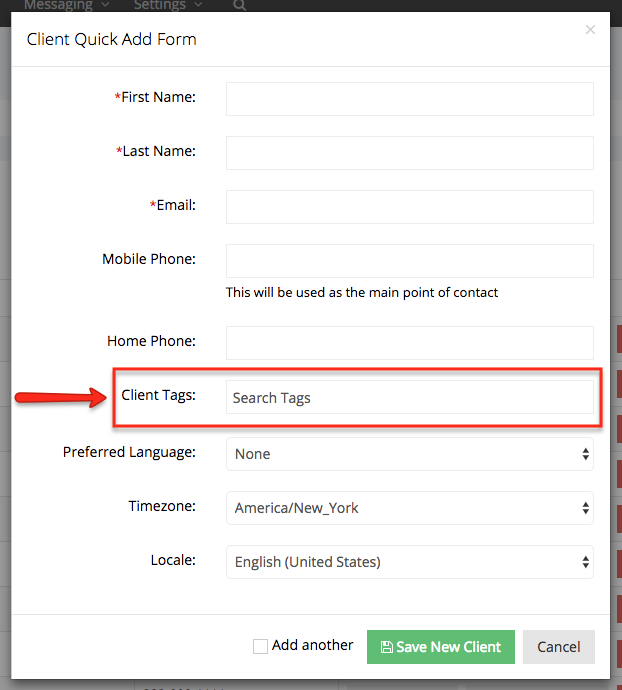
In the "Add New Client" form found by going to the Clients menu and clicking the green "Add New Client" button, you'll see the field for customer tags underneath your account's custom fields:
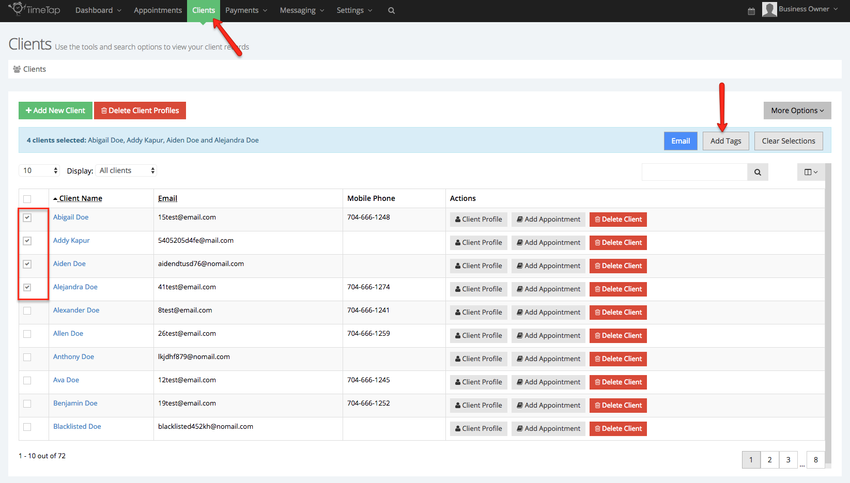
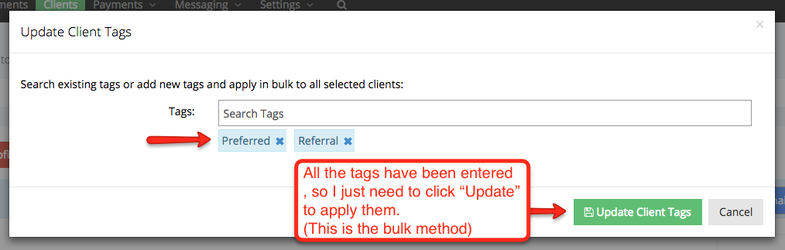
In the client list view, if you select multiple customers you'll see a button at the top of the list to "Add Tags". If you click on it, you'll be able to add tags to the customers in bulk:
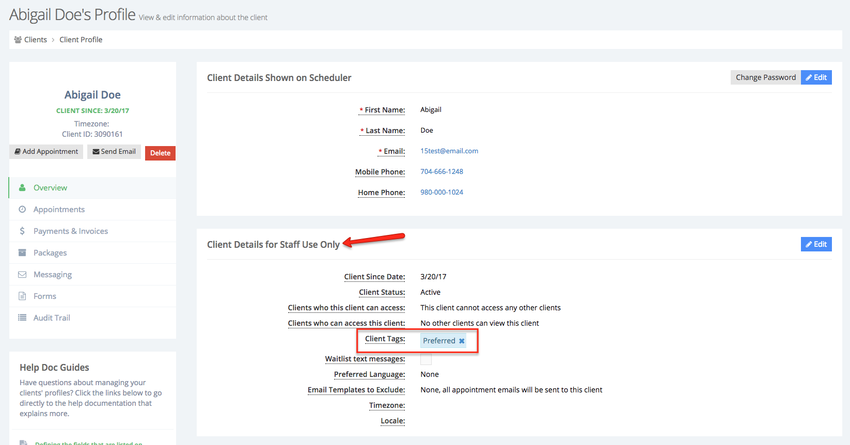
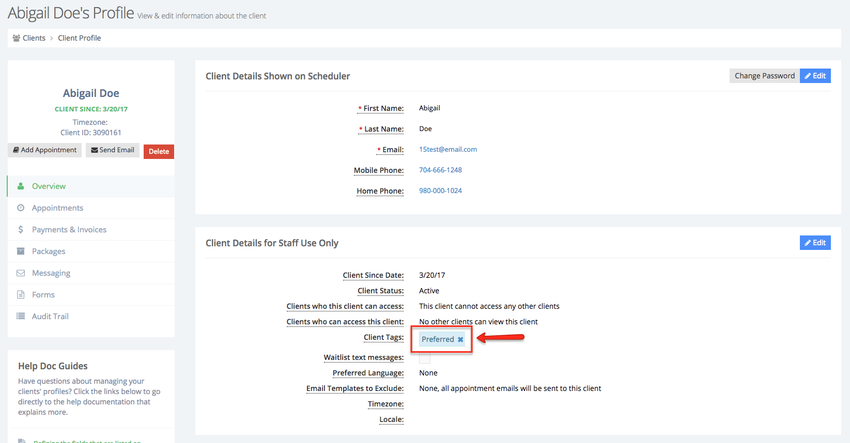
Lastly, on a client's profile, you'll see the tags section in the "Client Details for Staff Use Only" section:
You can use any of these three options to add tags to your clients. They all work the same way, it just depends on what's most convenient to you at the time for which one you want to use (obviously, for instance, you would use the "Add New Client" option to add tags to an existing client record)..
When adding tags, if you start typing in a tag name and that tag already exists on your account, it will appear as a suggestion underneath the type/input field:
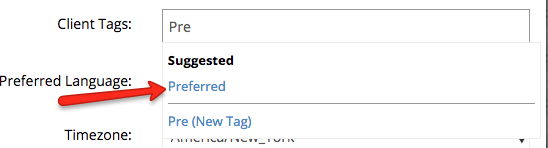
You can use your up and down arrows on your keyboard to select the tag from the list of suggestions shown there or you can select it with your mouse. Once you've selected the tag to add to the client, it will appear in a small blue tag box underneath the input field:

If you start typing in an entry for which there is not currently a tag on your account, you'll also see the option at the bottom of the suggestions list to add a new tag:

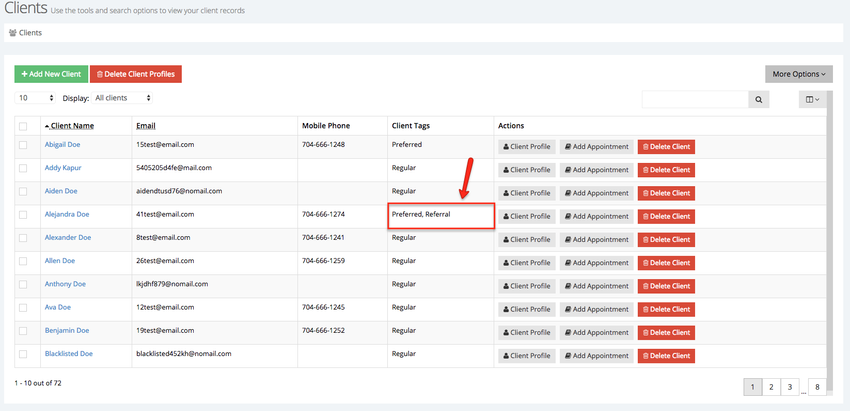
The same tag can't be added multiple times to a customer's profile. For example, you'll notice that the client in the image below already has the tag "Preferred" applied to her:
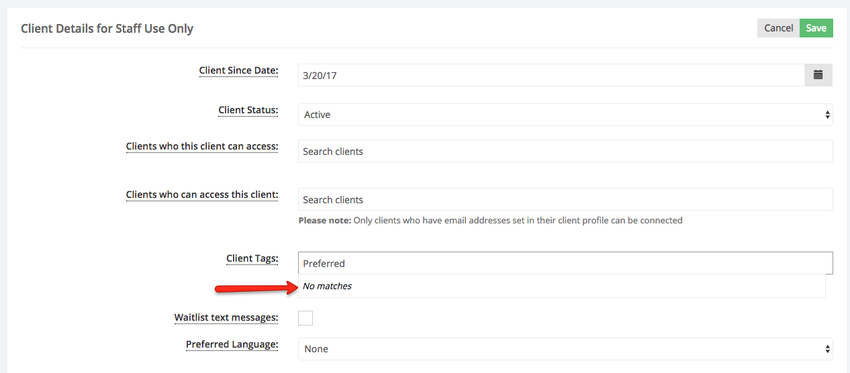
If I try to edit that client and add "Preferred" again, I'll get a warning that there are no new tag matches:
You can add as many tags as you'd like to a client. Once you've entered all the tags you want to apply, just click the save or update button depending on which method you're using
Once you've updated the customer's tags, you'll see them appear in the customer tags field for whichever customer you applied them to:
If you added any new tags while you were tagging the customer, you'll notice that those new tags will now also appear in the display tag dropdown at the top of the customer list:
This section of our documentation assumes you have already read through the basics of uploading a client list which can be found here. Here, we are diving deeper into the upload process with a focus on the column for tags.
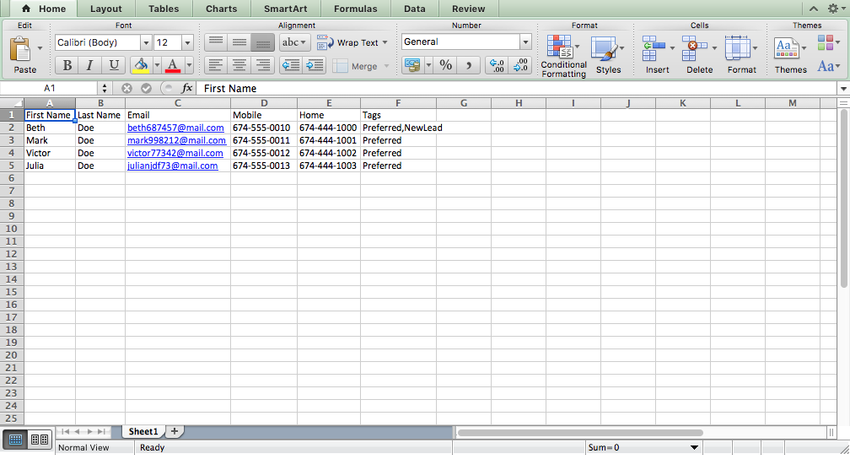
Let's take a look at a client list spreadsheet that I want to upload:
| Note | ||
|---|---|---|
| ||
| You'll notice on the spreadsheet that the tags are separated by commas and the there are no spaces allowed in tags |
Once all of these clients get uploaded to my account, I want them all to be tagged with "Preferred" so that I can sort the client list to show all clients tagged with "Preferred" and see those clients.
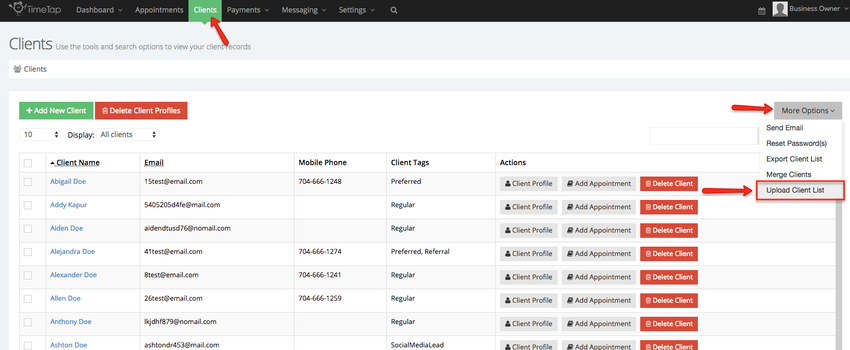
To do this, I'll start by going to Clients > More Options > Upload Client List:
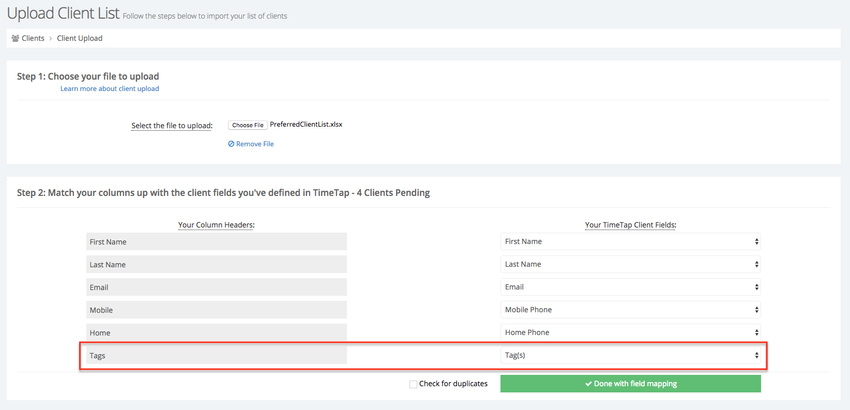
I'll browse and upload the file in step 1 of the client upload process. Then in step 2, I'll map the column headers from the spreadsheet to the fields in TimeTap. For the "Tag" column from my spreadsheet, I'll map that to the "Tag(s)" option in the dropdown:
Once I've finished mapping the column headers, I'll click the green "Done With Field Mapping" button and TimeTap will run a check behind the scenes for any duplicate clients and display a preview table before you import. You'll see the tags that are going to get added to the client in a comma separate array there:
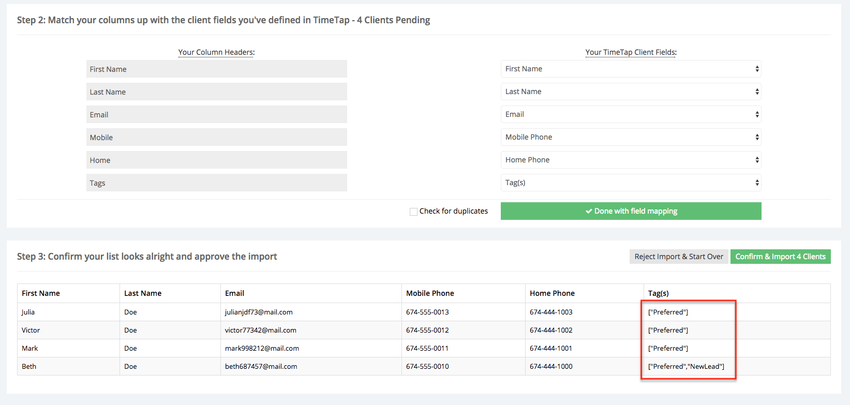
From here, I'll just click the green "Confirm & Import" button at the top of the table preview.
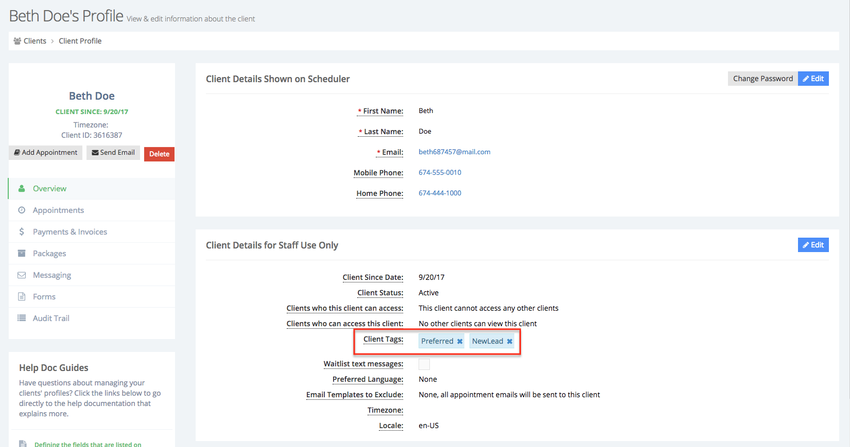
Once the customers are imported, I can go into any of their customer profiles and I'll see the tags added to that customer record:
If you always want to see your clients based on the tags you created, the easiest way to do this is to make sure that you tag your clients when you upload or add them (as described in the previous two sections of this documentation page).
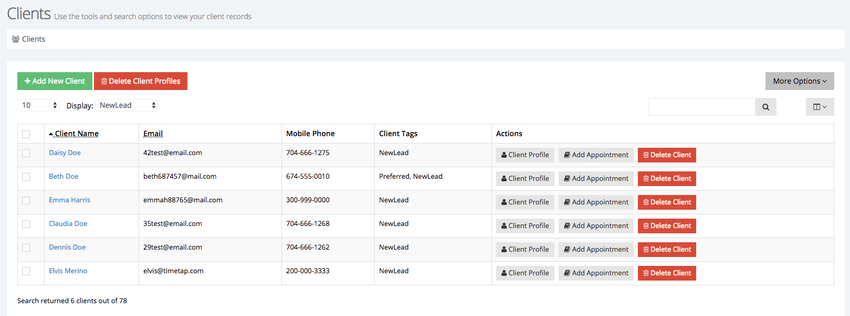
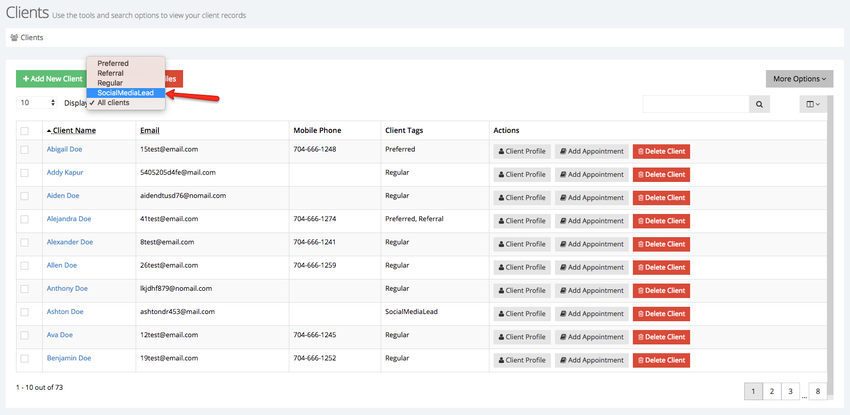
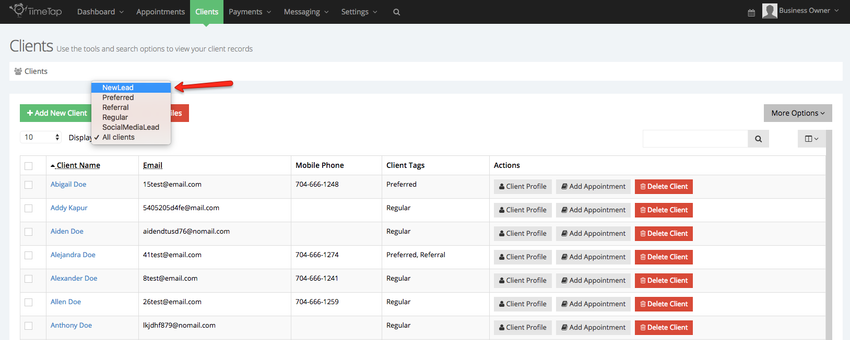
Once you've got your clients tagged, you can go to your client list and sort the view by all those in that tag group. To do this, locate the "Display" dropdown at the top of your client list:
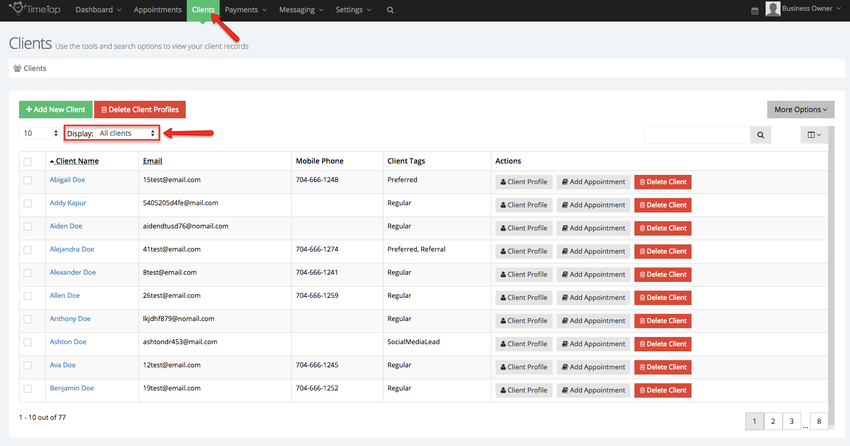
By default, this shows "All clients" which will be a full list of all candidates that have been uploaded or added across recruiters. You can toggle that dropdown, however, to show the tags on your account:
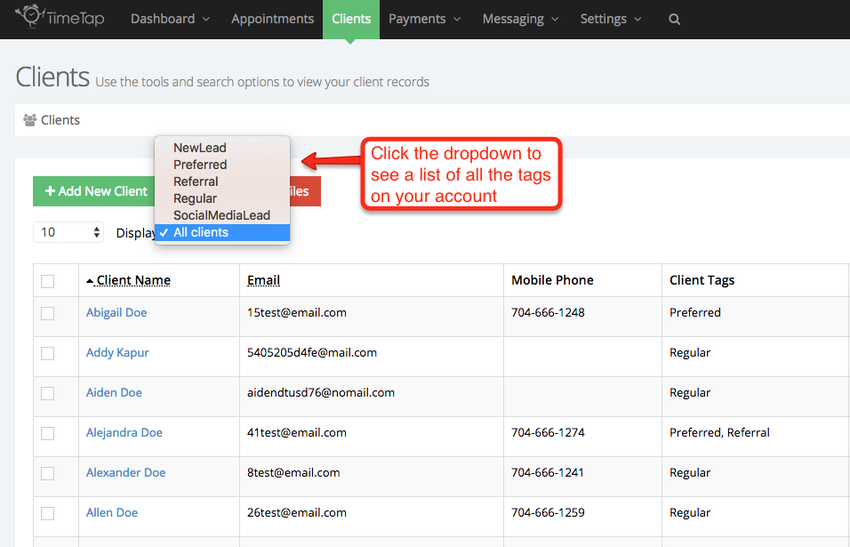
Select whichever tag you want to display the clients for, and you'll see your client list whittle down to just show the clients with that specific tag:
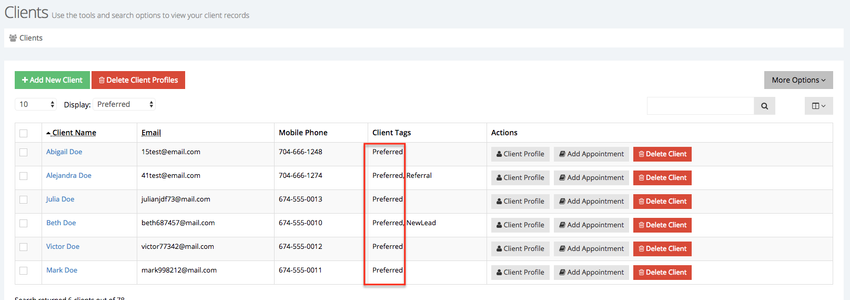
Now that you've selected your preferred tag view, you can navigate away from the client list and come back to it and you'll notice that TimeTap remembers your selected preference.
To remove a tag from a client, you can click into the client's profile and use the "X" button next to the tag name to remove it:
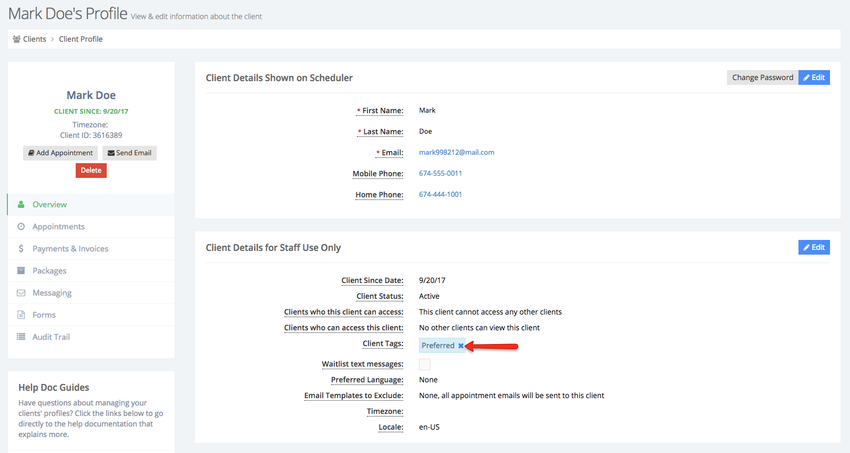
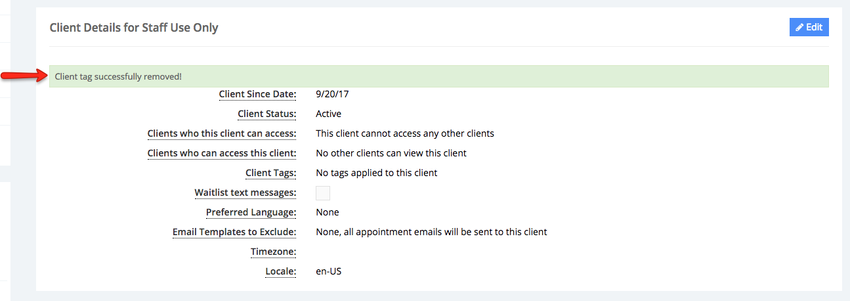
If you remove the tag while the "Client Details for Staff Use Only" section is not in edit mode, then you'll get a small confirmation message that the tag has been removed:
Please note: if you remove the tag while the "Client Details for Staff Use Only" section is in edit mode, then you'll need to save your changes for the tag to ultimately remove.
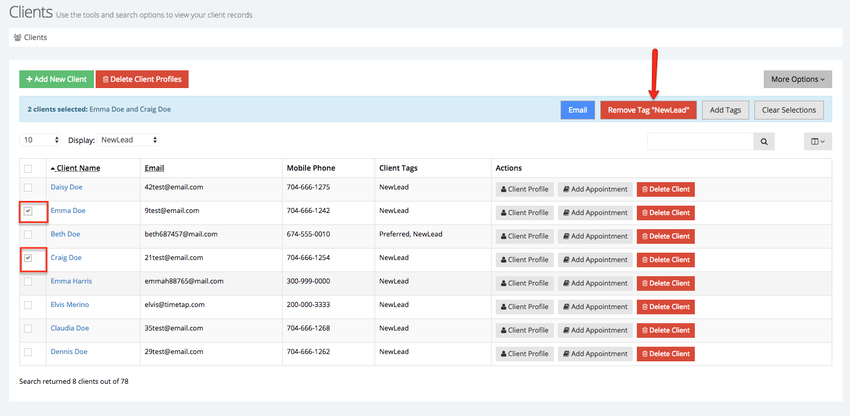
You can also remove tags in bulk from clients by using the filtered client list view. Start by selecting the tag group from which you want to remove some clients:
After you've selected the tag group to display, select the clients you want to remove from that tag group and then click the "Remove Tag" button at the top of the list view:
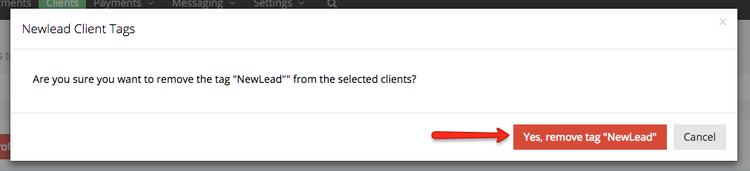
That will give you a small confirmation window to confirm you want to remove the tag. Click the red "Yes, remove tag" button to remove the tag:
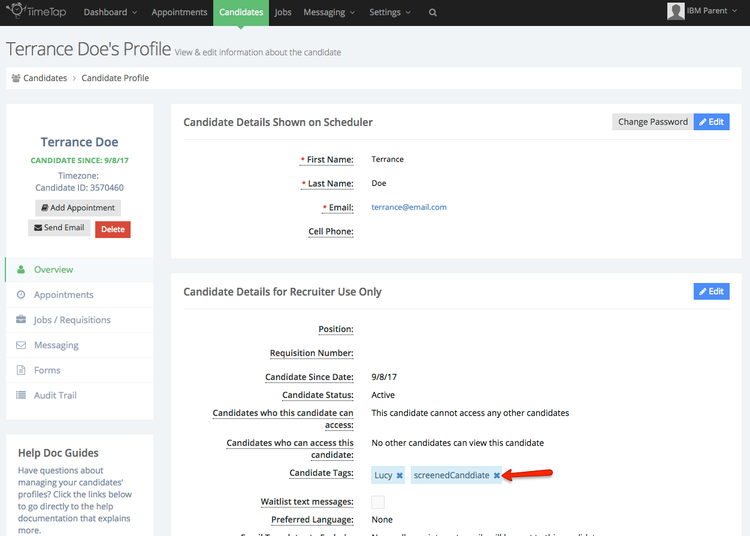
To remove a tag from a candidate, you can click into the candidate's profile and use the "X" button next to the tag name to remove it:
If you remove the tag while the "Candidate Details for Recruiter Use Only" section is not in edit mode, then you'll get a small confirmation message that the tag has been removed:
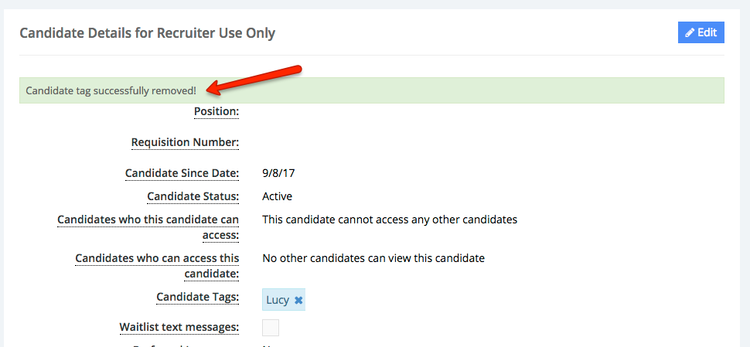
Please note: if you remove the tag while the "Candidate Details for Recruiter Use Only" section is in edit mode, then you'll need to save your changes for the tag to ultimately remove.
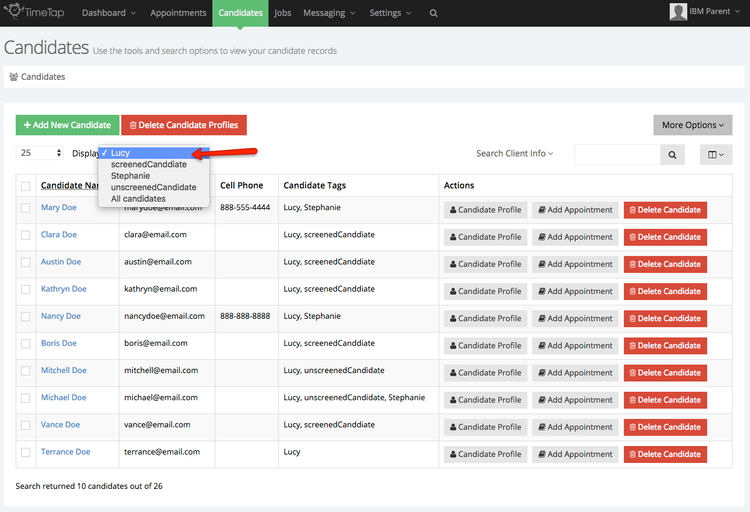
You can also remove tags in bulk from candidates by using the filtered candidate list view. Start by selecting the tag group from which you want to remove some candidates:
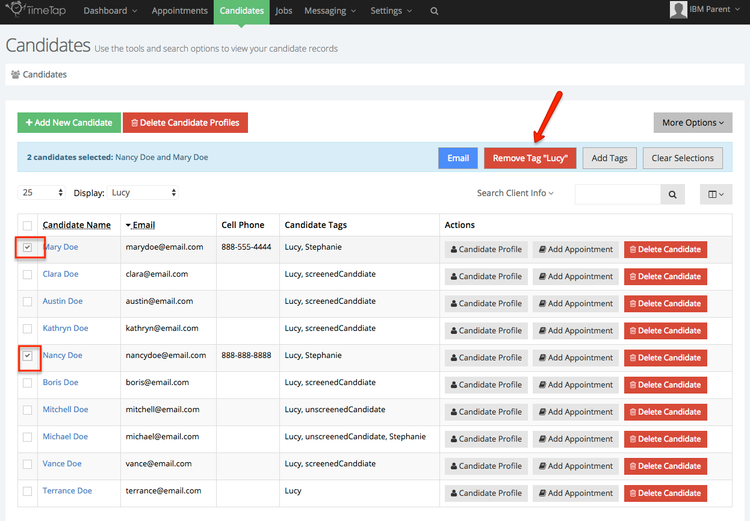
After you've selected the tag group to display, select the candidates you want to remove from that tag group and then click the "Remove Tag" button at the top of the list view:
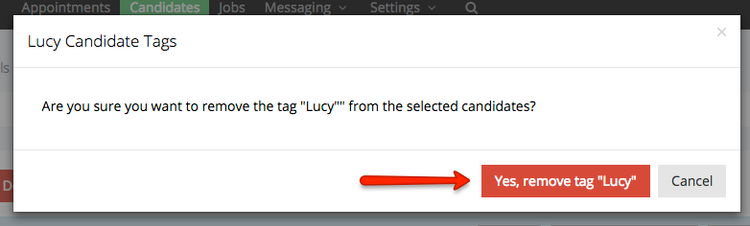
That will give you a small confirmation window to confirm you want to remove the tag. Click the red "Yes, remove tag" button to remove the tag:
You'll notice then that the candidate list will update with your tag selected and the candidates that you removed from that tag group will no longer be in it: