...
| Anchor | ||||
|---|---|---|---|---|
|
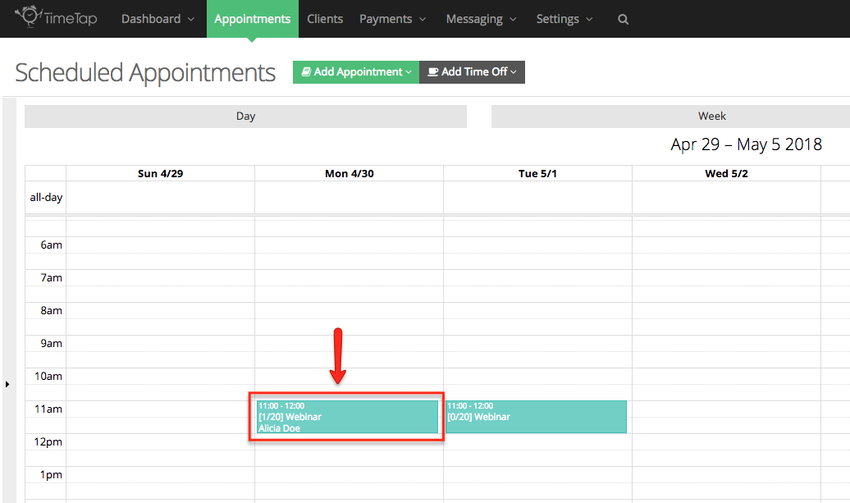
To do this, first navigate to your Class Session Details screen by finding it on your Appointments → Calendar view and clicking on the session that's displayed there:
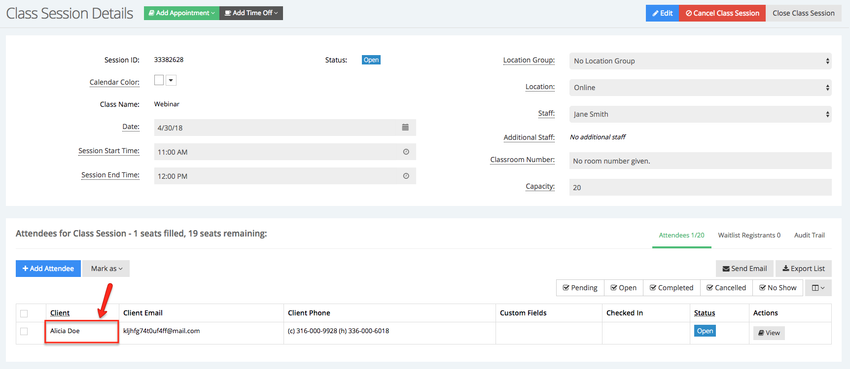
Clicking on the session on your calendar display will take you to the Class Session Details page for that session. On this page, you'll see the session details laid out on the left and any registered clients listed in the table on the right:
You can add attendees to your class sessions by:
To add a client to a class session using the Quick Add navigate to your class session in the calendar view and click on it:
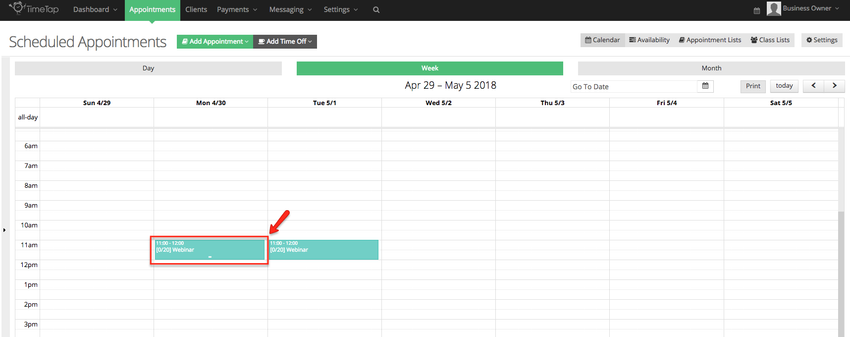
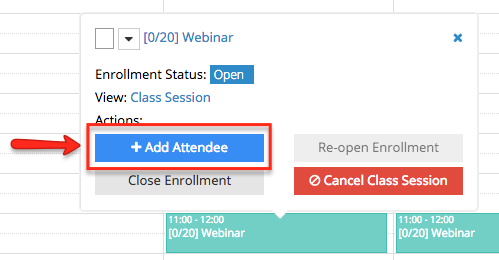
After you click on the class sessions a new window will appear, in this window you can change the color of the class session in the calendar view (1), view the session's enrollment status (2), view the class session details (3), add an attendee (4), close the enrollment (5), re-open the session's enrollment if the enrollment has been closed (6), and cancel the session (7):

Click the Add Attendee button to add a new client to the class session
...
:
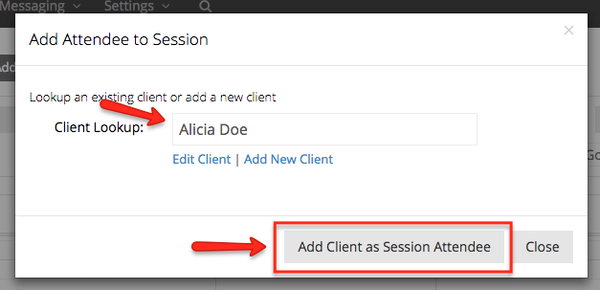
This will give you a small window where you can add a new attendee by either (a) searching through your existing Clients or (b) adding a new client:
...
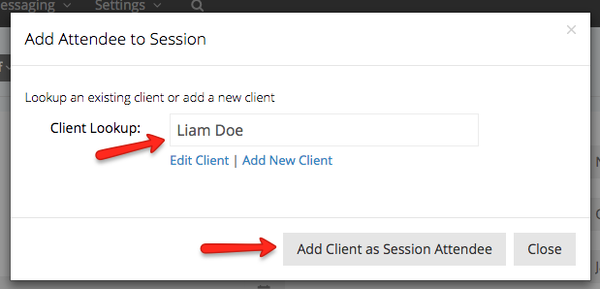
A new window will appear where you'll have the option to search for an existing client in your account or to add a new client, for this example we'll assume that the client is already in the account. After searching for the client and selecting her name click the Add Client as Session Attendee
...
button:
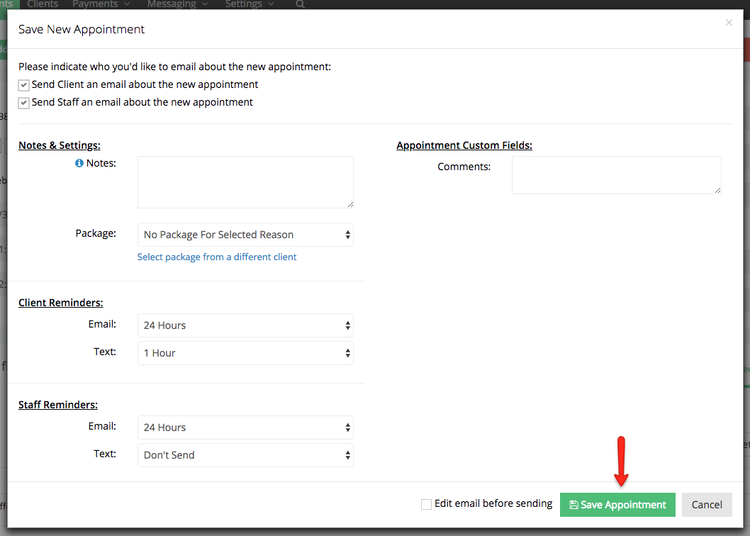
This will bring up a window to ask if you'd like to send out an email to your client about the new appointment. If you check off that you do want to send an email out to your client, then you'll see a small checkbox appear in the bottom where you can indicate if you'd like to edit the email before sending it out:
Please note: Edit email before sending is only available for TimeTap Professional users.
Clicking "Save Appointment" from here will bring up the edit email screen. I can review the email and then press "Send Email":
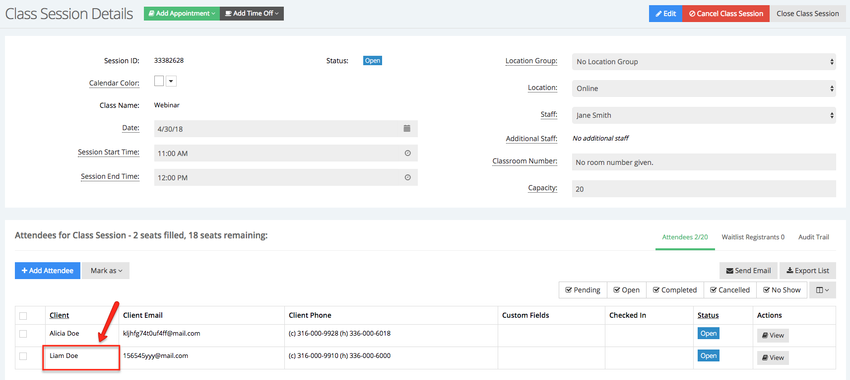
As soon as I press the "Send Email" button, I'll return back to the Class Session Details screen and I'll see my attendees list has been updated with the new attendee I added to the session:
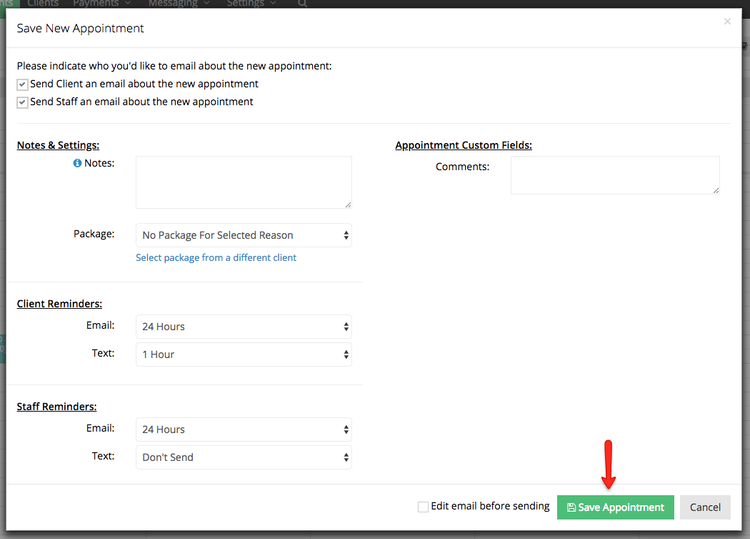
After the Add Client as Session Attendee button is clicked the Save New Appointment window will appear, click the Save Appointment button at the bottom of the window to add the client to the class session:
After the window closes you'll notice that the client is now added as an attendee in the class session:
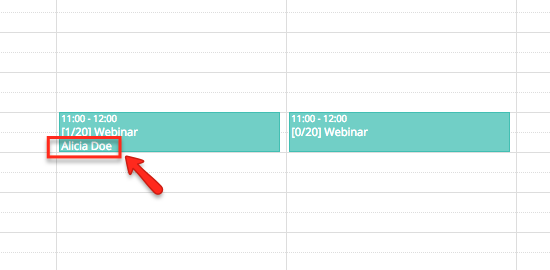
If you go to the Class Session Details screen you'll see the client listed in the Attendees section:
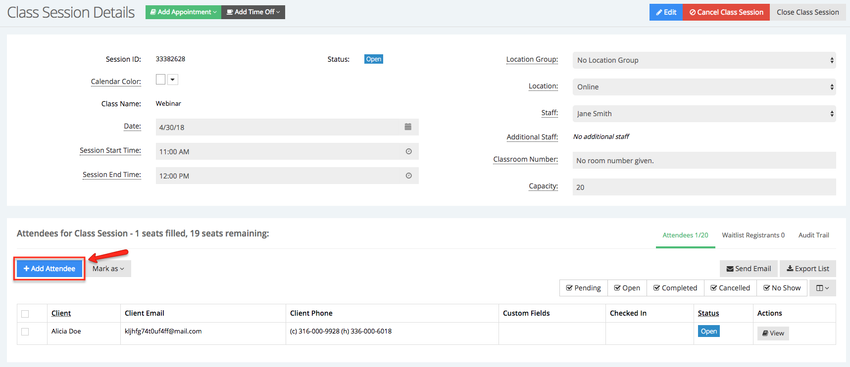
You can also add attendees to a class session from the Class Session Details screen, to do this locate your class session and double click on it to view its details:
Once you're in the Class Session Details screen click the Add Attendee button in the Attendees section:
A new window will appear where you can search for an existing client or add a new one, for this example we'll assume that the client is already in the account. After searching for the client and selecting her name click the Add Client as Session Attendee button:
After the Add Client as Session Attendee button is clicked the Save New Appointment window will appear, click the Save Appointment button at the bottom of the window to add the client to the class session:
You'll then see the client be added to the list of attendees:
You can also add a client to a class session by going through the add one time appointment flow.