| Status | ||||
|---|---|---|---|---|
|
| Anchor | ||||
|---|---|---|---|---|
|
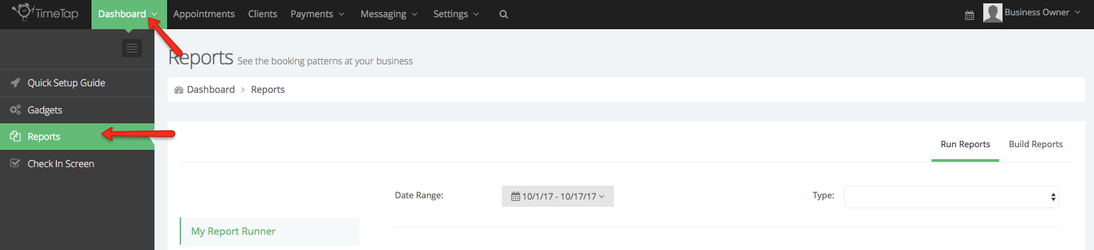
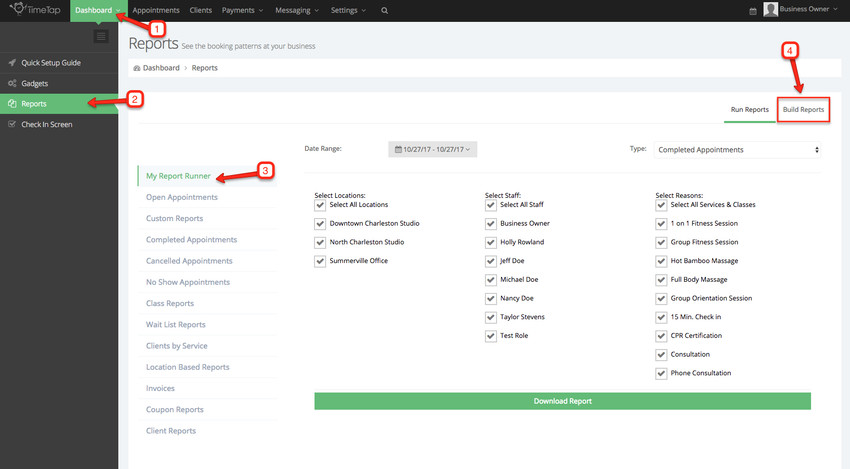
To generate a report using your Report Runner go to Dashboard → Reports:
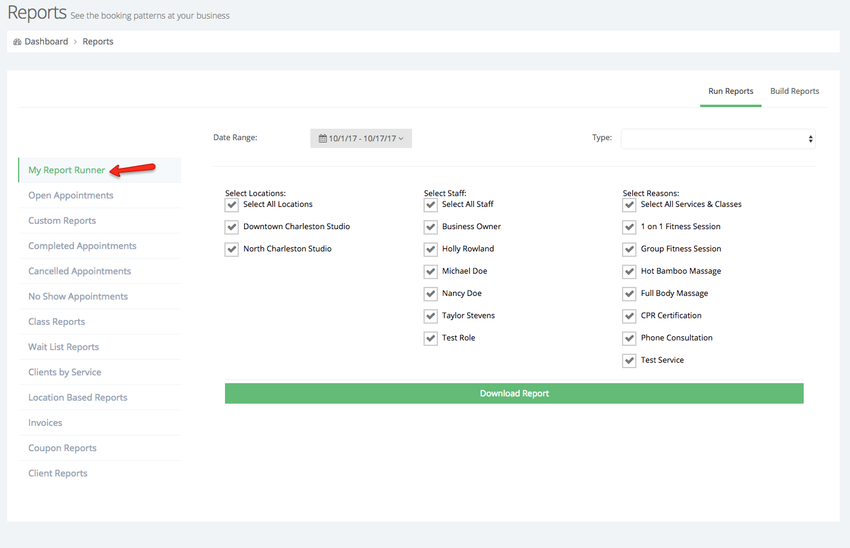
Once in the Reports screen, select My Report Runner:
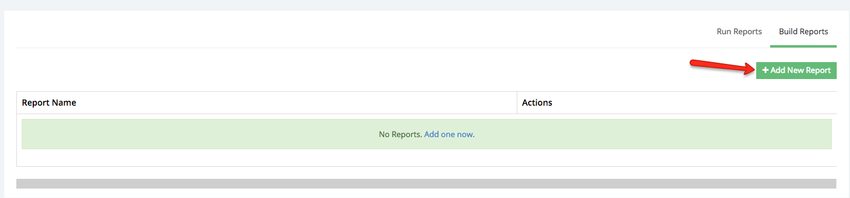
Within the My Report Runner tab click Build Reports:

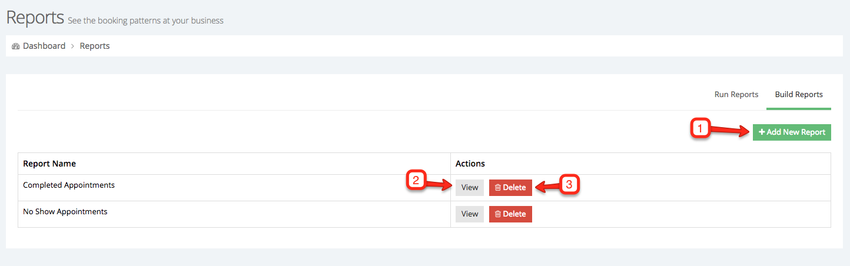
Once in the Build Reports screen click the Add New Reports button:
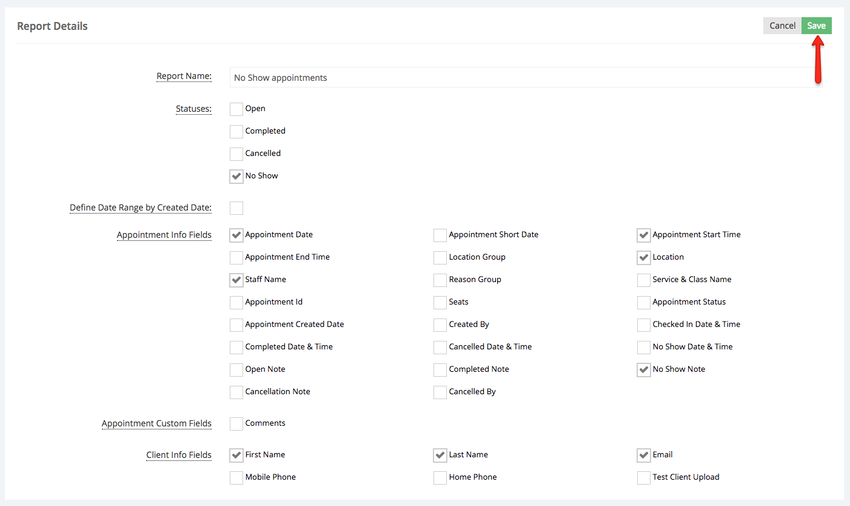
You will then be taken to the Report Details screen where you will name your report and select the information you want to display within it:

The Report Details screen is composed of the following sections:
- Report Name: This is the section where you assign a name to your report, this name will appear in the dropdown for you and your staff to select to export
- Statuses: These are what statuses of appointments you want the report to export for
- Define Date Range by Created Date: Check this off if you want the date range that you define on running the report to calculate based on the date the appointments were created instead of the date the appointment is scheduled to take place
- Appointment Info Fields: These are all the appointment specific fields that are included on export
- Appointment Custom Fields: These are the fields you define under Settings > Define Client Field Labels and applied to the appointment detail page
- Client Info Fields: These are the fields you defined user Settings > Define Field Labels and applied to the client profile
Once you've chosen the information you would like to export in your report click the Save button:
After you've clicked the Save button, the Report Details screen will change to view mode, if you need to add additional information click the Edit button or click Report on the side menu to run your newly created report:
Once you're back in the Reports screen click the My Report Runner tab, select your report from the Type field, select the date range needed, and click the Download Report button:
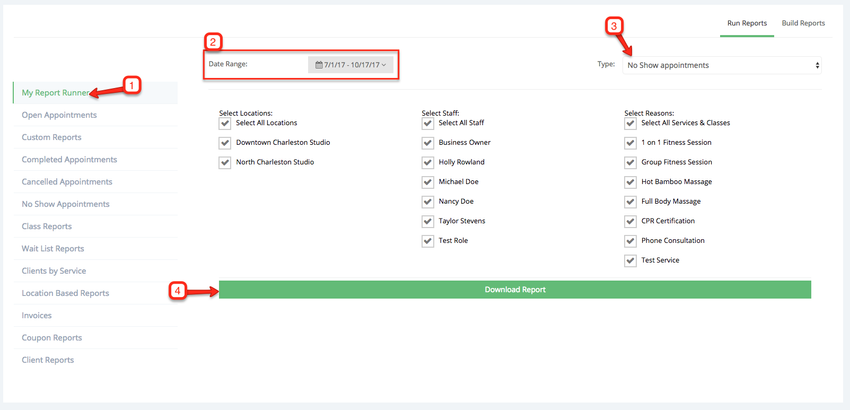
After the download button is click the report will be downloaded to your computer in .xls format.
If you need to add or remove information from the reports you created go to Dashboard → Reports → My Report Runner and click the Build Reports tab to view a list of the reports you've created:
Once in the list of your report you'll see the option to (1) add a new report, (2) view the details selected in a report, and (3) delete a report. Click View next to the report you want to update:
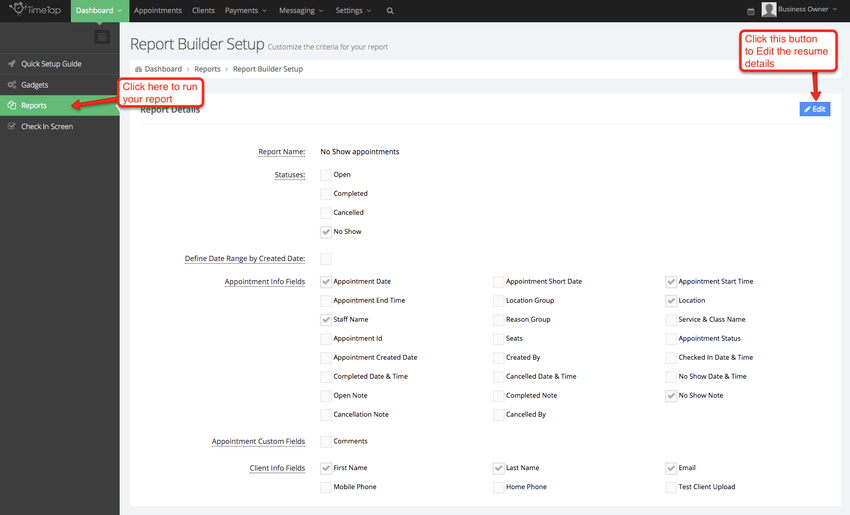
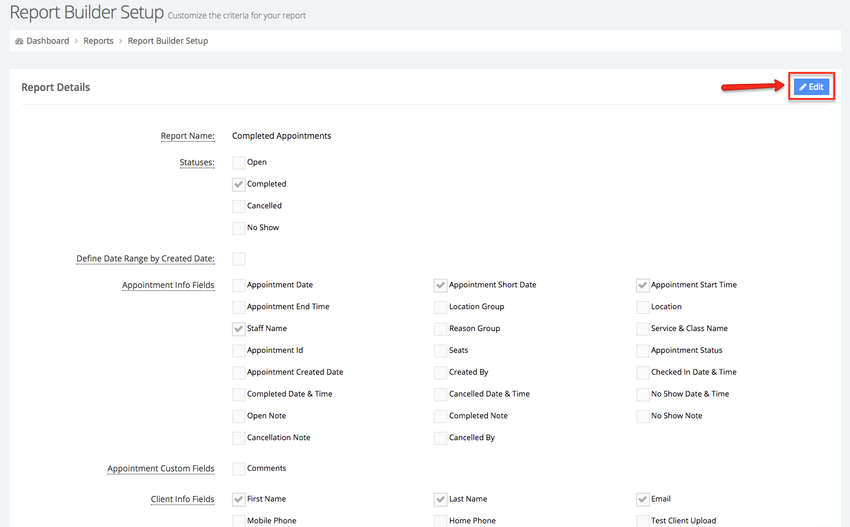
After you click the View button you'll be taken to the Report Builder Report screen, click the Edit button in the Report Details section to add or remove information:
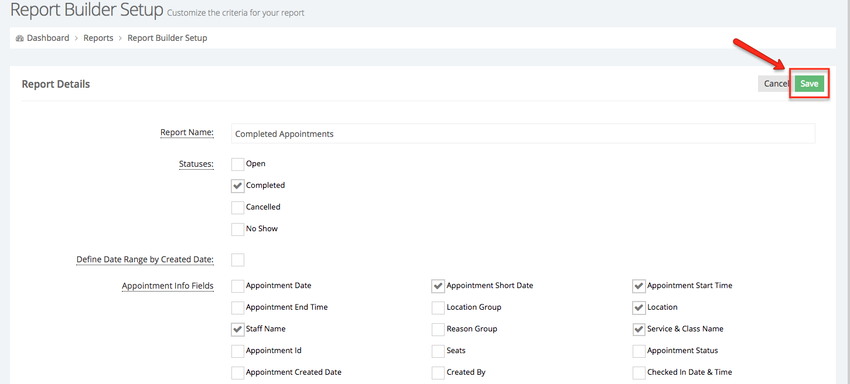
Once the Report Details section goes into Edit mode, select or unselect the fields you want in your report and click Save:
After you've clicked the Save button, the Report Details screen will change to view mode, if you need to add additional information click the Edit button or click Report on the side menu to run your newly created report:
Once you're back in the Reports screen click the My Report Runner tab, select your report from the Type field, select the date range needed, and click the Download Report button:
After the download button is click the report will be downloaded to your computer in .xls format.