| Anchor | ||||
|---|---|---|---|---|
|
This Page will Feature:
Anchor Anchor - #How How to Add a New Folder to Your File Library#How
- New Folder
| Anchor | ||
|---|---|---|
|
|
|
How to Add a New File to Your File
/FolderLibrary
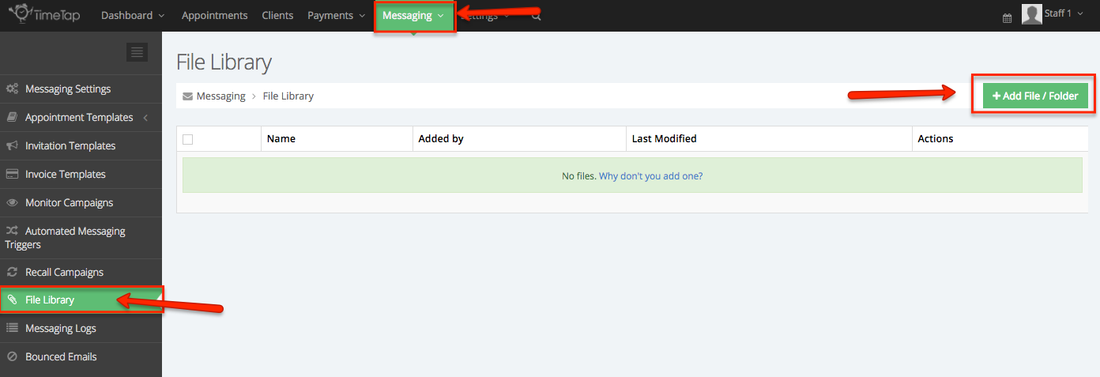
In order to add a new file to your file library you will go to the Messaging tab and click on File Library. On this screen you will be prompted to add a file/folder to your File Library.
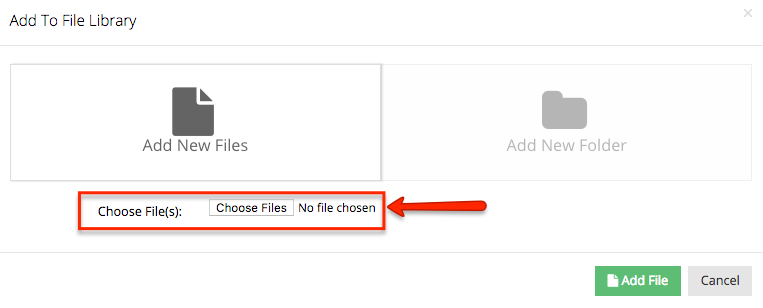
Once you have clicked the +Add File/Folder button a window will pop up asking you to choose a file(s). On this screen you will first click the Choose Files button to browse your computer and select the file(s) you are wanting to add to your File Library. Secondly, when you are done selecting the file(s) from your computer you will then click the green Add File button to add those files to your library.
Once you have chosen the files you want to add to library they will be listed and you are given the option to make the file public. By checking the Makes File(s) Public box, TimeTap will add a link that you can use in your email templates and other documents. If you only want the file(s) to be available for backoffice use do not check the box.
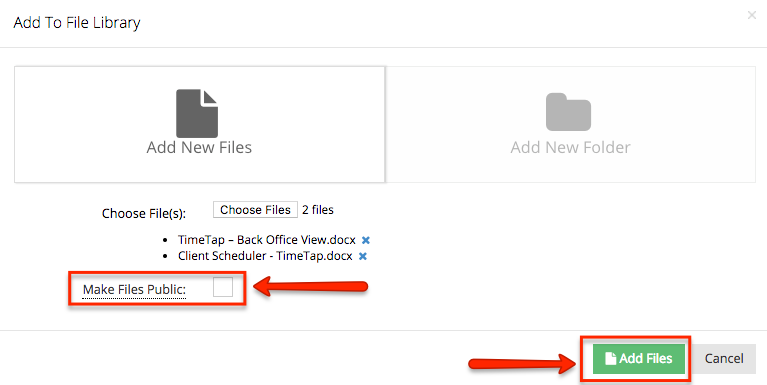
Lastly, when you are done selecting the file(s) from your computer you will then click the green Add File button to add those files to your library.

Now that you have added files to your Library you are given the opportunity to take the following actions:
- Download your file - by clicking the download icon you are able to view the file
- Edit the name of your file (The file name will be what the client sees if you were to attach this file to an email)
- Copy Link - The link icon will show next to the file(s) that you made public when you added them to the library. By clicking on the link icon you are copying the link to then paste in an appointment template, invitation template or an email to a client.
- Delete - by clicking the red trashcan you are removing that file permanently from your file library
| Anchor | ||||
|---|---|---|---|---|
|
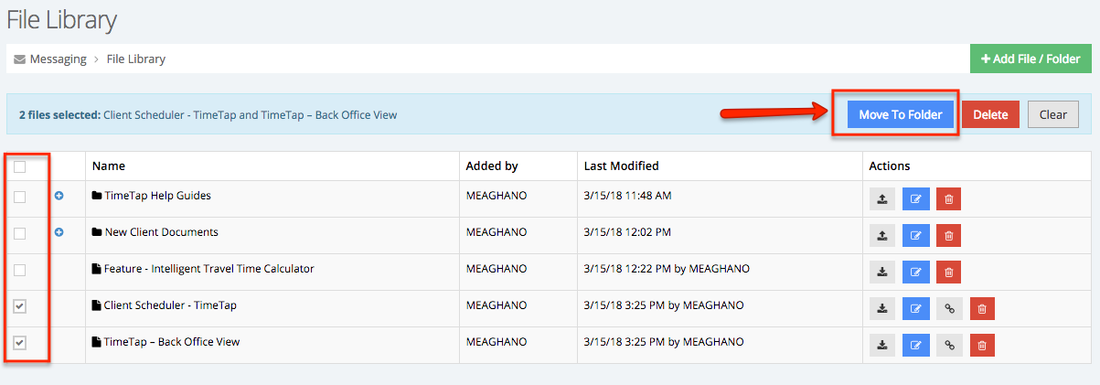
Much like adding folders on your computer, adding a folder to your file library is a way to organize and group together multiple files into one space. Similar to how we added a file, to add a new folder you will click that green +Add File/Folder button and click on the add new folder box. From there you will be prompted to add  Once you click the add folder button you will then see the name of your folder listed in the File Library table with a folder icon next to it. Now that we have build a couple of folder we can start to organize our file library. By checking the boxes to the left of the file names the system will prompt a couple of actions for you to take, Move to Folder, Delete (file or folder) or clear which will unselect the boxes checked.
In the example below we will follow the prompt Move to Folder. The blue Move to Folder button will create a pop-up window asking which folder you would like to move the files into.
The pop up window labeled Update Files will have the two folders we created to choose from. We will select the Folder TimeTap Help Guides to store these files and click update files.
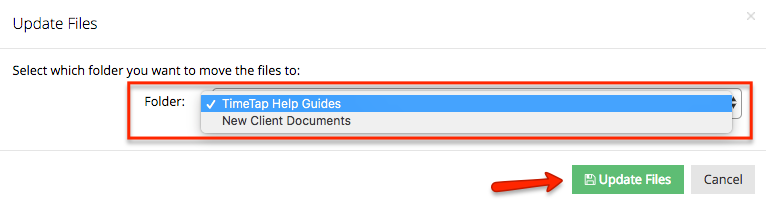
By clicking update files those two files we selected, Client Scheduler-timetap and TimeTap-backoffice, are now placed in the TimeTap Help Guides' folder as seen below.
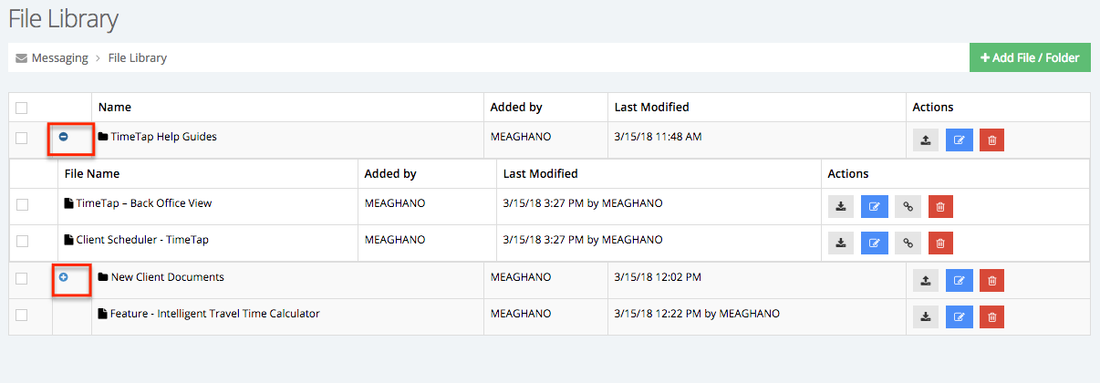
By clicking the blue minus sign ( - ) or the plus sign ( + ) you can hide or show the contents of each folder.
| Anchor | ||||
|---|---|---|---|---|
|
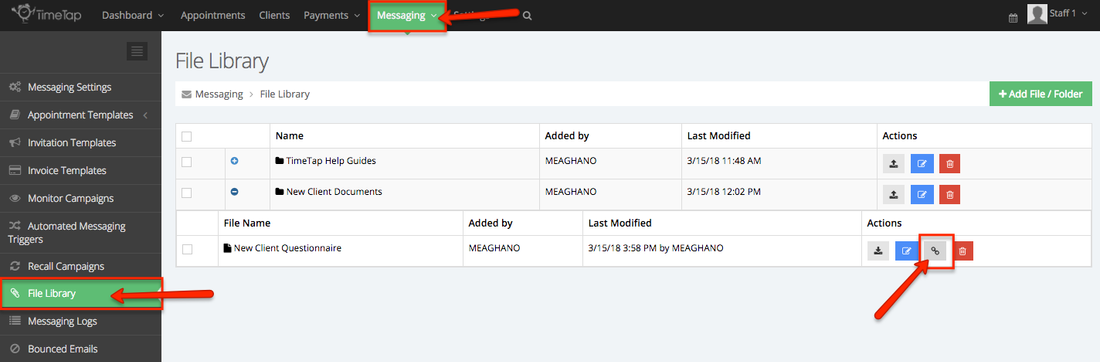
Now that we have successfully added both files and folders to our file library it is time to put our files to use. For our files that we marked "Make File Public" we are able to copy the link created and paste it within any of our appointment templates or email templates.
The first step will be to go to Messaging > File Library > Expand the folder in which the file exists > click the link icon  and once that box says "linked copied" Go to your Appointment Templates.
Now that we have copied the link for the New Client Questionnaire we are going to go to Messaging > Appointment Templates > Click View next to the New appointment by Client. We have cloned the New Appointment by Client template and tailored this template specifically for the service Initial Appointment. for a reminder on how to clone appointment templates click here to view that documentation.
To add the copied link to the template we will click the edit button in the template section of the template profile:

And we will pasted the copied link in the body of the template. In this example I have hyperlinked the file into the text "clicking here."
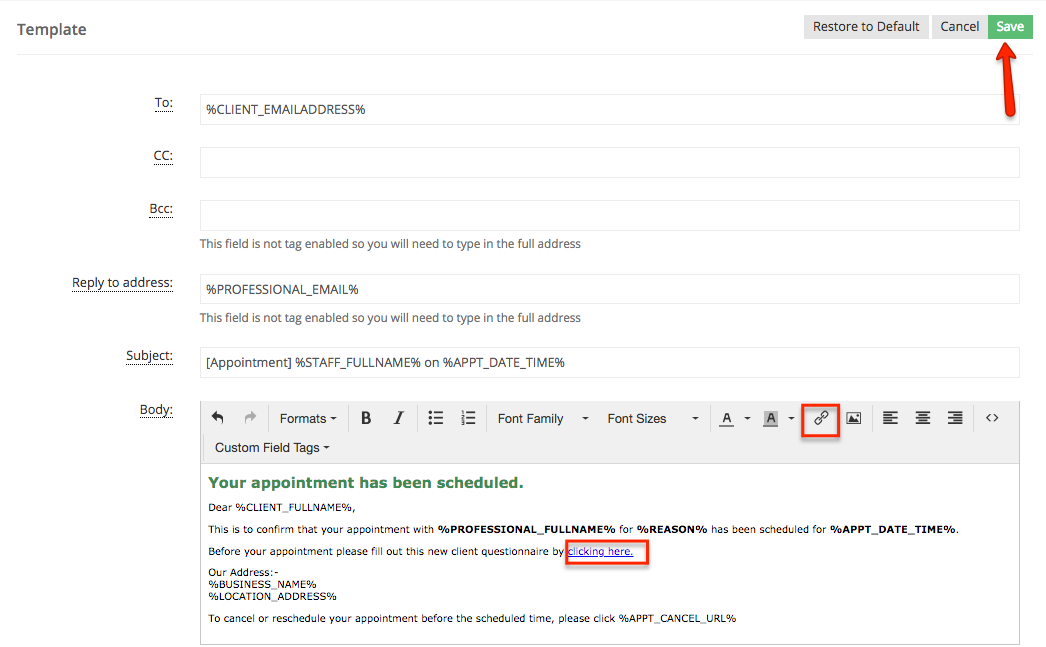
Once you are done tailoring your appointment template you will click save. Now that it is saved all clients who make an appointment for the service labeled Initial Appointment will receive this template with our New Client Questionnaire file added.