| Anchor | ||||
|---|---|---|---|---|
|
Filters are a versatile tool that will make your client's booking experience much more efficient. For example, adding a Location Filter will allow your client to find your closest location to them and adding a Filter to your Staff members will allow clients to search by service, class, or any other criteria you'd like to set. In this documentation page, we'll cover:
| Anchor | ||||
|---|---|---|---|---|
|
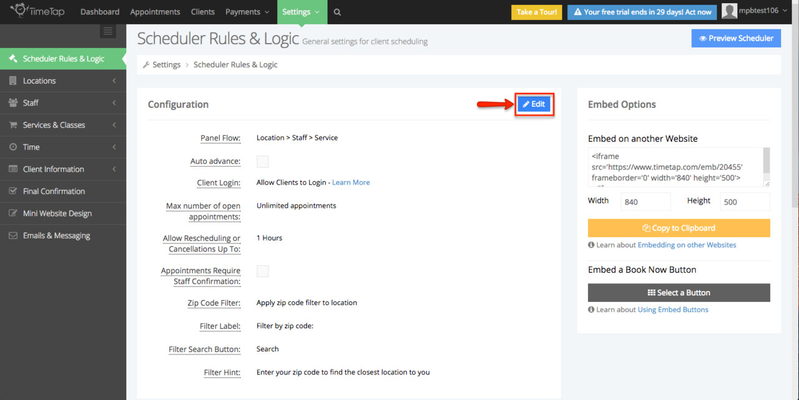
To add a location filter, first select Settings, then click Scheduler Rules & Logic:

Next, click Edit to the right of the Configuration heading:
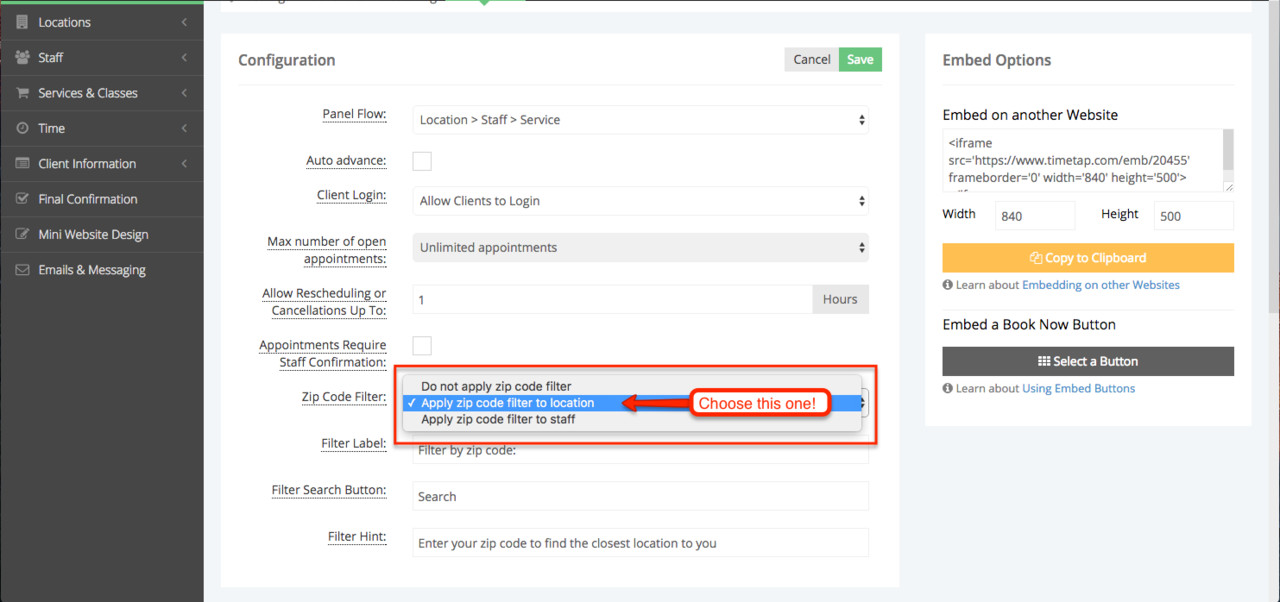
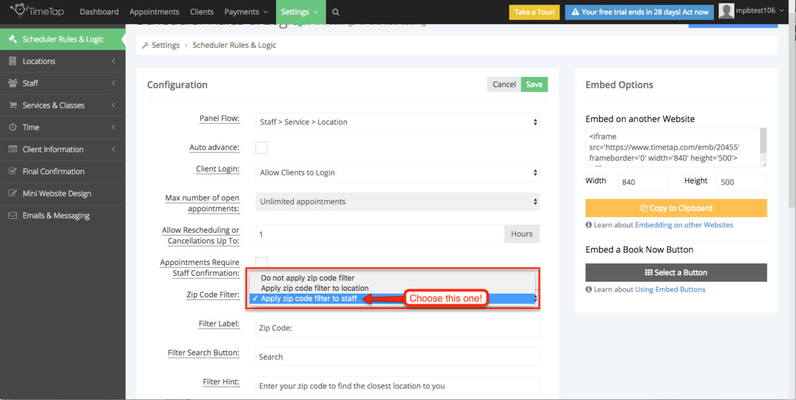
On the next screen, scroll down until you see Zip Code Filter and click anywhere inside the text box to the right of it:
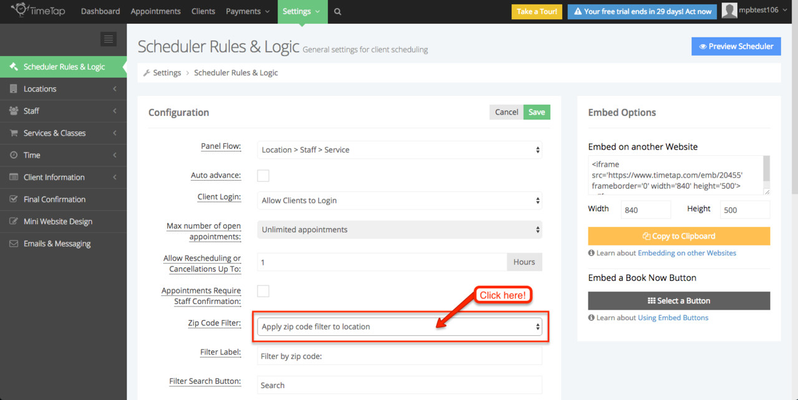
When you click into the Zip Code Filter selection box, you'll see three options: Do not apply Zip Code Filter, Apply zip code filter to location, and Apply zip code filter to staff. For now, choose to apply your filter to location:
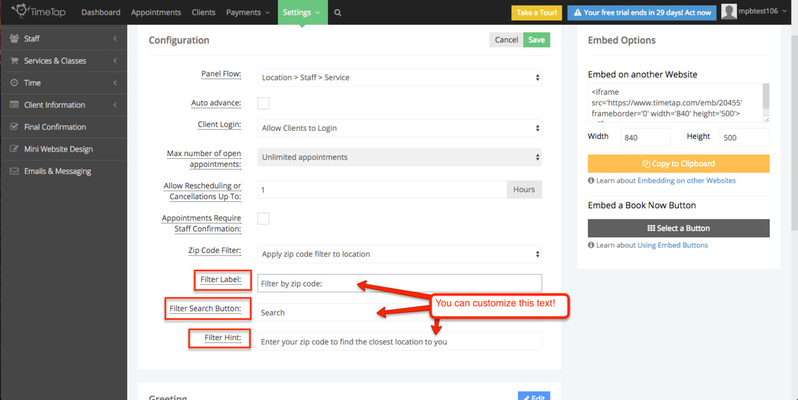
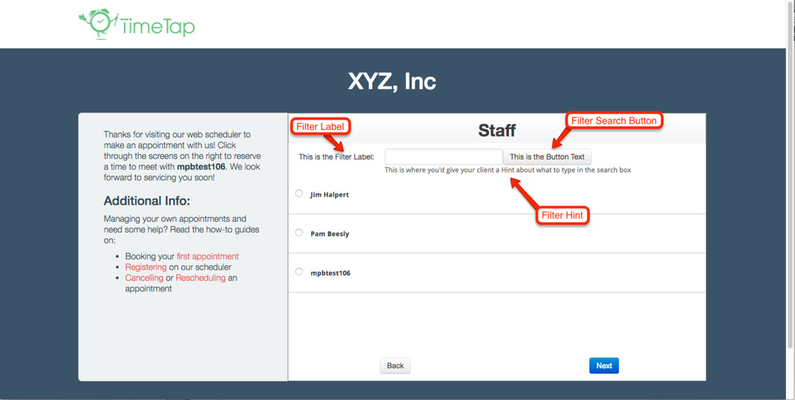
The next three text boxes allow you to customize what your clients will see when the Zip Code Filter is added to your scheduler. The options to customize are the Filter Label, Filter Search Button, and Filter Hint:
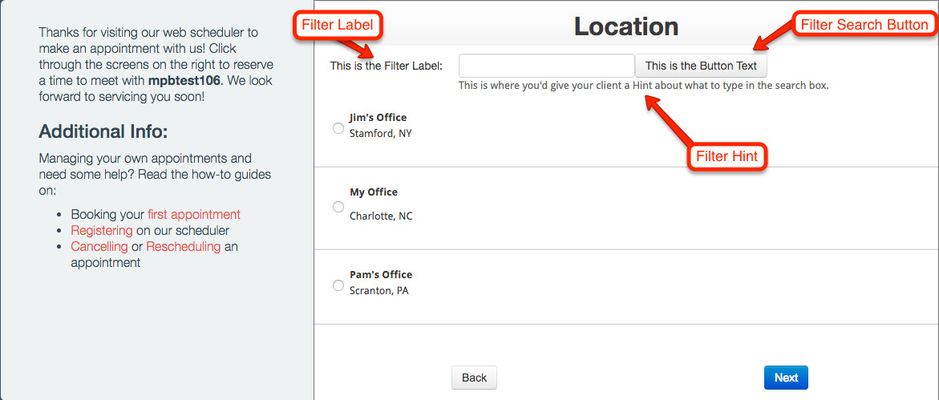
Here's what your clients will see:
Now that you're Location Filter is activated, and your Scheduler text is customized, you can add your filtering criteria...
| Anchor | ||||
|---|---|---|---|---|
|
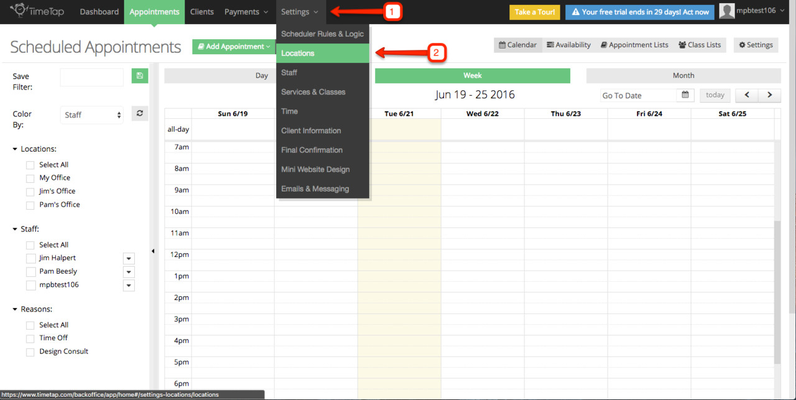
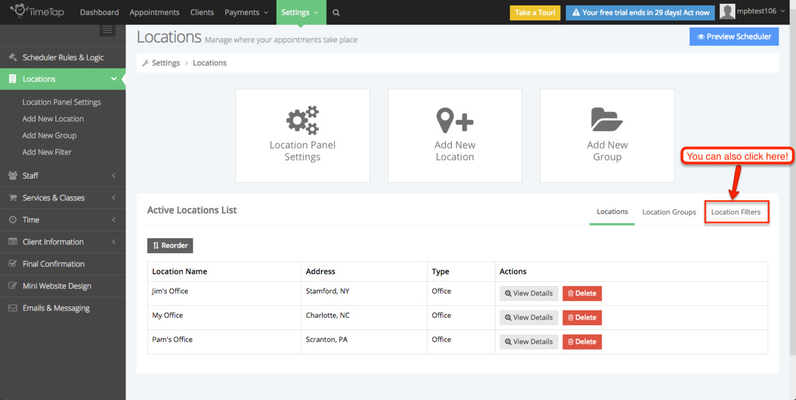
To add location filtering criteria, select Settings, then click Locations:
Next, select Add New Filter from the Locations side panel:
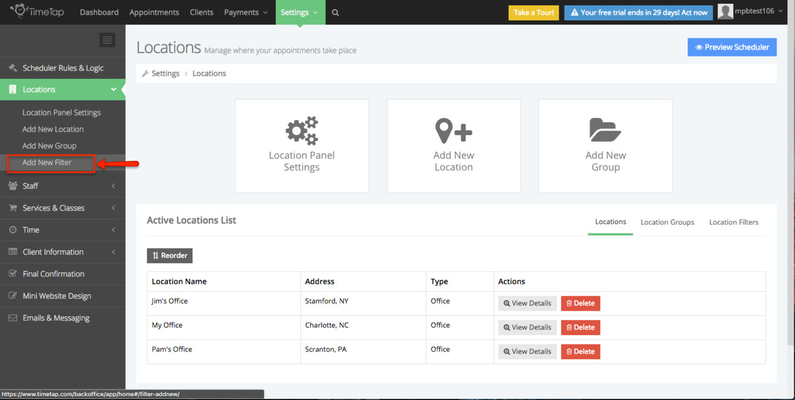
Alternately, you can click Location Filters on the far right of the screen:
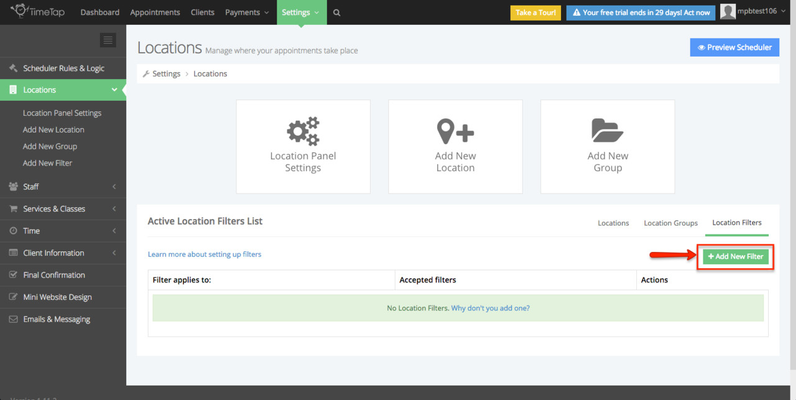
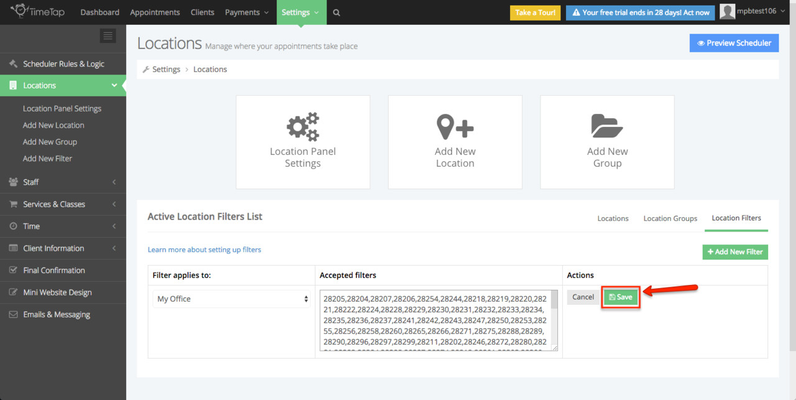
At this point, you'll see the Active Location Filters List. If you already have a filter in place, it will show up here. And to add a new filter, click Add New Filter:
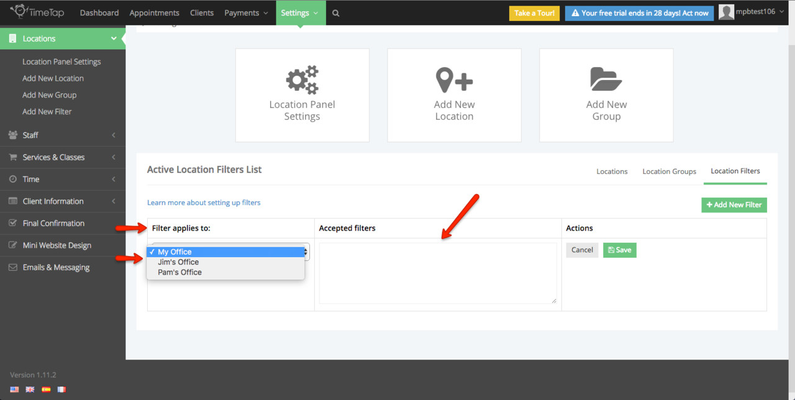
After clicking Add New Filter, you'll see a selection box under the heading Filter applies to, where you can select which location to apply your filter to. And the middle section, titled Accepted filters is where you enter the text you want to filter for:
In a Zip Code Location Filter for example, this is where you'd enter the zip code of your office location and any surrounding area zip codes. One easy and free method to do this is to use the freemaptools.com radius search. This tool will provide a list of surrounding zip codes that you can copy and paste into the Accepted filters text box:
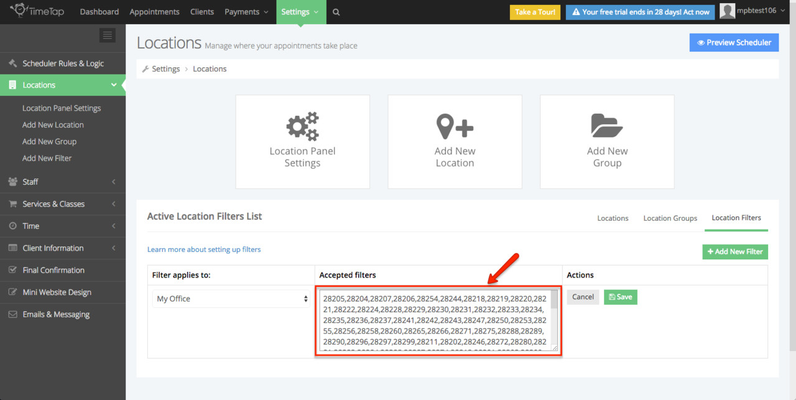
*Note: Values entered into the Accepted filters text box must be separated by commas.
After you've entered your zip code values into the Accepted filters text box, click Save and you're all done:
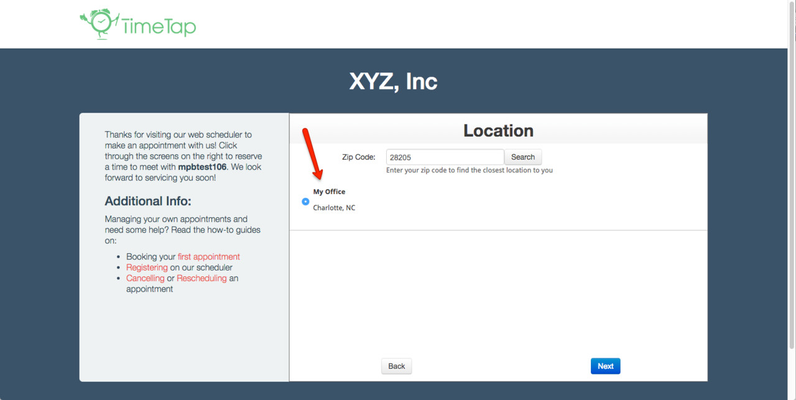
How it looks on the Front-End
This is what your customers will see on your scheduler:

When they click Search, the closest location to the zip code they entered will be displayed:
| Anchor | ||||
|---|---|---|---|---|
|
Adding a Staff Filter is very similar to adding a Zip Code Filter, and the functionality will be similar. Instead of finding the closest location to them, your clients can find the closest staff. Adding a Staff Filter will also be helpful if your Scheduler Flow is set to show Staff before Location. There is one key difference between Staff and Location Filters however. With Staff Filters, you aren't limited to filtering for zip codes. With a Staff Filter, you can filter based on any criteria that suits the needs of your business.
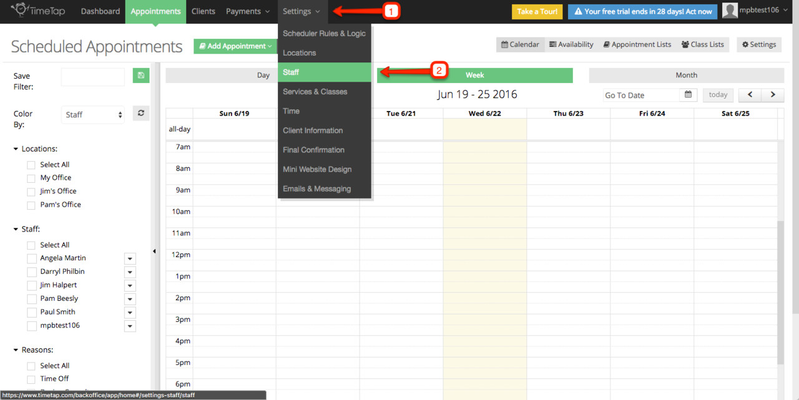
To add a Staff Filter, select Settings from the top menu bar, then click Scheduler Rules & Logic:
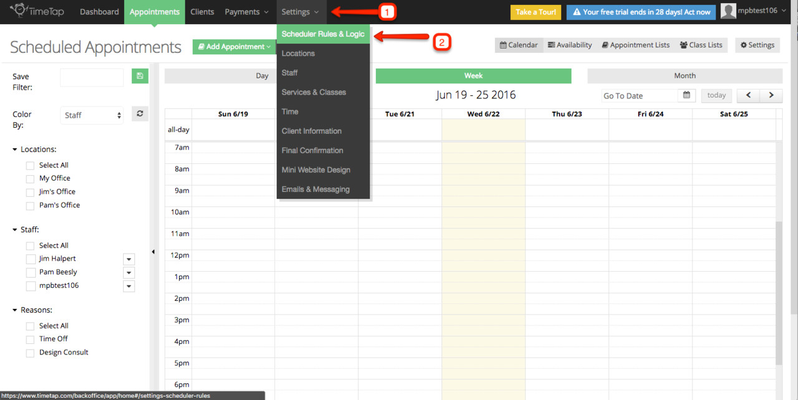
Next, click Edit to the right of the Configuration heading:
On the next screen, scroll down until you see Zip Code Filter and click anywhere inside the text box to the right of it:
When you click into the Zip Code Filter selection box, you'll see three options: Do not apply Zip Code Filter, Apply zip code filter to location, and Apply zip code filter to staff. Select Apply zip code filter to staff:
The next three text boxes allow you to customize what you're your clients will see when the Staff Filter is added to your scheduler. The options to customize are the Filter Label, Filter Search Button, and Filter Hint:
Here's what your clients will see:
| Anchor | ||||
|---|---|---|---|---|
|
Adding Staff Filter criteria is similar to adding Location Filter criteria, with the key difference that you are not limited by filtering for zip codes. You can add any text filters you want to the Staff Filter. Our example company has a large staff of Financial Advisors, but some of them are Certified Financial Planners. So we'll set a filter that our clients can use to search for our staff members who are CFP certified.
To get started adding Staff Filter criteria, select Settings from the top menu bar, then click Staff:
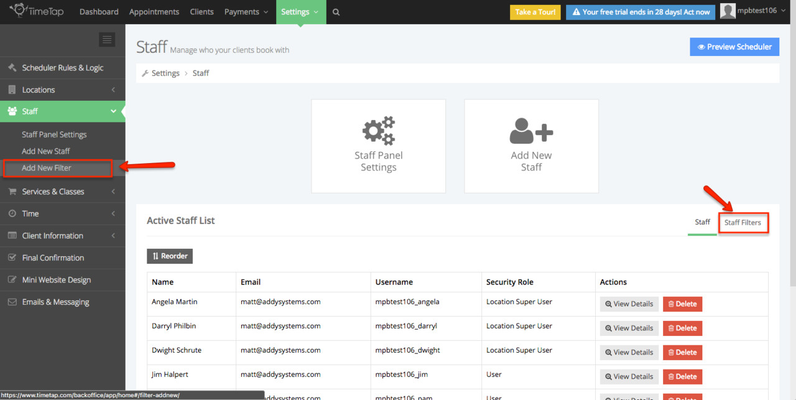
Next, choose Add New Filter, or alternatively click the Staff Filters heading on the far right of the Active Staff List:
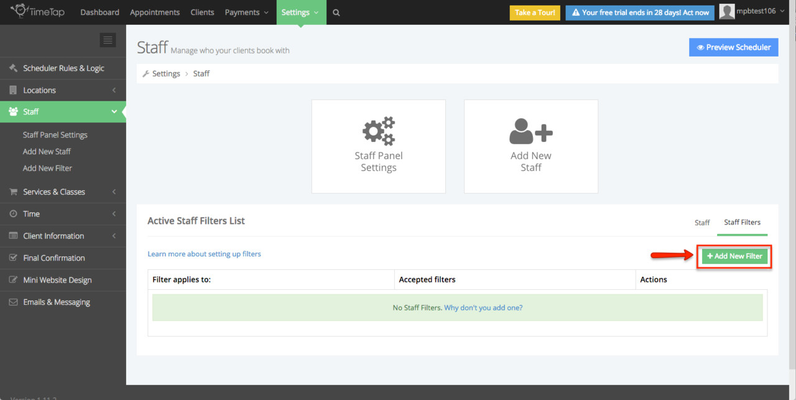
Then select Add New Filter on the right side of the Active Staff Filters List:
Here's where we'll select the Staff member our Filter applies to, and enter the actual text we want to filter for in the Accepted filters text box:
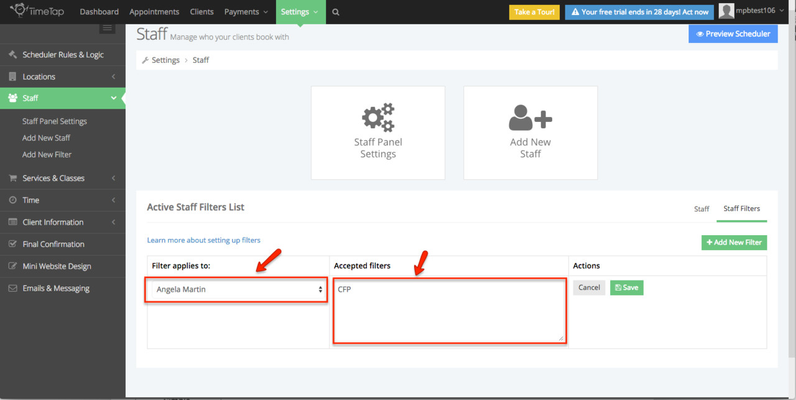
In this example, we'll use an abbreviation, CFP, as our text filter to avoid potential issues with misspellings or incomplete entries on the client side.
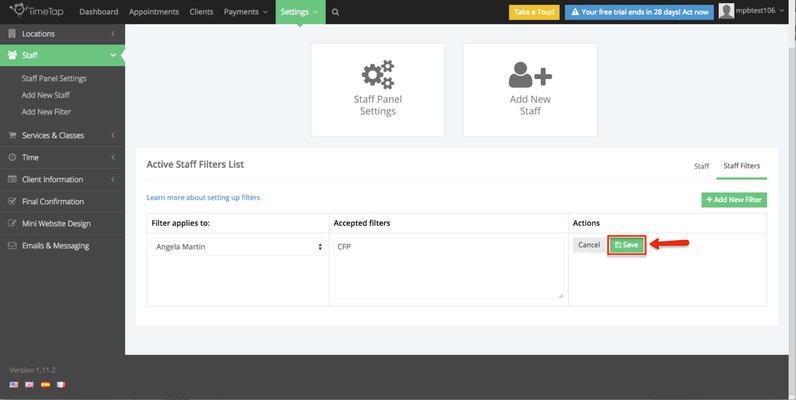
Next, click Save, to save your Staff Filter:
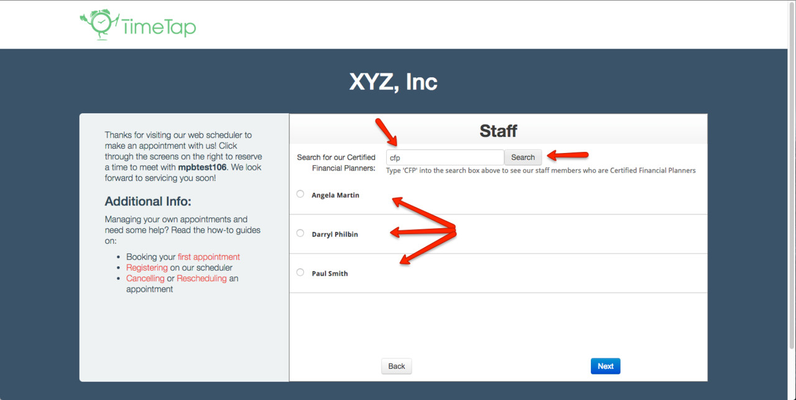
How it looks on the Front-End
This is what your customers will see on your scheduler:

*Notice that the text for Filter Label, Filter Search Button, and Filter Hint is customized for the specific context we want our clients to be able to search for.
And typing CFP (in upper or lower-case) into the search box, and pressing Search will display XYZ, Inc's employees who are Certified Financial Planners: