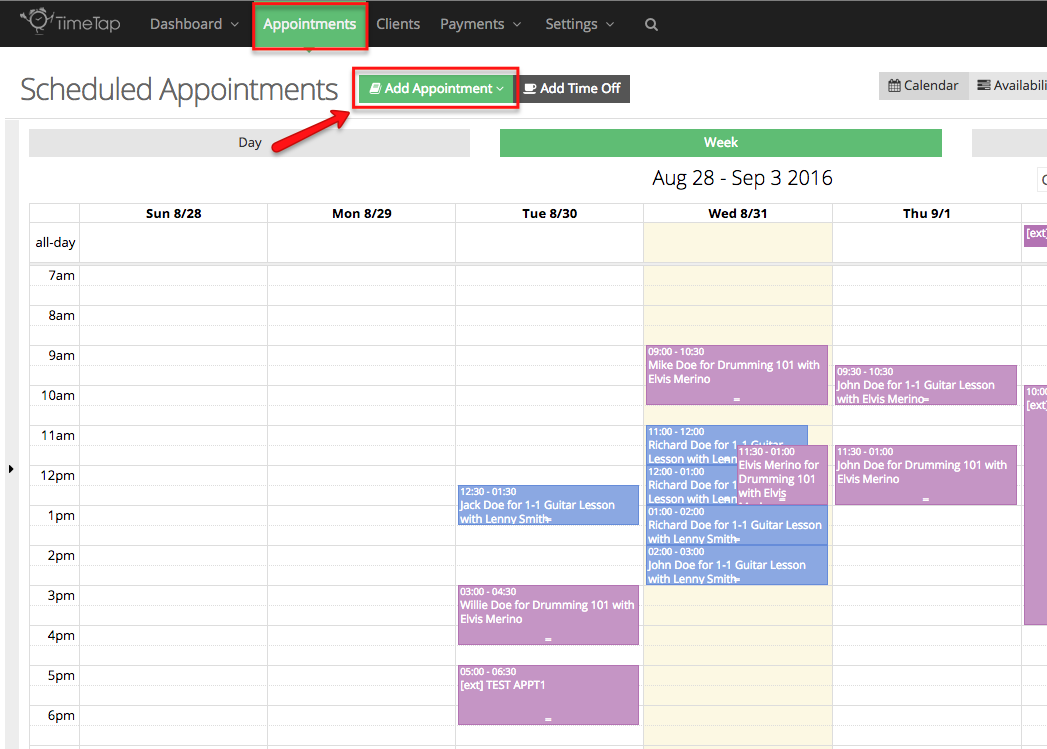
While your clients can use your online scheduler to book appointments, staff member can use TimeTap's back office to add appointments to their own calendar or their peers calendars. In this documentation we will cover how to add a one time appointment. One time appointments can be added for 1-1 services or classes.
Method in checkAppointments
In checkAppointments if you wanted to book a one time appointment you would go to the Main tab, click Book one time appointment, you will then select a location, staff and a service. Then you will have to select a date in the calendar, a time slot, and enter the client's information on a separate screen.
Method in TimeTap
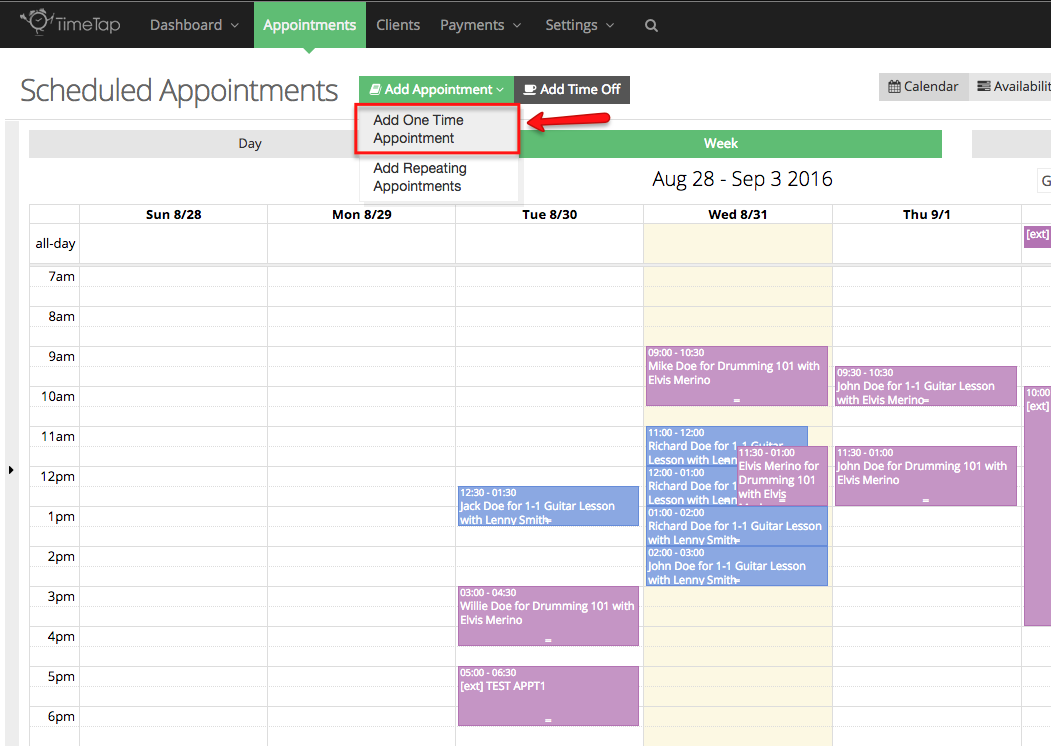
To add a one time appointment in TimeTap go to the Appointments screen and click the Add Appointment button:
Select the option Add One Time Appointment from the dropdown menu:
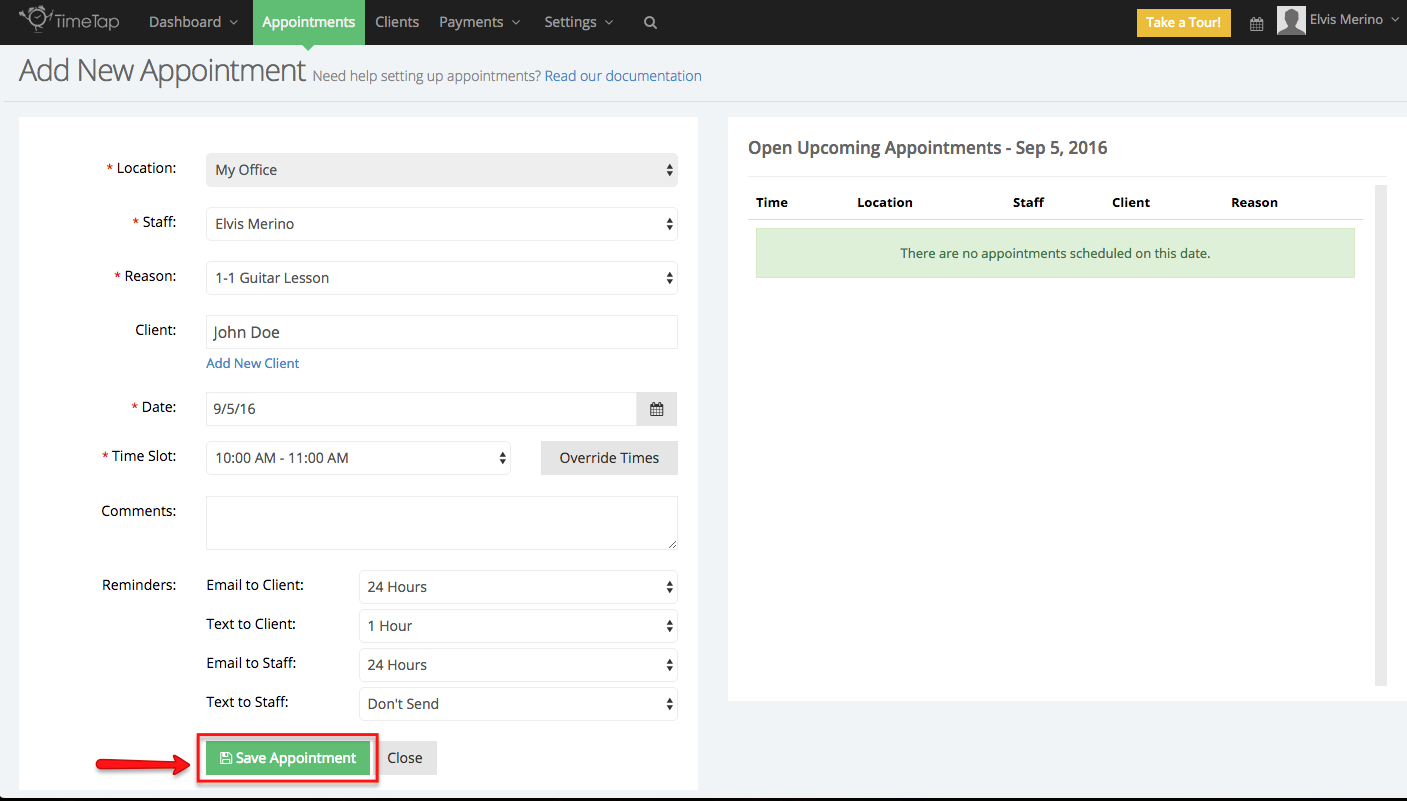
In the next screen you will be asked to select a location, staff, reason (service/class), enter the name of the client or add a new client record, select a date and time slot. Time time slot can be override by clicking the Override Times button, you will then be able to enter a comment and fill out all the custom fields assigned to this service/class, set the reminder notification settings, once you're done entering the information click Save Appointment:
We have written a more extensive guide on how to add one time appointments, click here to read itIn setting up a One Time Appointment, you'll first want to fill in all the required fields. If you only have 1 staff and 1 location, the staff and location fields will be pre-populated for you, but you can edit and change all the other fields. Then, select the "Reason" (aka service or class) that you are going to be making the appointment for. I recommend selecting the Reason right after selecting the staff so that all the recommended dates and time slots (that are based on the availability you have added) show up with the proper start and end times:
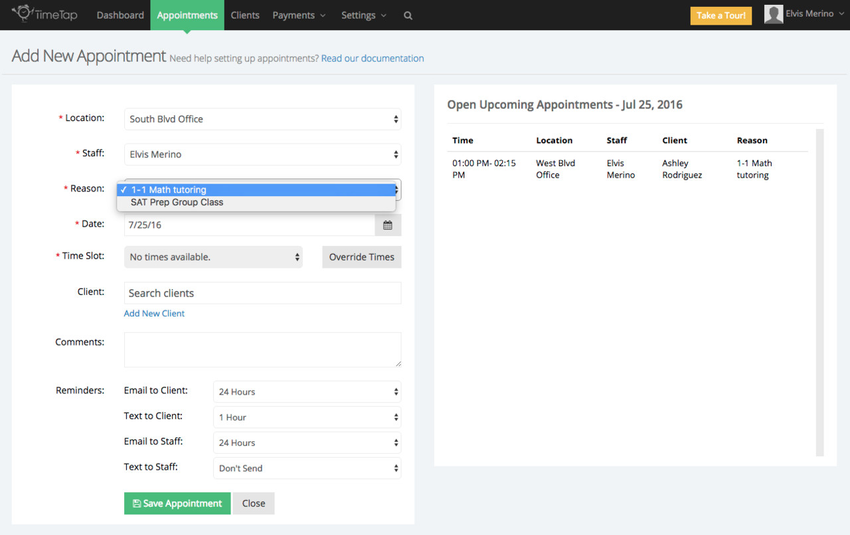
Once you've selected the Reason, you can now look at the calendar drop down to see what dates you have available on your calendar for the selected service/class based on the selected staff person's availability:
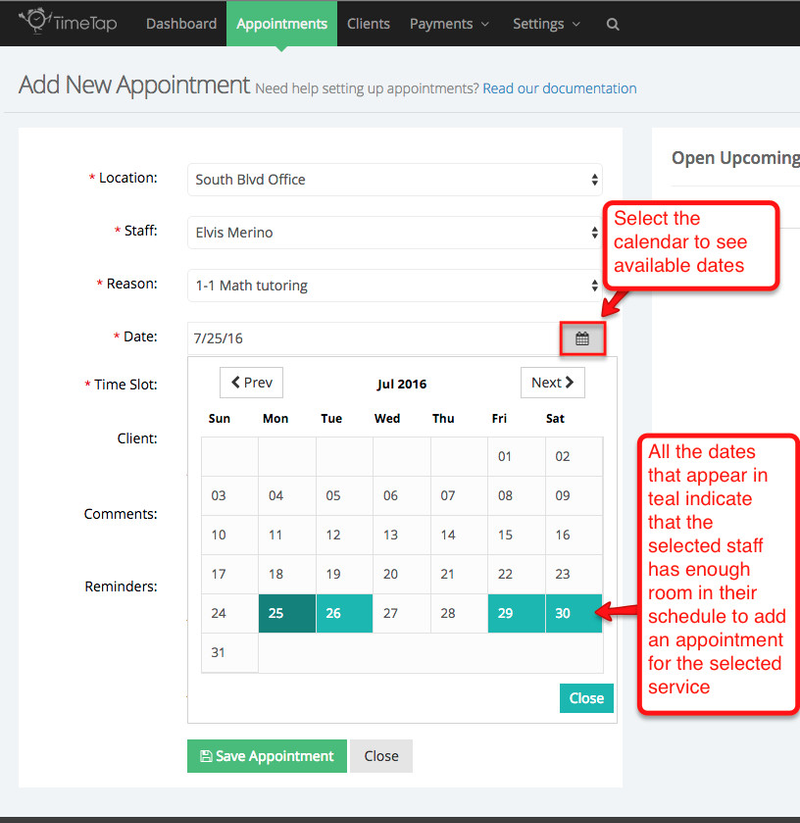
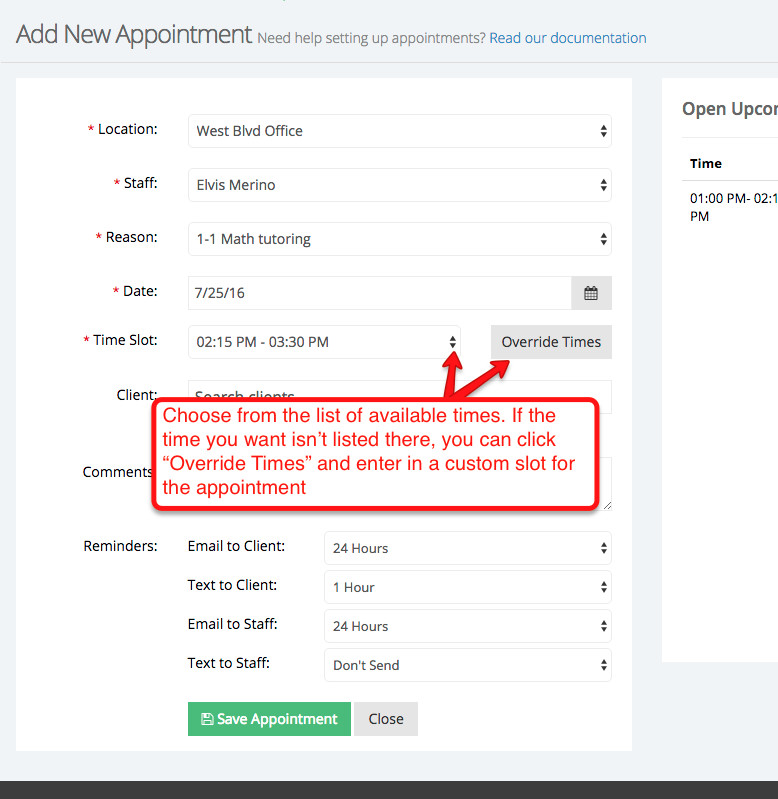
Once you've selected a date from the calendar, you'll see the "Open Upcoming Appointments" panel on the right hand side update with any other appointments you have scheduled for that day. If you are setting up an appointment for a Service reason type, then the suggested dates and times will be based on what the staff you've selected has setup in his/her Service Availability. You can then either choose a time for the appointment based on the list of available times or you can press "Override Times" to enter in a custom time:
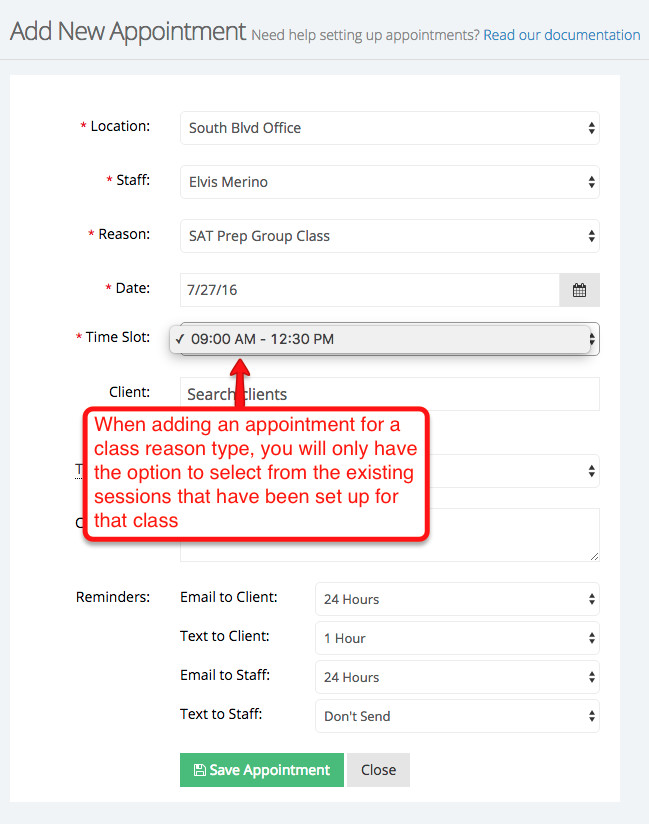
If you are setting up an appointment for a Class reason type, then the suggested dates and times will be based on when you have scheduled your class sessions for. Since your class session times are already set, you will not have the ability to "Override Times" when setting up an appointment for a class. In order to do that, you would need to edit the details for the scheduled class session and set the session to a different time:
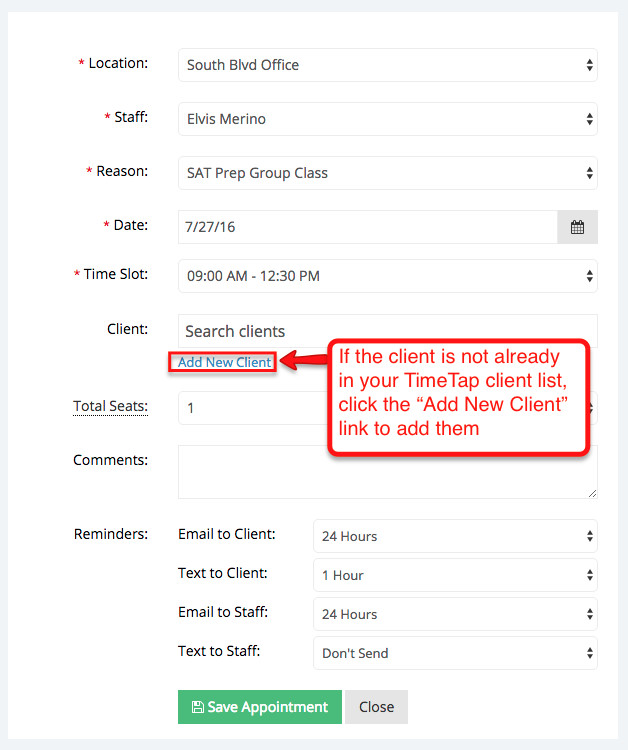
Now that you have the reason, date, and time inserted in, you need to enter in which client this appointment is going to be with. If the client alright exists in your account then you can type in the first two letters of his/her first or last name and find them on the client search:

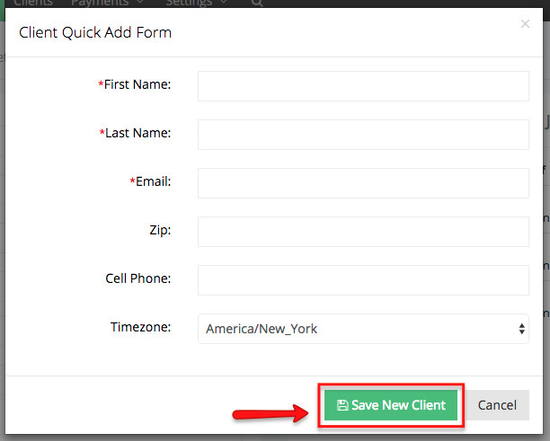
If it is a new client, you can press the "Add New Client" link beneath the client search field to quickly add in the client:
Once you press Add New Client, you'll be prompted to enter in whatever Client Information fields you have set up in your Settings > Client Information screen and set the client's time zone. Once you've entered in these details, press the "Add Client" button and the client will be added both to your account as well as to the appointment record:
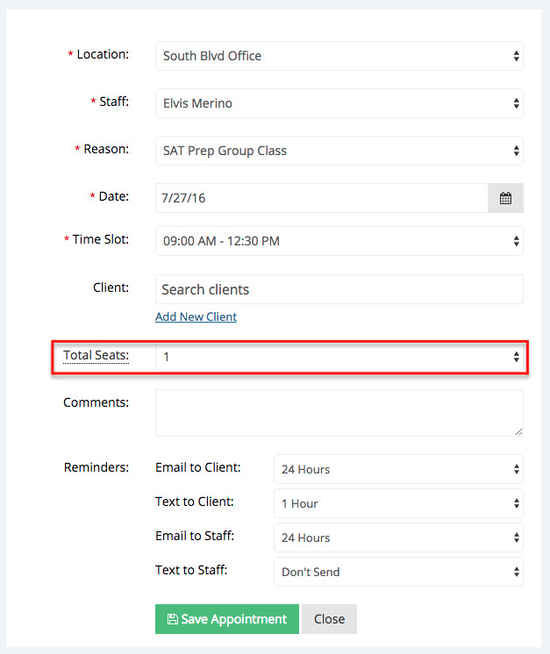
If you are adding an appointment for a class session, you will see a field called, Total Seat. This field is design to indicate whether the client coming to the appointment will bring an additional person to the class session, if the person is bring another person type the number 2, if not you can leave at 1. Additional seat will automatically be deducted from the class capacity:
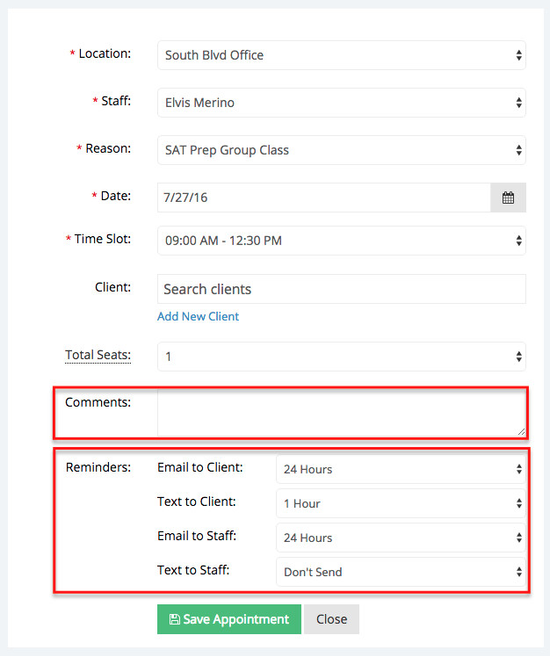
Now that you've got the client attached to the appointment in the Add New Appointment screen, you are ready to save the One Time Appointment. Just make sure to fill out any of the custom appointment fields that you may have (like comments or anything else you've configured under Settings → Client Information → Define Field Labels) and to select the number hours before the appointment you'd like to send the reminders out:
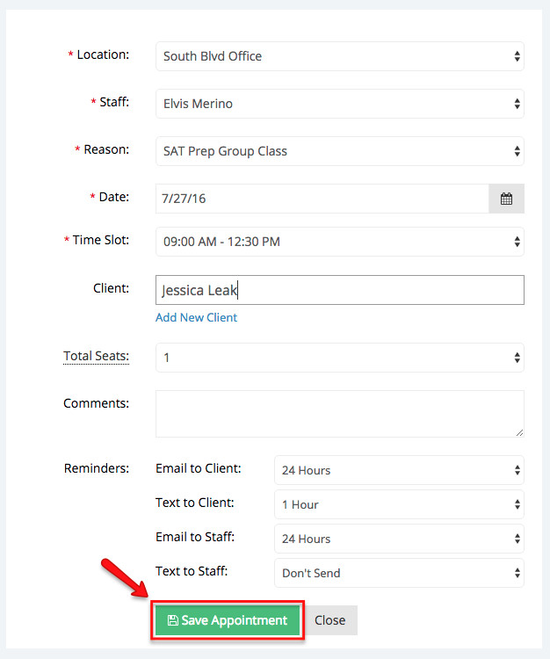
After customizing those last few things, go ahead and press "Save Appointment":
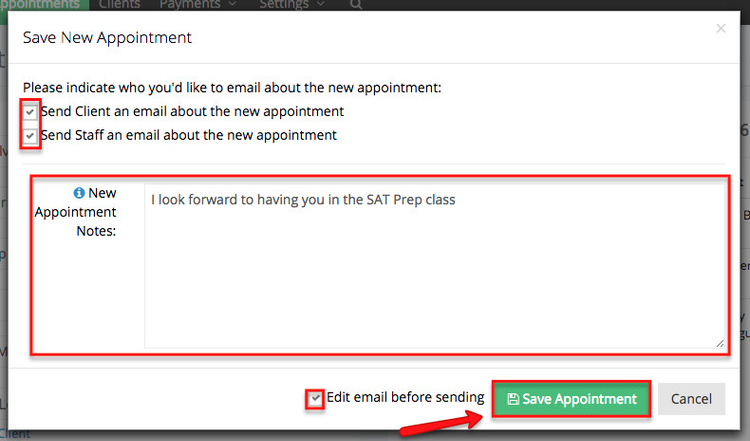
You'll be asked whether you want to send an email to the client and/or to your staff about the new appointment. You'll also have room to enter in a new appointment note/message, which will be plugged into the email that goes out to your client. If you've elected to send an email out to your client, you'll also see you have the option to edit the email before sending; this checkbox will also be pre-selected if you have checked it before, as TimeTap remembers your last selected email options:
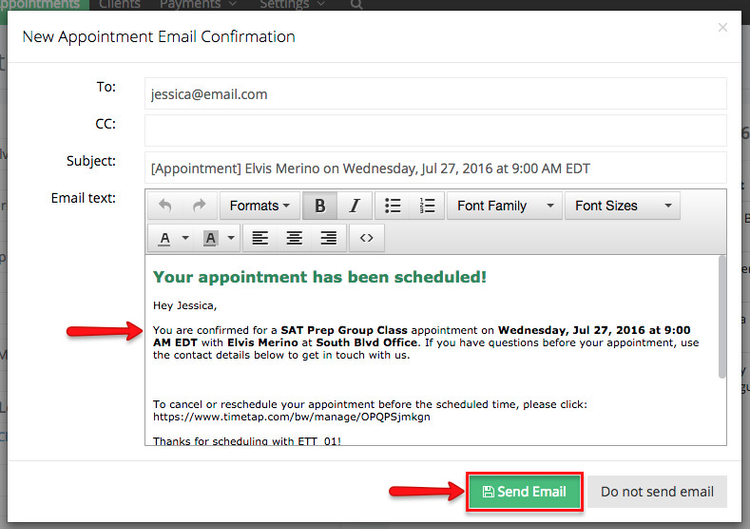
After pressing Save Appointment from that window, you'll then be presented with the window for editing the email that goes out to the client about the appointment. Once you are finished editing, press the "Send Email" button at the bottom of the window to send out the appointment confirmation email:
After sending the email, the screen will update and show that your appointment is now listed as being in Open status:
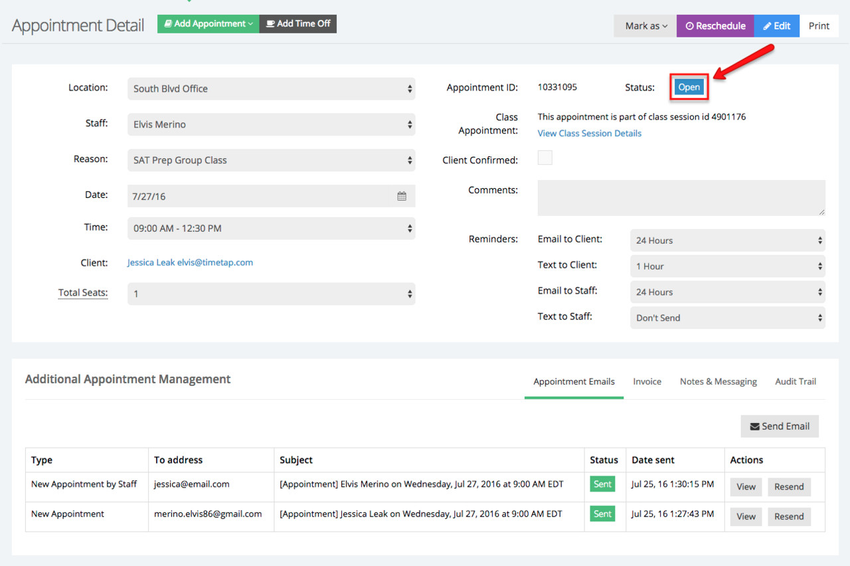
You can navigate away from your appointment at this time as it is successfully saved and added to your schedule. You can navigate to it again at any time by either using your calendar or your appointment lists.