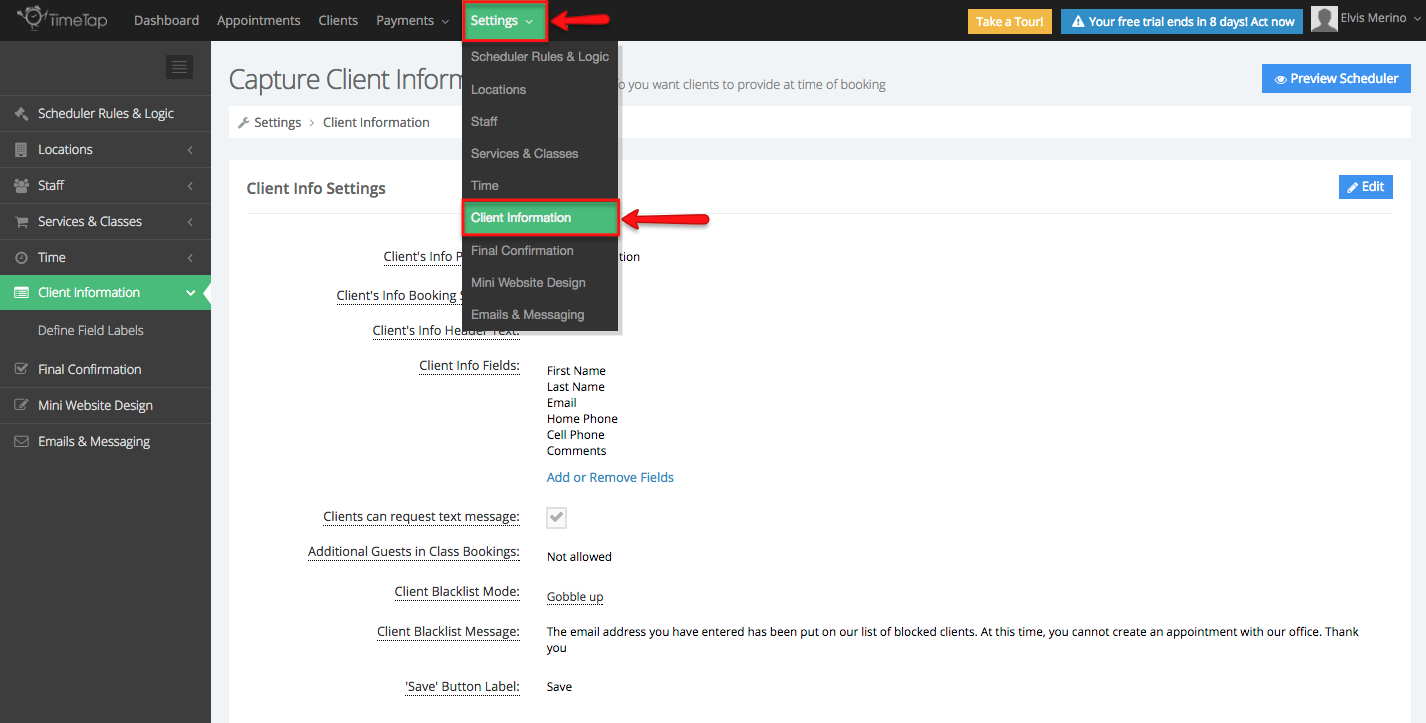
The Client Information screen under Settings → Client Information has settings that affect the last two screens in the client-facing scheduler which are:
- The screen where clients enter in their contact information and
- The confirmation screen that let's them know their appointment has been created.
You can customize what information you want to collect from clients at time of booking as well as what the confirmation message says by using the features available to you on the Client Information screen. The location and layout of this screen is shown in the screenshot pasted below:
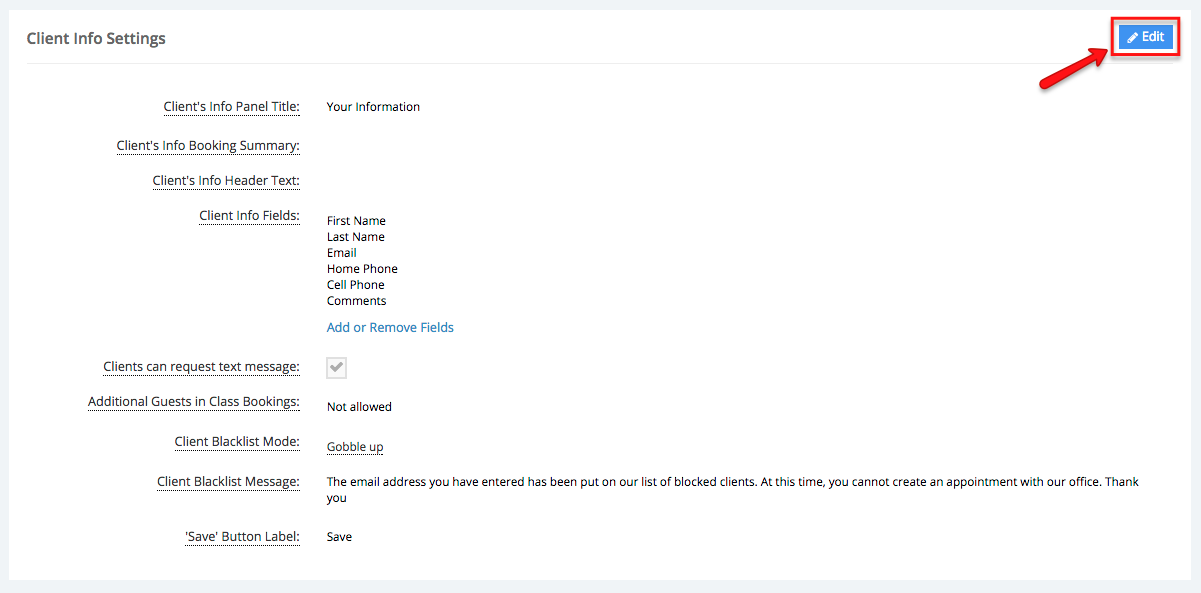
Once in the Client Information screen you'll see the Client Info Settings area. By clicking "Edit" on this section you can customize what your title bar says as well as add some header text and change the label on the "Save" button. By clicking on the "Add or Remove Fields" you can customize what specific information you want to request for clients to submit. Here's a close up of this section:
You can learn more about editing your Client Info panel settings by reading our documentation here.
You can also learn more about adding or removing fields by reading our documentation on defining field labels.