| Anchor | ||||
|---|---|---|---|---|
|
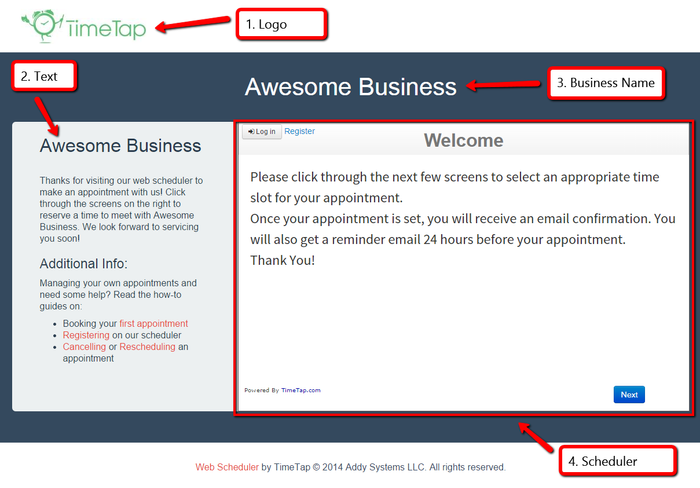
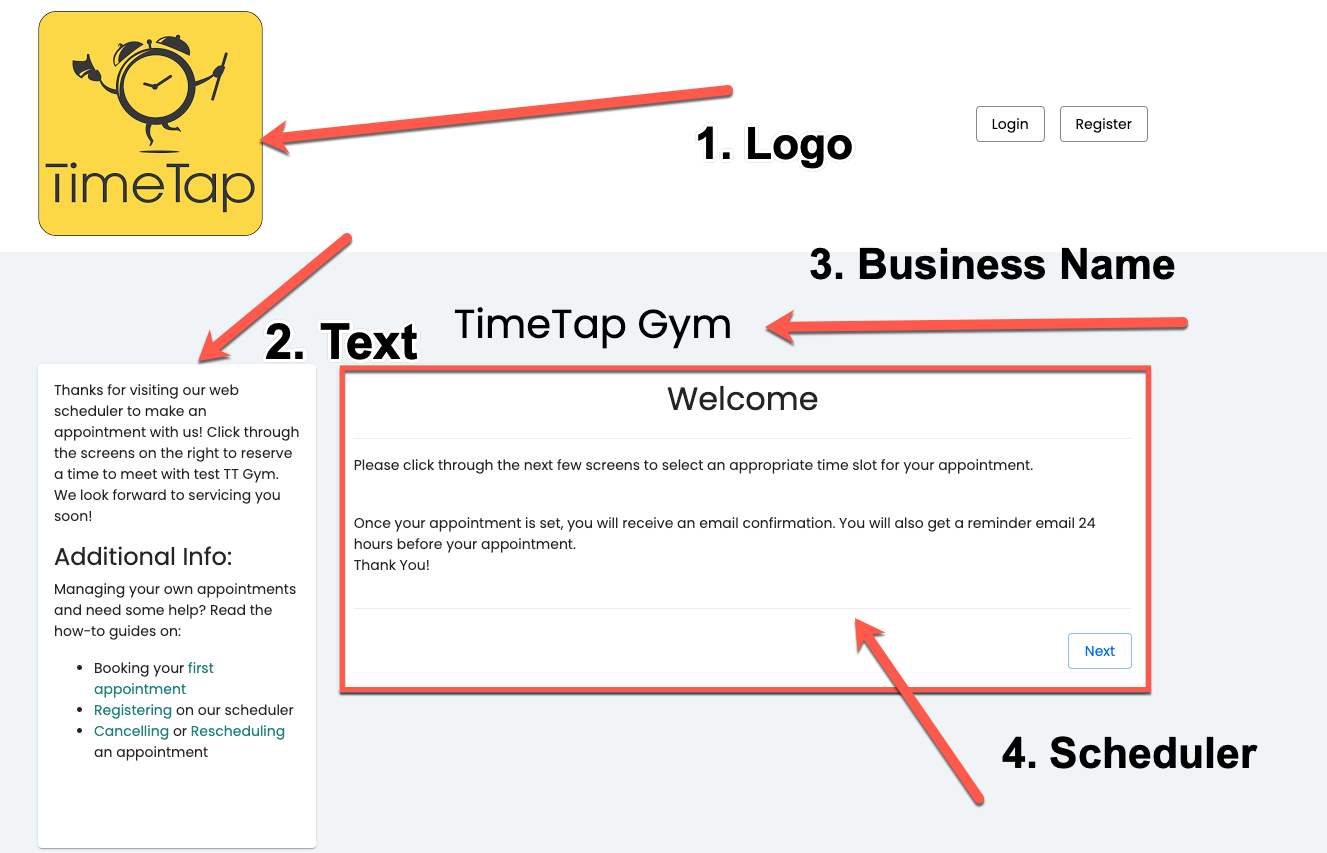
These four different parts of the mini website are shown in the screenshot to the right:
You can edit both the Logo and the Text that are shown on the mini website underneath Settings → Mini Website Design. You can also change the web address of the mini-website on this page in TimeTap's Back Office. In this documentation we'll go through:
| Table of Contents |
|---|
If you want to change the text on your scheduler or the selections that are offered when clicking through it, read through some of our other documentation under the Settings menu or get in contact with our support team with your question.
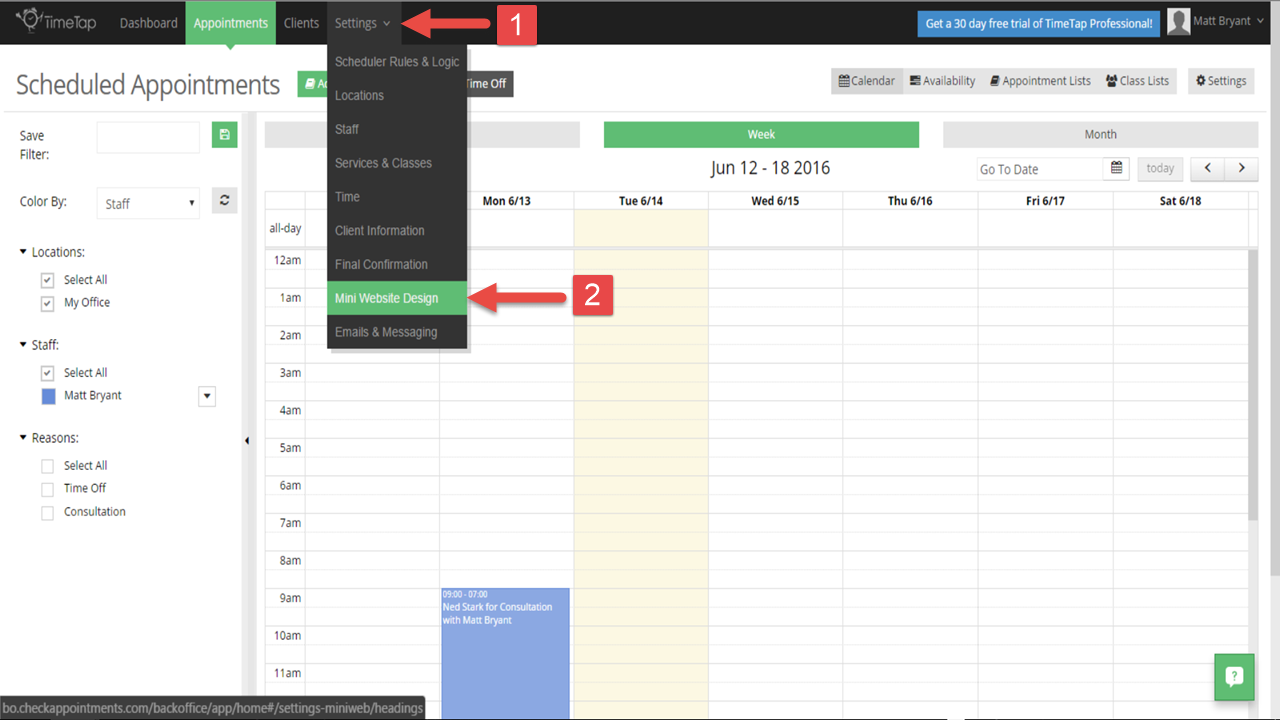
There are many ways to customize your Mini Website design. You can add custom text in each section, choose to hide or display certain text areas, and even choose custom colors for the background and text for certain sections. To start editing your mini website, go to Settings > Mini Website Design from within the application:
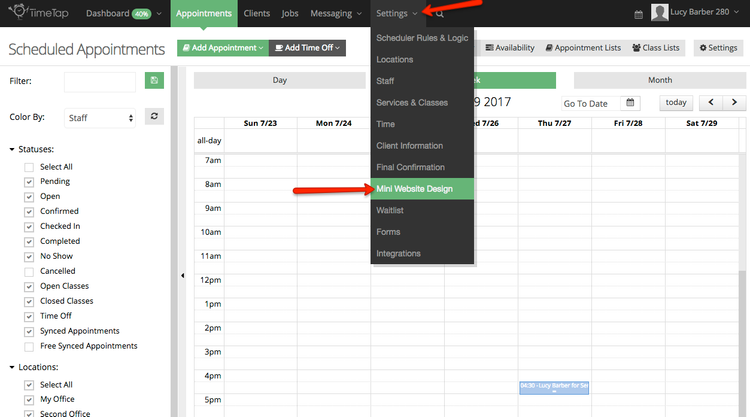
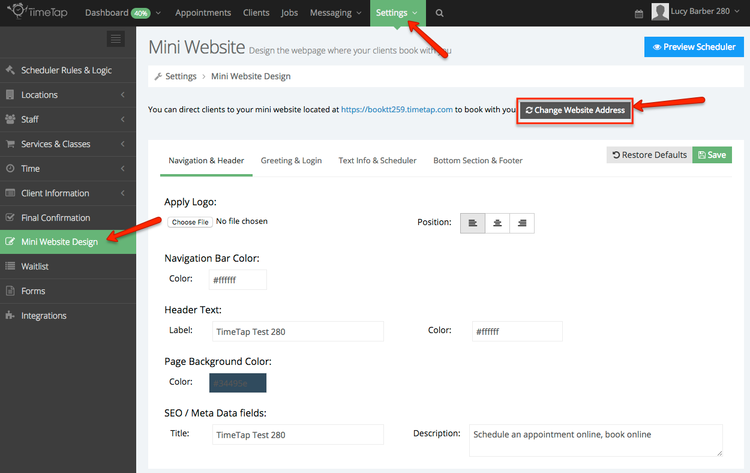
On the Mini Website Design page, you'll see that you have 4 5 different sections of the page you can edit separated by different tabs as well as a button to change your mini website address:
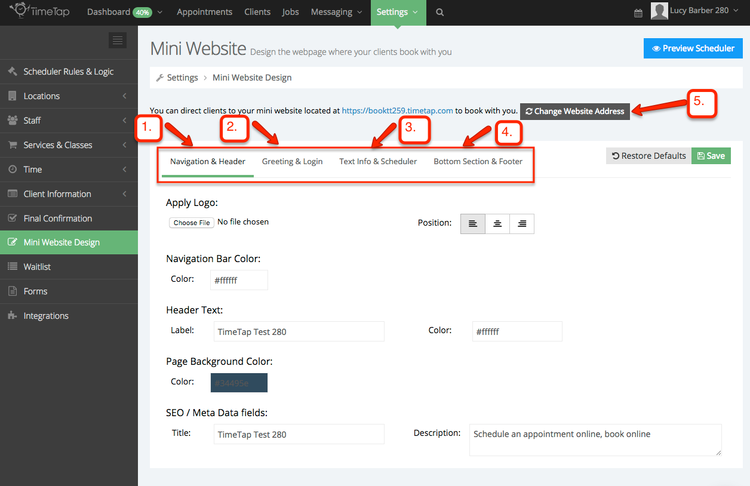
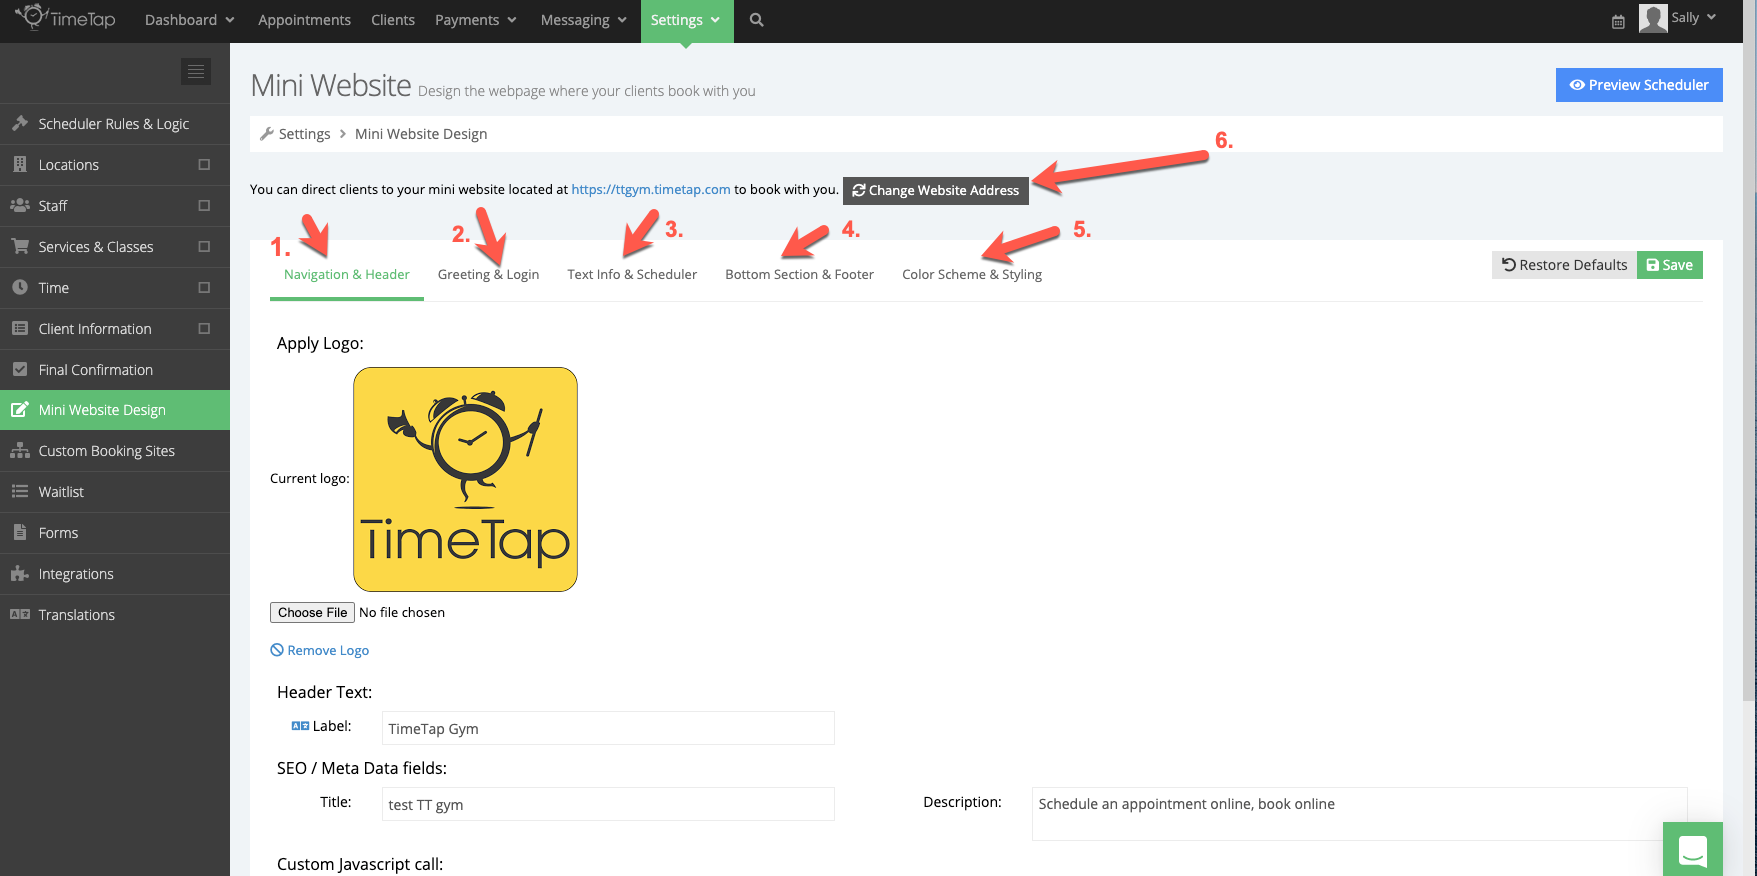
The sections that are included (as indicated by the numbers in the image above) are:
- Navigation & Header
- Greeting & Login
- Text Info & Scheduler
- Bottom Section & Footer
- Color Scheme & Styling
- Changing the Website Address
Click on any of the links above to go directly to the section of the documentation that speaks on editing those portions of the mini website design.
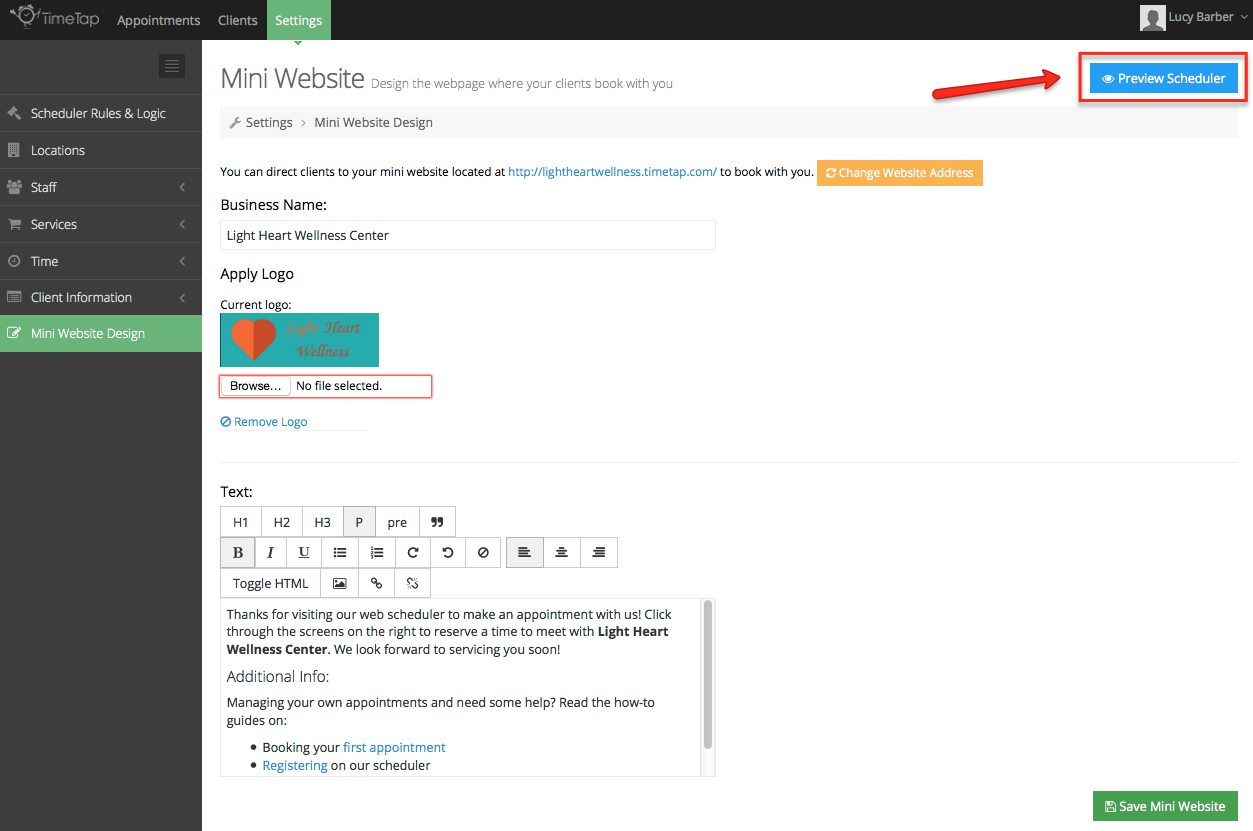
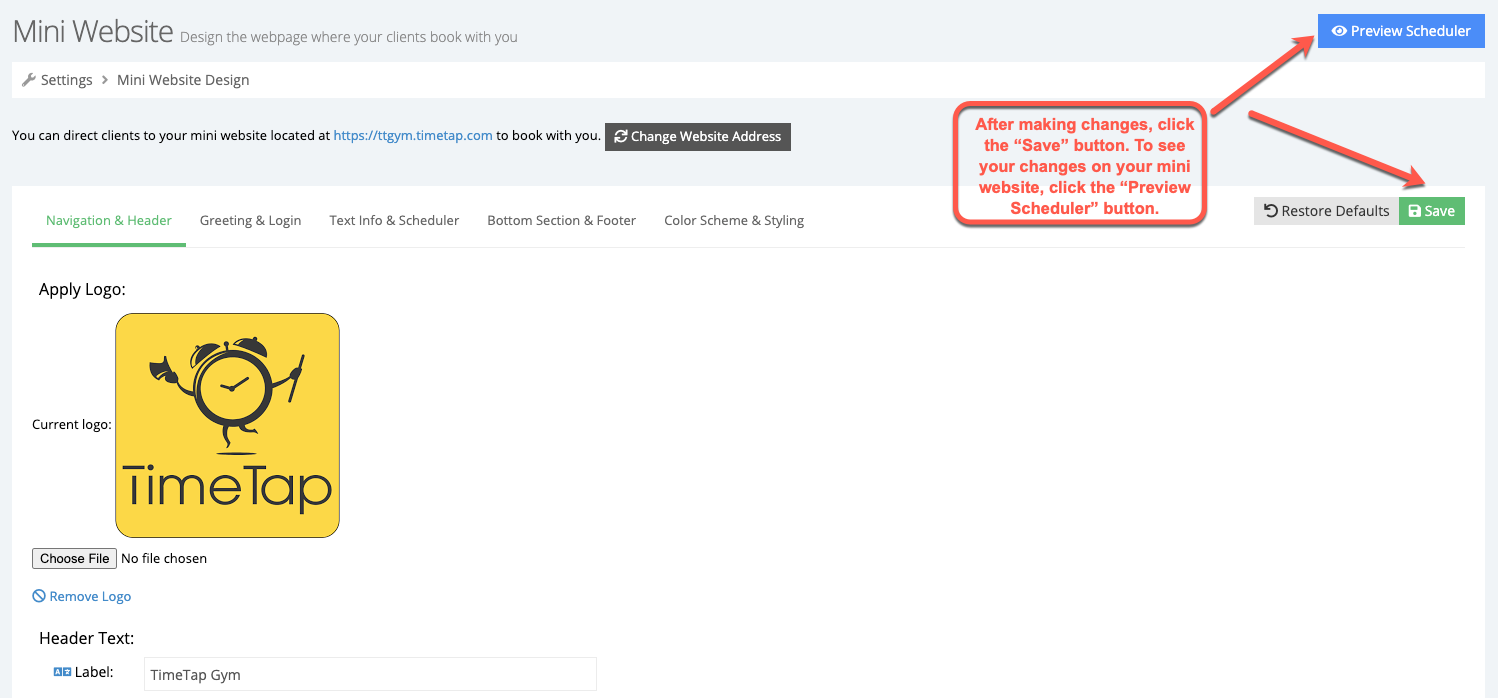
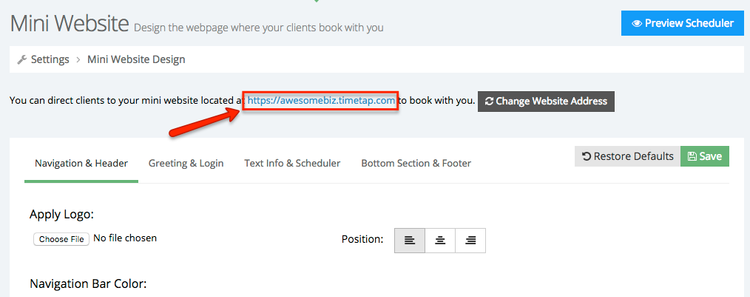
After making changes in any of the sections above, you can preview your changes on your mini website by either clicking the blue "Preview Scheduler" link in the top right of the page or clicking the link in the sentence to the left of the "Change Website Address" button:

A great place to start customizing your mini-website is by adding your logo to display in the top left corner of the page. The TimeTap logo is displayed by default, and as much as we love our logo, adding your company logo and color scheme will help orient your clients to your new scheduler and provide consistency across your web space.
Once on the Design Page, Under the Apply Logo section, click "Choose File":
![]()
Next, a window will open for your file explorer. Select your logo and click "Open" (or double-click logo file) to apply to your mini website. The logo will resize to be a maximum of 60 pixels in height. The width will resize automatically to maintain the original aspect ratio.
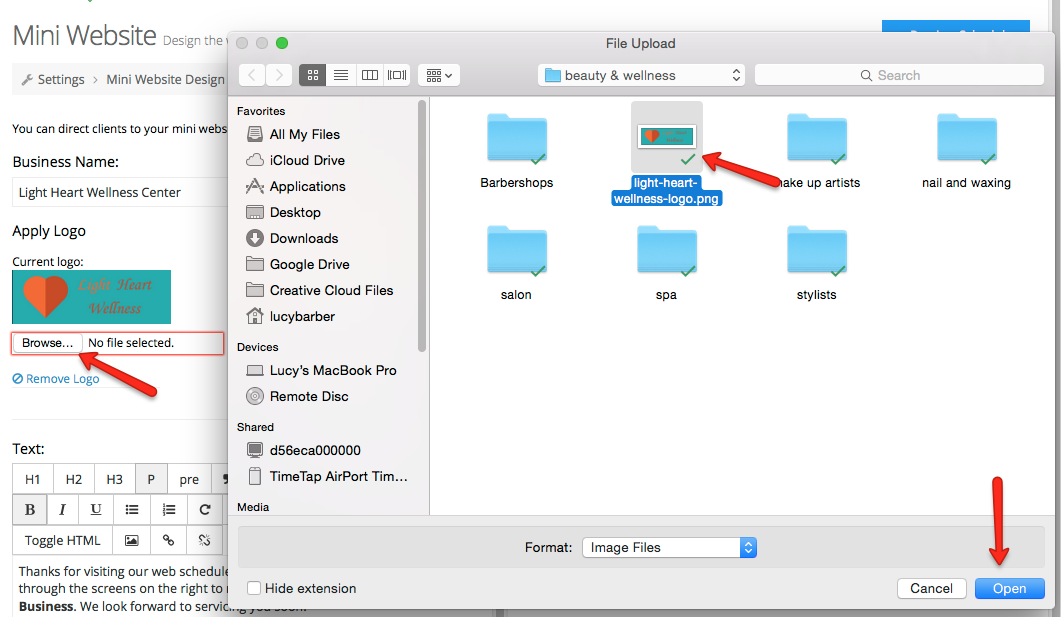
Once you've chosen your logo, the Mini-Website Design tool will save your change automatically. If you need to update your logo, simply repeat the steps above to select another file. To remove a logo, click the "Remove Logo" button beneath the "Choose File" button.
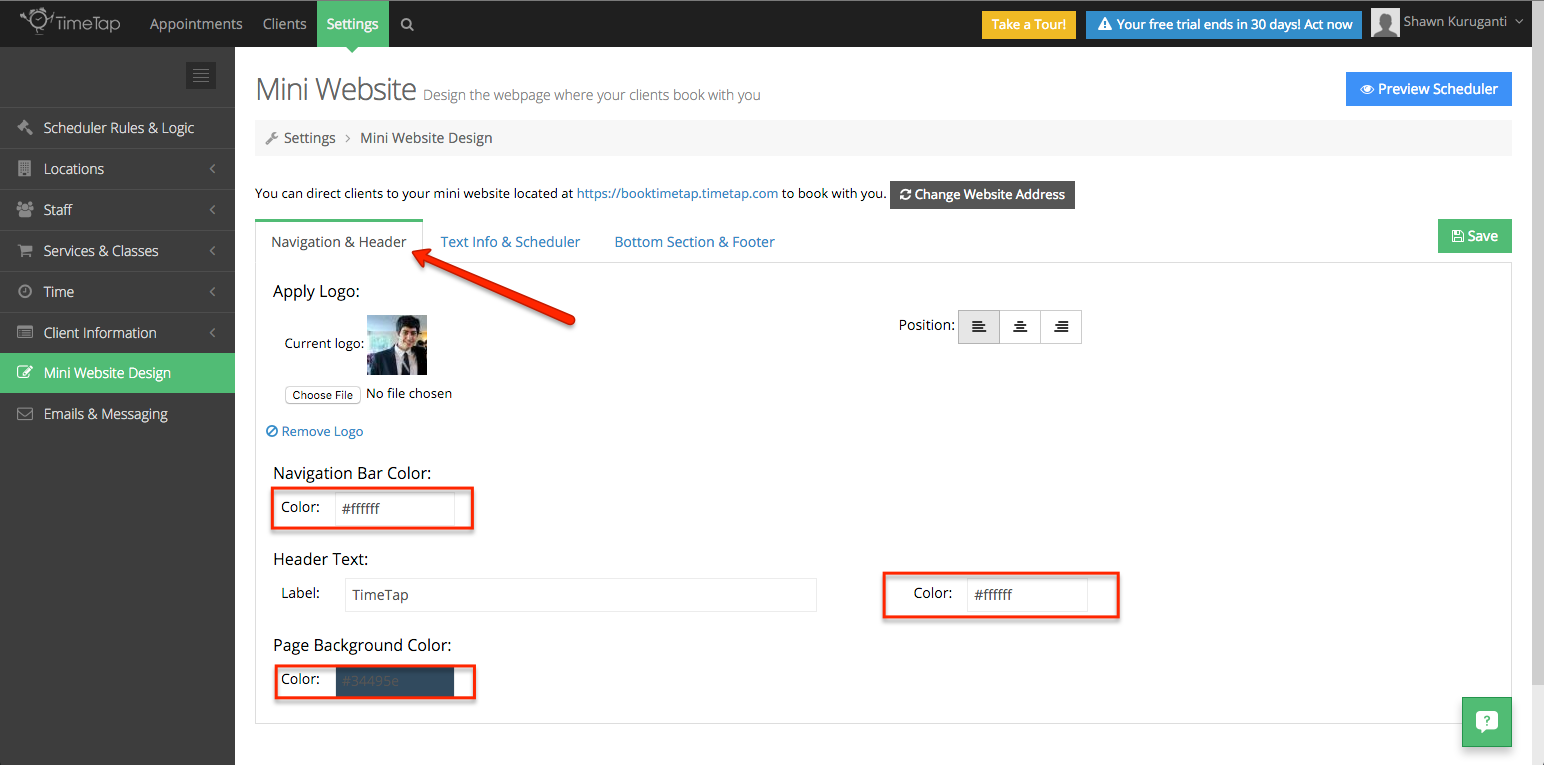
To Change your Colors you can click the "Color" boxes and choose the color you want. Each color is given a specific code, so to keep colors consistent just copy the code from one section into the color box for a different section, you can change the colors of the Navigation Bar, the Background, and the Header Text in the "Navigation and Header Tab"
After saving your text changes, you can click the blue "Preview Scheduler" button in the top right to open up your mini website and see how the changes look:
 The Navigation & Header section of your Mini Website Design has 5 different sections to it:
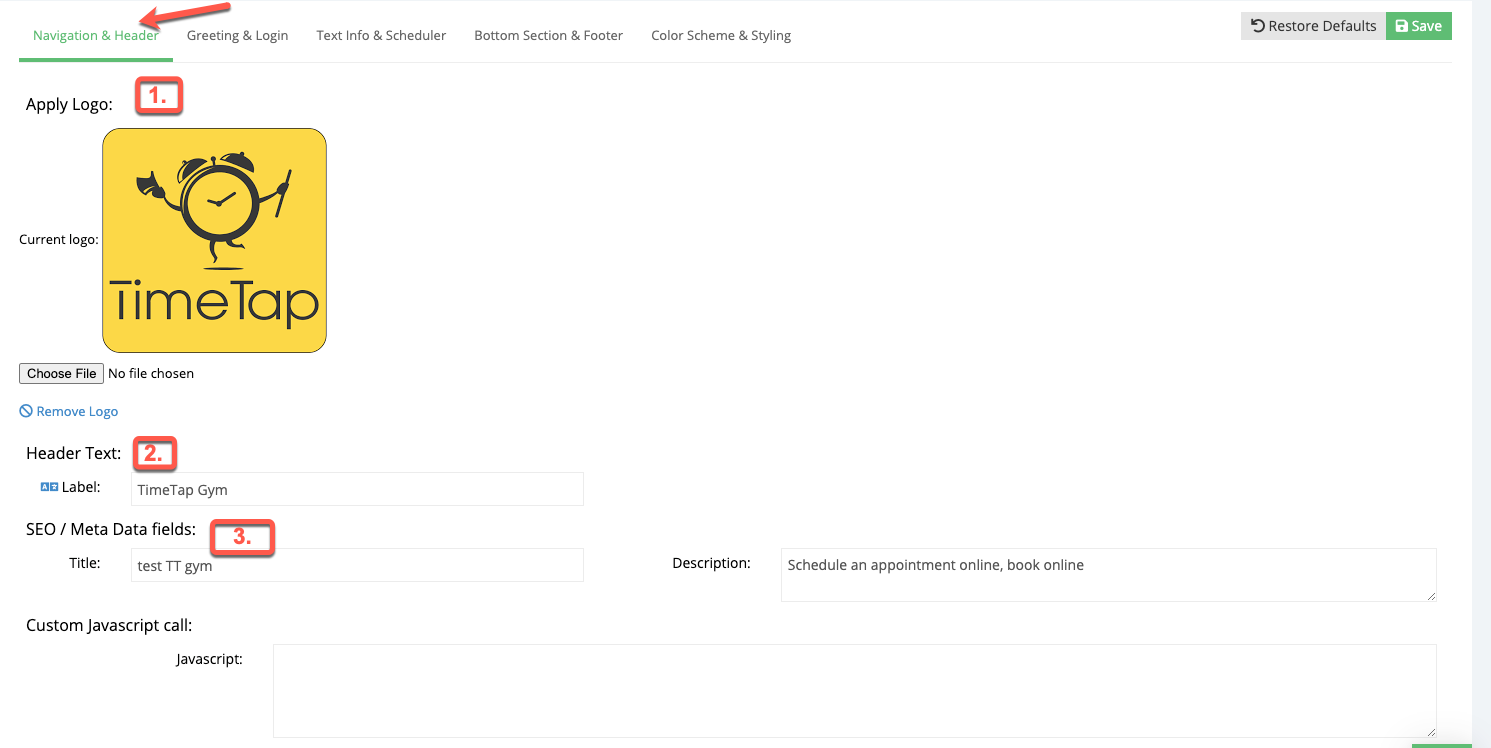
- Apply Logo: This section will allow you to change the logo on the mini website landing page. By default, the TimeTap logo shows. Upload your own logo using the "Browse" or "Choose File" button to choose a png, jpg, or gif file from your computer to display. You can then position it on the page using the left align, center align, or right align buttons to the right of the choose file button.
- Header Text: This is the text that appears above the scheduler. By default it is set to your business's name. You can change it to something else or just remove all the text from that field if you don't want a header to show. You can also set the color of the header text with the color selector to the left of the header text label.
- SEO / Meta Data Fields: The mini website has some light SEO options. You can set the title for the page (also what shows in the tab at the top of the browser) as well as a description (which shows up in the snippet underneath your name in a Google or Bing search). If you don't wish your scheduling page to be found through search, I recommend either removing any text from here or just not optimizing the text
Once you have made the changes you would like to that page, simply click the "Save" button in the top right to commit your changes. You can then use the preview scheduler button in the top right to see the changes live on your mini website:
The Greeting & Login section of the page has a bit more to it, so we've separated the documentation for that section out to its own separate page. To read through that, click this link.
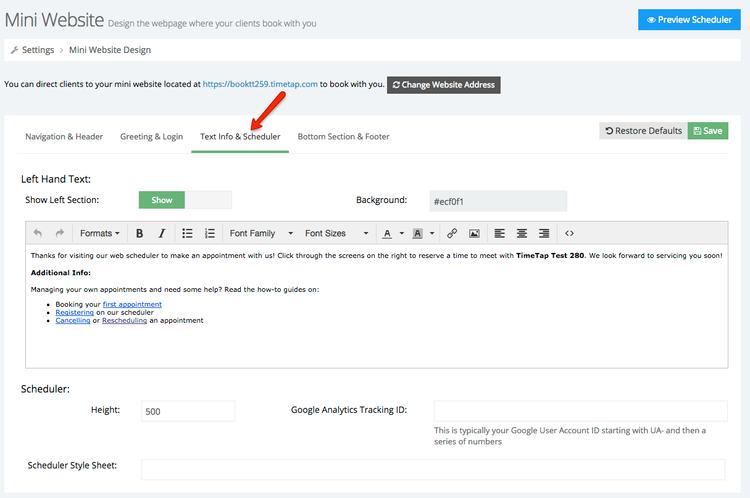
To update your Text that appears to the left of your scheduler on your mini website, simply click The Text Info & Scheduler section of the mini website design has two primary sections:
- Left Hand Text
- Scheduler
You'll see these two headings if you click on the "Text Info and Scheduler" tab. You can add images, links, and even write in html if you'd prefer. Once you finish updating it simply press the green "Save" button in the top right. You can even hide this section by clicking the "Show/Hide" toggle button.
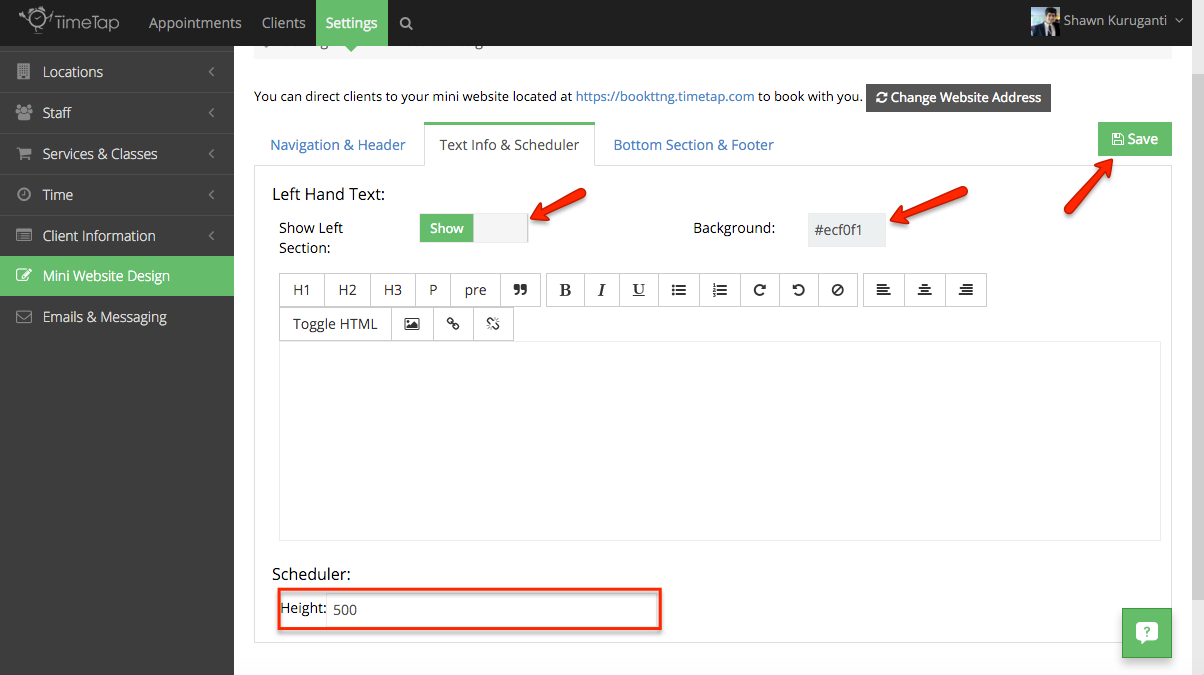
To set the height of the scheduler window and the color of the side window in the "Text Info & Scheduler" tab as seen below, note that the default window height is 500:
 & Scheduler" section of your mini website design page:
The "Left Hand Text" section contains three options:
- Show Left Section: this can be set to either "Show" or "Hide". By setting it to "Hide" you will effectively turn off the left hand text section that is next to the scheduler on the mini website page.
- Background: this sets the background color of the left hand text section. By default it is set to a light grey color, but you can change that to a different color setting if you'd like.
- Text Editor: the text editor is where you can customize what text actually shows to the left of the scheduler. You can use any of the options in the text editor tool bar to customize how the text appears.
The "Scheduler" section also contains three options:
- Height: This sets how tall the scheduler is on the page. By default the height is set to 500 (which translates to 500 pixels). This matches up with the height of the left hand section. If you add text to the left hand section so that it is longer than the scheduler, you can adjust the height to something taller to match it.
- Google Analytics Tracking ID: If you want the scheduler to send an update to your Google Analytics tracking system whenever someone visits the scheduler, paste in your tracking id to this field
- Scheduler Style Sheet: You can insert a custom stylesheet that will apply to the scheduler portion of the mini website. This stylesheet is inserted in the header of the iframe that the scheduler is embedded through. It is inserted before the bootstrap stylesheet so if you want to override default bootstrap styles you will either have to use more exact target criteria for your styles or the !important tag.
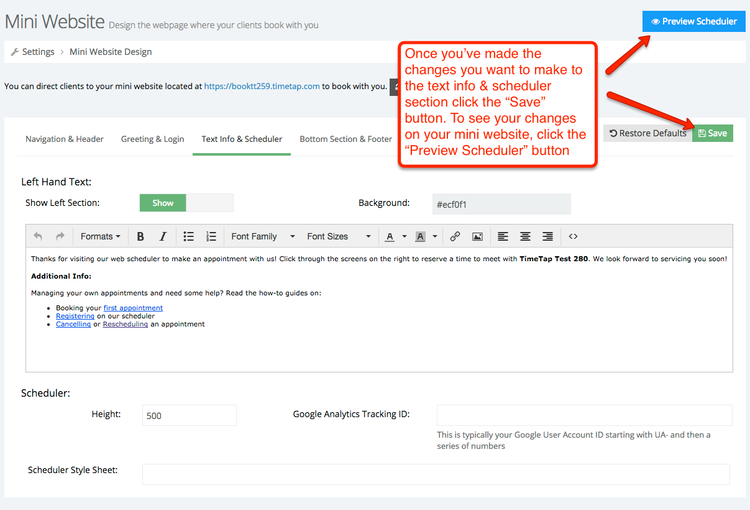
Once you've made the changes you want to on that page, click the "Save" button in the top right. If you want to see the changes live on your mini website, click the "Preview Scheduler" button after saving:
To change the text in the bottom section and footer sections simply click the "Bottom Section and Footer" tab and click the "Show Bottom Section" tab to make sure that this shows us on your scheduler. Edit the "Policies and Procedures" text to what you want and click "Save"

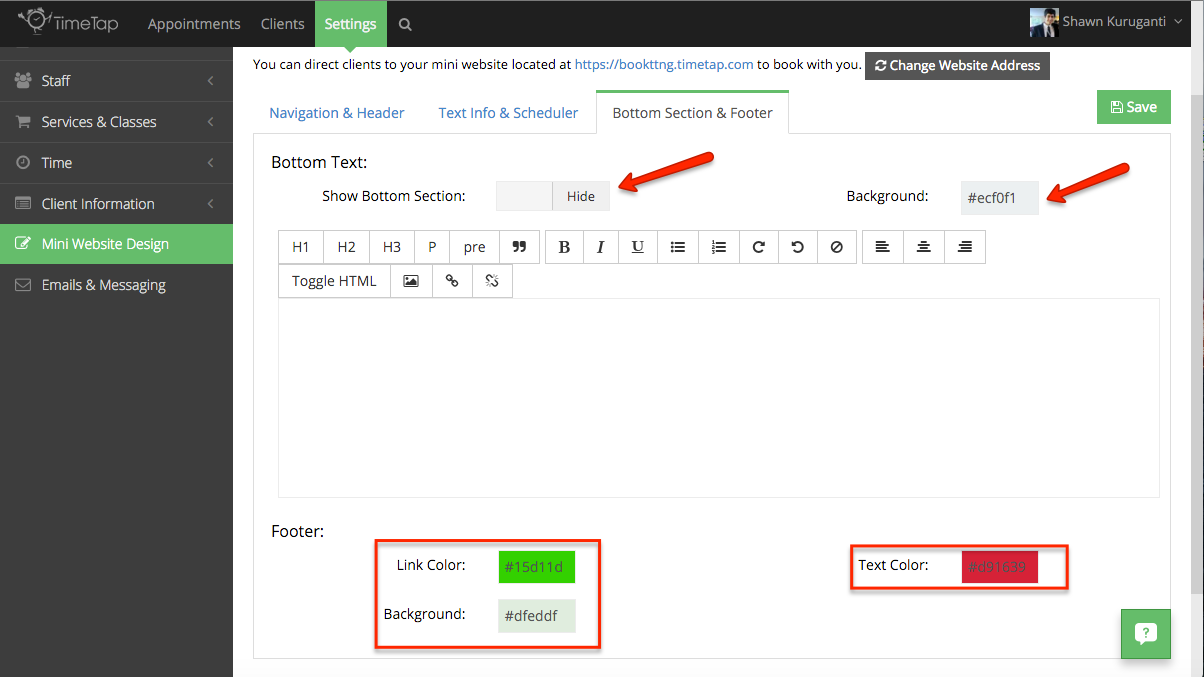
To change the colors for the bottom section and footer as seen below, just click the "Bottom Section & Footer" tab and click into the different color boxes to change each aspect:
 By default, the bottom section does not show on your mini website. You can turn it on under your "Bottom Section & Footer" portion of your Mini Website design page.
The Footer, however, does show and cannot be turned off, but you can change the colors for them.
The "Bottom Section & Footer" portion of your mini website design has two sections:
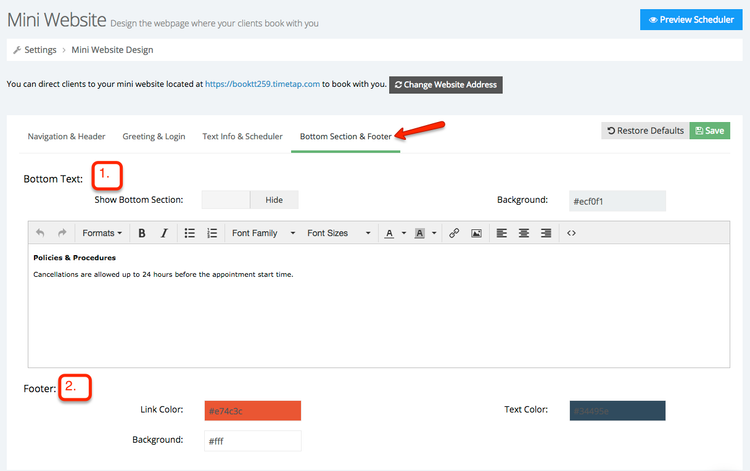
- Bottom Text: this section will allow you to turn on and off a section of text between the bottom of your scheduler and the footer of the page
- Footer: this section will allow you to customize the color of the text in the footer as well as the background of the footer.
The Bottom Text section consists of three parts:
- Show Bottom Sections: By default, the bottom section is hidden, but you can turn that section on by toggling the "Hide" button to "Show".
- Background: This is the background color of the bottom text section if you choose to show it. By default it is a light grey.
- Text editor: This is where you can edit the text that appears in the bottom section of the scheduler. A lot of businesses like to use this to show their policies and procedures, but you can use the text editor's tools to customize the text to say whatever you'd like.
The Footer section consists of three parts as well:
- Link Color: This is the color of the hyperlink to TimeTap's website. Default is a bright red orange.
- Text Color: This is the color of the rest of the attribution text in the footer. Default is a dark, navy blue.
- Background: This is the overall color of the background of the footer (behind the text). Default is white.
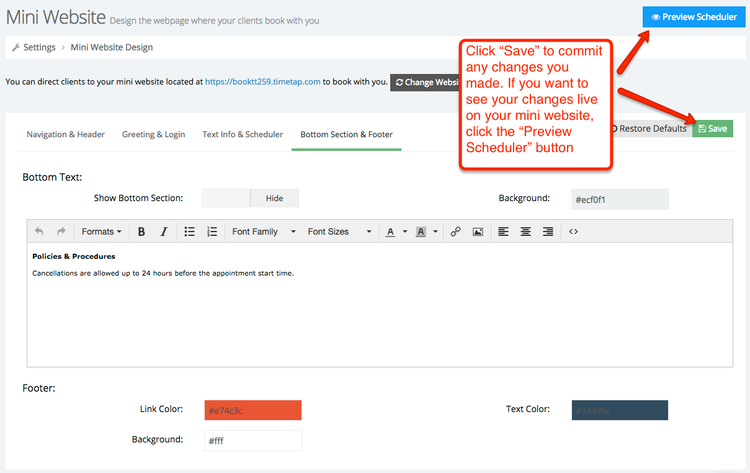
Once you've made the changes you want to on "Bottom Section & Footer" portion of the mini website design, click the "Save" button in the top right. If you want to see the changes live on your mini website, click the "Preview Scheduler" button after saving:
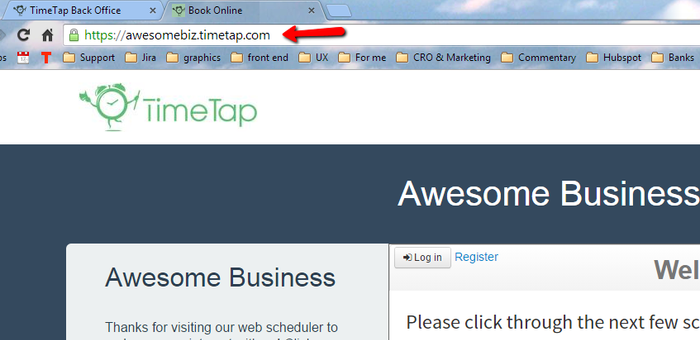
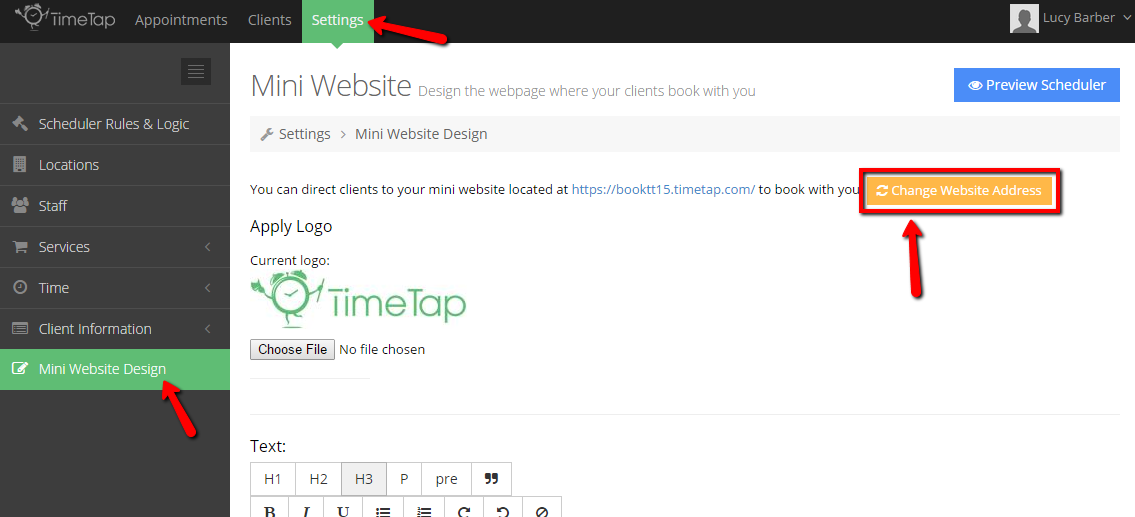
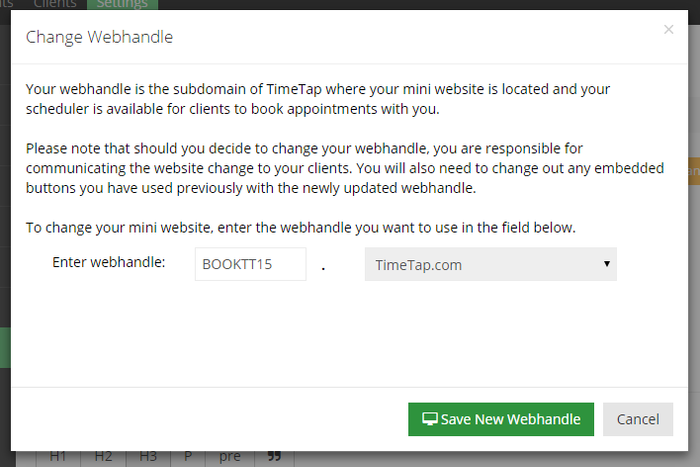
If you don't like the mini website web address you were given upon sign up, your TimeTap Account Owner or anyone with Administrator level security access can always change this from the Mini Website Design page.
To do this from your Mini Website Design page, go to Settings → Mini Website Design and click on the yellow dark grey "Change Website Address" button:
This will bring up the "Change Webhandle" window where you can change the handle that comes before the .timetap.com portion of your website address:
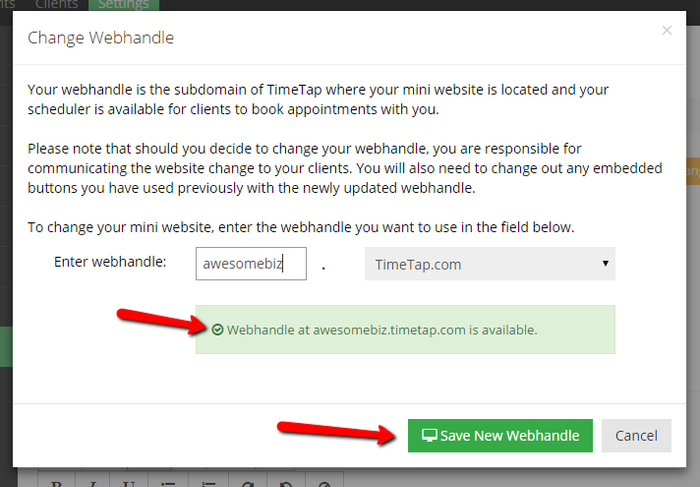
As you type in a new address, you will see either a red ![]() or a green
or a green ![]() appear to let you know if the webhandle is available. Once you have found a webhandle that you like and is available, click the "Save New Webhandle" button:
appear to let you know if the webhandle is available. Once you have found a webhandle that you like and is available, click the "Save New Webhandle" button:
As soon as Iyou've saved the new webhandle, I you will see the new webhandle as applied on my your Mini Website Design page:
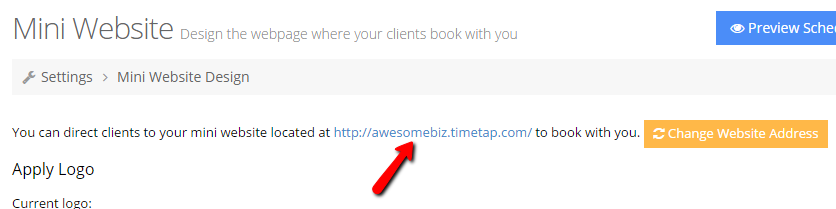
IYou'll also notice now that all of the blue "Preview Scheduler" buttons throughout the Settings menu link to the new mini website: