| Anchor | ||||
|---|---|---|---|---|
|
Please note: you will only be able to add and edit availability for other staff on your account if you are the account owner or have a security status of "Administrator". Staff with security status of "Location Super User" or "User" will only be able to add availability for him/herself. If a staff person cannot accept appointments, then you will not be able to add availability for them since availability is only set up to determine what hours you are open to have appointments made with you. You can see what security level you are as well as whether you are allowed to offer appointments by looking at your Staff Details in your My Profile view.
The scenarios we will walk through will be:
- Adding availability when a staff person has no availability set up
- Adding availability when a staff person has a closed date range of availability set up
- Adding availability when a staff person has an onward date range set up
We have also written extensively on how to add service availability that repeats every week and every two weeks. If you have any questions about adding availability for a staff person, please feel free to reach out to our support team and let us know.
When your staff has no availability set up, then their availability tab will be complete blank of any date ranges. You can view their availability tab by going to Settings → Staff and clicking the "View Details" button next to the Staff person you want to check out the availability for:
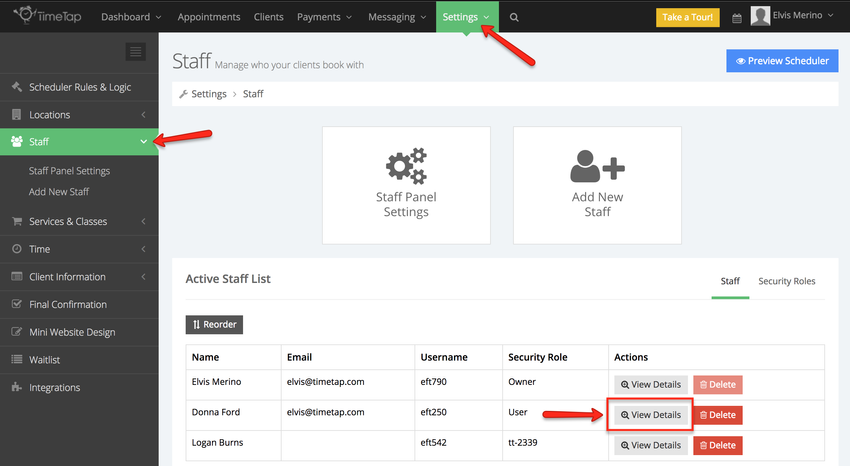
After clicking the "View Details" button, you will enter into the Staff Profile for that staff. Click on the "Availability" tab to see what availability the staff currently has set up for accepting appointments:

When the staff has no availability set up for taking appointments, the availability tab will look completely bare. In order to add a date range of availability, click the "Add New Date Range" button:
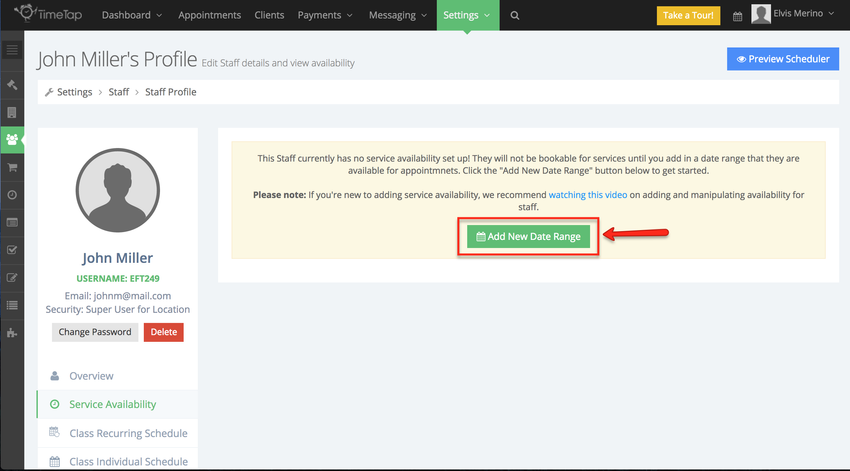
This will take you into the "Add Staff Availability" flow and will have the staff person from whom's profile you clicked through from pre-selected:
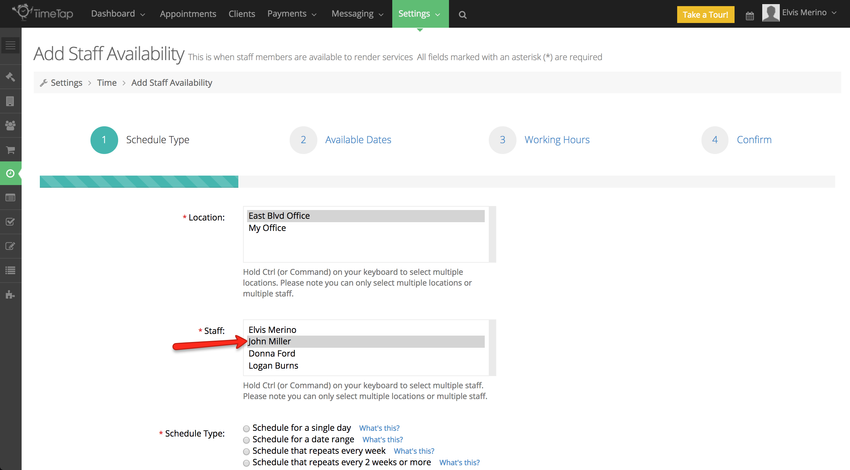
At this point, if you have security access as an Account Owner or Administrator, you can select whether you are adding availability just for the staff person you clicked through the profile for or if you want to add availability for multiple staff at one time. Just make sure you aren't overriding any of the existing staff's availability.
In this example, I'm just sticking with adding availability for one staff and will be adding availability for the month of March 2017 so I'll select the option that I'm adding "Availability for a date range" and hit "Continue":

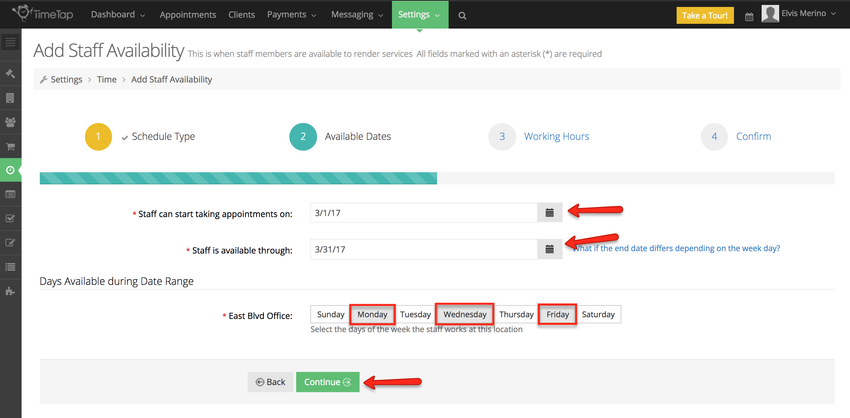
Next, under "Available Dates" I'll select that I'm defining this date range of availability for March 1st, 2017 - March 31st, 2016 and check off that I'll be available Monday, Wednesday, & Friday between those dates:
Under the "Working Hours" tab, I'll set up what hours I'm available on Monday, Wednesday, & Friday between those dates. In this example, let's say that on Mondays and Wednesdays I'm available between 8:00am - 12:00pm then 1:00pm - 5:00pm. Fridays I leave early so I don't take a lunch break but my day ends at 2:00pm:
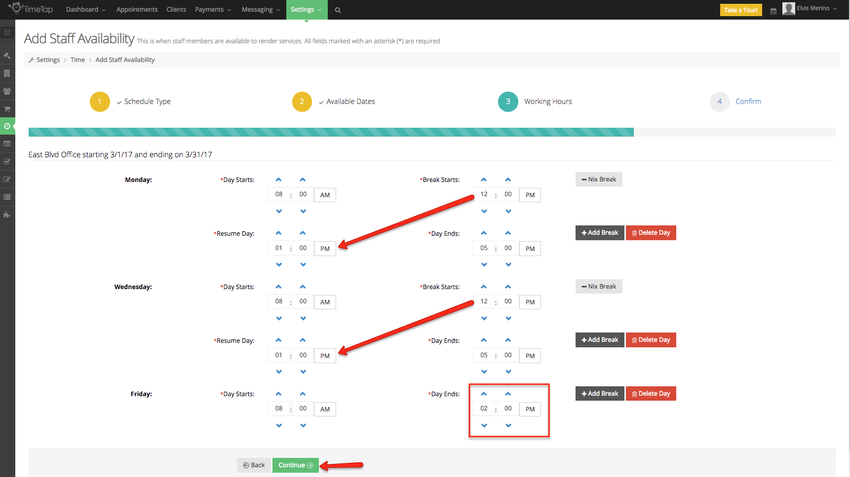
You can customize your working hours as much as you would like. Add breaks for when you don't want appointments to be scheduled. Once you've finished customizing the hours of availability for the days you're available in the given date range, click the "Continue" button to move to the Confirmation screen.
On the Confirmation screen, make sure that the hours of availability look correct before pressing "Submit":
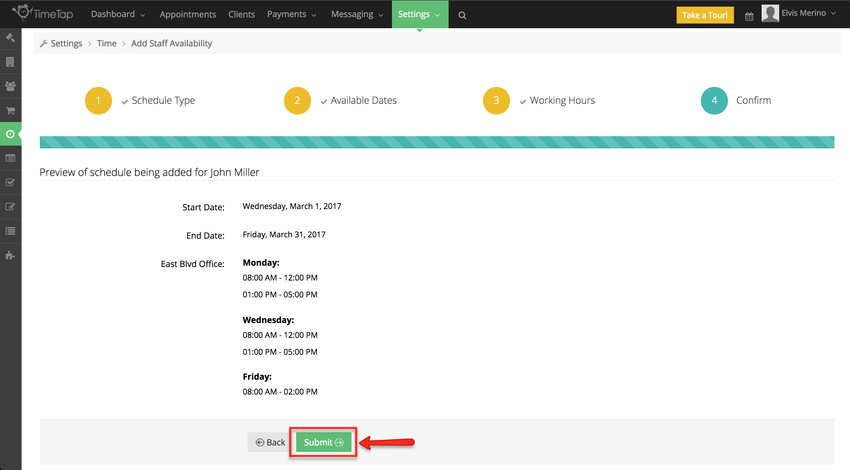
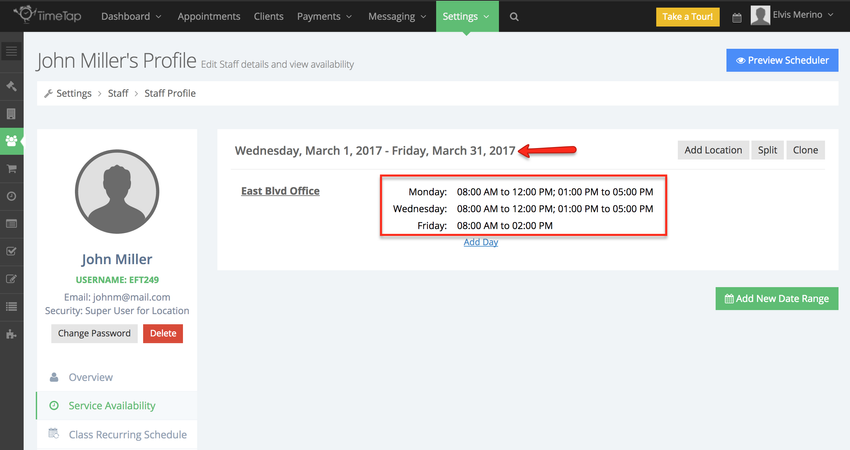
Once you press "Submit" you'll be taken back to the Staff's Availability tab where you'll see their new date range of availability setup:
If you want to learn more about how to read your availability once it has been added to your service availability tab, you can check out our documentation on understanding your service availability display. We also have a lot written on how you can edit staff availability for services, make changes to your date ranges, as well as remove it all together.
If there are dates in your date range that you don't want to take appointments on (say you don't want to take appointments on the Monday after Mother's Day) then it's best to go ahead and just add some Time Off from the appointments screen.
At this point, it's a good idea to quickly hit the "Preview Scheduler" button just to make sure that it your availability for clients trying to book looks proper during the date range you added. This helps to ensure you got everything entered correctly ![]()
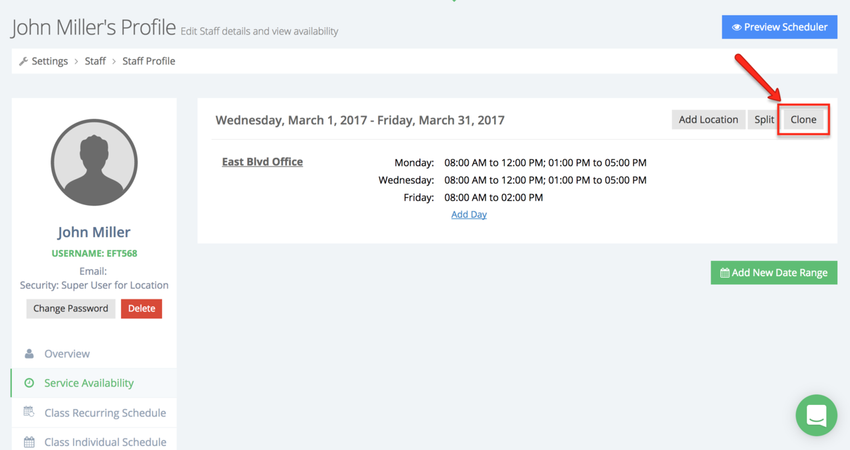
Let's say you have availability set up in your service availability tab under Settings → Staff → Staff Profile for a closed date range (Mondays, Wednesdays, & Fridays between 3-1-2017 and 3-31-2017), but you may want to add a second range to it. Starting on the first of April, you switch your days of the week to Mondays, Tuesdays, Wednesdays, & Thursdays and take Fridays off. At this point in time, that's going to be your schedule of availability for services until you want to end date it or change it.
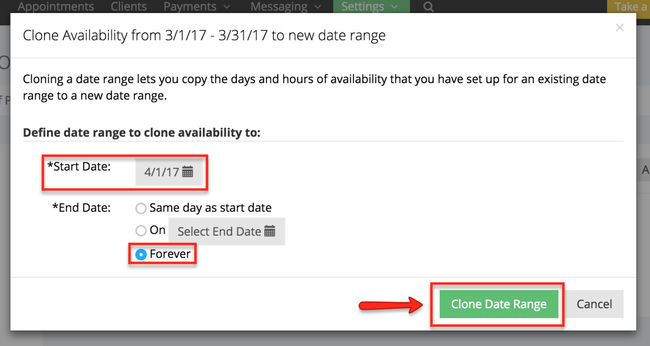
We will duplicate the existing date range and modify it reflect the new days and times when this staff member will be available. What you'll want to do is press the "Clone" button to bring up the "Clone Availability Window":
First, we will select the Start Date to be April 1st, 2017, and an End Date of "Forever", this means that availability is in effect indefinitely or until an end date is selected. Once the date range has been selected click Clone Date Range:
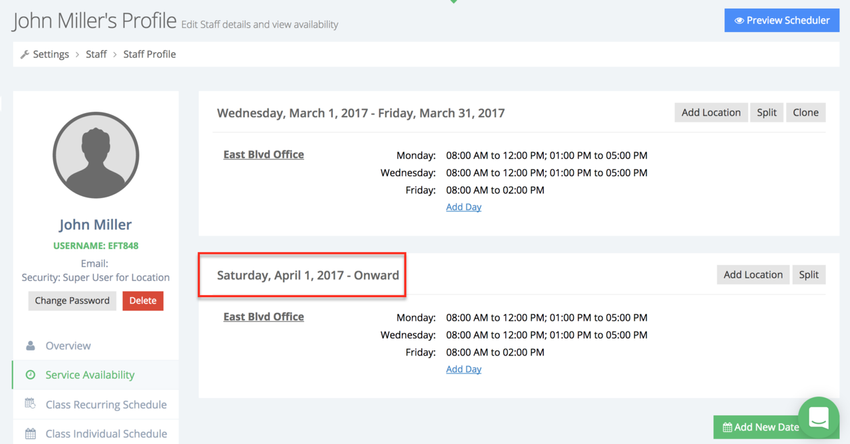
This will create a duplicate of the 3/1/17 - 3/31/17 date range, however the new date dates will reflect the dates selected in the Clone Availability window:
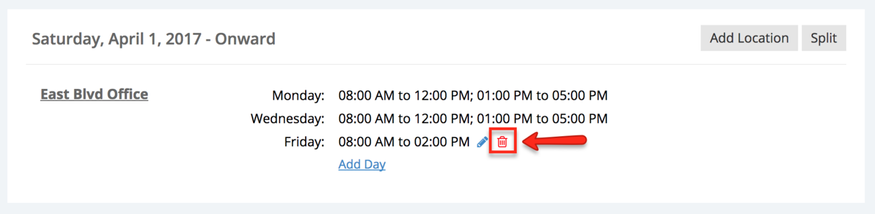
Now we'll modify this newly created date range to reflect the Mondays, Tuesdays, Wednesdays, & Thursdays availability. First, move your mouse over Friday and click the delete icon to remove it from this date range:
With Friday removed from this date range click Add Day:
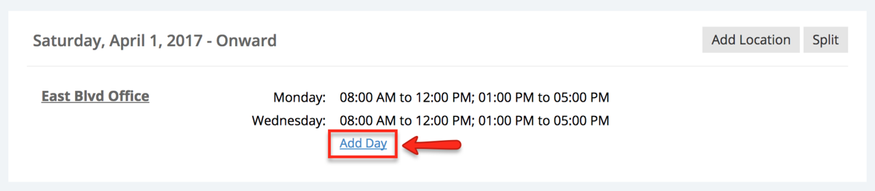
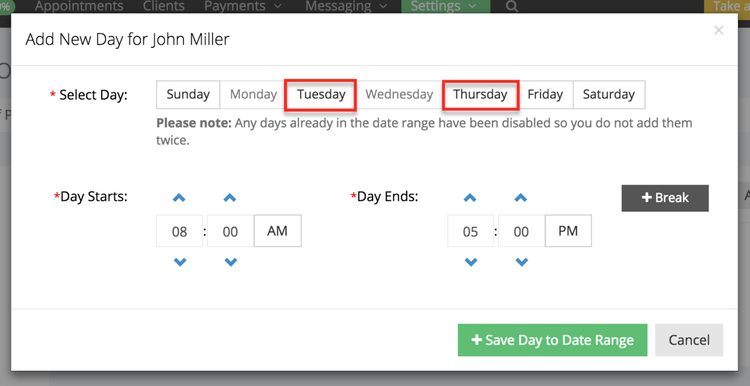
After clicking Add Day, a new window will appear where you can select which days you want to add to this date range. We will select Tuesday and Thursday:
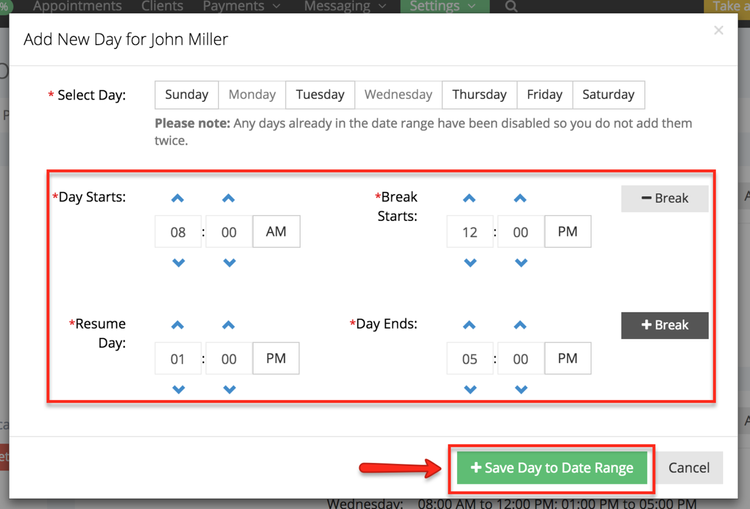
After selecting the days of the week we want to add, we time slots when this staff will be available can be modified. Once the desired availability has been select click "Save Day to Date Range":
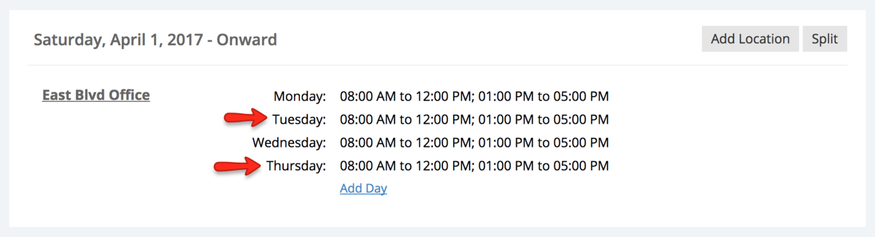
After pressing the Save button, the updated date range of availability will have the Tuesday and Thursday added:
Again, after making these changes to your service availability, I recommend quickly clicking the blue "Preview Scheduler" button at the top of any of the settings pages (including your staff profile) to click through your client-facing scheduler to make sure appointment times are displaying correctly for your clients who are booking services with you.
As in the case mentioned above, you may get to a point where you have a range of availability set up that extends for a long period of time. If you want to change it up with a different set of availability, you could always do this by splitting the date range with the Date Range Actions and then using the Edit Availability Split button, but you can also override existing "Onward" ranges of availability by adding in a new date range over top of it.
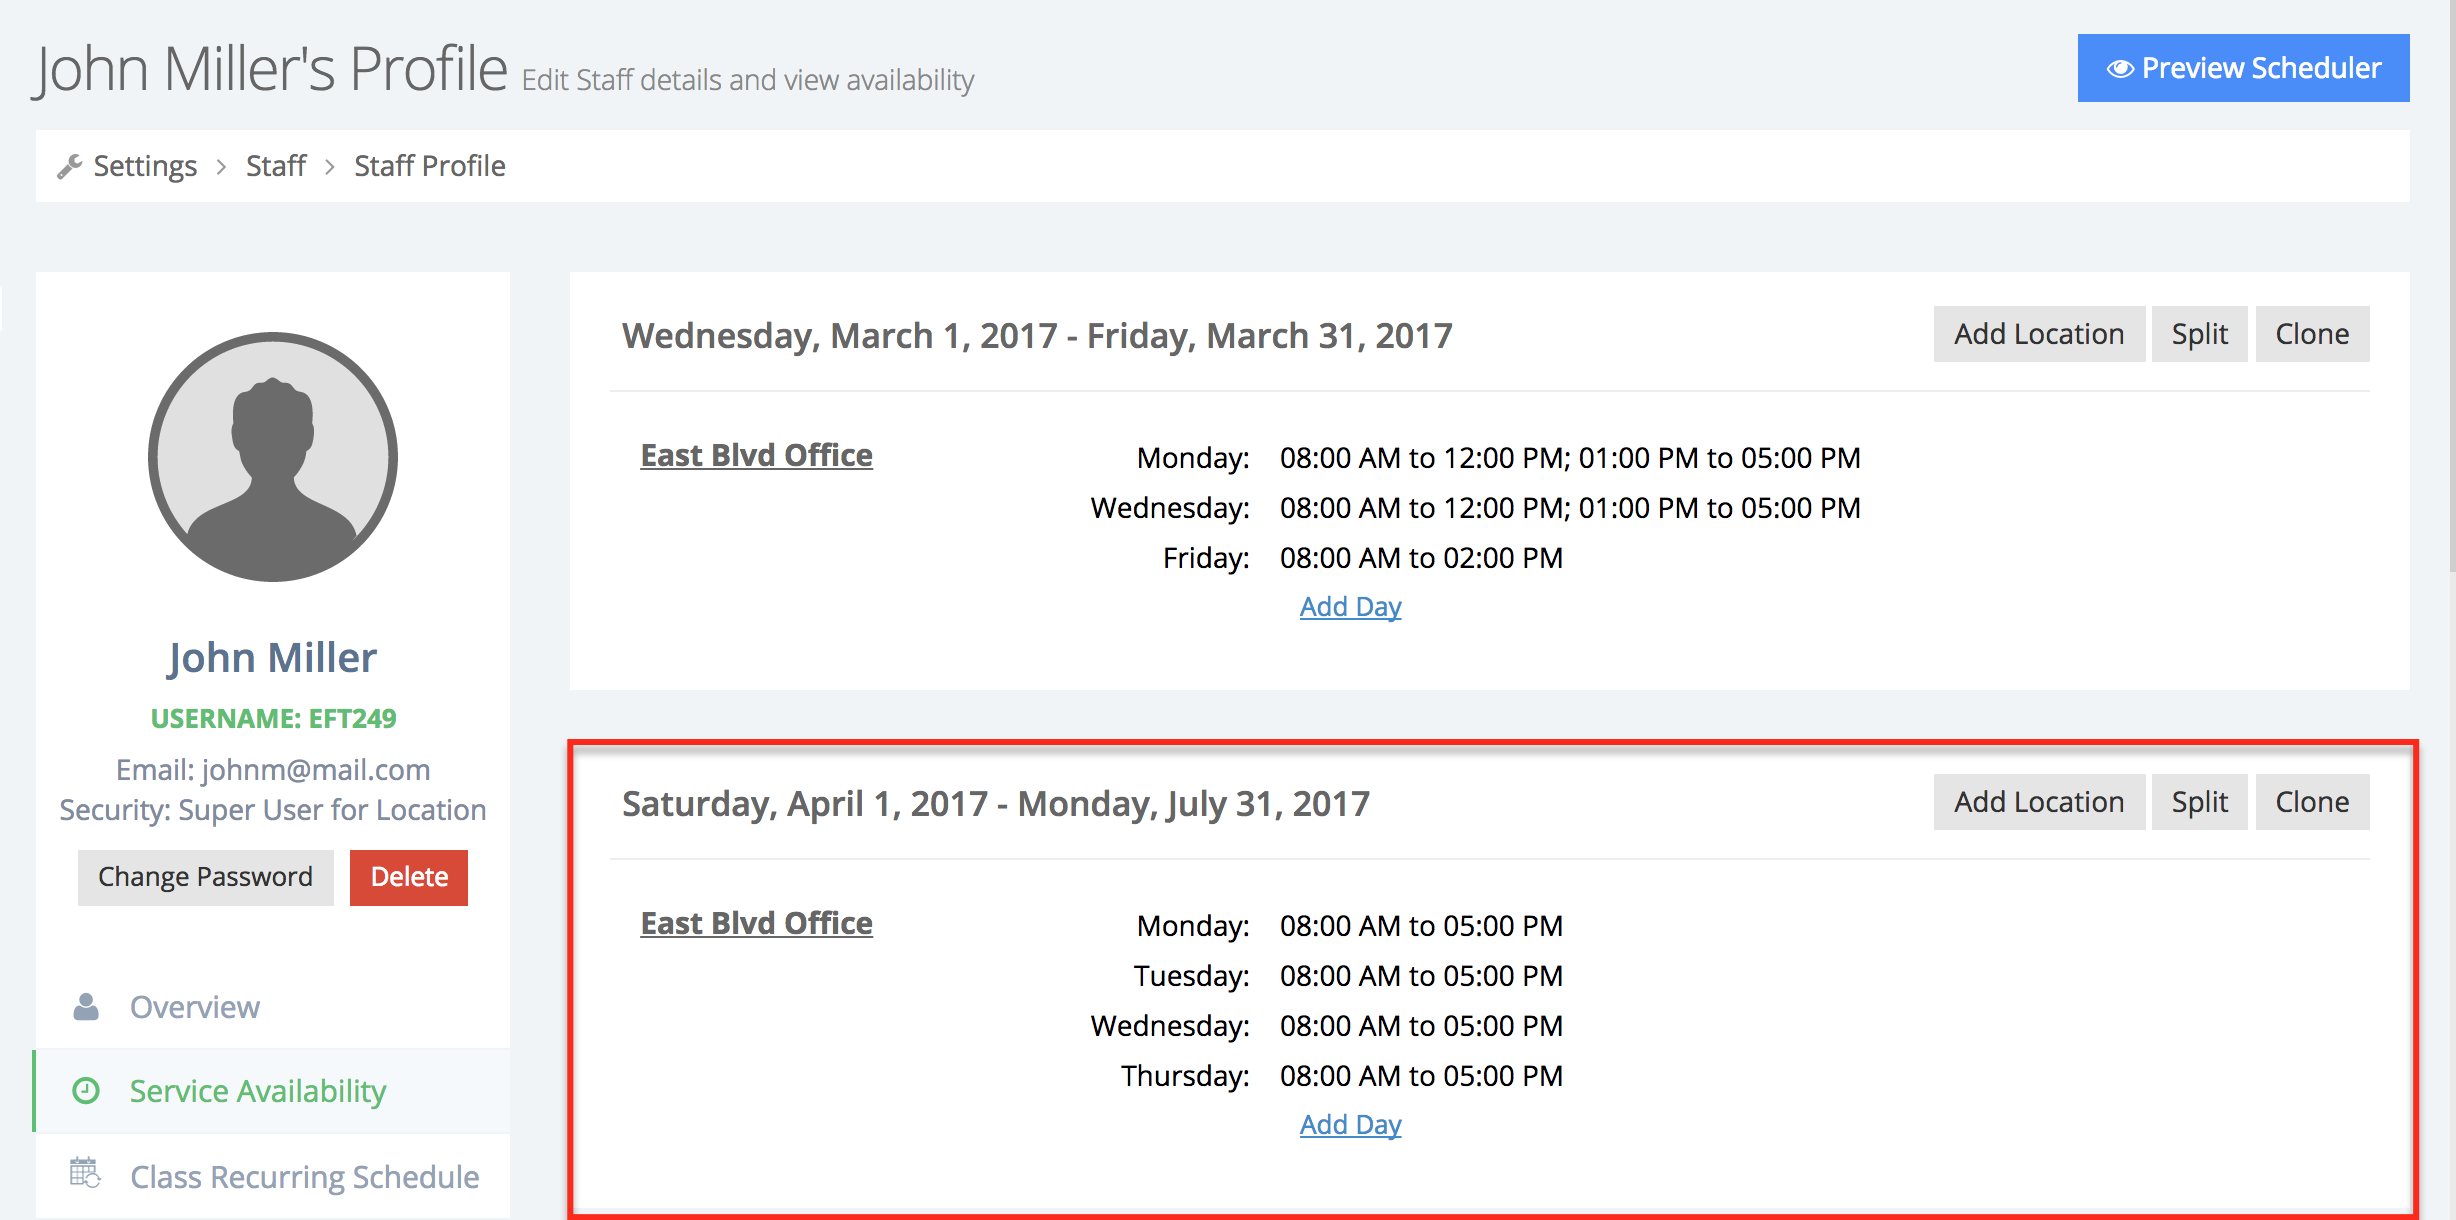
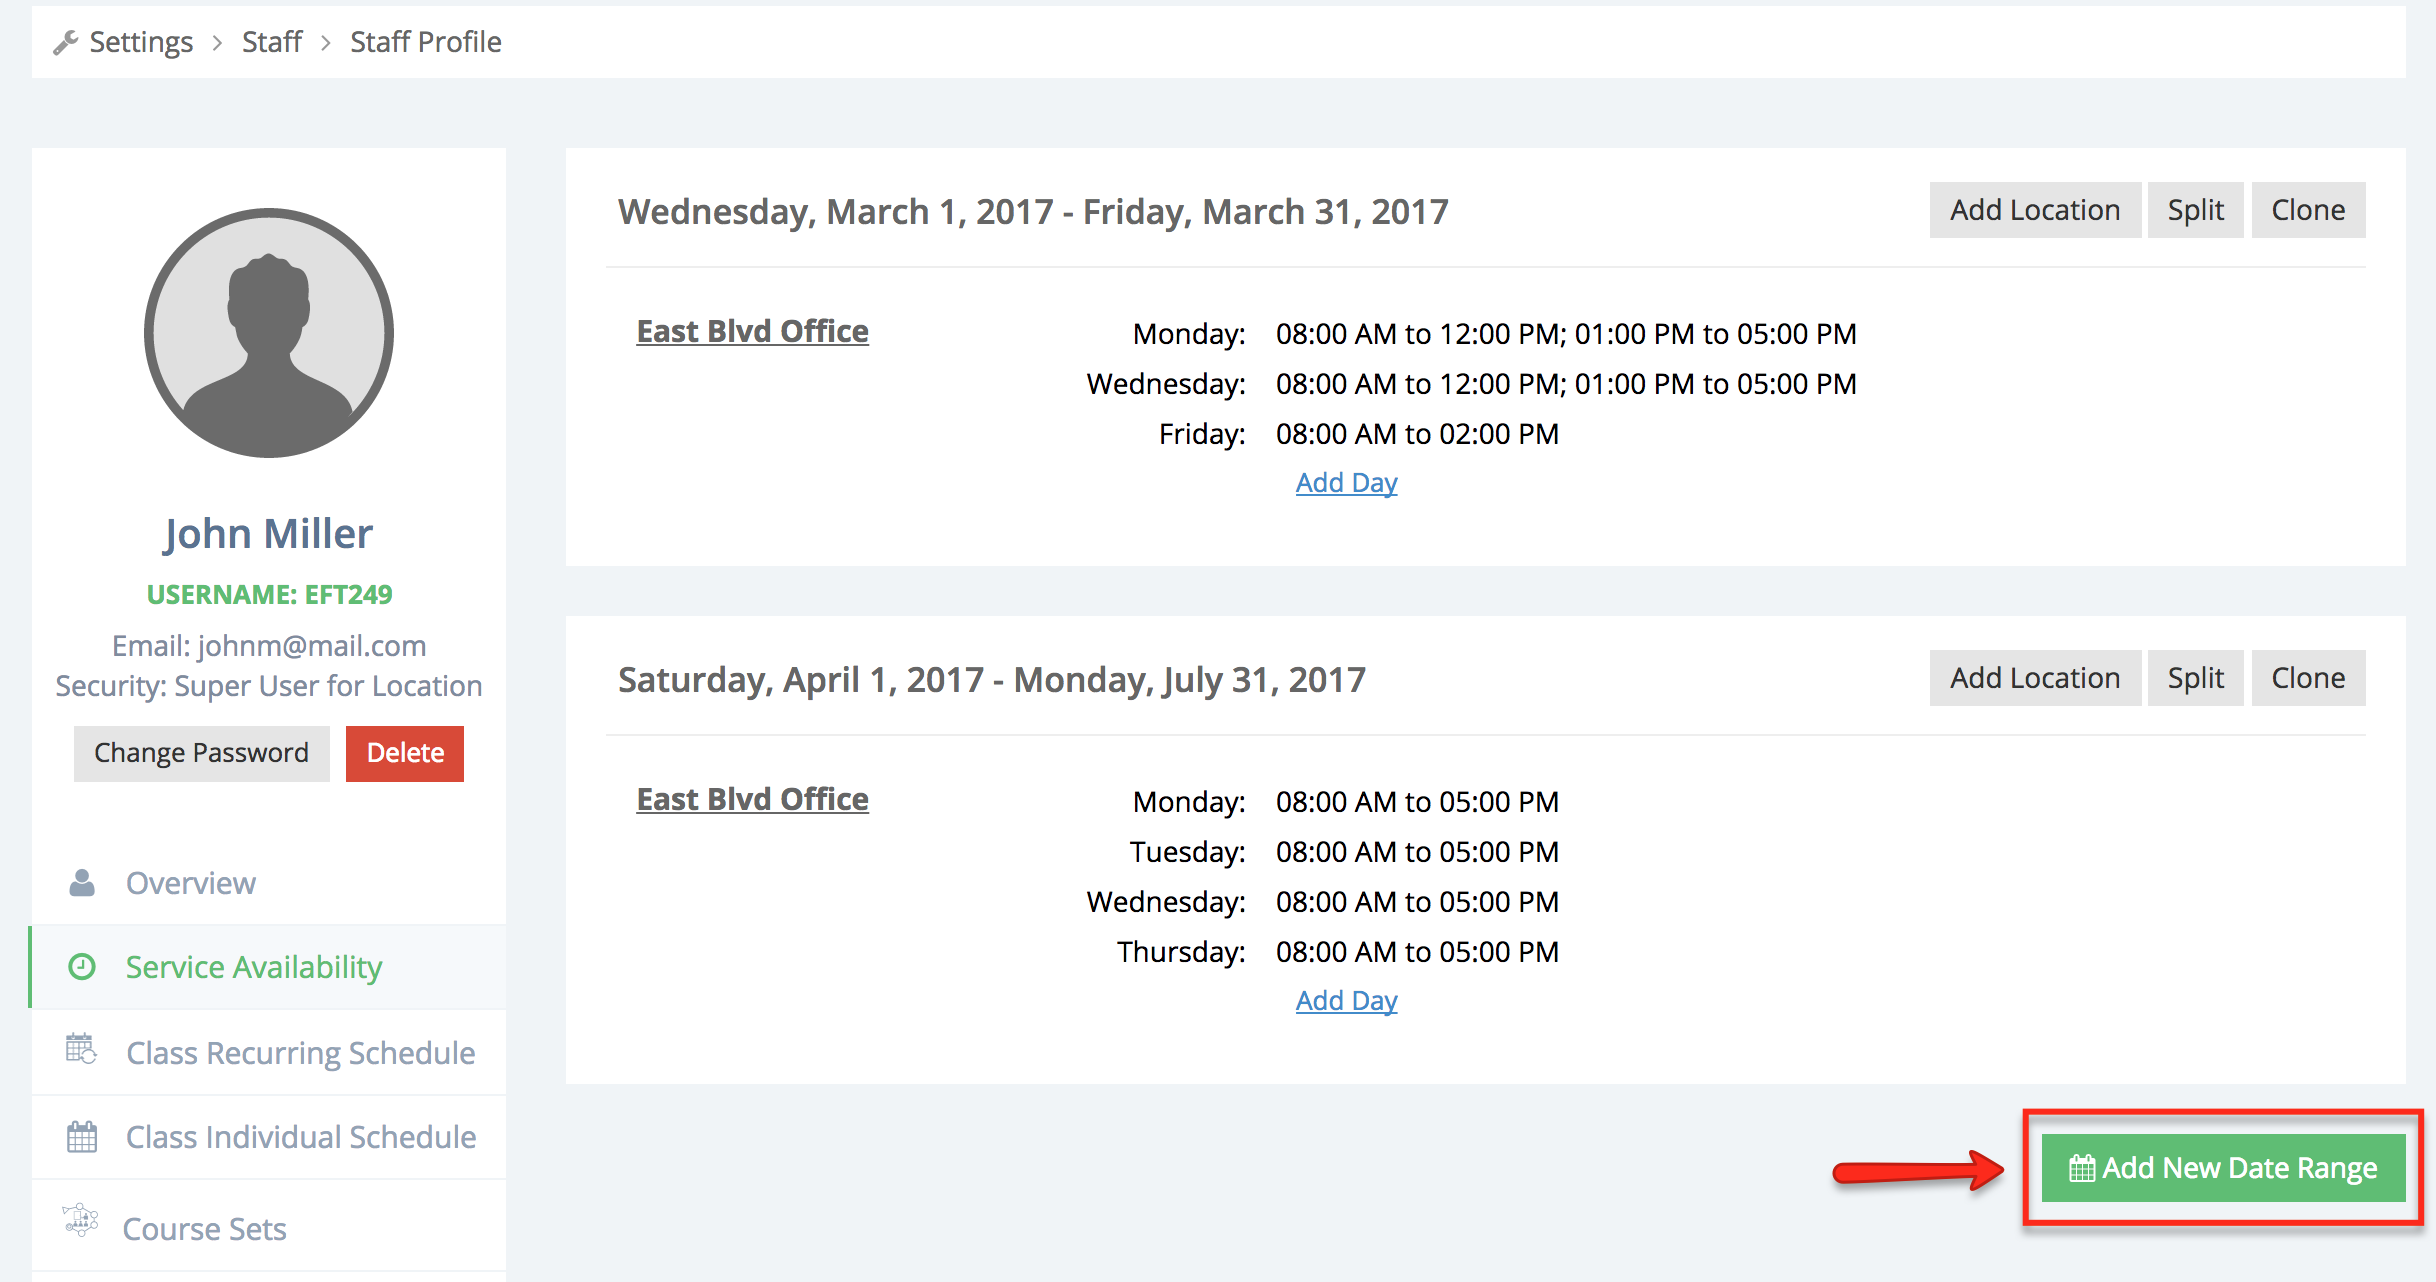
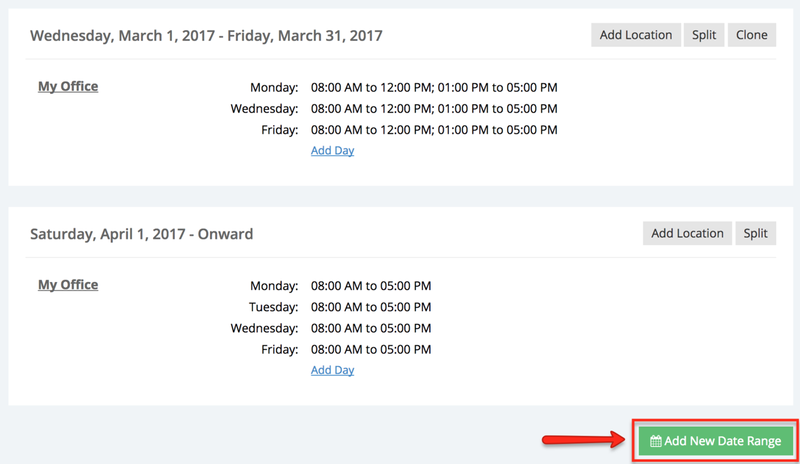
Let's say that this staff member has availability for services set up for Monday-Thursday from 8:00am-5:00pm starting on April 1st, 2017 to July 31st, 2017extending indefinitely (Onward):
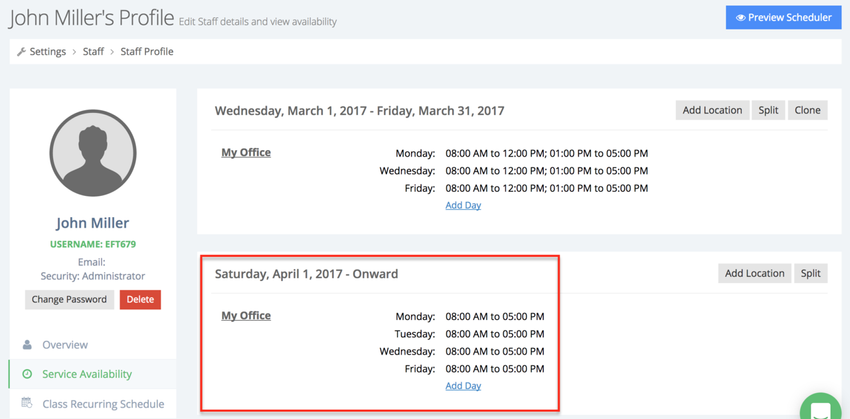
But on Thursday June 22nd, 2017 he has extended hours and will be taking appointments until 8:00pm. If I want to add this schedule for just the one day of 06-22-2017, I can click the green "Add New Date Range" button:
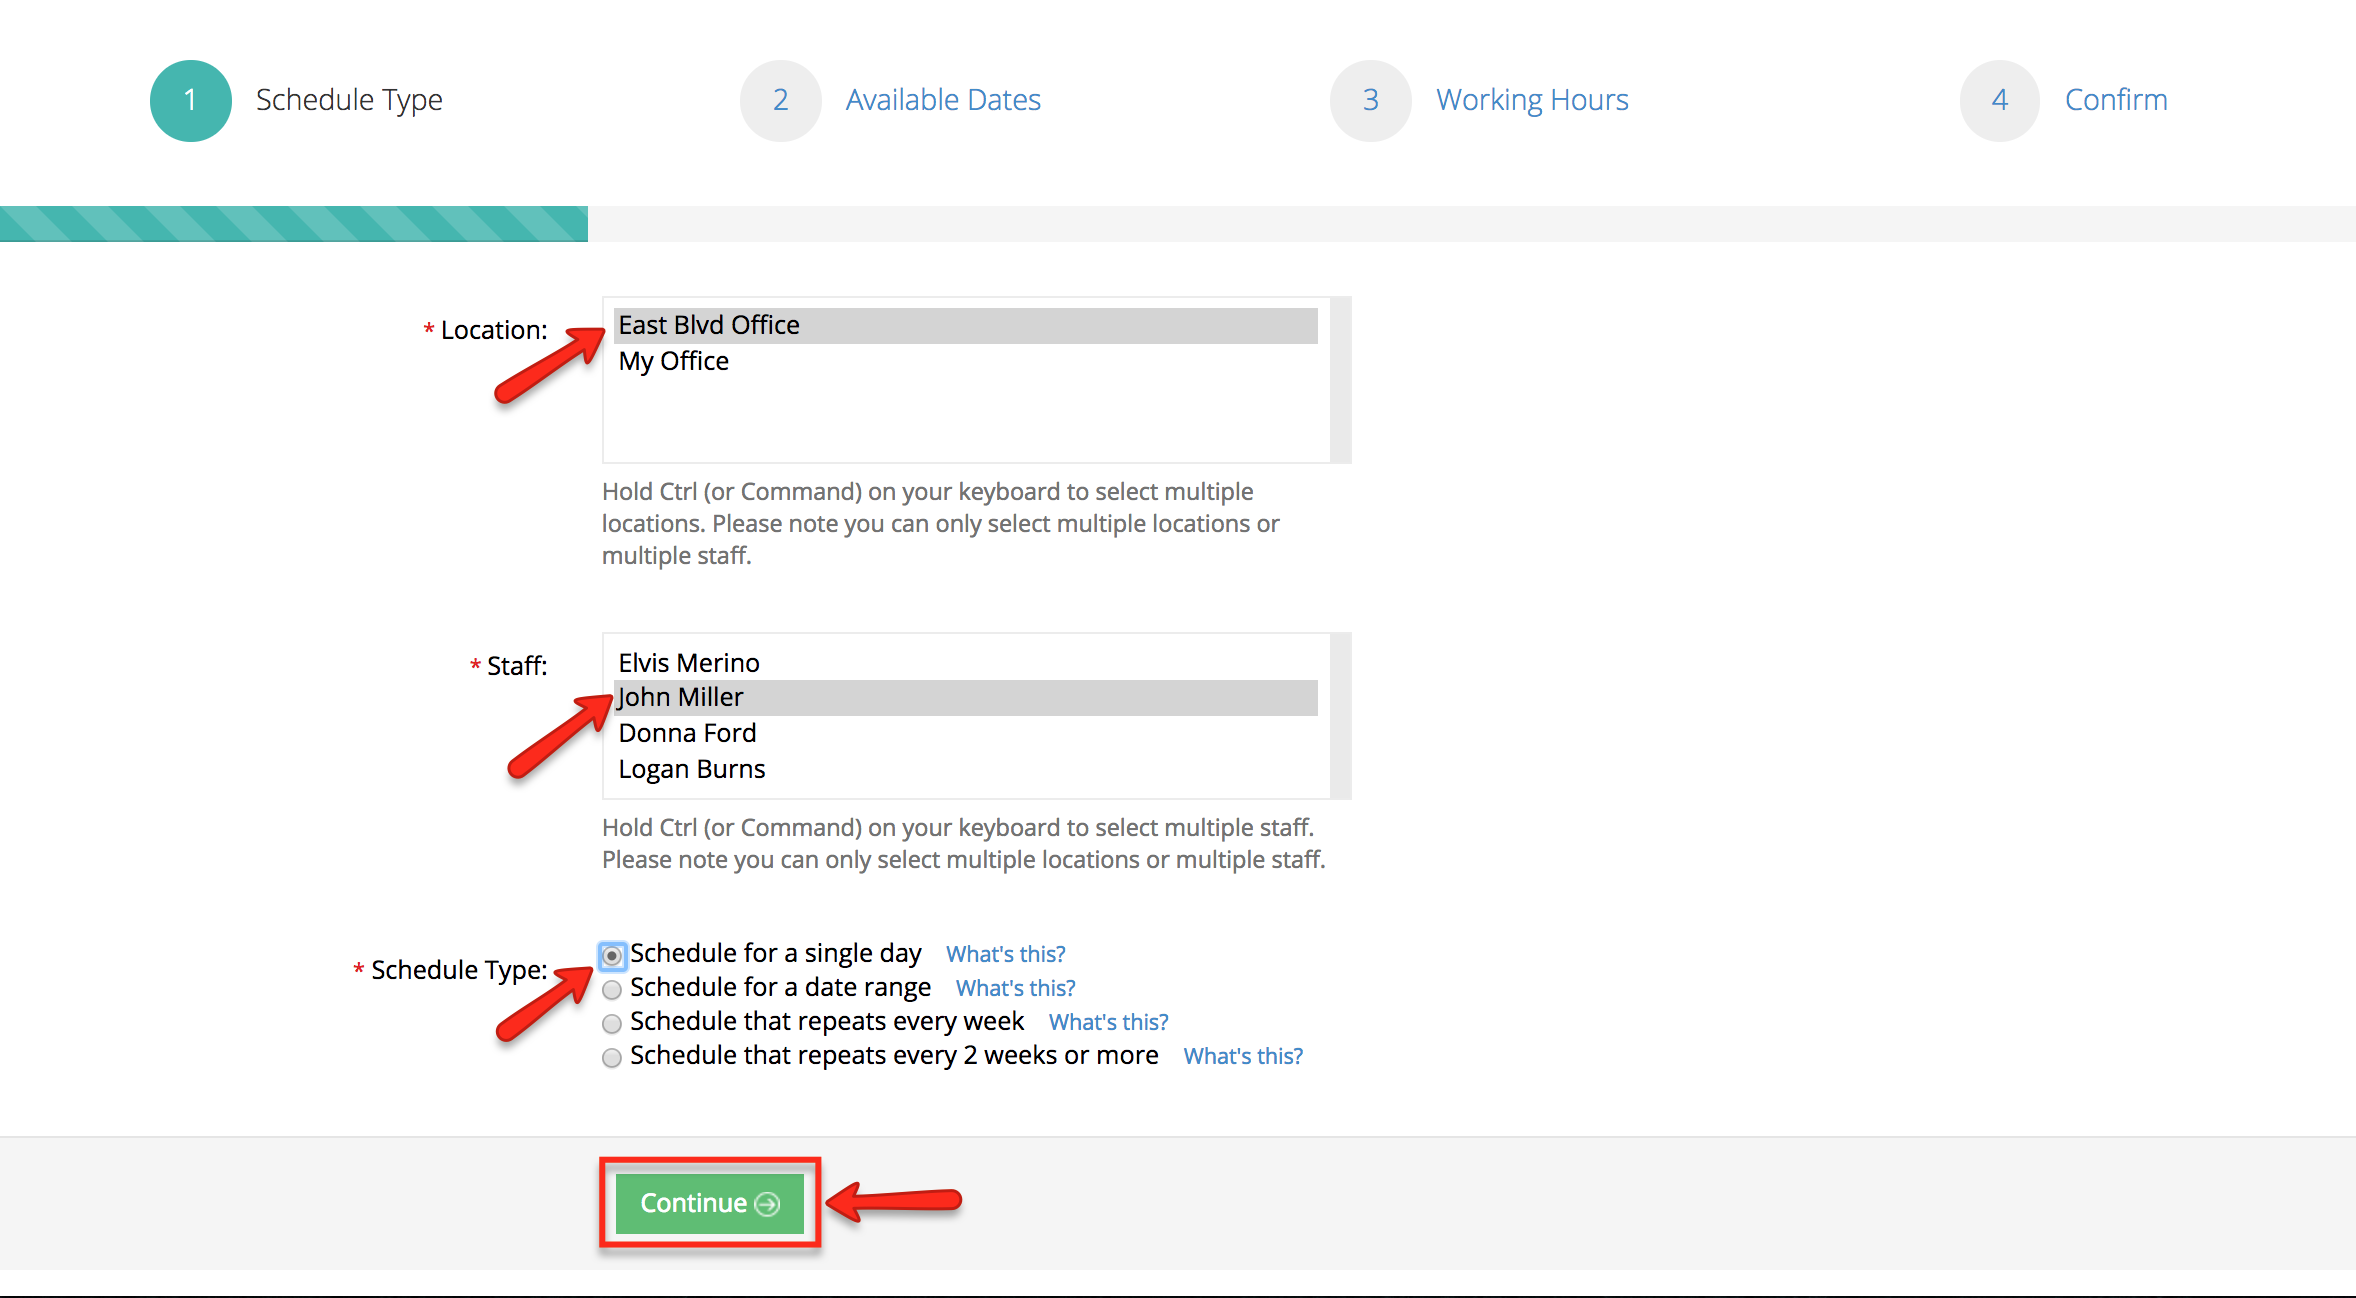
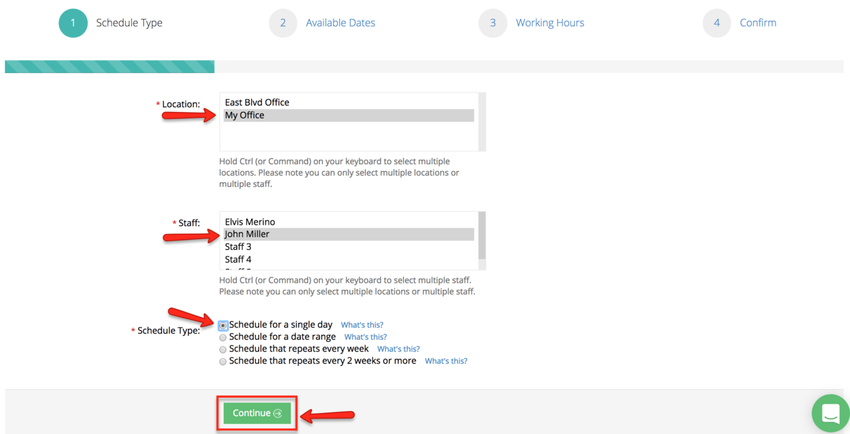
Then I'll select the staff and location that I'm adding this availability for and indicate that I'm only adding "Availability for a single day":
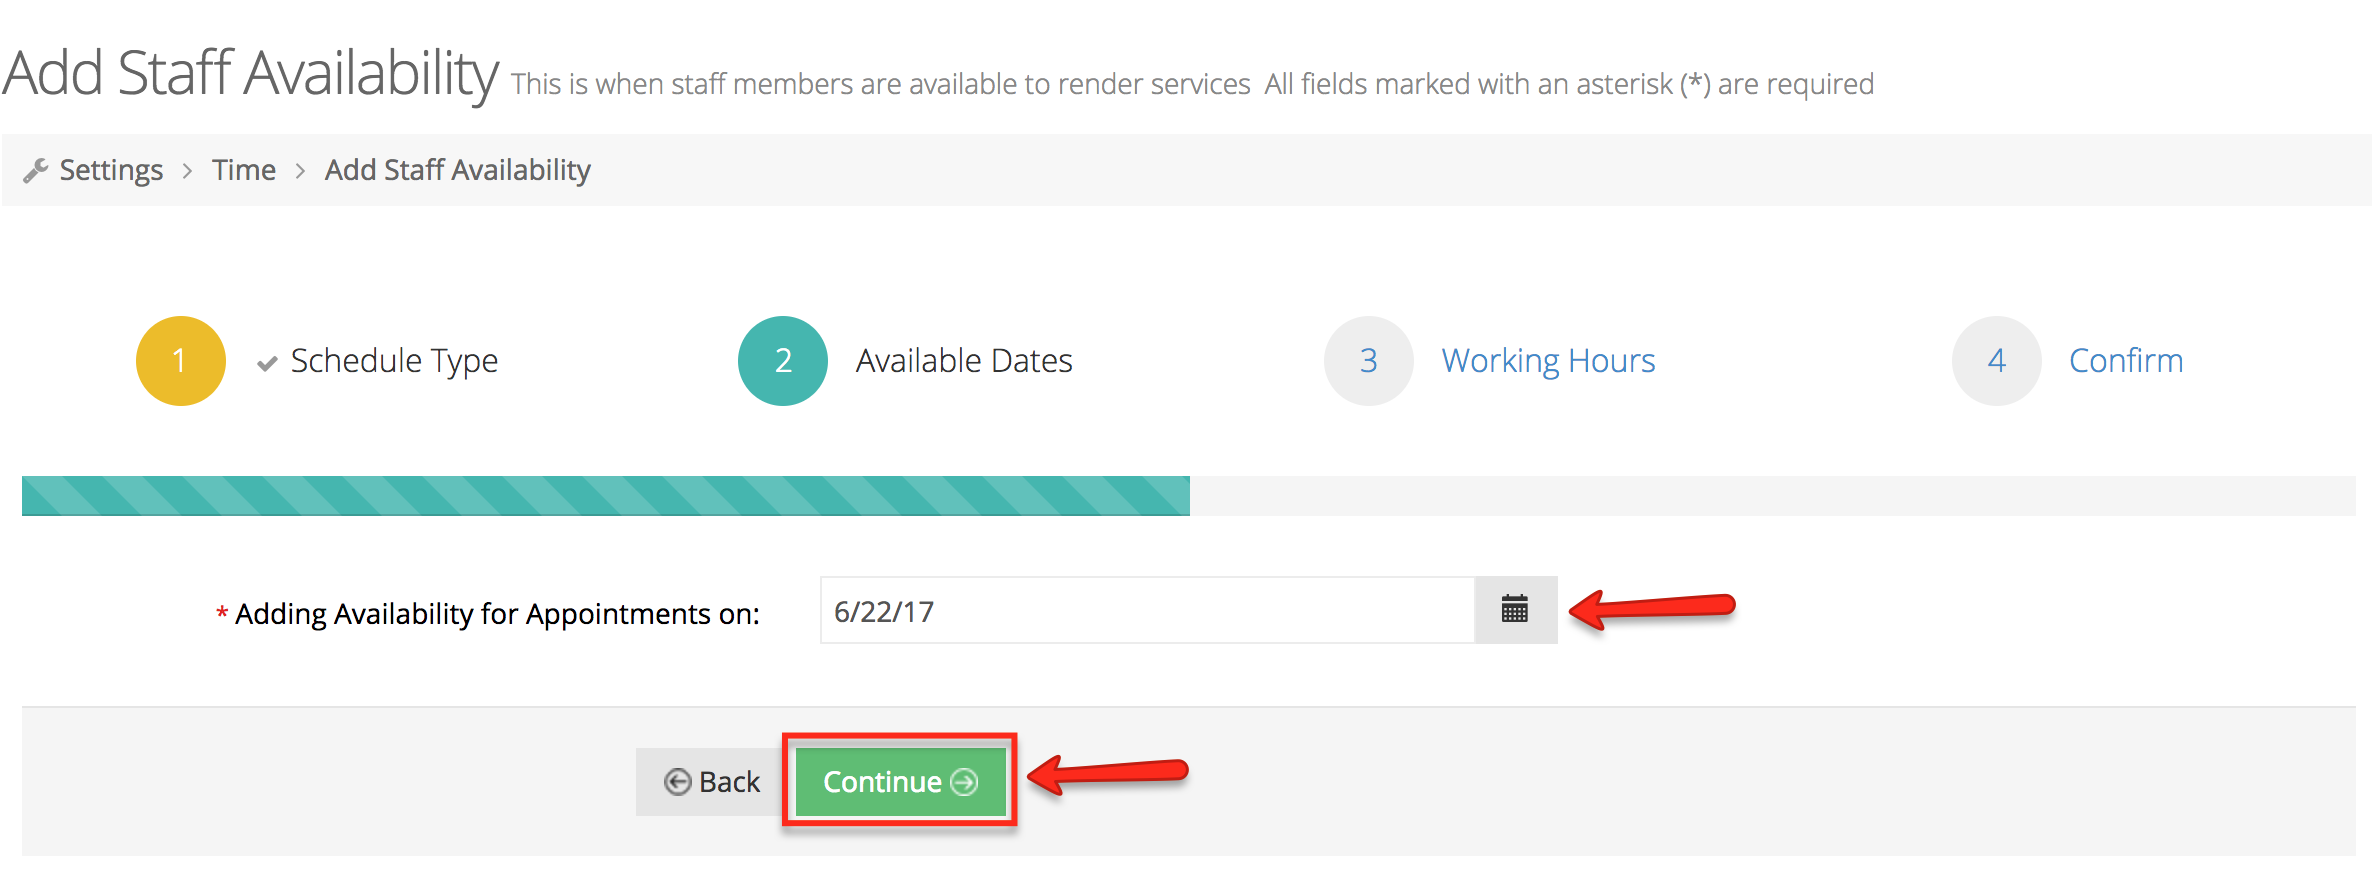
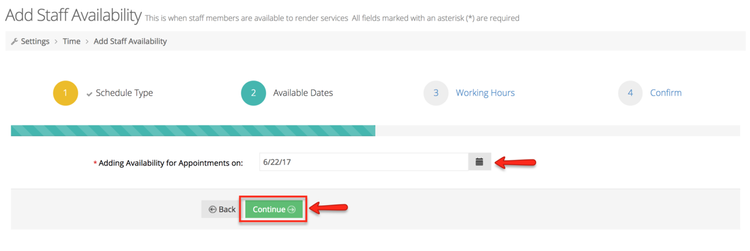
From "Available Dates" screen I'll select that I'm adding availability for 6/22/17 and press "Continue":
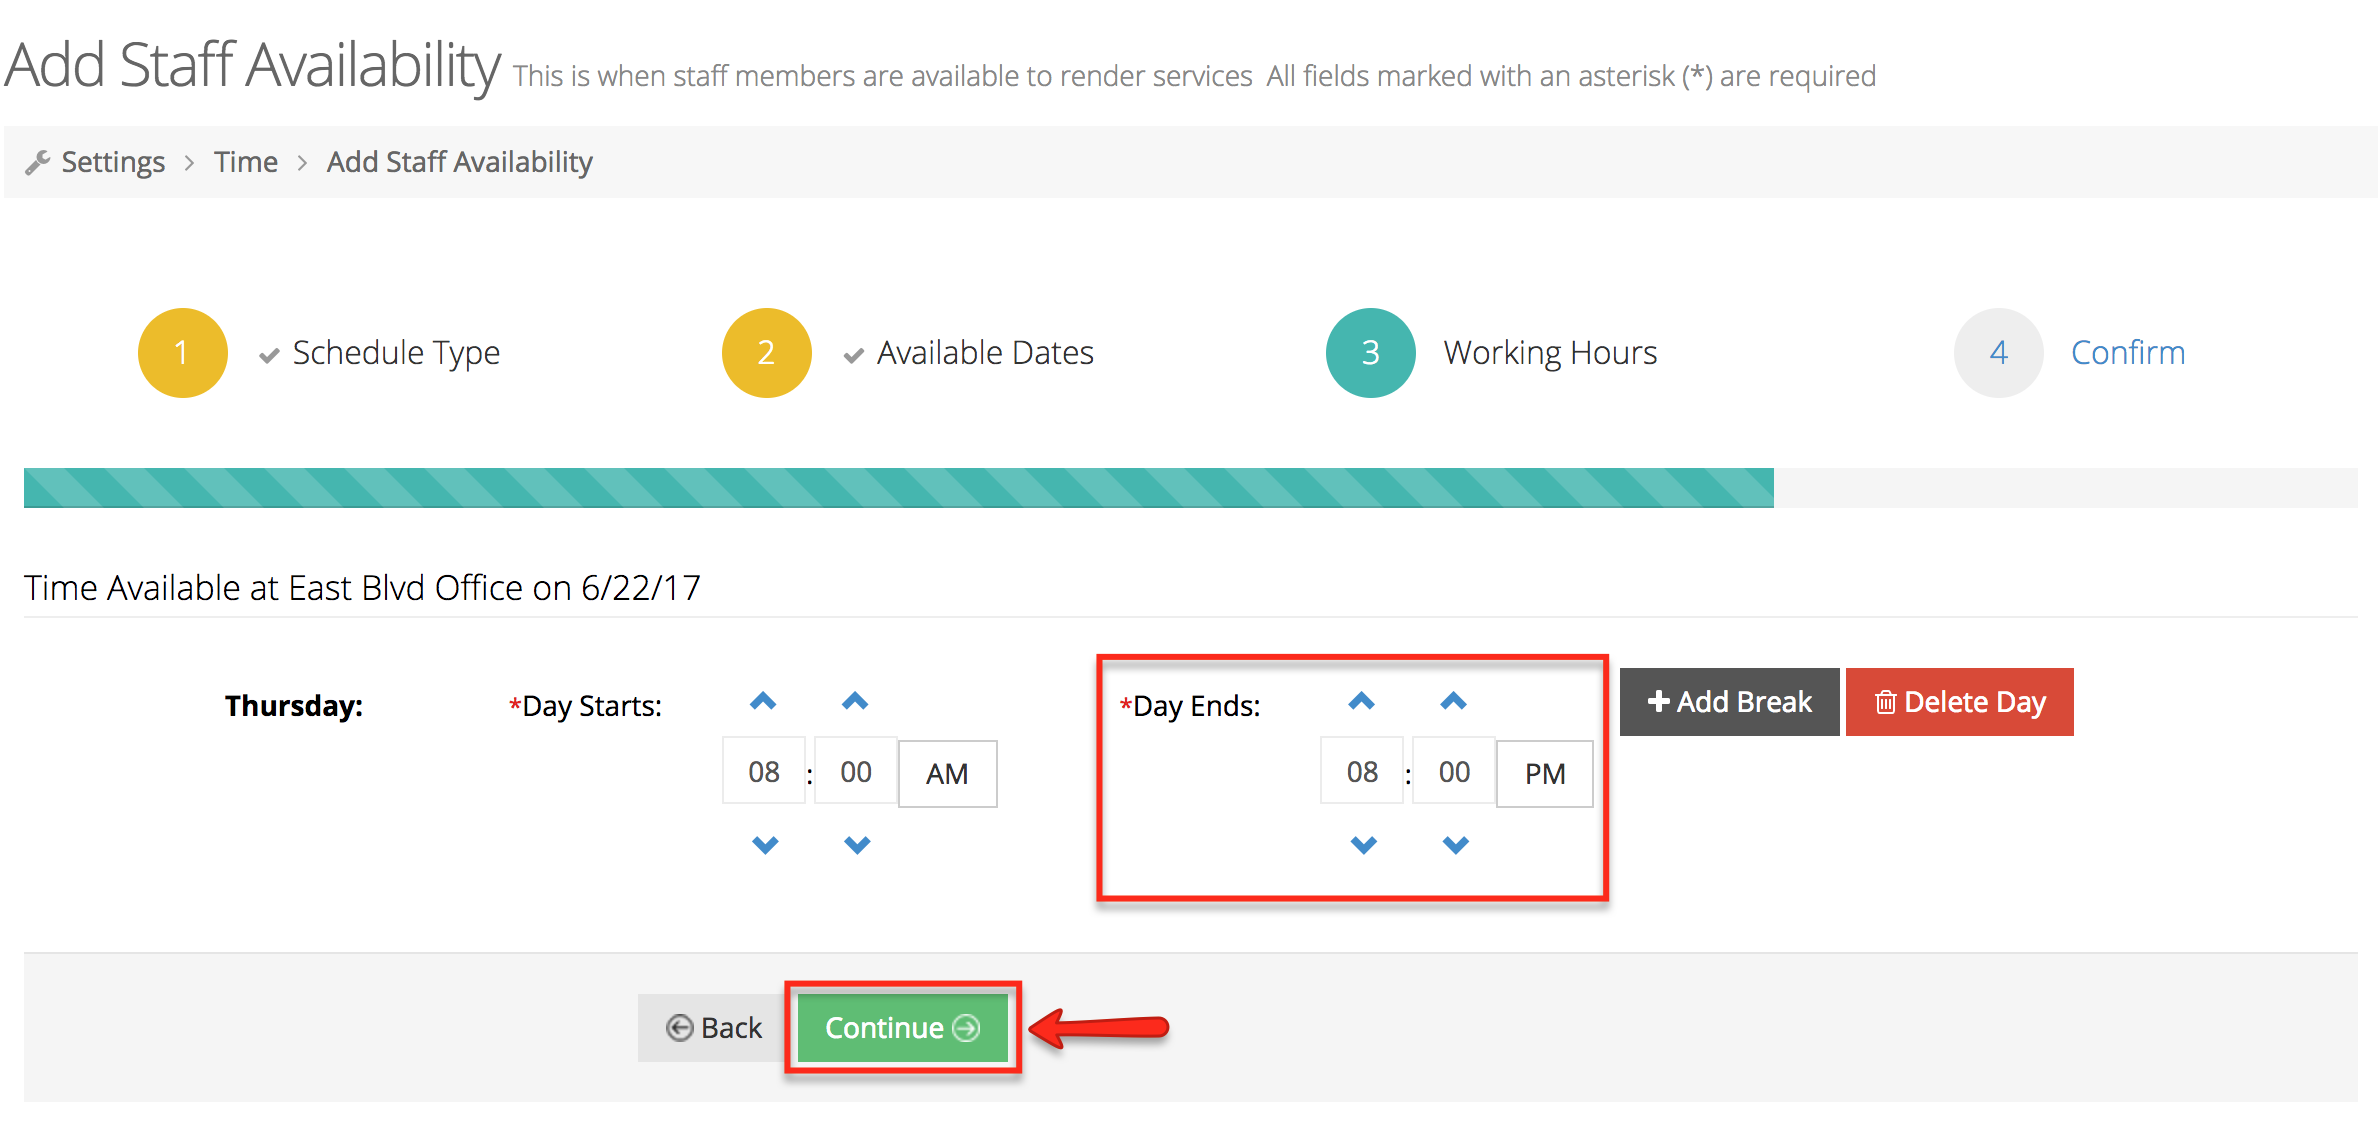
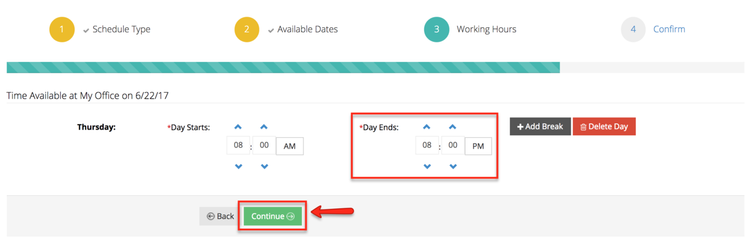
On the working hours screen, I will adjust the availability so that the Day Ends at 8:00pm and click to "Continue":
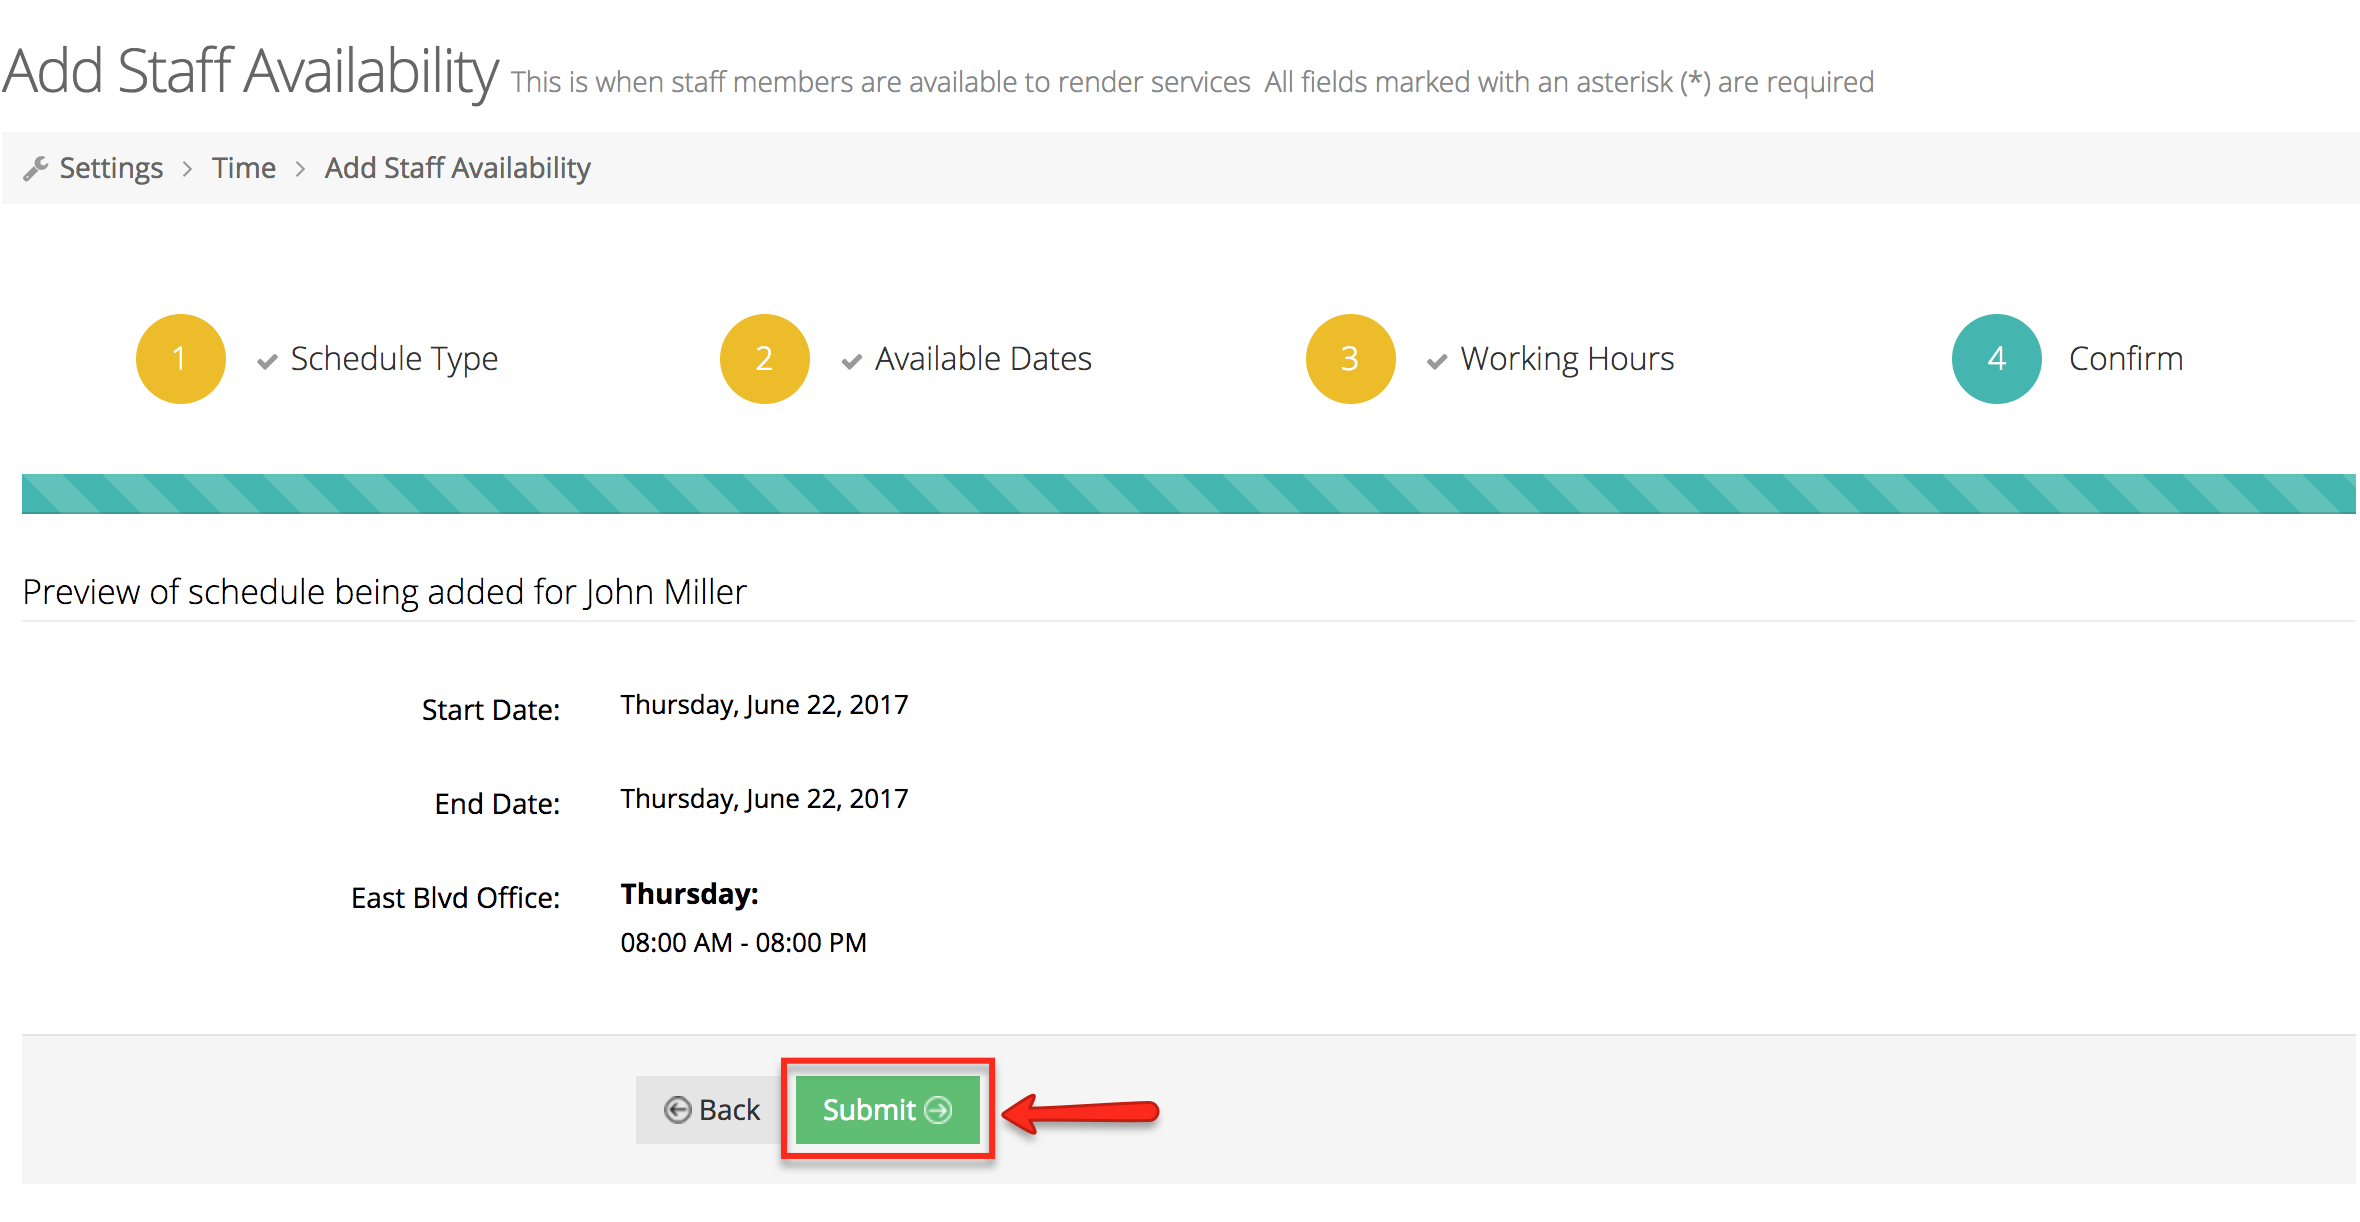
On the last page, I can confirm everything I've entered and Press "Submit":

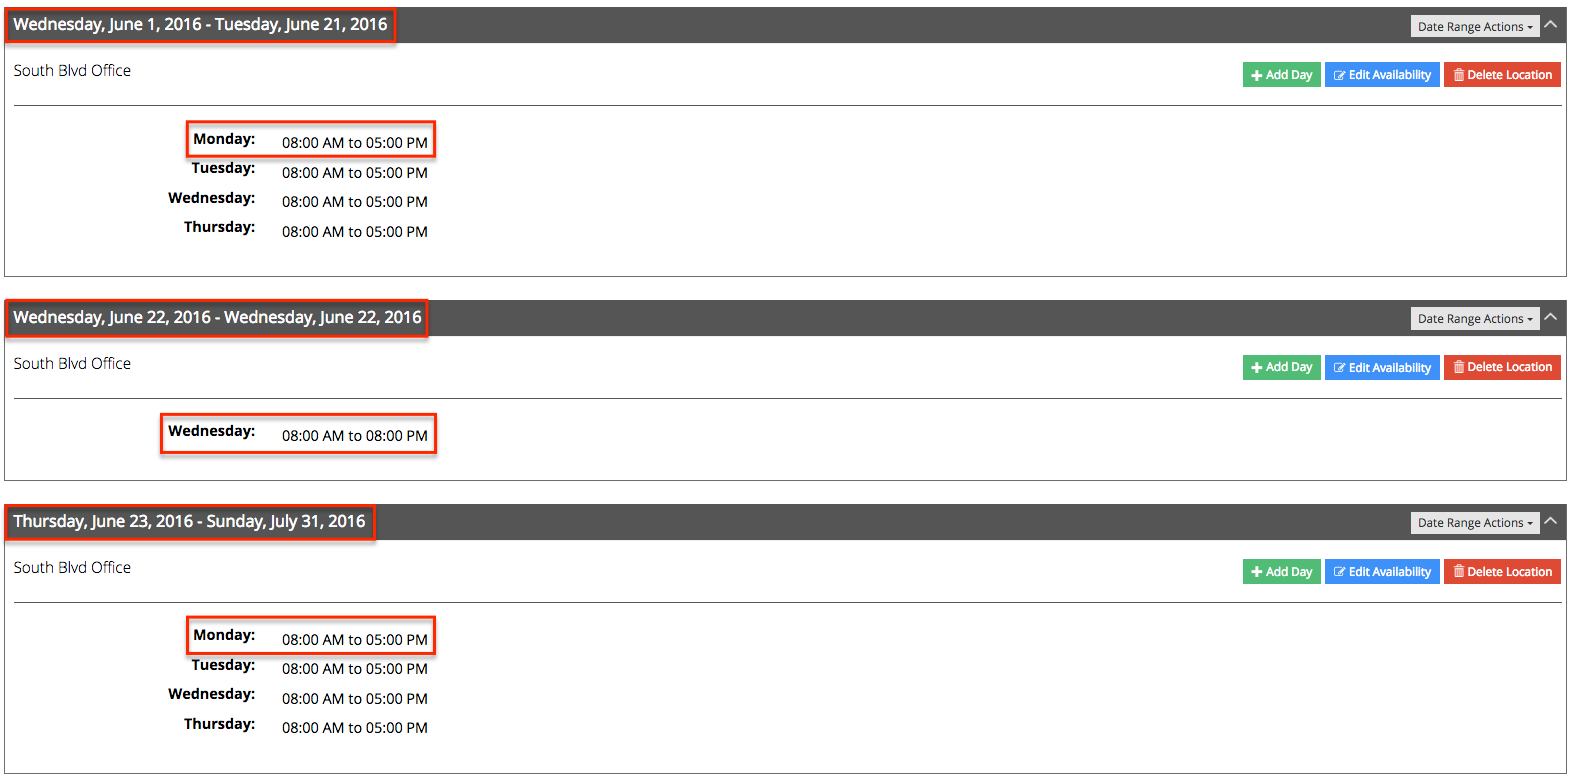
What will happen when I press "Submit" is the existing date range will change so that it is only effective through 06-21-2017 and then the availability for 6/22/2017 will take effect. Starting 6/23/2017 - 7/31/2017Ongoing, the availability that had been from 6-1-2017 - 7/31/17 Ongoing will start back up. My new schedule will thus look like this:
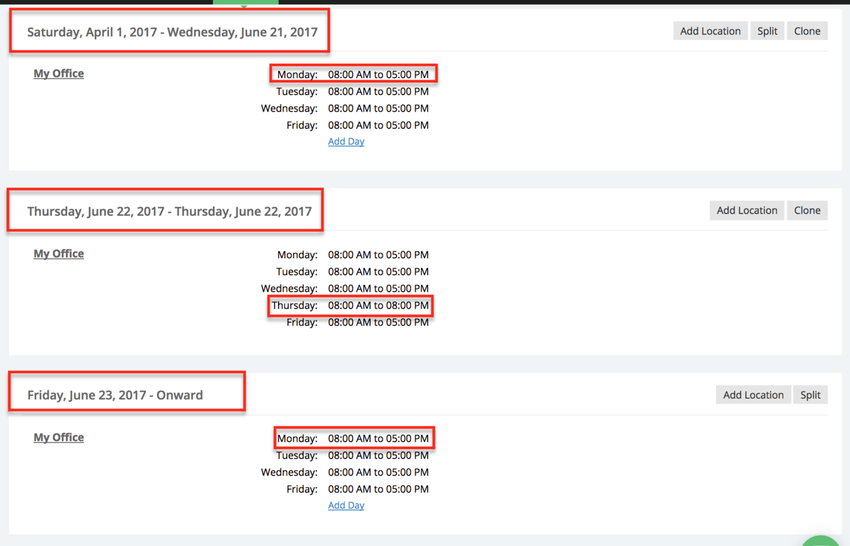
Notice that on the June 22nd availability you see Monday to Friday, however, since this date is a Thursday only the 8am to 8pm will apply.
There's a lot more you can do with your schedule of availability for services that we talk about in additional documentation. You can edit your service availability in existing ranges for effective from and through dates. You can edit the end dates you have set to your service availability. You can remove your availability for services altogether.
As always, remember to check the changes you made to your service availability by clicking the "Preview Scheduler" button and quickly clicking through your scheduler to see how those appointment timeslots are showing up for clients who are booking services with you ![]()
If you have any questions about adding availability for you or your staff to accept service-based appointments, please feel free to contact our support team.