The fields that you have defined under Settings → Client Information → Define Field Labels are the fields that are going to show up on either your add appointment or add new client screens depending on whether the fields are appointment fields or client fields. You can pretty much create a form that's completely customized to the information that your business cares to know about your clients or the information that's required before being able to render a service for an appointment.
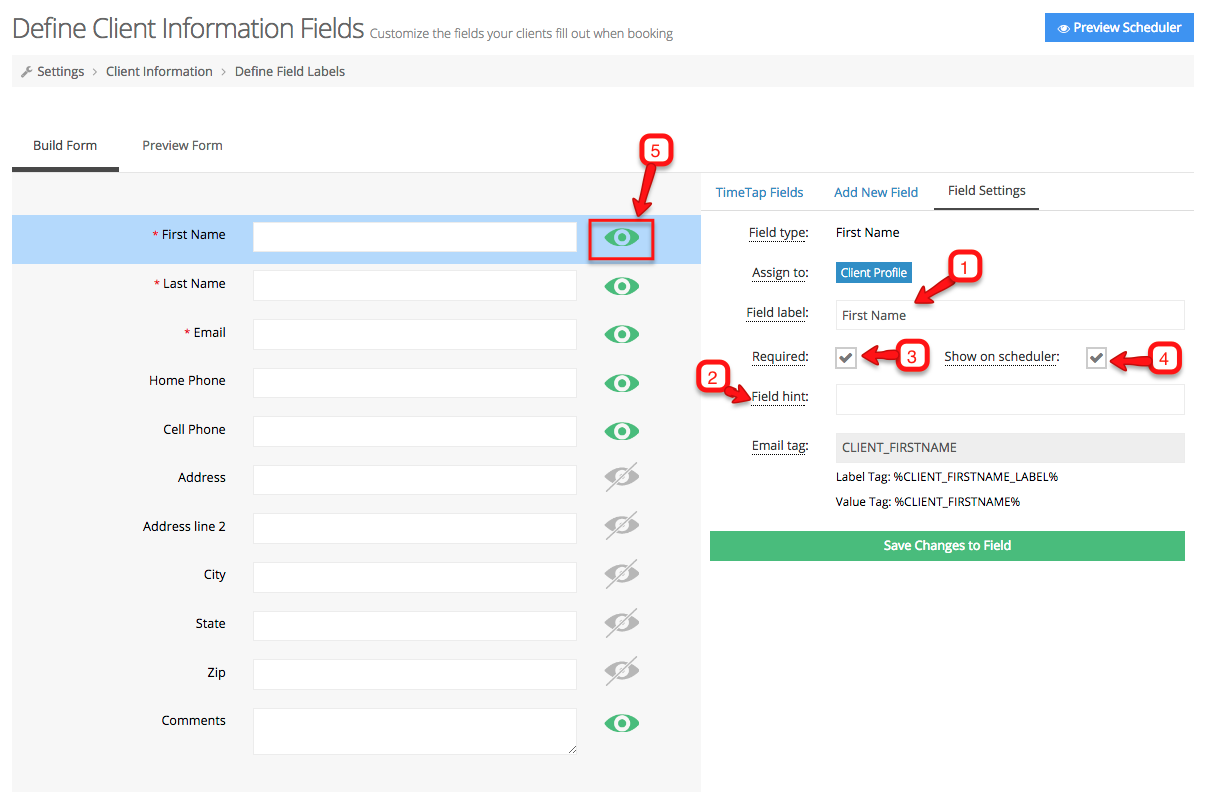
Any field on this screen has five components:
- Field label: this is the name of the field. This is what will appear before the field when you are viewing it either on your scheduler or in your TimeTap back office login.
- Field hint: this will appear beneath the field on your client facing scheduler and can be used to provide some sort of instructions on what you want the client to fill in there
- Field required: this toggle switch will either make the field mandatory (when requirement is "on") or let it be optional (meaning the client and/or the staff does not have to fill it out in order to confirm a booking
- Show on Scheduler: this toggle switch will make it so that you can either make this field show for clients to fill in themselves when booking an appointment or make it so that only your staff see this to fill in when using the back office application
- Hide Field button: This will remove the field from your form so that it will no longer show on either your scheduler or any of your back office views
Any of the above components can be edited and you'll see those edits take affect all across your account once you save the changes on your form.
While this is just a general overview of this page, we go through what you can do specifically through define field labels on other areas of our documentation. This includes:
- Customizing fields:
- Adding New Fields:
- Where fields show up:
- On your scheduler
- When you're adding/editing appointments
- When you're adding/editing clients
- On any list exports
Click on the links above to go to the specific area within our documentation site where we cover those topics
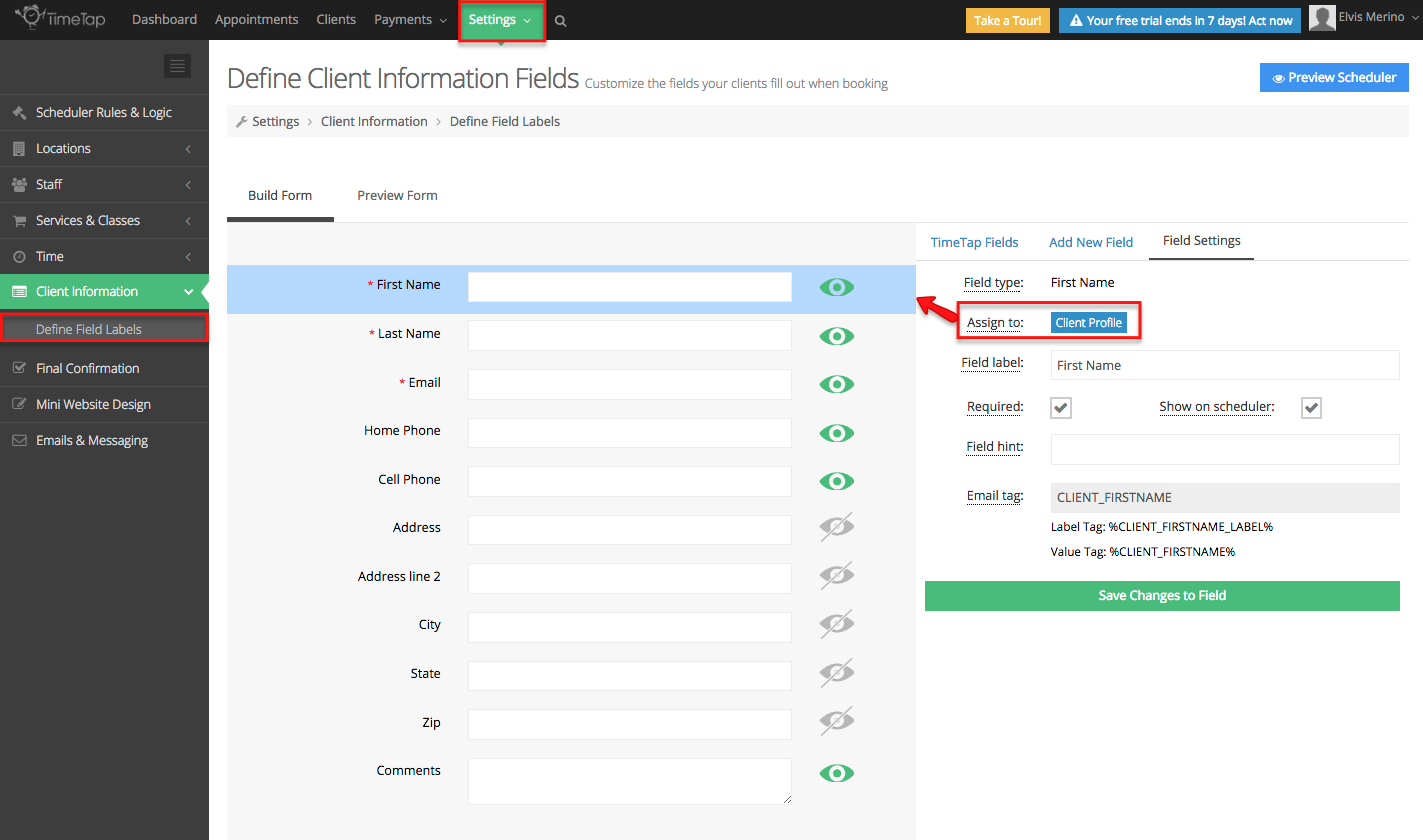
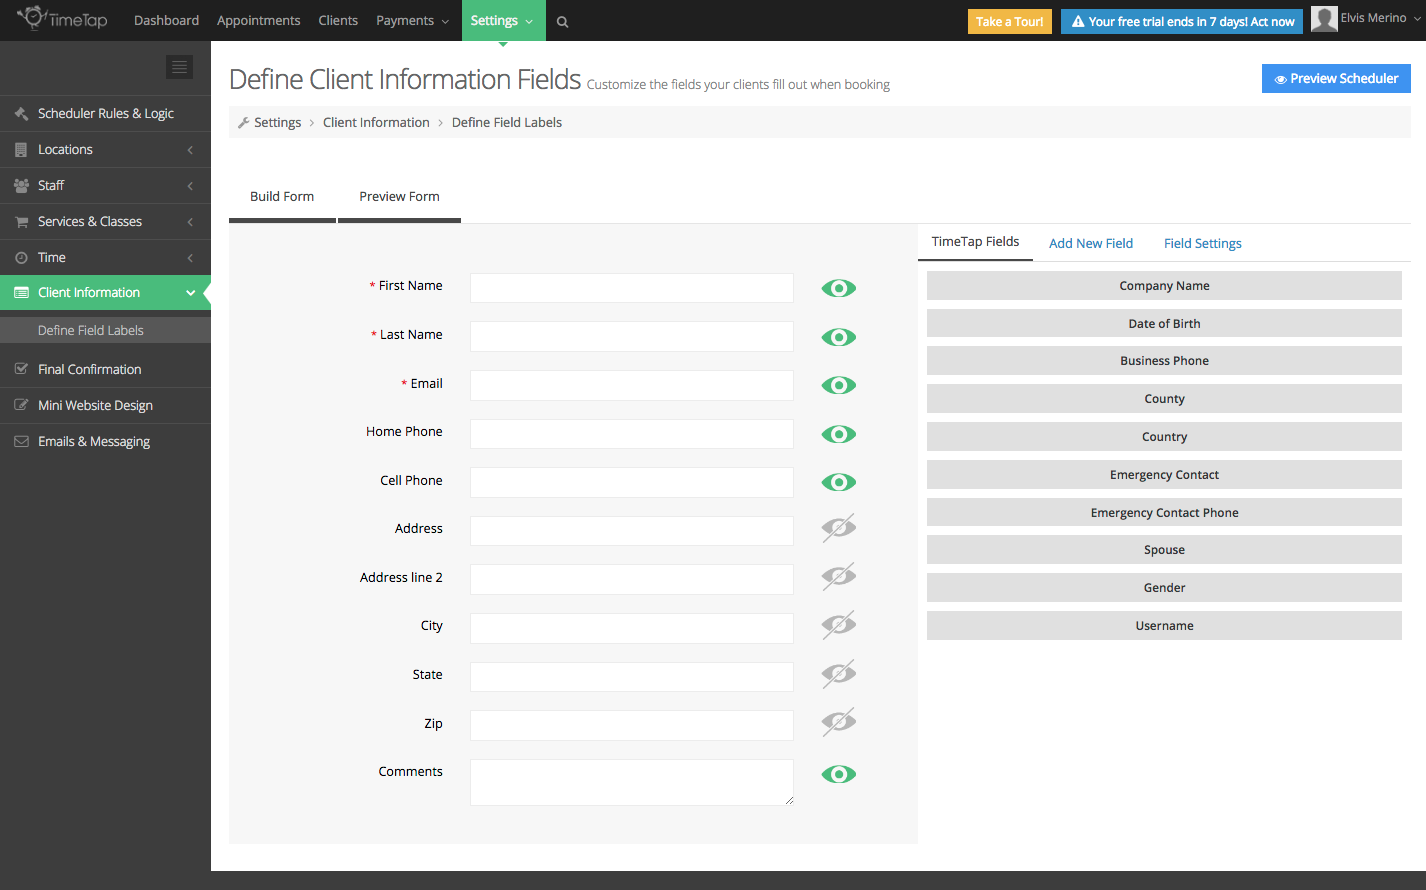
When you're looking at your Define Field Labels screen under Settings → Client Information, click on the labels already created and you'll see a little label of your fields to indicate whether the field is a client field or an appointment field, in the example below I clicked the field 'First Name' and it's currently set as a client profile field:

In the image below I selected the field 'Comments' and it's currently set as a client profile field:

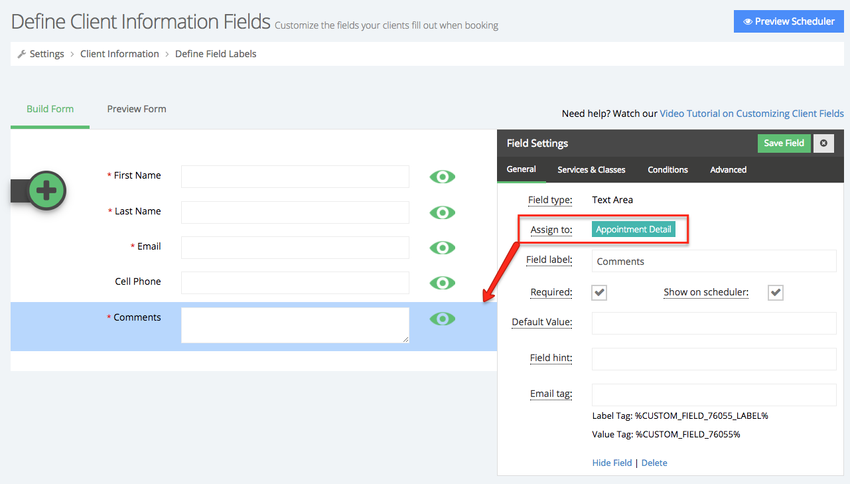
What these labels indicate is whether this field will show up as part of the Client Profile or if it will be included on the Appointment screen.
If it is a Client Field, then when you are adding a new client, you will be prompted to enter in that information as part of the client record:
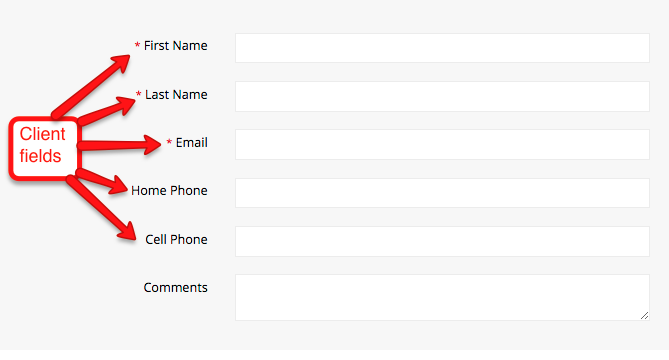
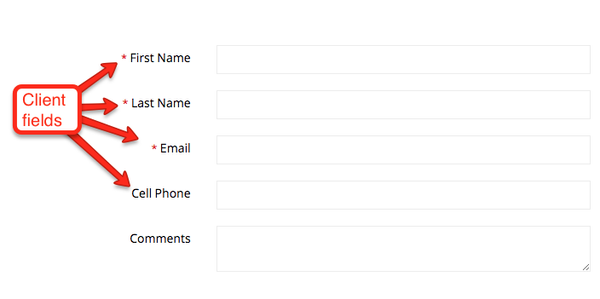
Once these fields are filled in for a client, then if a client logs in when booking his/her next appointment they will not be prompted to fill out these fields for a second time.
If it's an Appointment Field, then it will show up when you're adding a new appointment or editing an appointment from the Appointment Detail page:
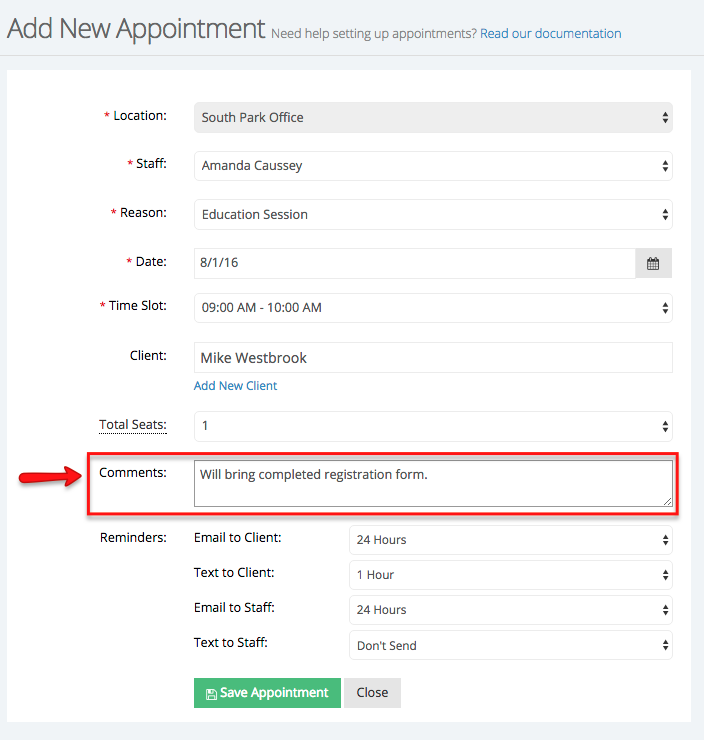
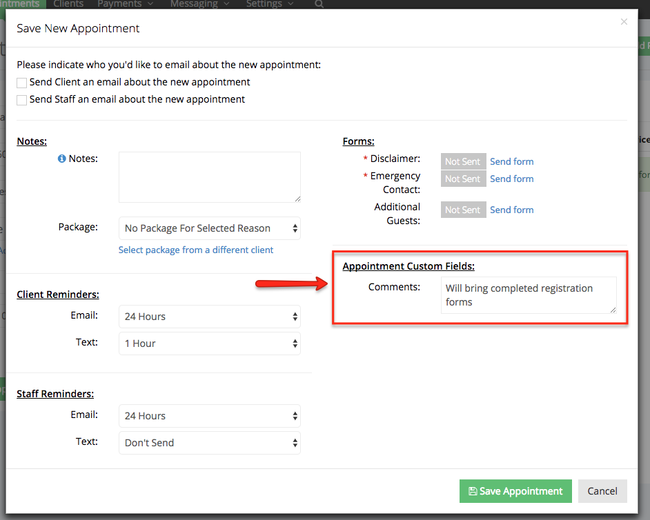
A client will be prompted to fill out these fields each time they are making an appointment.
The reason behind having different fields for appointments than for clients is because some of the information you may want to capture from a client is permanent (their home address for instance) and you'd want that to show up with all of their client information on their profile. Other information you may need from clients (like "What do you want to talk about during your appointment?") is something that is more transient and would only apply to the appointment they're booking currently.
Have questions about client fields vs appointment fields? Please reach out to our support team and we'd be happy to get those answered.
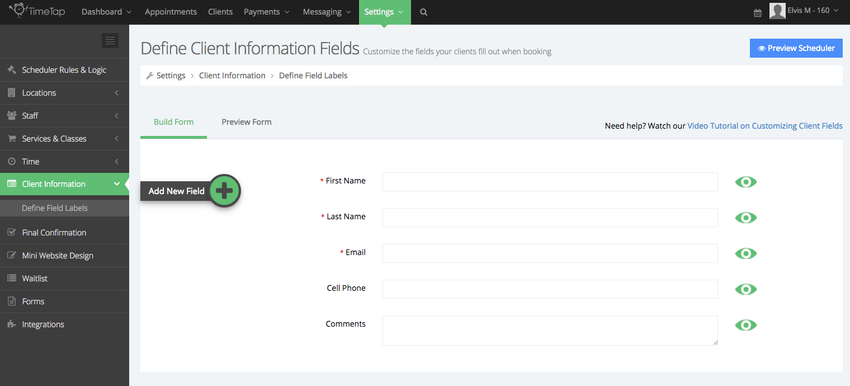
When you start your account, your Define Field Labels screen will look like this:
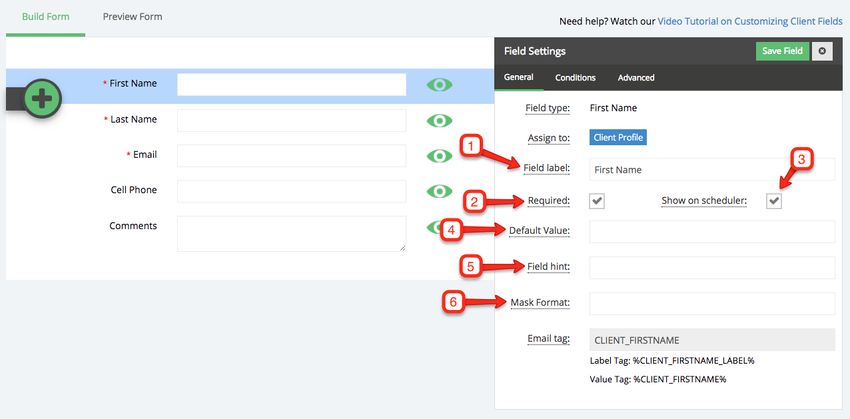
Once in this screen, select one of the pre-existing fields and then you can make the following changes individually for each field,
- Field Label: This tells the clients what you want them to fill out in the field
- Required: When this option is selected, the field
- will be mandatory. If unselected, the field does not need to be filled in to save the client/appointment
- Show on scheduler: This sets whether you want the client to fill in the field upon booking or whether you just want staff to fill it in on the back office
- Default Value: This is what value will be set in the field by default when the client gets to the 'Your Information' panel of the scheduling flow
- Field hint: This adds some text underneath the field to give clients a better idea of what you're expecting
- Mask format: If your field is a number entry field, you can put in the hash sign # to represent the format you want it to be in. For example, if the field you selected is a a phone number field and you want all the entries to be like (888) 888-8888, you would put in this field (###) ###-#### where the sign # represents where a number should go and other characters represent spacing between them
Make sure to click Save Changes to Field after you've made any changes under the Field Settings:

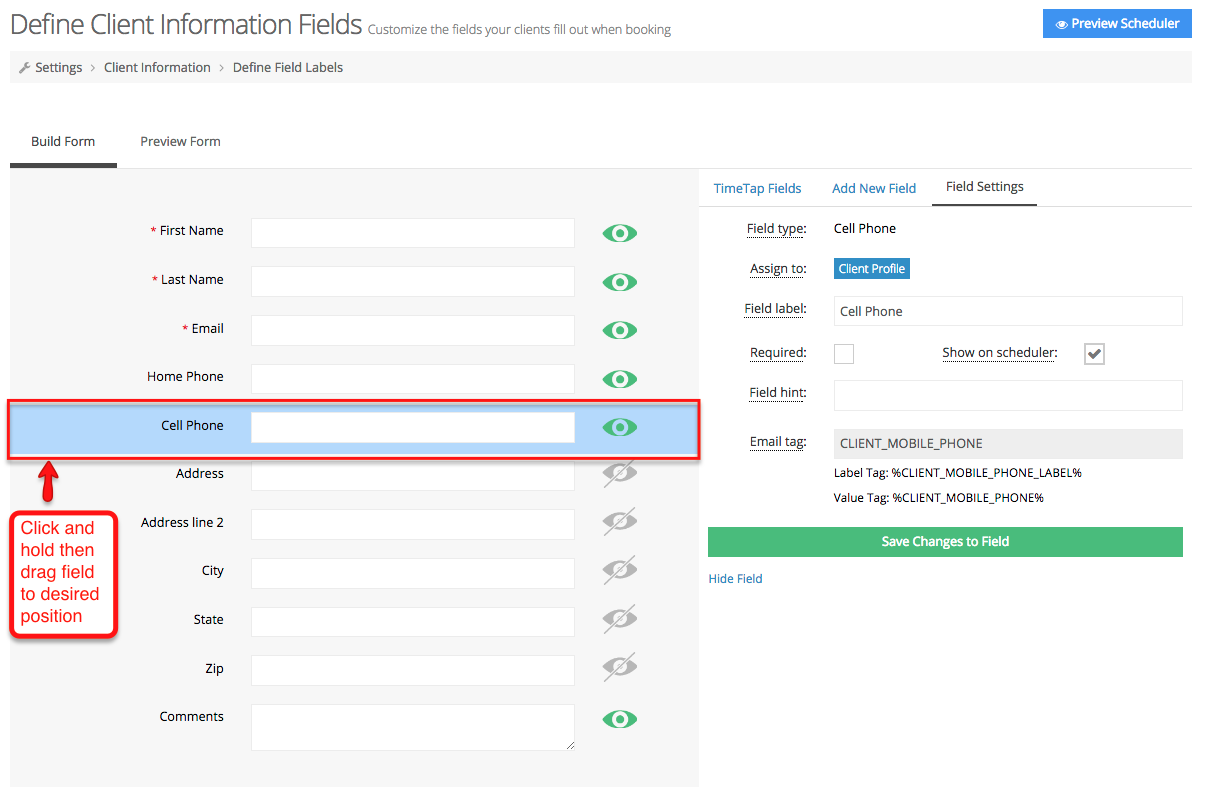
If you would like to change the order in which the fields appear, simply left click and hold anywhere in the field you would like to move and drag it to the desired location:
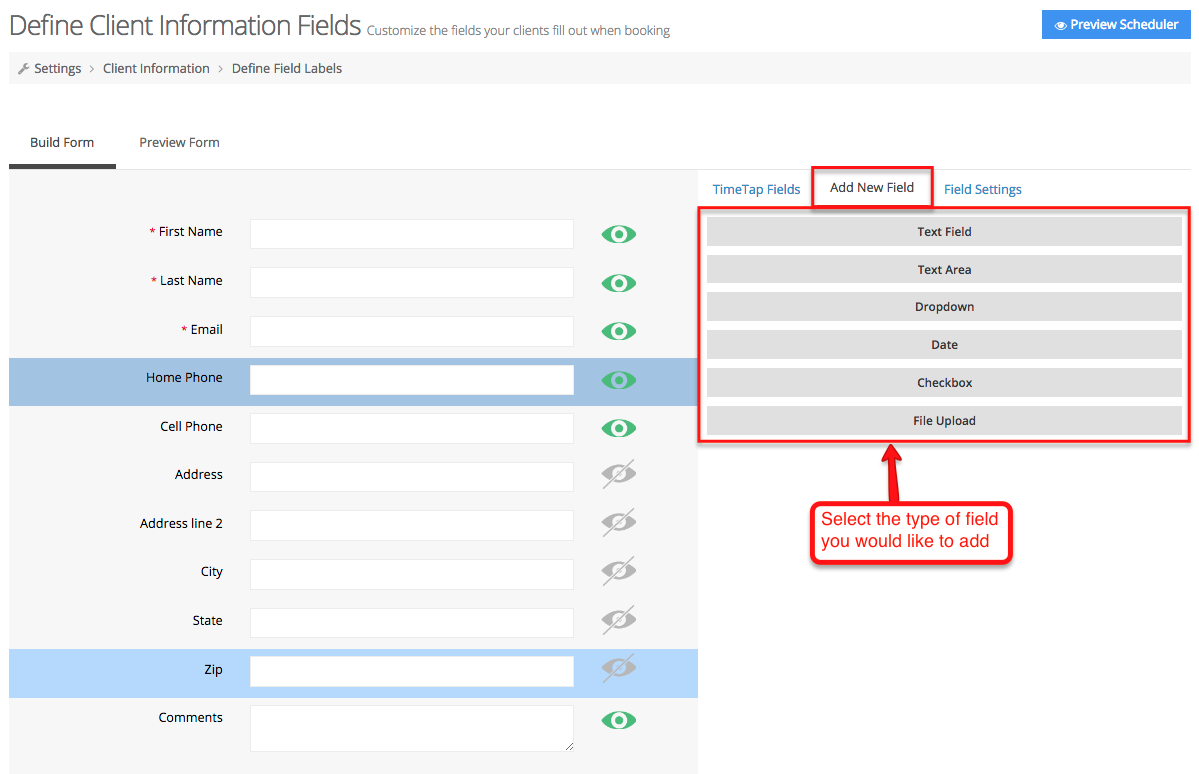
Finally we will briefly cover the Preview Form, TimeTap Fields, and Add New Field tabs:
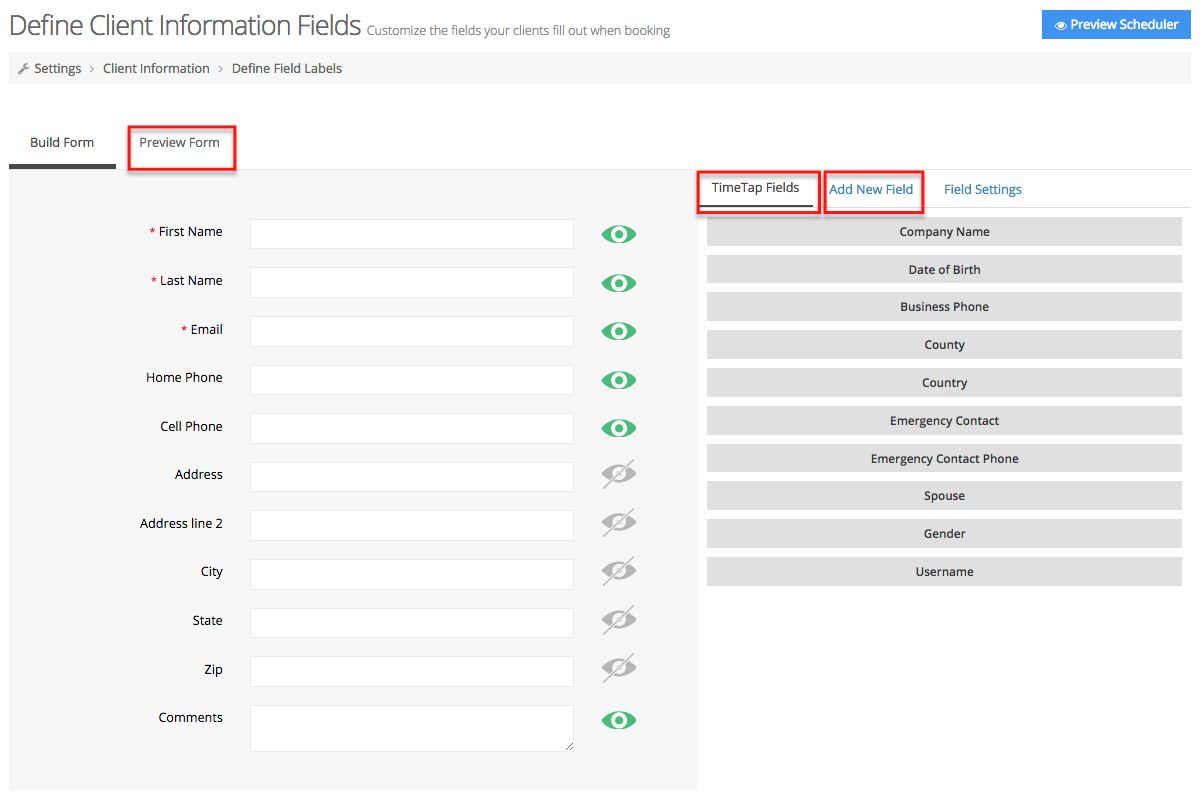
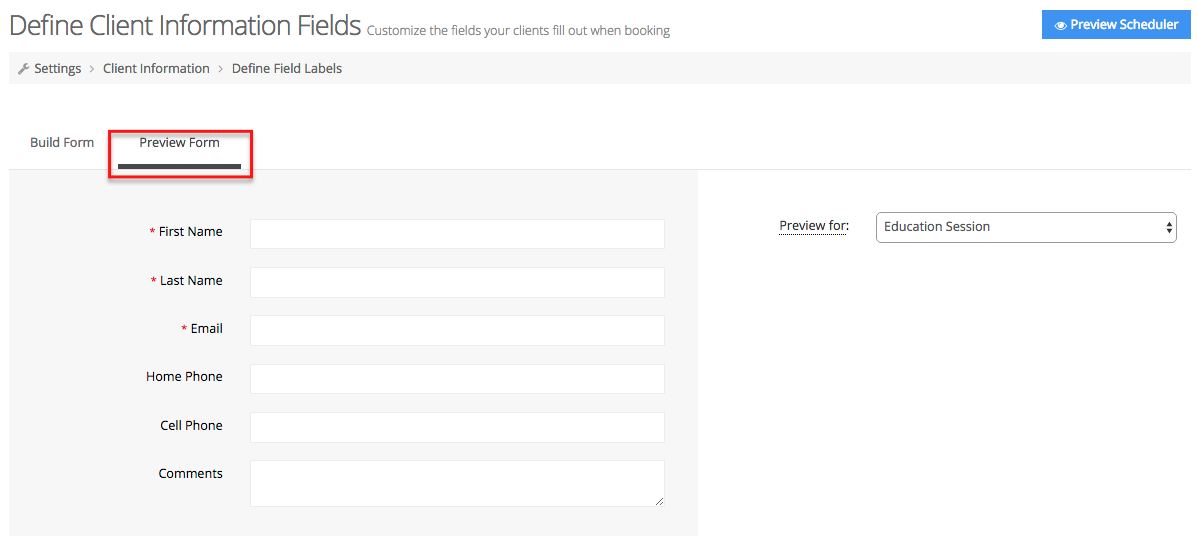
If you press the button to "Preview Fields" you'll toggle on the view for all the fields that are set to Show on Scheduler which is what your clients will see when they're booking:
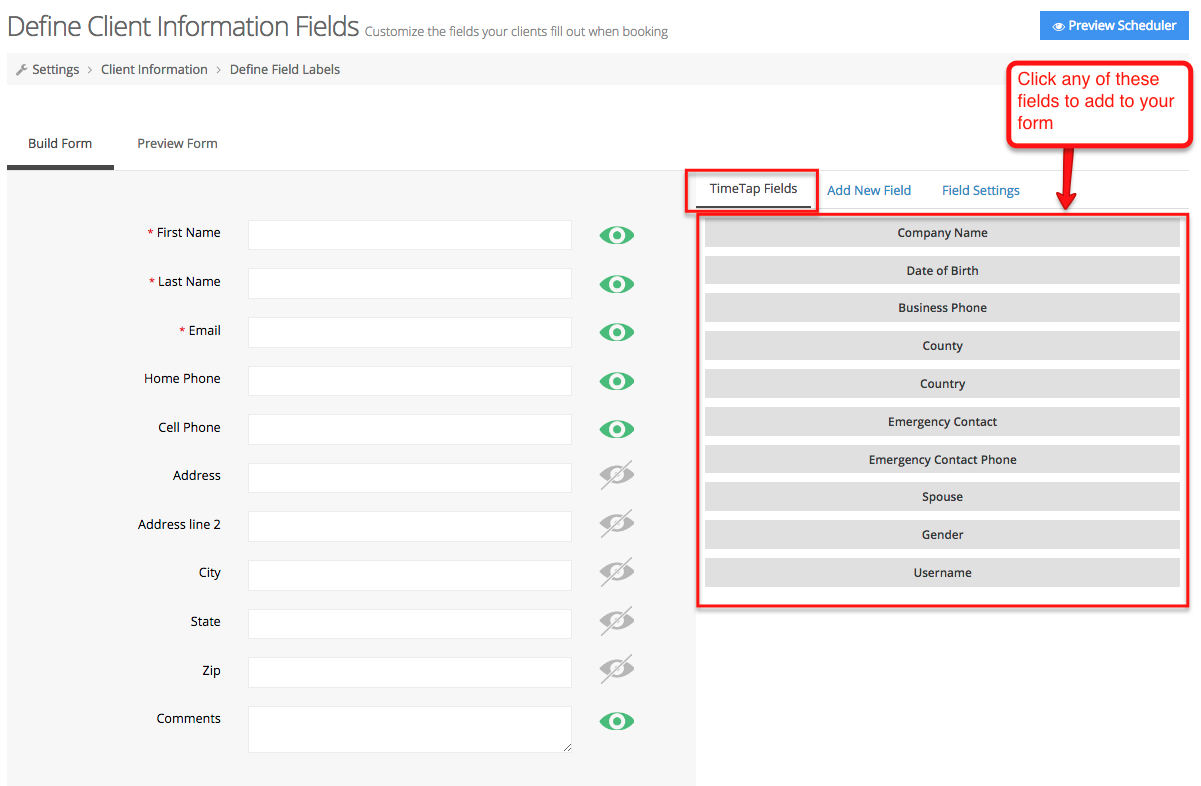
The TimeTap Fields tab gives you a list of default fields that you can add to your form, simply click the field you would like to add and it will automatically appear in your form:
If you press the button to "Add New Fields" you'll be able to create a new field that only your business uses. You'll also be able to select any fields that you had previously hidden: