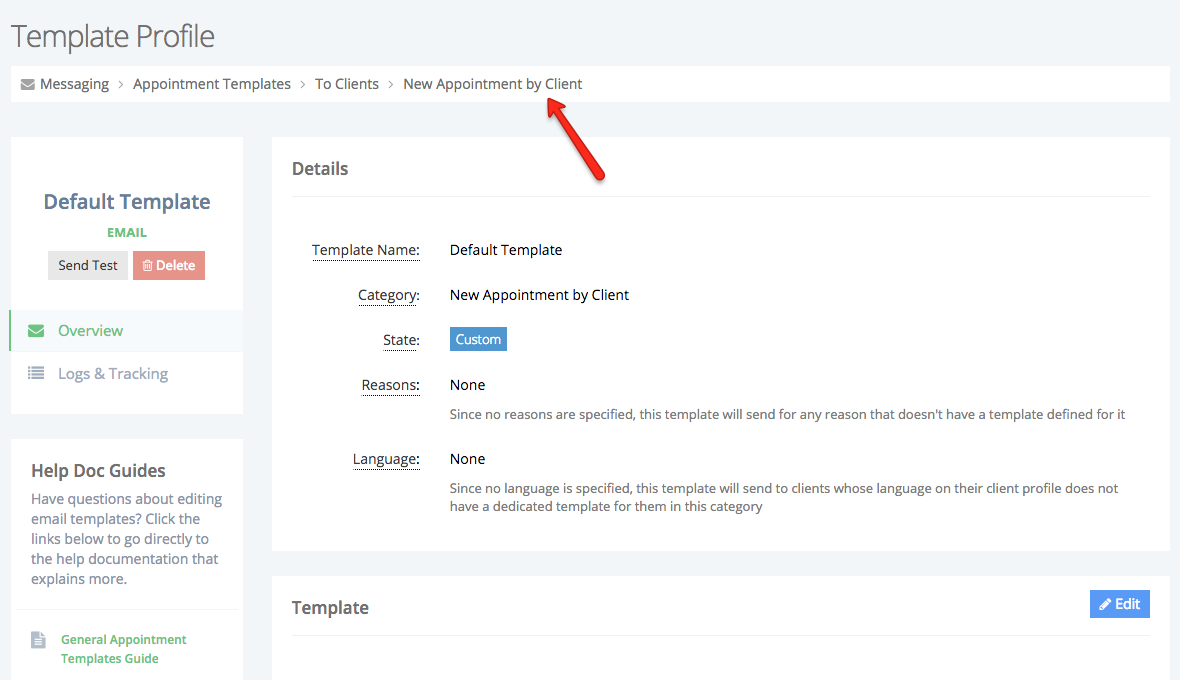
...
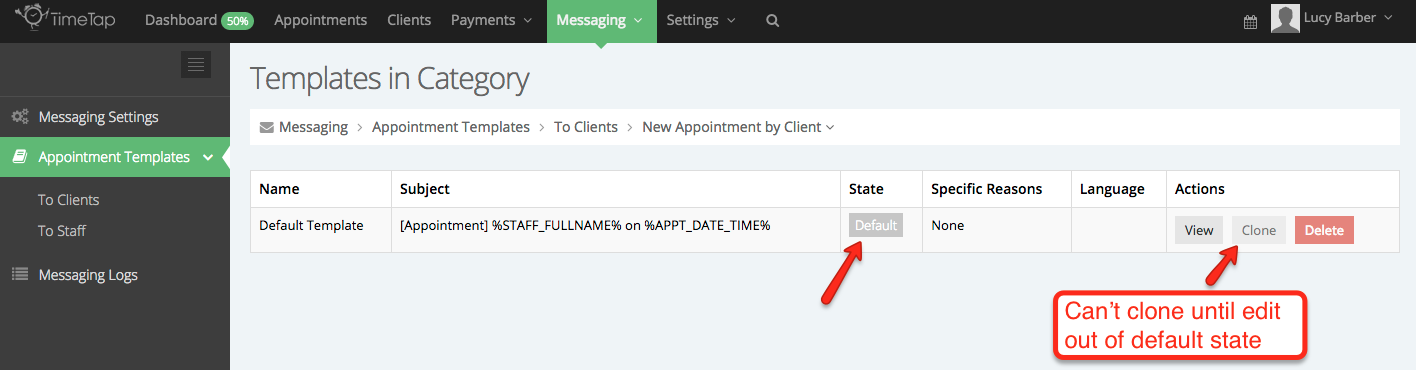
Step 2: This will take you to the list of templates in that category. Before you've made any adjustments to any templates in this category, you'll see that the "Default Template" listed there is in "Default" state. Your Default Template is the fall back template in case there's not been a customization made for a client's language. For instance, if you happen to have a client that books an their preferred language is French but you've not created a template in French, they will receive the default template. So, before you can clone this template, you first have to edit it to move it out of it's default state. You'll see the clone button in the screenshot below. Click that the clone button is disabled because the default template has not been customized:
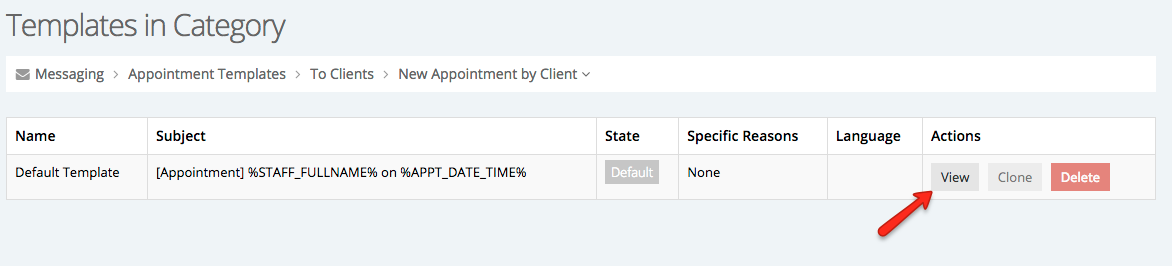
So first you'll need to click the "View" button to edit the default template in order to be able to clone it (please note: if your template is already in custom state, you can skip ahead to step 4):
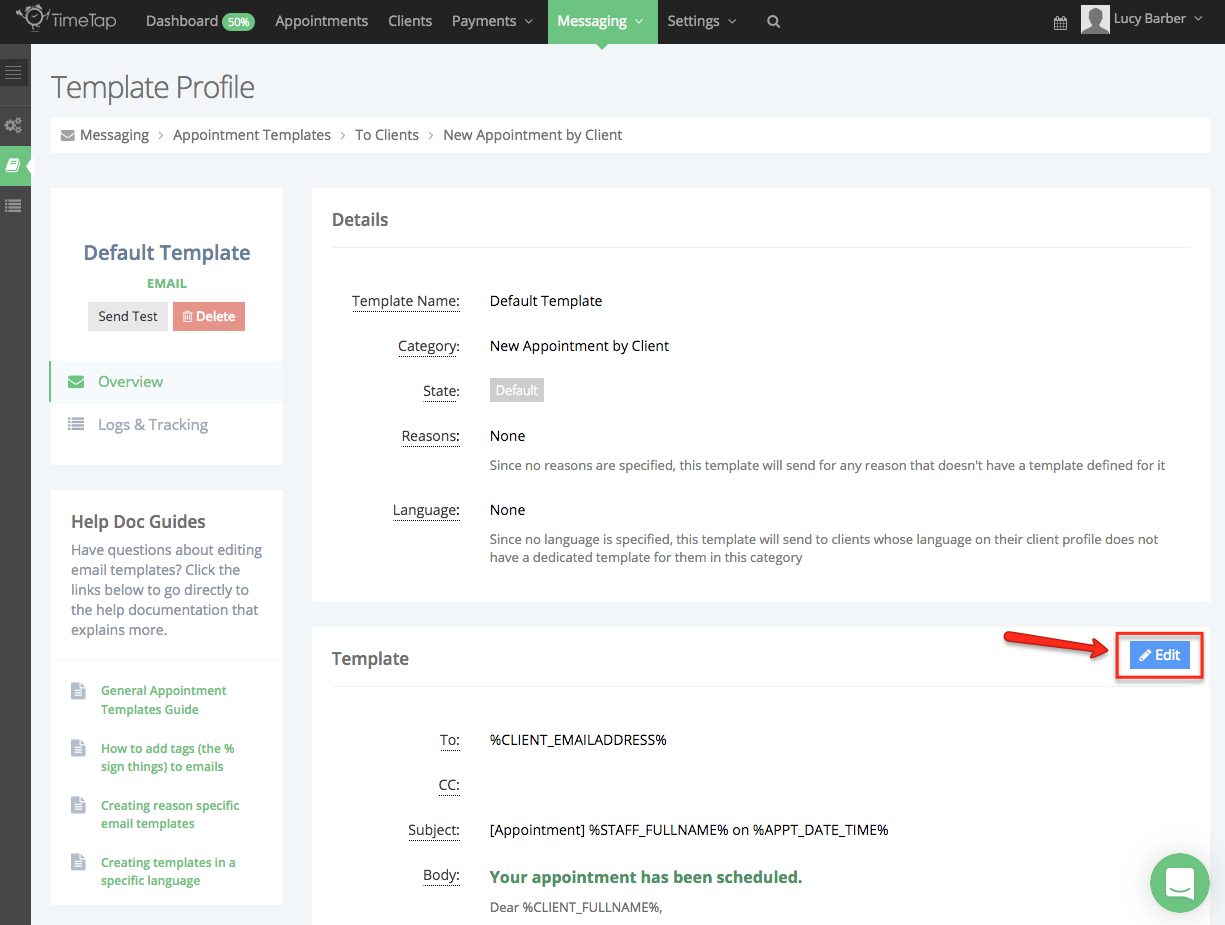
Step 3: On that template's profile, click the "Edit" button next to the "Template" section:
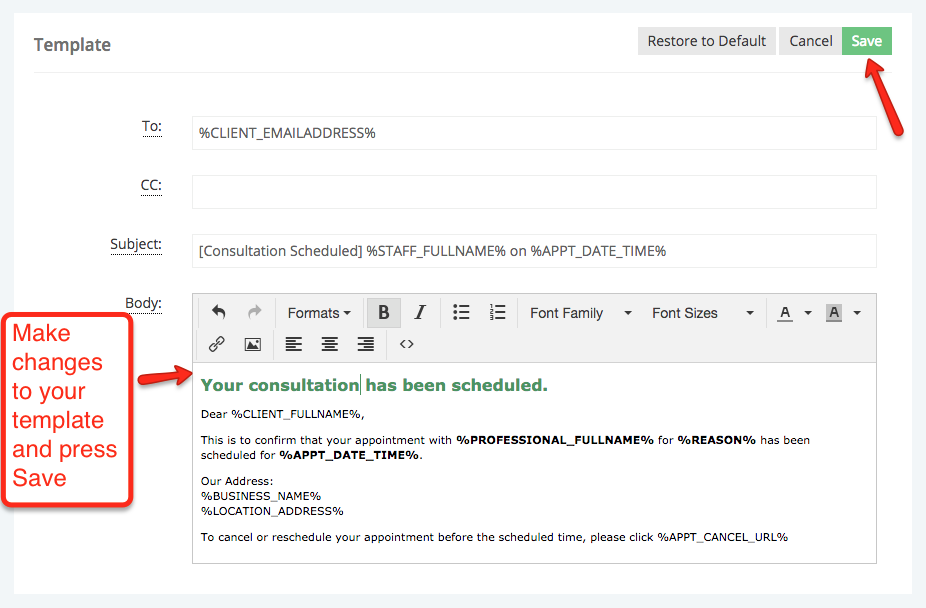
You can update your default template to have language more specific to your business and then press "Save":
Once you save changes to your template you'll see that it is now in "Custom" state:

Since it is now in "Custom" state, we can back out of the template profile view to the list of templates in order to clone the custom template to apply it to the language we want to customize for. To back out to the template list level, just click the link from the breadcrumbs bar at the top:
Step 4: Back on the list of templates in the New Appointment by Client category, the template will be in "Custom" state and you can now "Clone" the template:
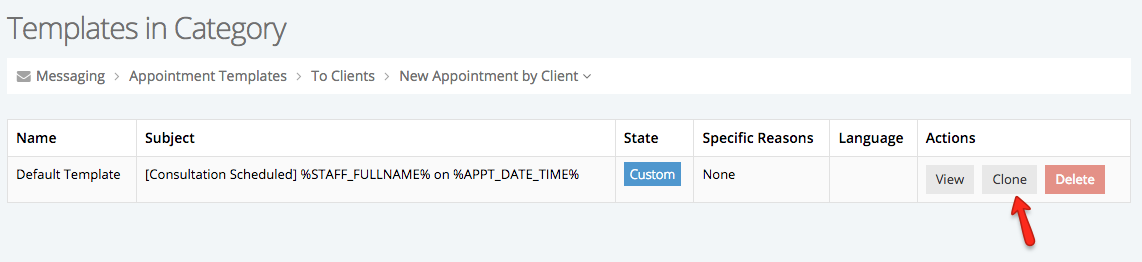
to clone the template:

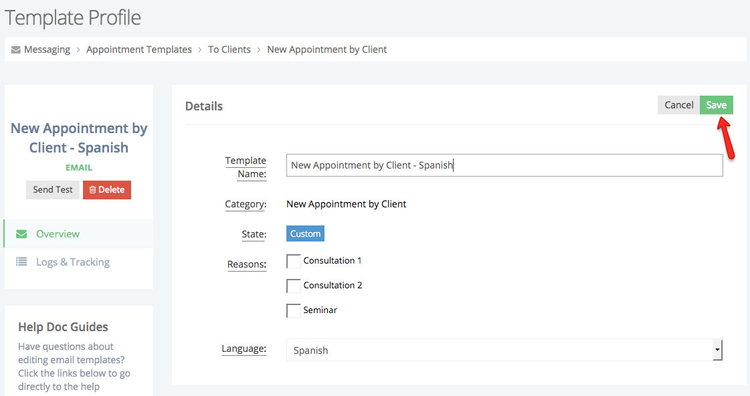
Step 3: On cloning it, you can assign the new template to a specific language:
...
I'd also recommend naming the template so that it's easy to distinguish. In this case, I'm going to name it "New Appointment by Client - Spanish" and "Save" the template:
 Step 5
Please note: any new template you create (i.e. any template in addition to the Default Template) is going to have to be assigned to a specific service or language to differentiate itself. You cannot have conflicting templates in the same category, meaning I can't have two templates assigned to no specific language for my "Consultation 2" service. I could have a template for Consultation 2 in English and a template for Consultation 2 in Spanish, but I can't have duplicate templates with the same reason/language assignments in the same category.
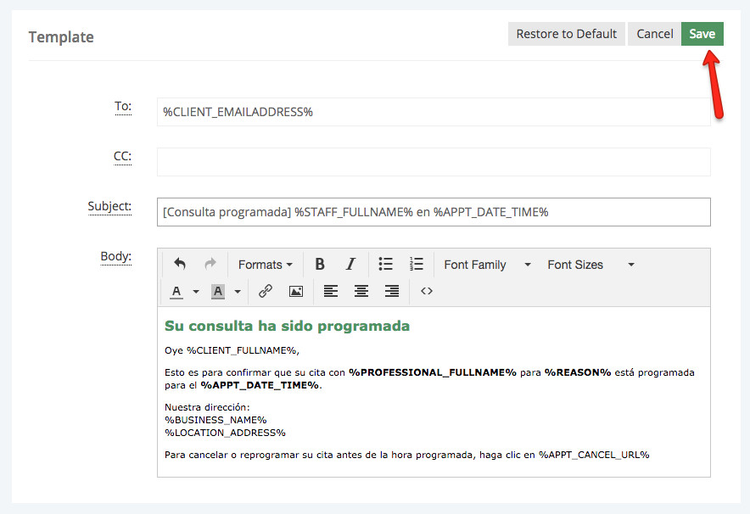
Step 4: Now that the "Details" customizations are in place, we can update the language in the template to Spanish. Scroll down on the Template Profile and click "Edit" next to the Template section:
...
When it's in Edit mode, you can put in the Spanish language customization that you'd like to add and press "Save":
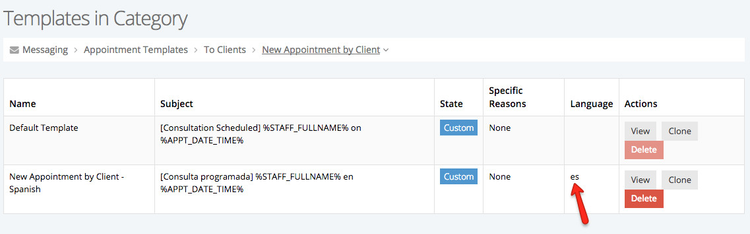
If we look back at the category template list now, we'll see we have two templates the default and then the one we've customized for Spanish:
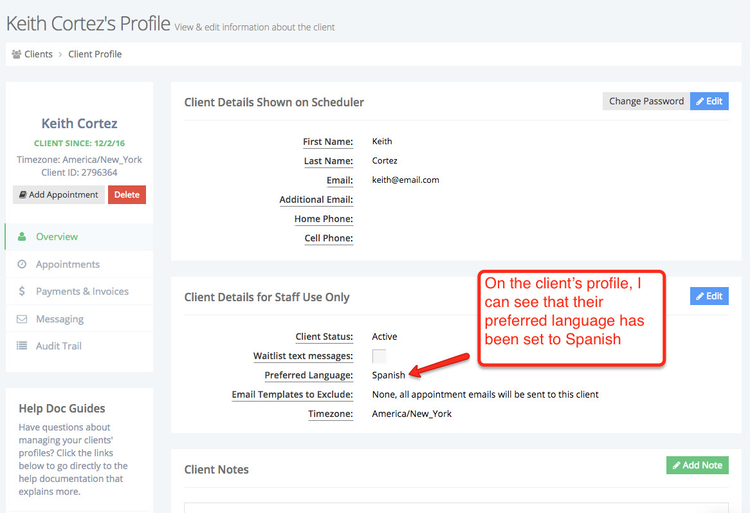
Step 6: : Now, let's look at how this will impact clients. I've got one client, Keith Cortez, whose preferred language is Spanish. Take a look at his client profile below for how I can see how that's been set in his account:
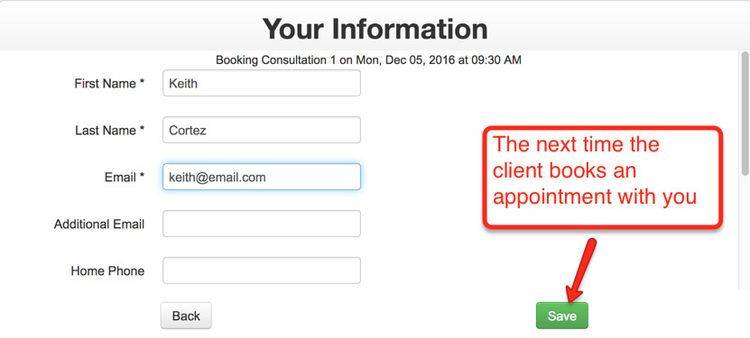
When that client goes to book an appointment through the scheduler...
...then the email that goes out to them will have the new Spanish template we made:
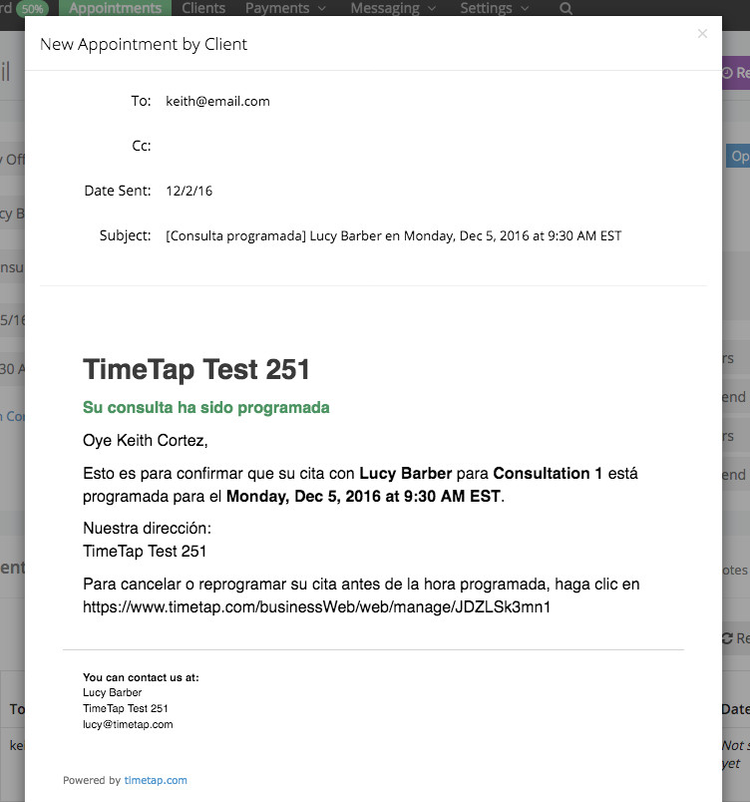
By creating templates in specific languages, then when clients get assigned to those languages all their emails in those categories will go out in those languages. You'll just need to make sure that there is a template made for that language and then that clients are assigned to those languages.