| Anchor | ||||
|---|---|---|---|---|
|
We cover both of those items on this page. Click the links below to jump directly to those sections:
| Table of Contents |
|---|
If you want to send out an email blast to your client list, you can do so from your Client list view. Simply follow the steps below:
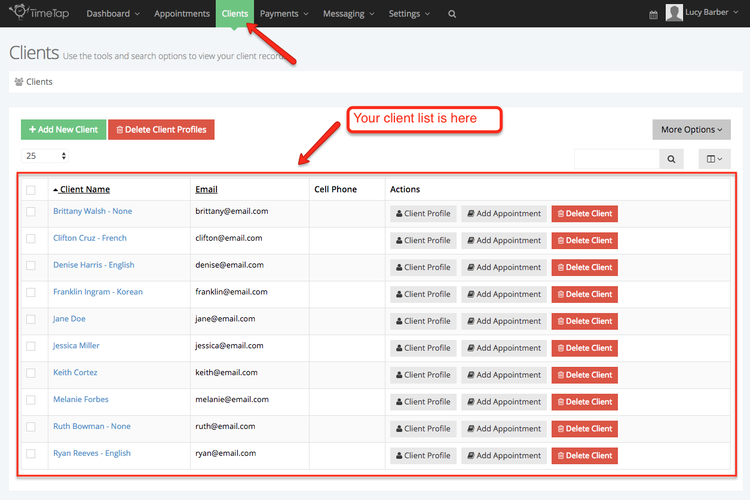
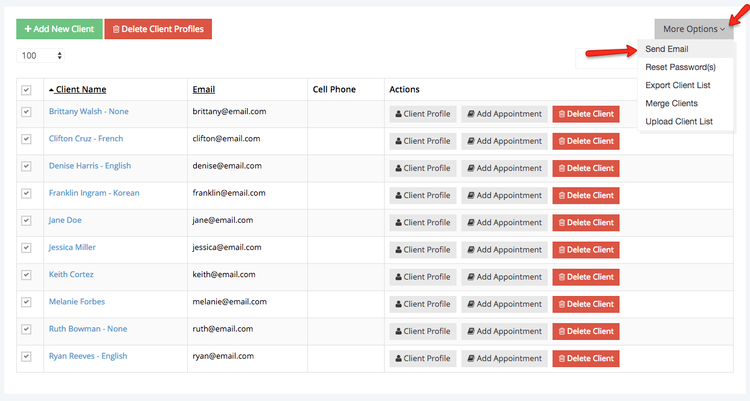
Step 1: Navigate to your Clients menu where your client list is:
Step 2: Next, select which clients you'd like to send the email to. You can do this by using the checkboxes on the left hand side of your clients. If you'd like to see more clients in a single page view, change the selection dropdown to 100200:
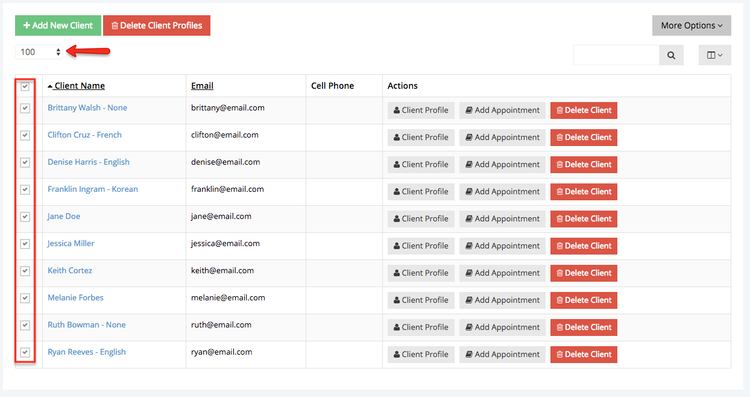
Please note: TimeTap's mass emailing feature was released in version 1.25.0. In our first release, you can only email clients in bulk through the client list at up to 100 200 clients at a time. In upcoming releases we will be adding more options for emailing clients in bulk and by different field values. If you have 500 clients, you will have to click through each page of your client list to send them an email.
Step 3: Choose the "Send Email" option under the "More Options" dropdown:
Step 4: On the pop up, choose which email template you want to send out to your client base and then click the green "Select Template" button:
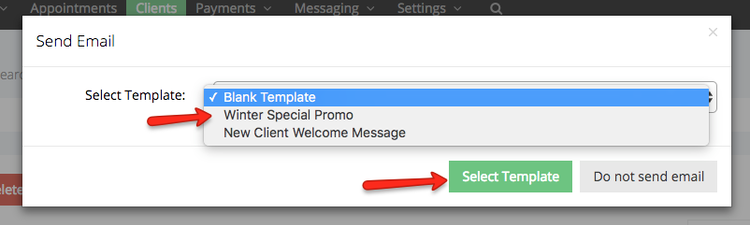
Please note: The templates that display on the select template dropdown are the templates stored in your Messaging > Invitation Templates view. You can add templates to this section to have different templates to choose from.
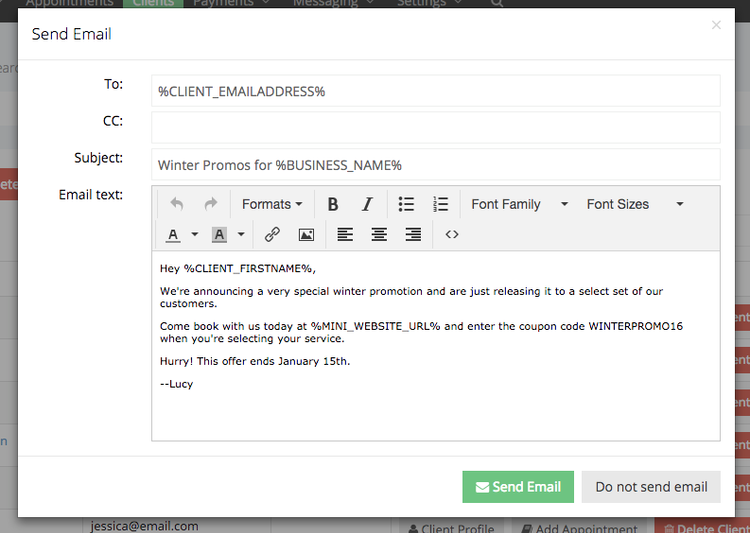
Step 5: Once you select the template, a preview of the email you're going to send out will appear. Since you are sending this email out to multiple clients at once, the merge fields will display as tags (the % sign things). Once the email is sent, they will merge with the values stored on your account.
Here is where you can make any final changes and then click "Send Email":
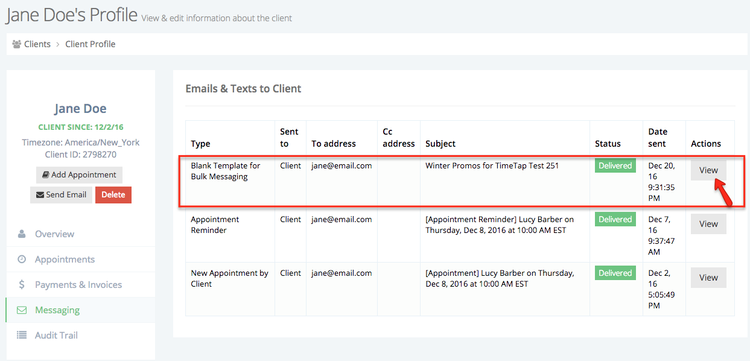
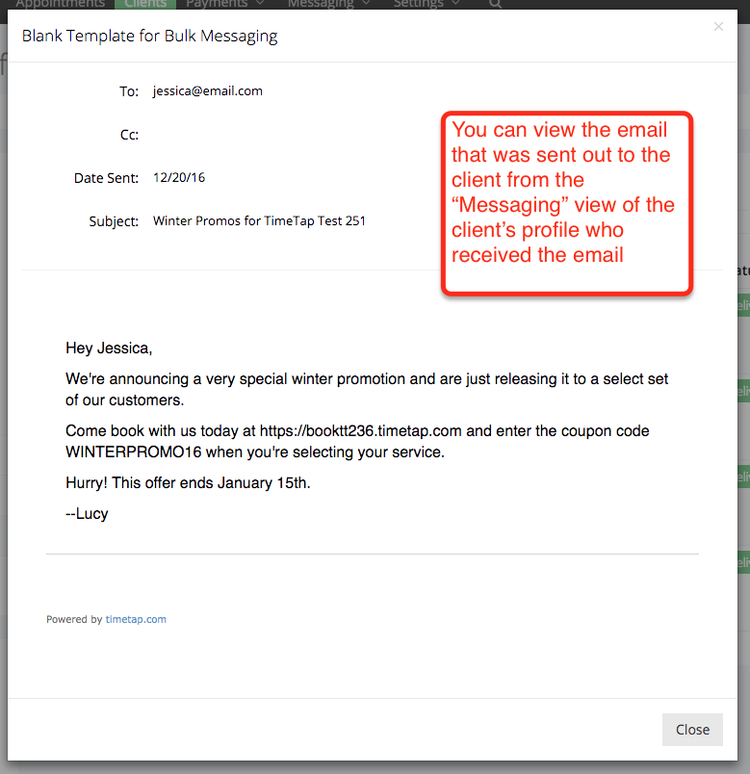
After you've sent the email, you can see the message that was sent out from the "Messaging" view of any of the client profiles you sent it to:
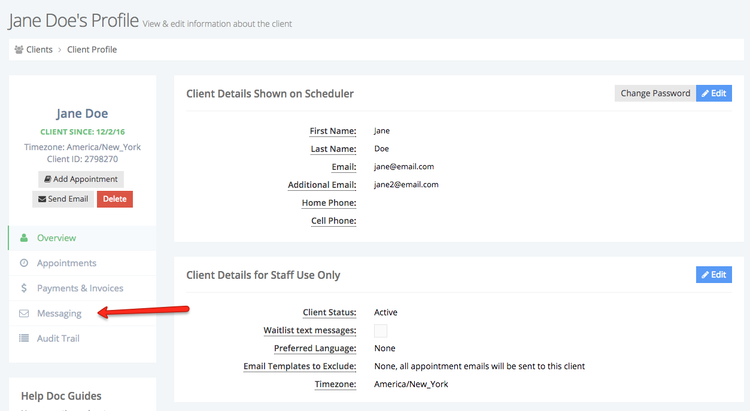
You can send an email to a client by using the "Send Email" button from their client profile. Simply follow the steps below.
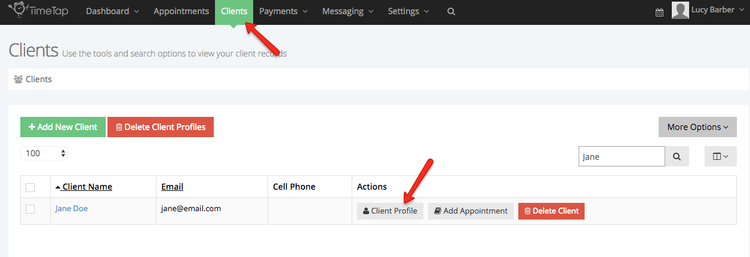
Step 1: Find the client you'd like to send the email to from your client list and click the "Client Profile" button next to their name to enter their client profile:
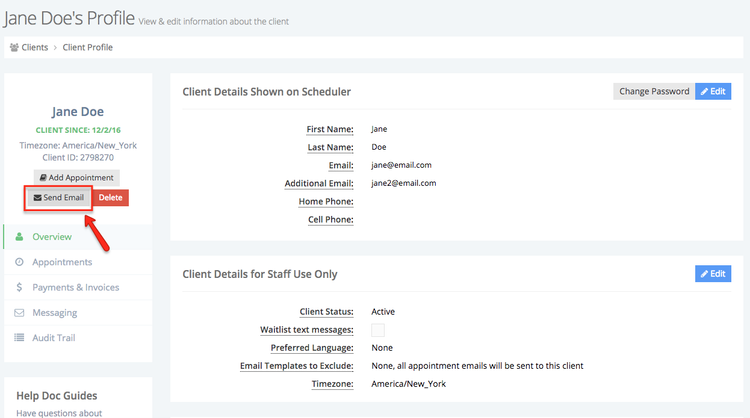
Step 2: From that client's profile, click the "Send Email" button from their left hand navigation menu:
Step 3: On the pop up, choose which email template you want to send out to your client and then click the green "Select Template" button:
Please note: The templates that display on the select template dropdown are the templates stored in your Messaging > Invitation Templates view. You can add templates to this section to have different templates to choose from.
Step 4: Once you select the template, a preview of the email you're going to send out will appear. The preview will not have merged the tags with the client values yet. That will happen once the email is sent out.
Here is where you can make any final changes and then click "Send Email":
After you've sent the email, you can see the message that was sent out from the "Messaging" view of the client's profile