...
First we will cover how to add additional staff to accept appointments. The Staff person in TimeTap is communicated to the client as the person who will be rendering the service they are booking. The staff person could be a specific individual (like yourself or one of your colleagues) or it could be a generic name so the client doesn't think they are meeting with someone specific. Begin by clicking the + symbol to expand the staff section and selecting
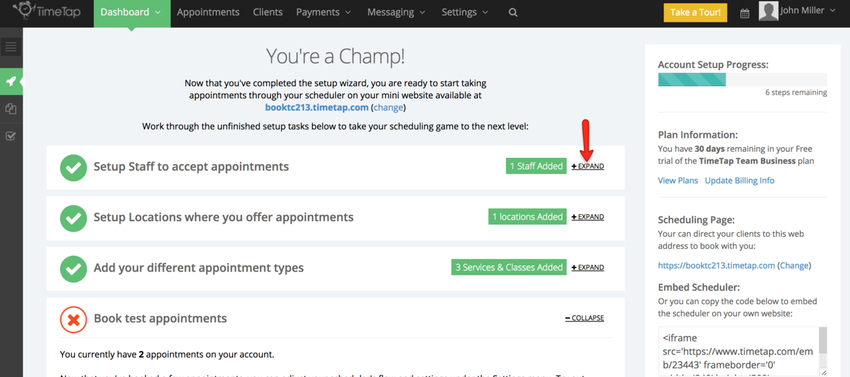
If you're in a Team Professional or Team Business Plan you can add multiple staff member to be available to take appointments. Within the Quick Setup Guide you will see a section called "Setup Staff to accept appointments", at a quick glance you will be able to see how many staff members you've added to your account. To see the option to a new staff member click the Expand link to the right of this section:
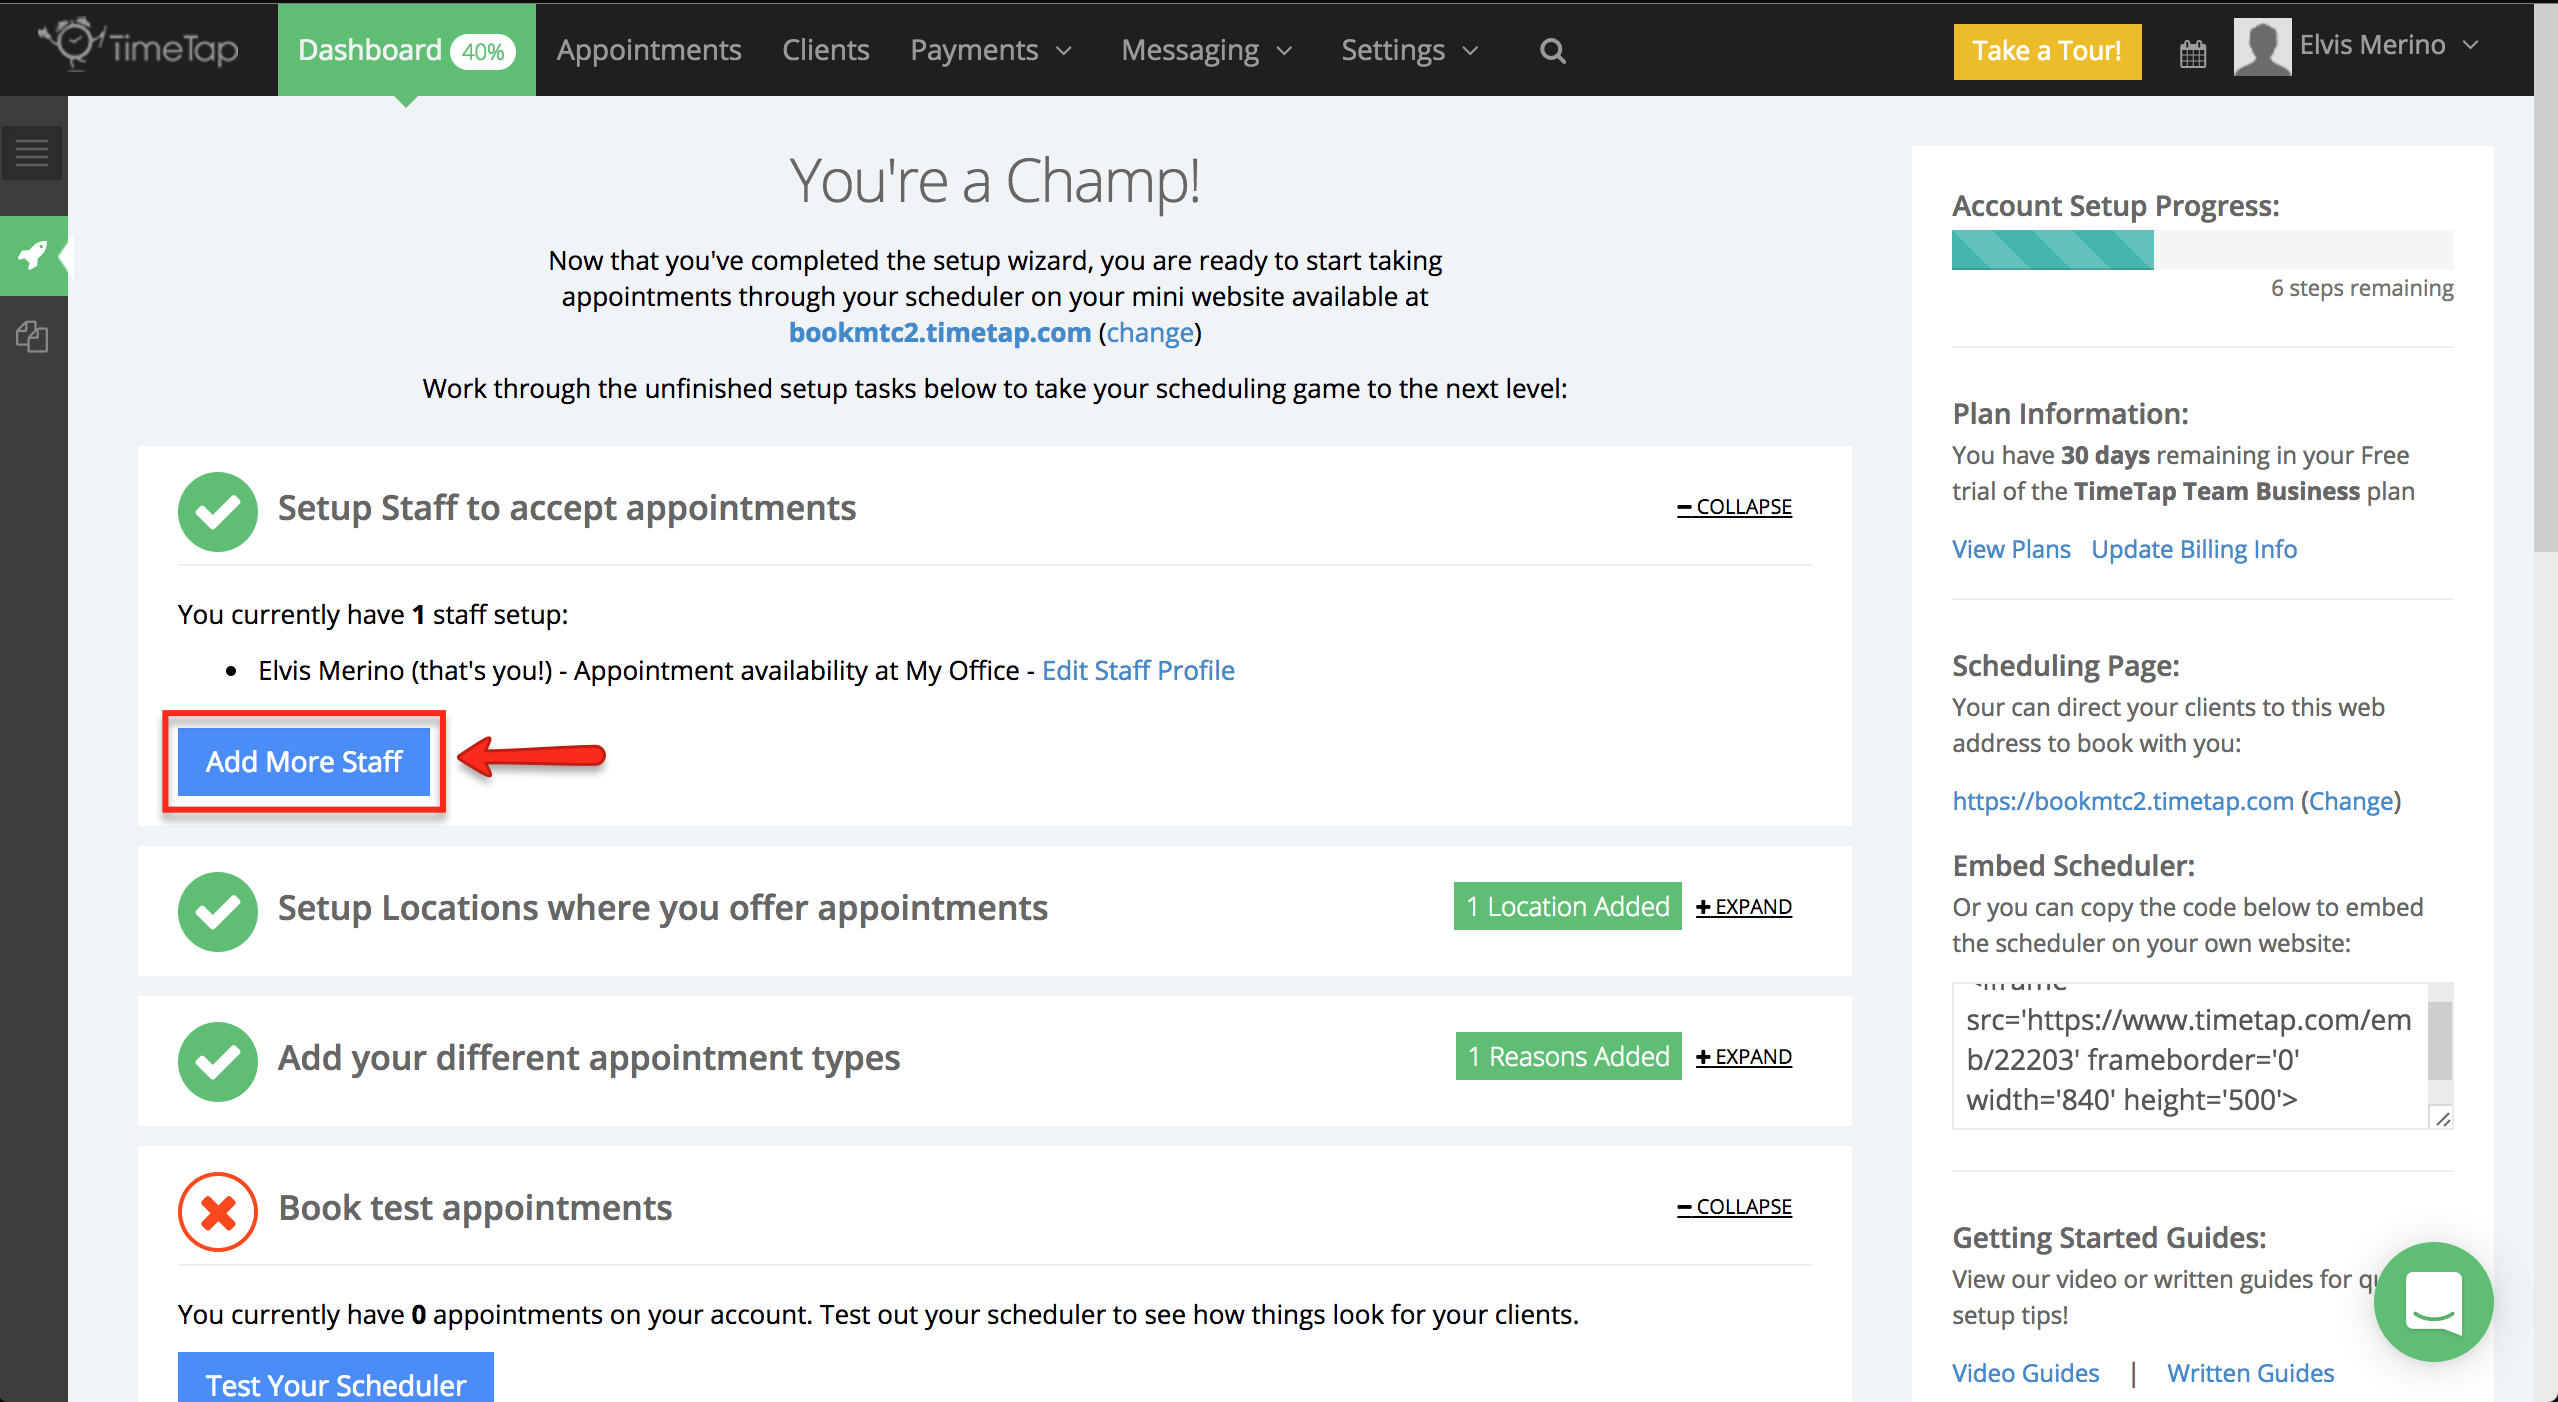
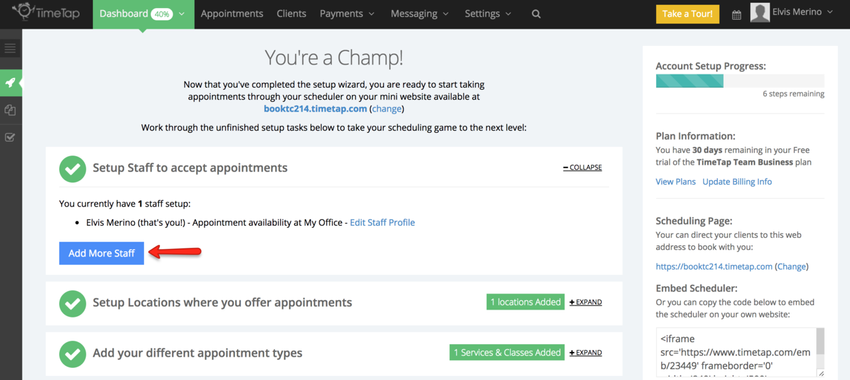
With the section expanded you will be able to see the names of the staff you already added as well as the name of the location(s) where they are able to accept appointments. To add a new staff member click the "Add More Staff" button:
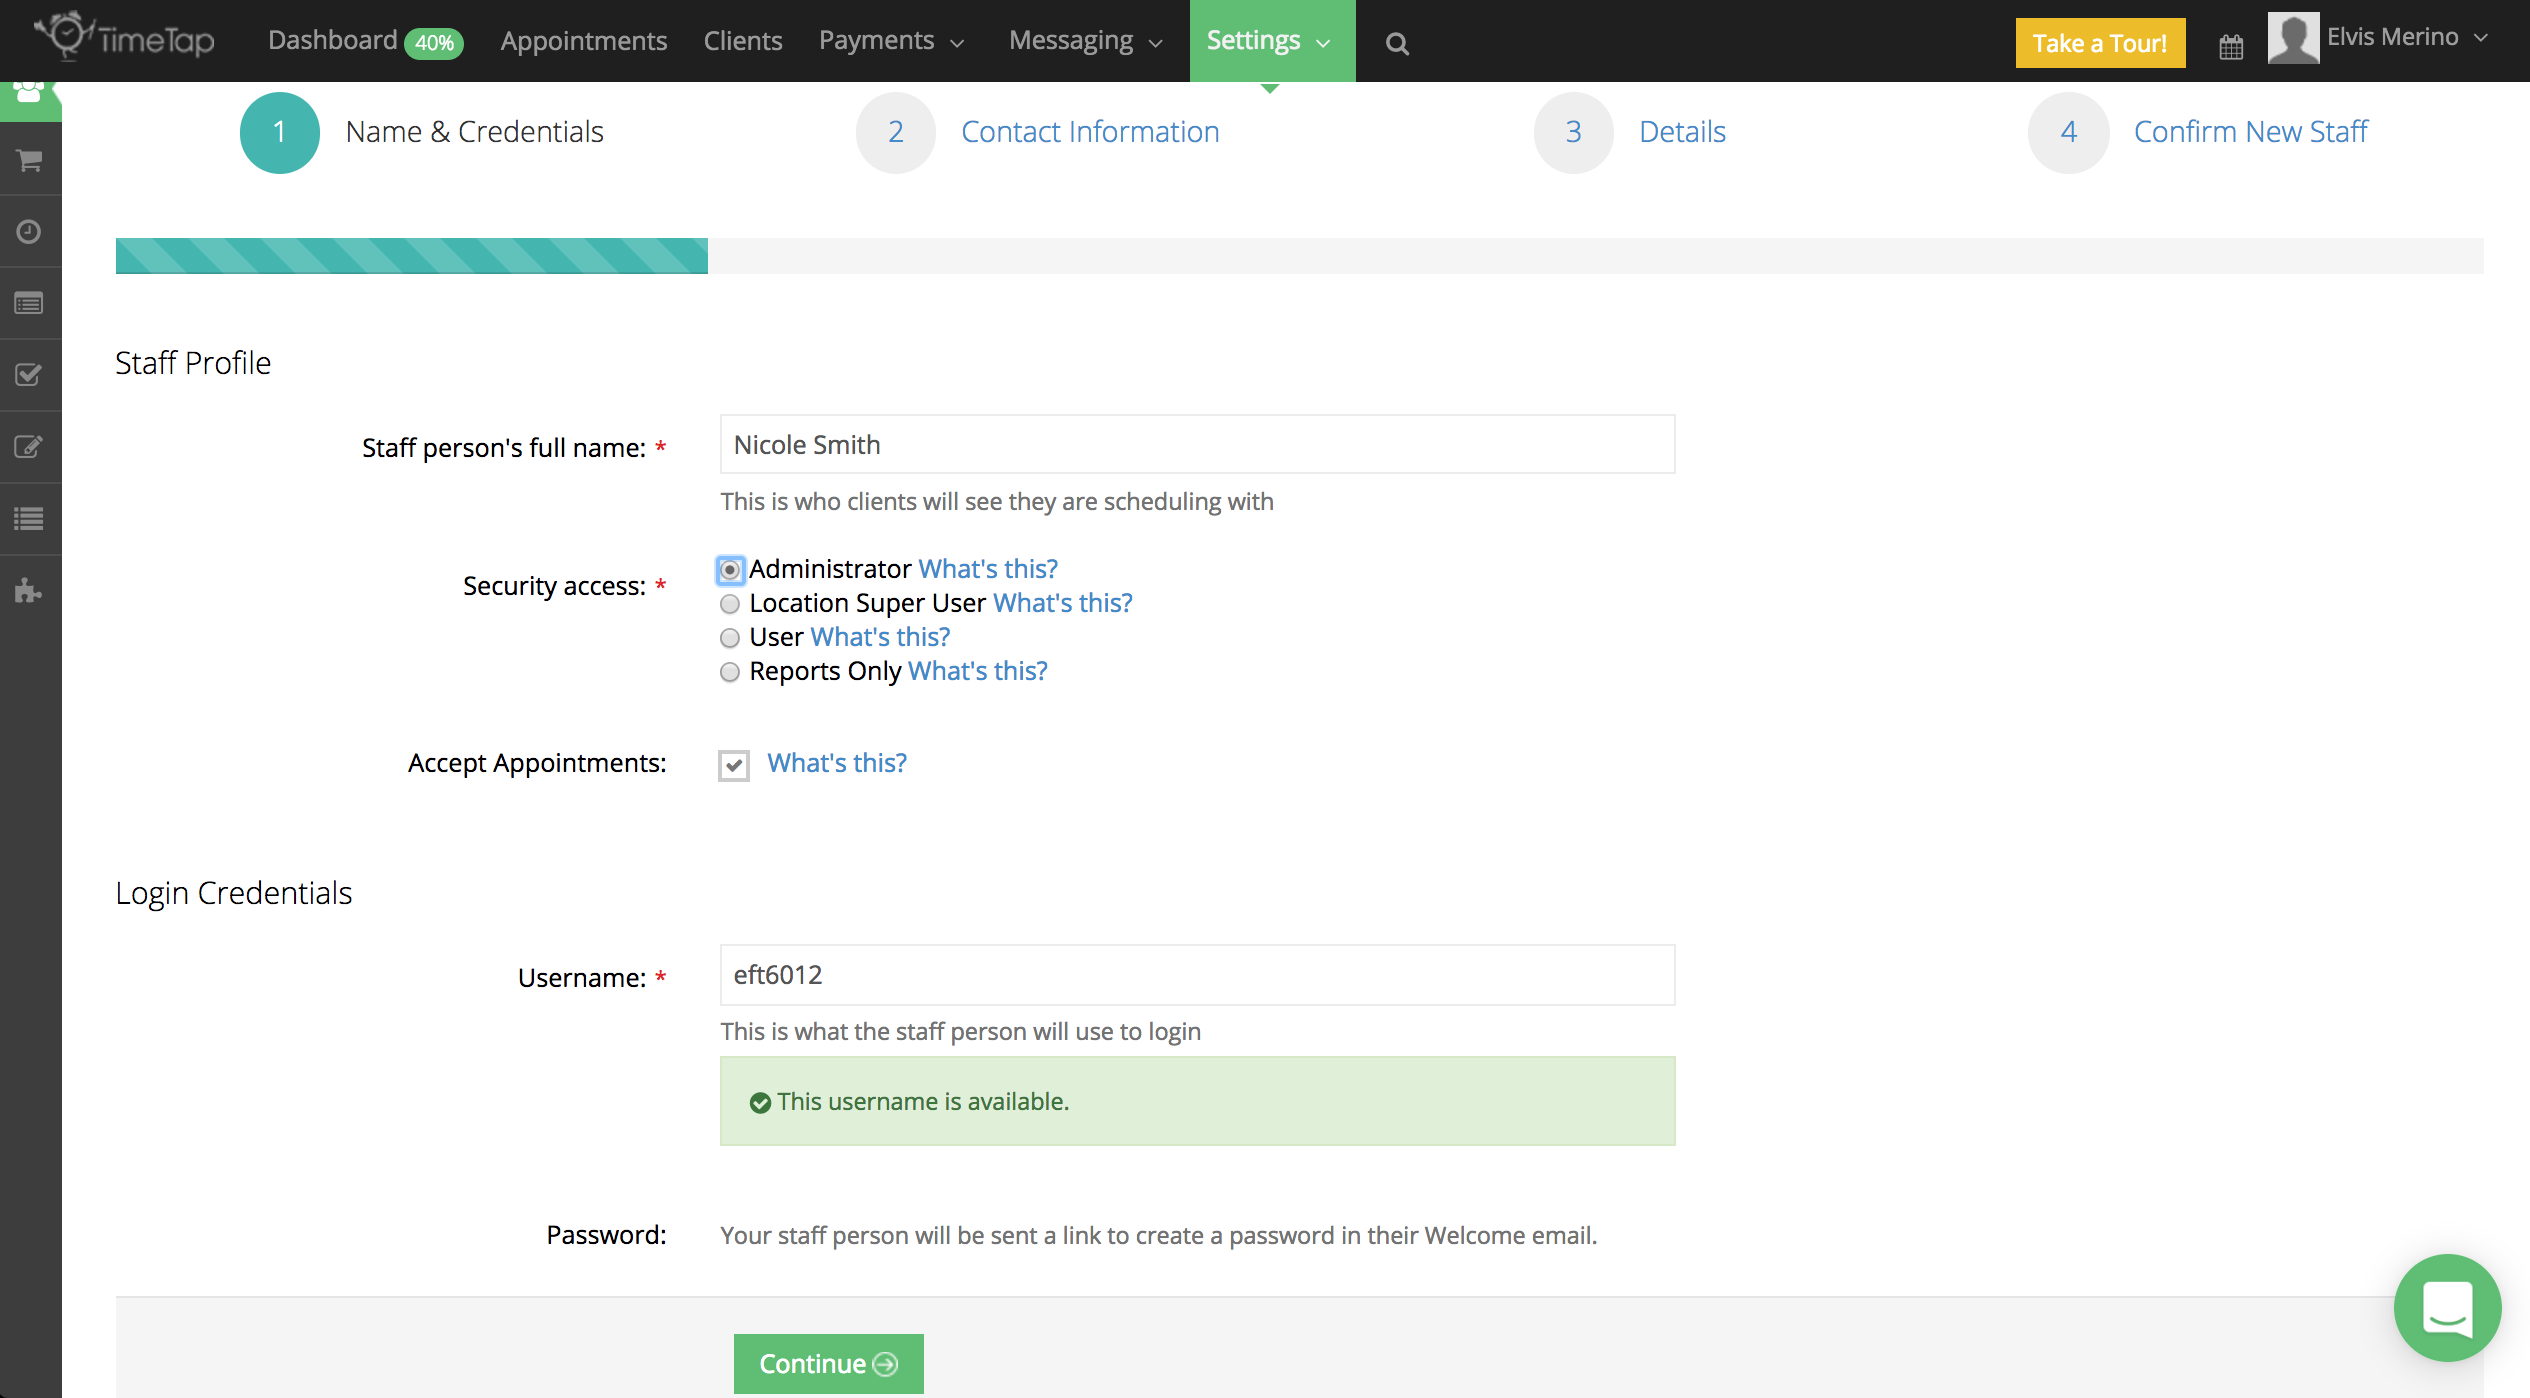
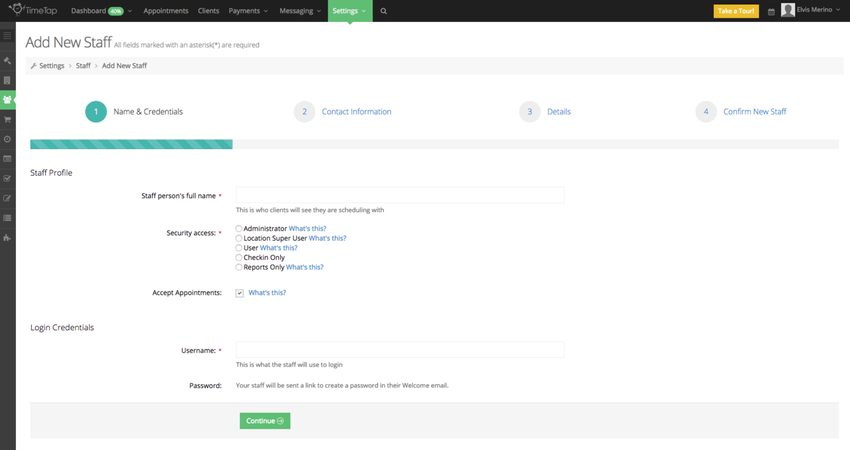
You will then be taken to the Add New Staff screen where you'll enter your new staff's name, assign a security role, allow him/her to take appointments, and assign a username. Click Continue to move to the next step:
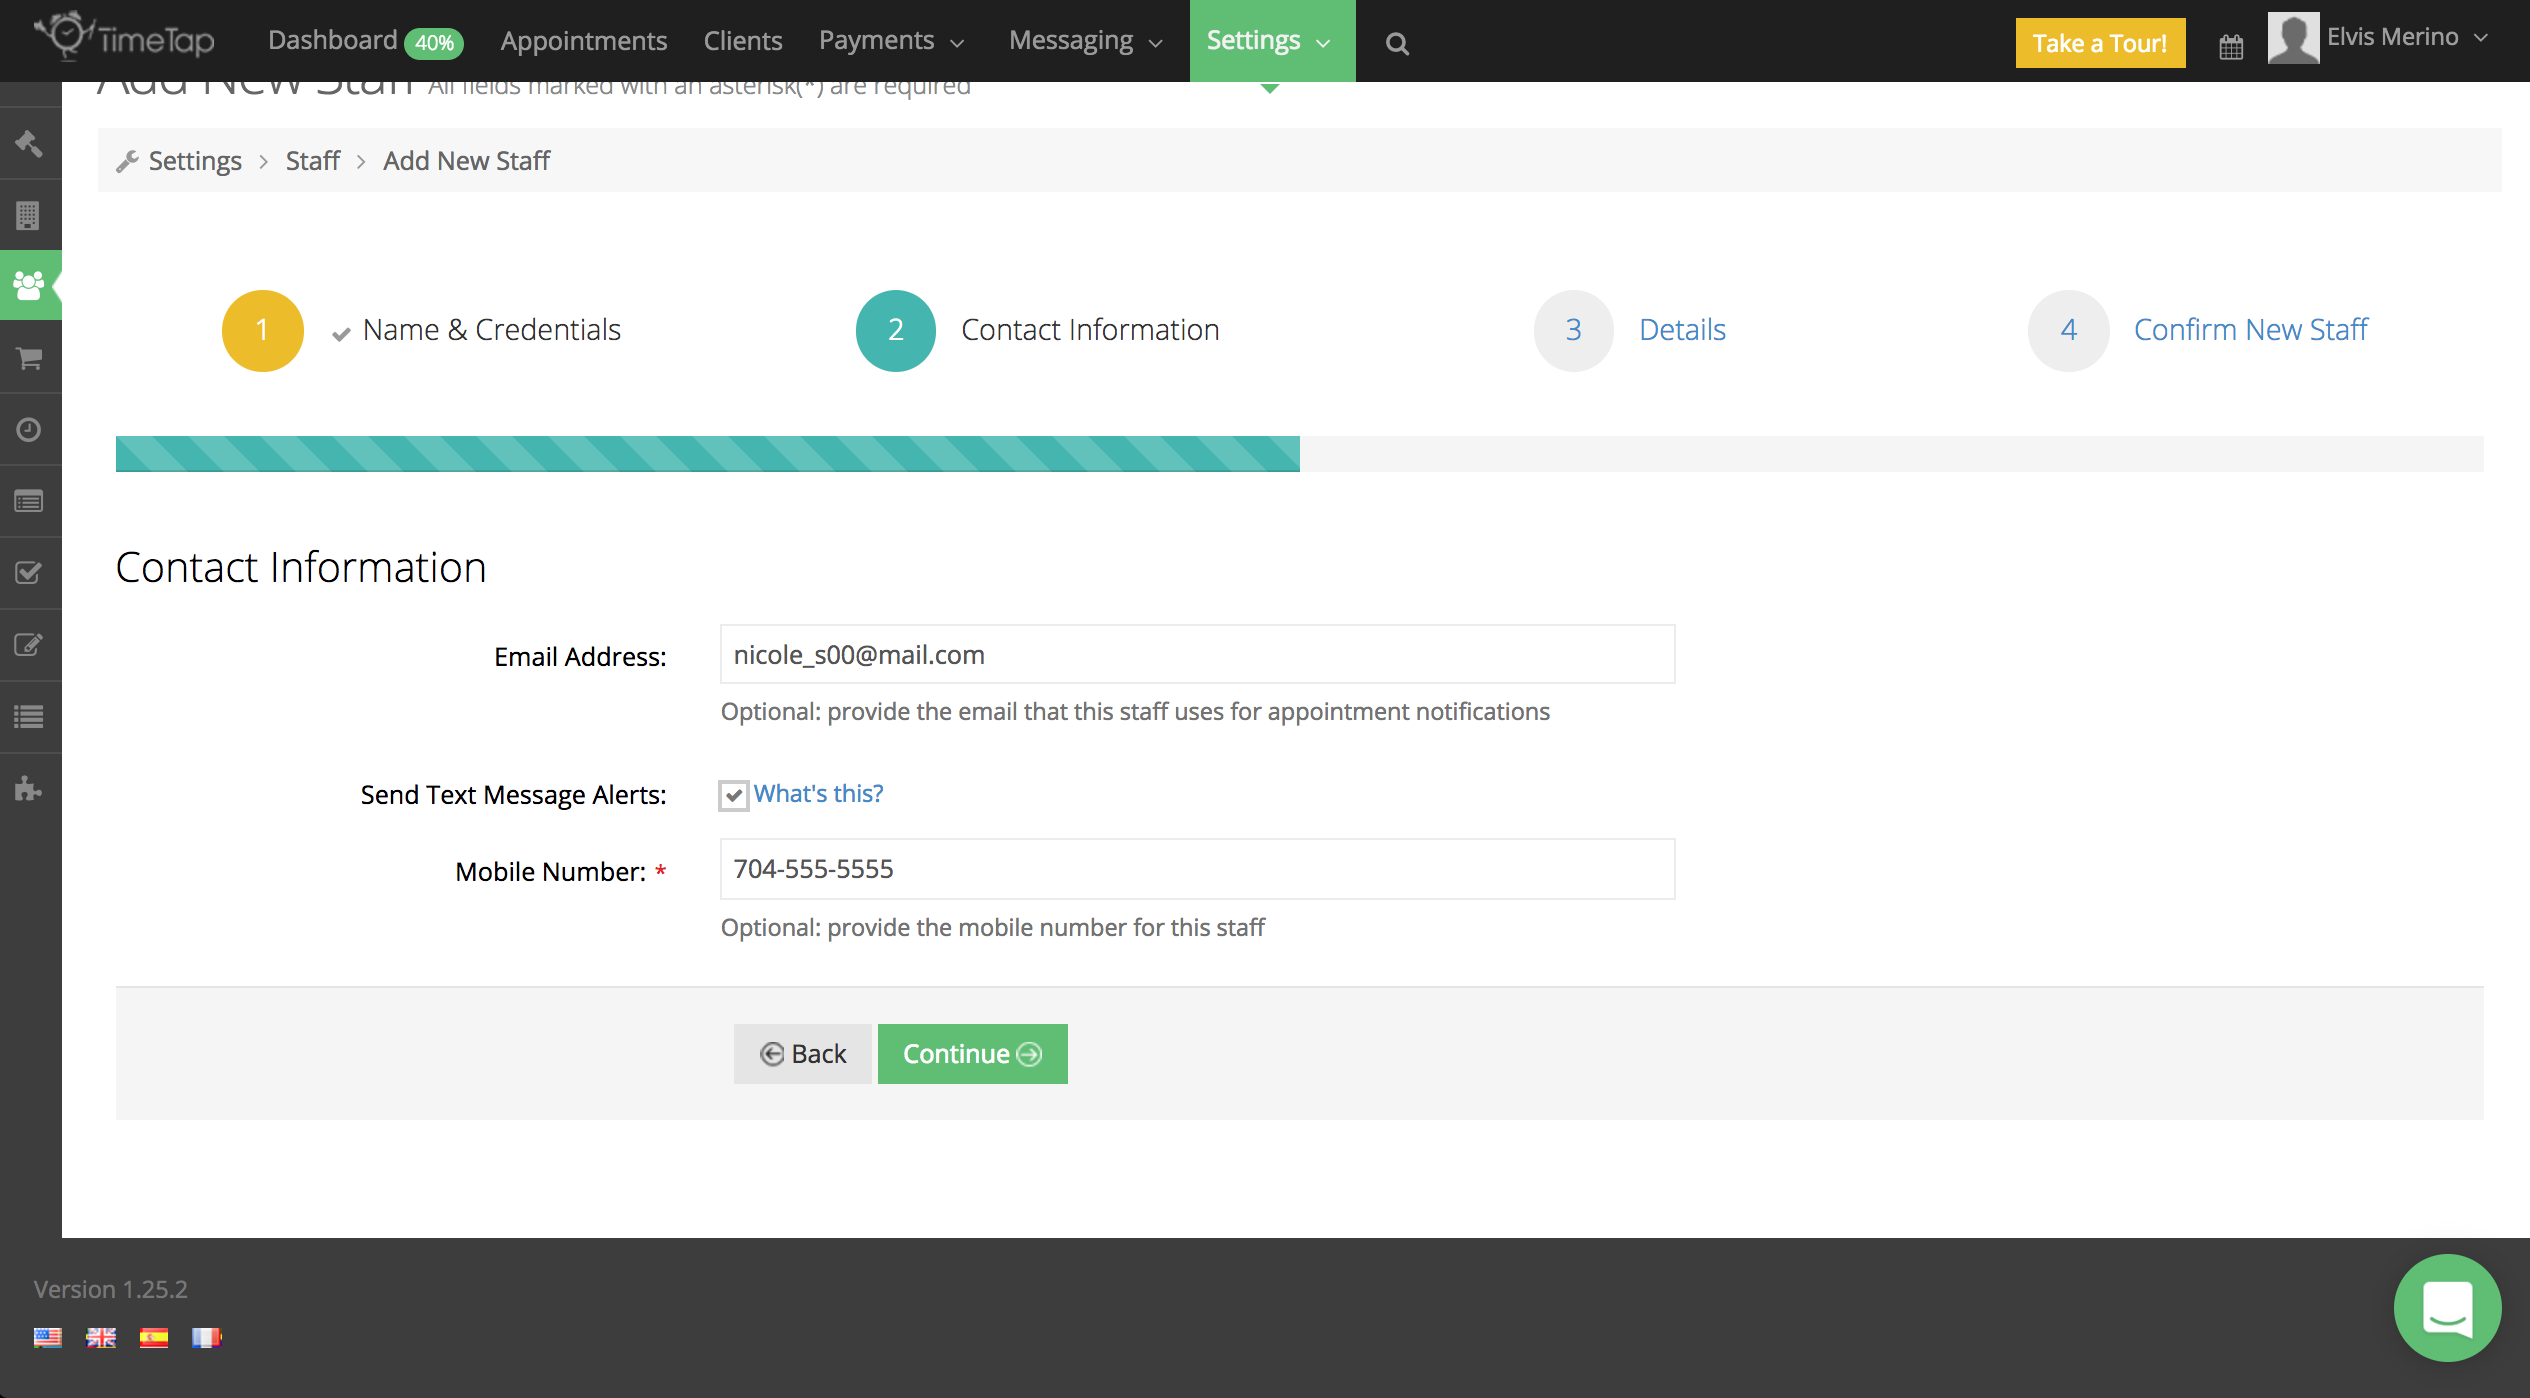
In the next step, you'll enter the staff's email, select whether you want him/her to receive text message alerts, and enter a mobile phone number. Click Continue to move to the next step:
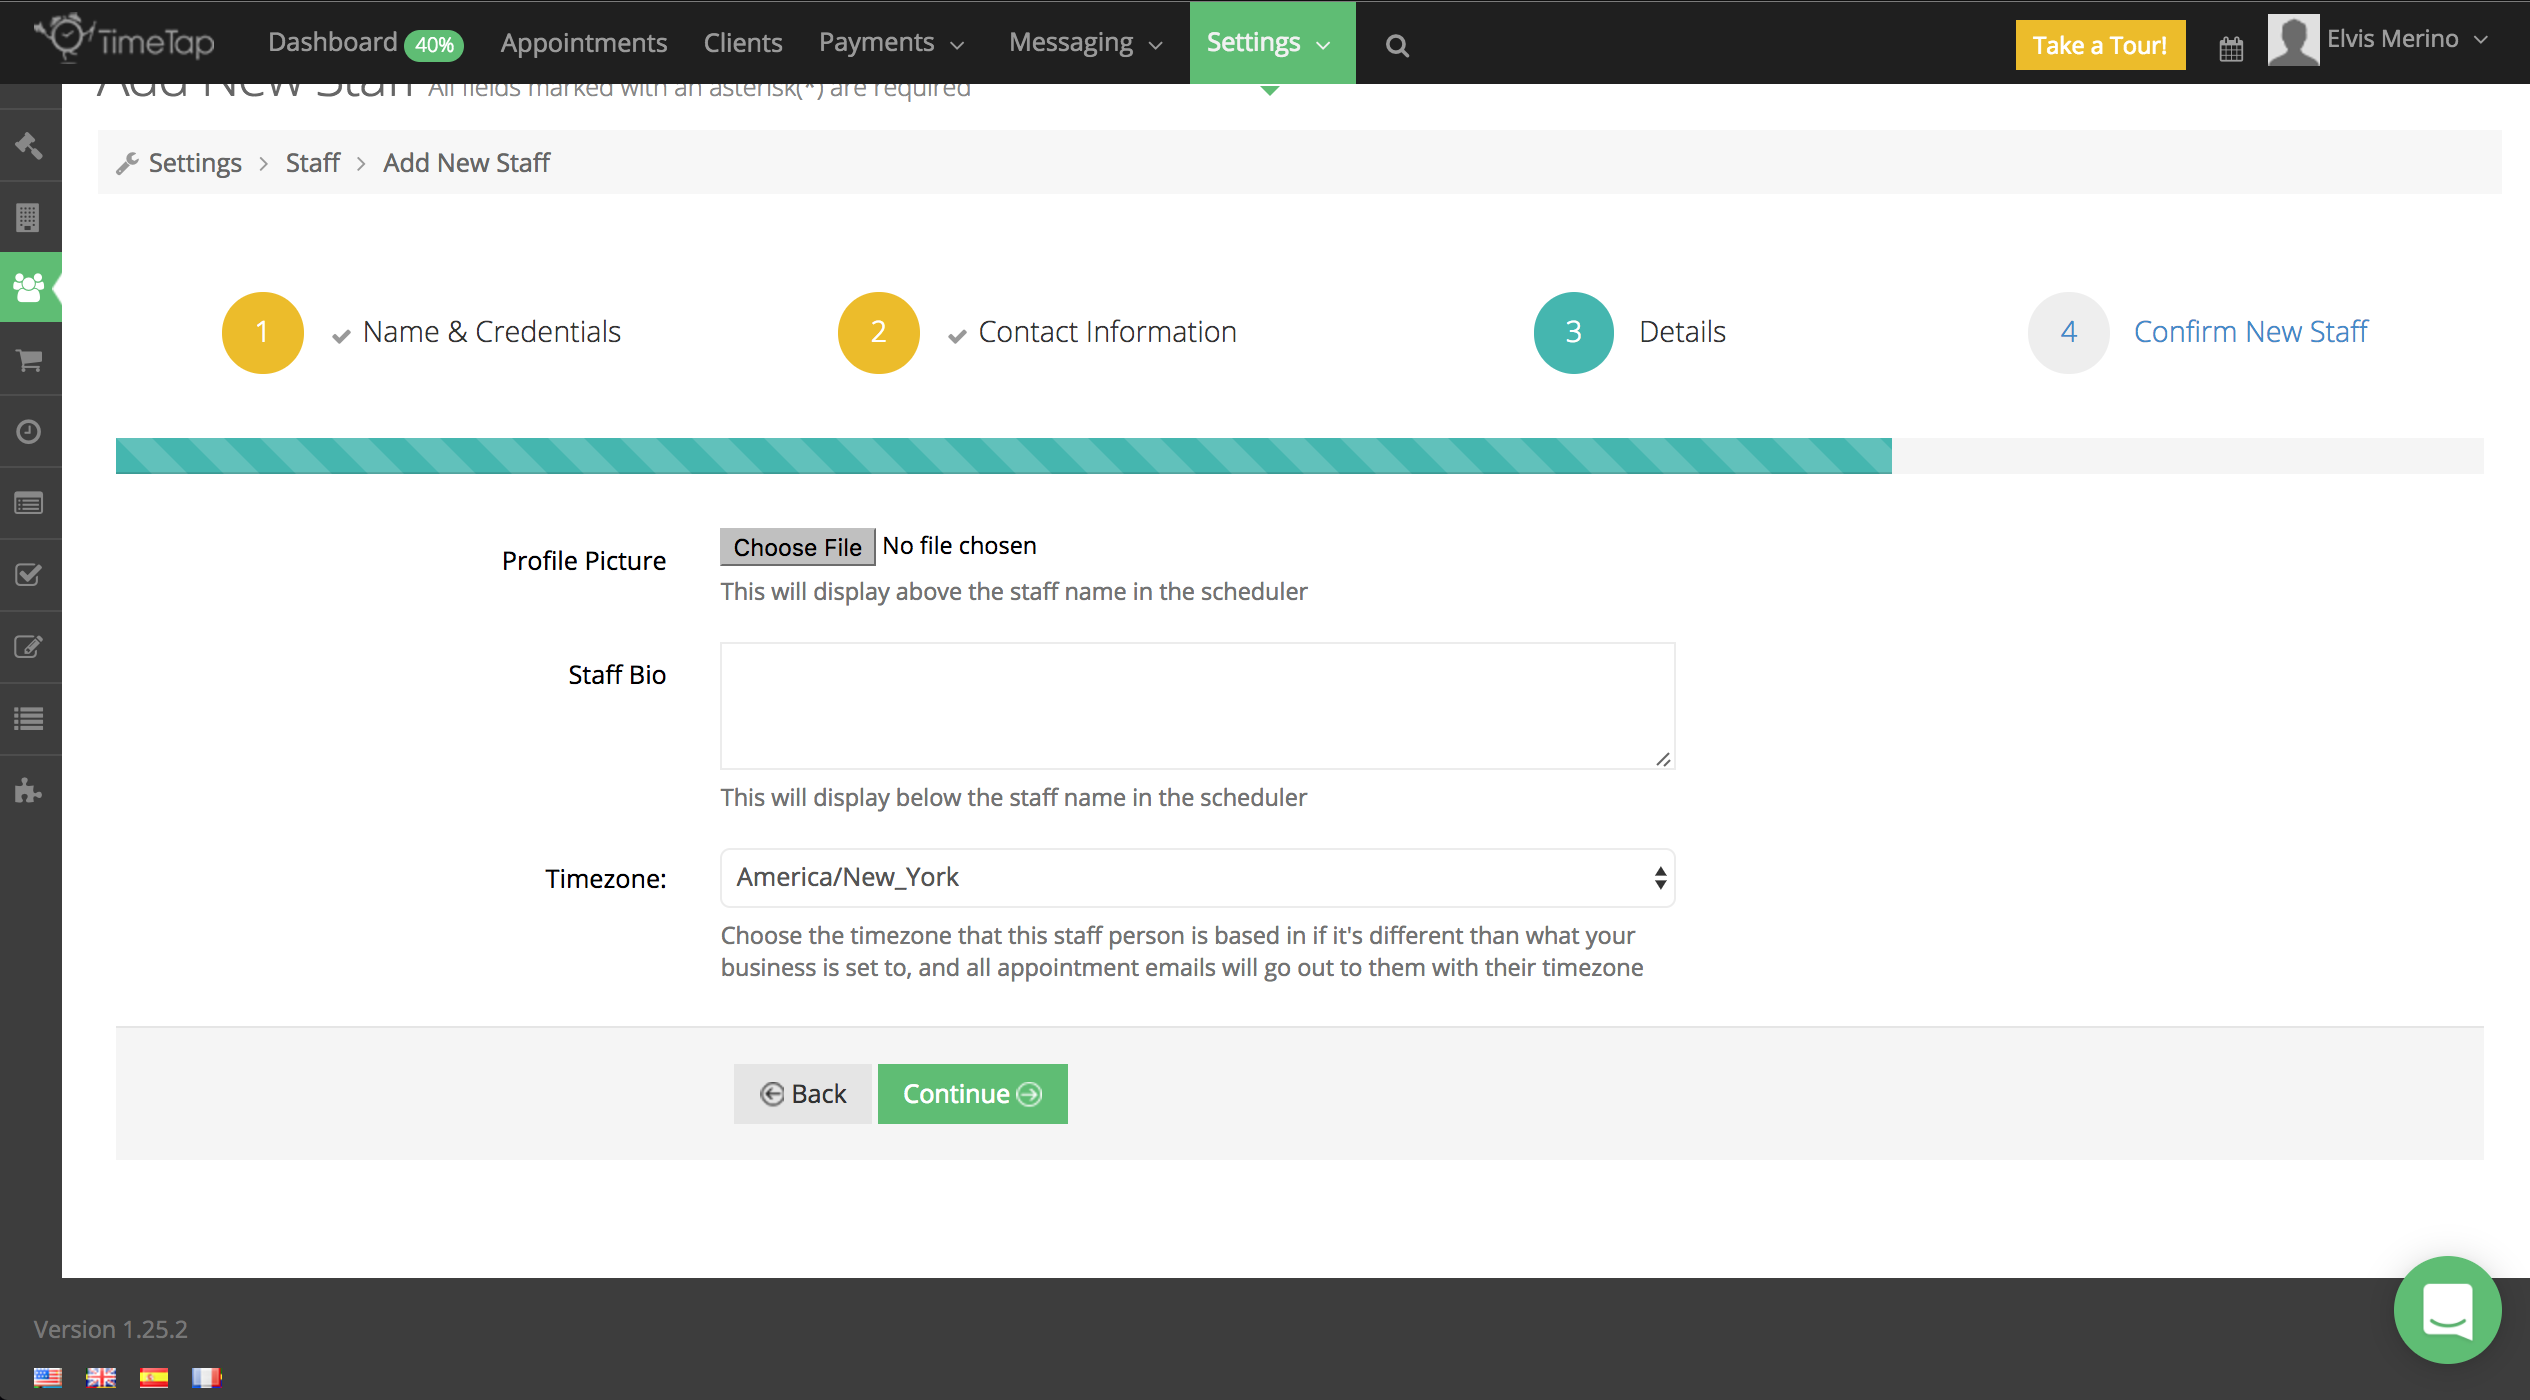
In the next step, you'll have the option to upload a photo this new staff member, add a quick bio, and select a timezone. Click Continue to move to the next step:
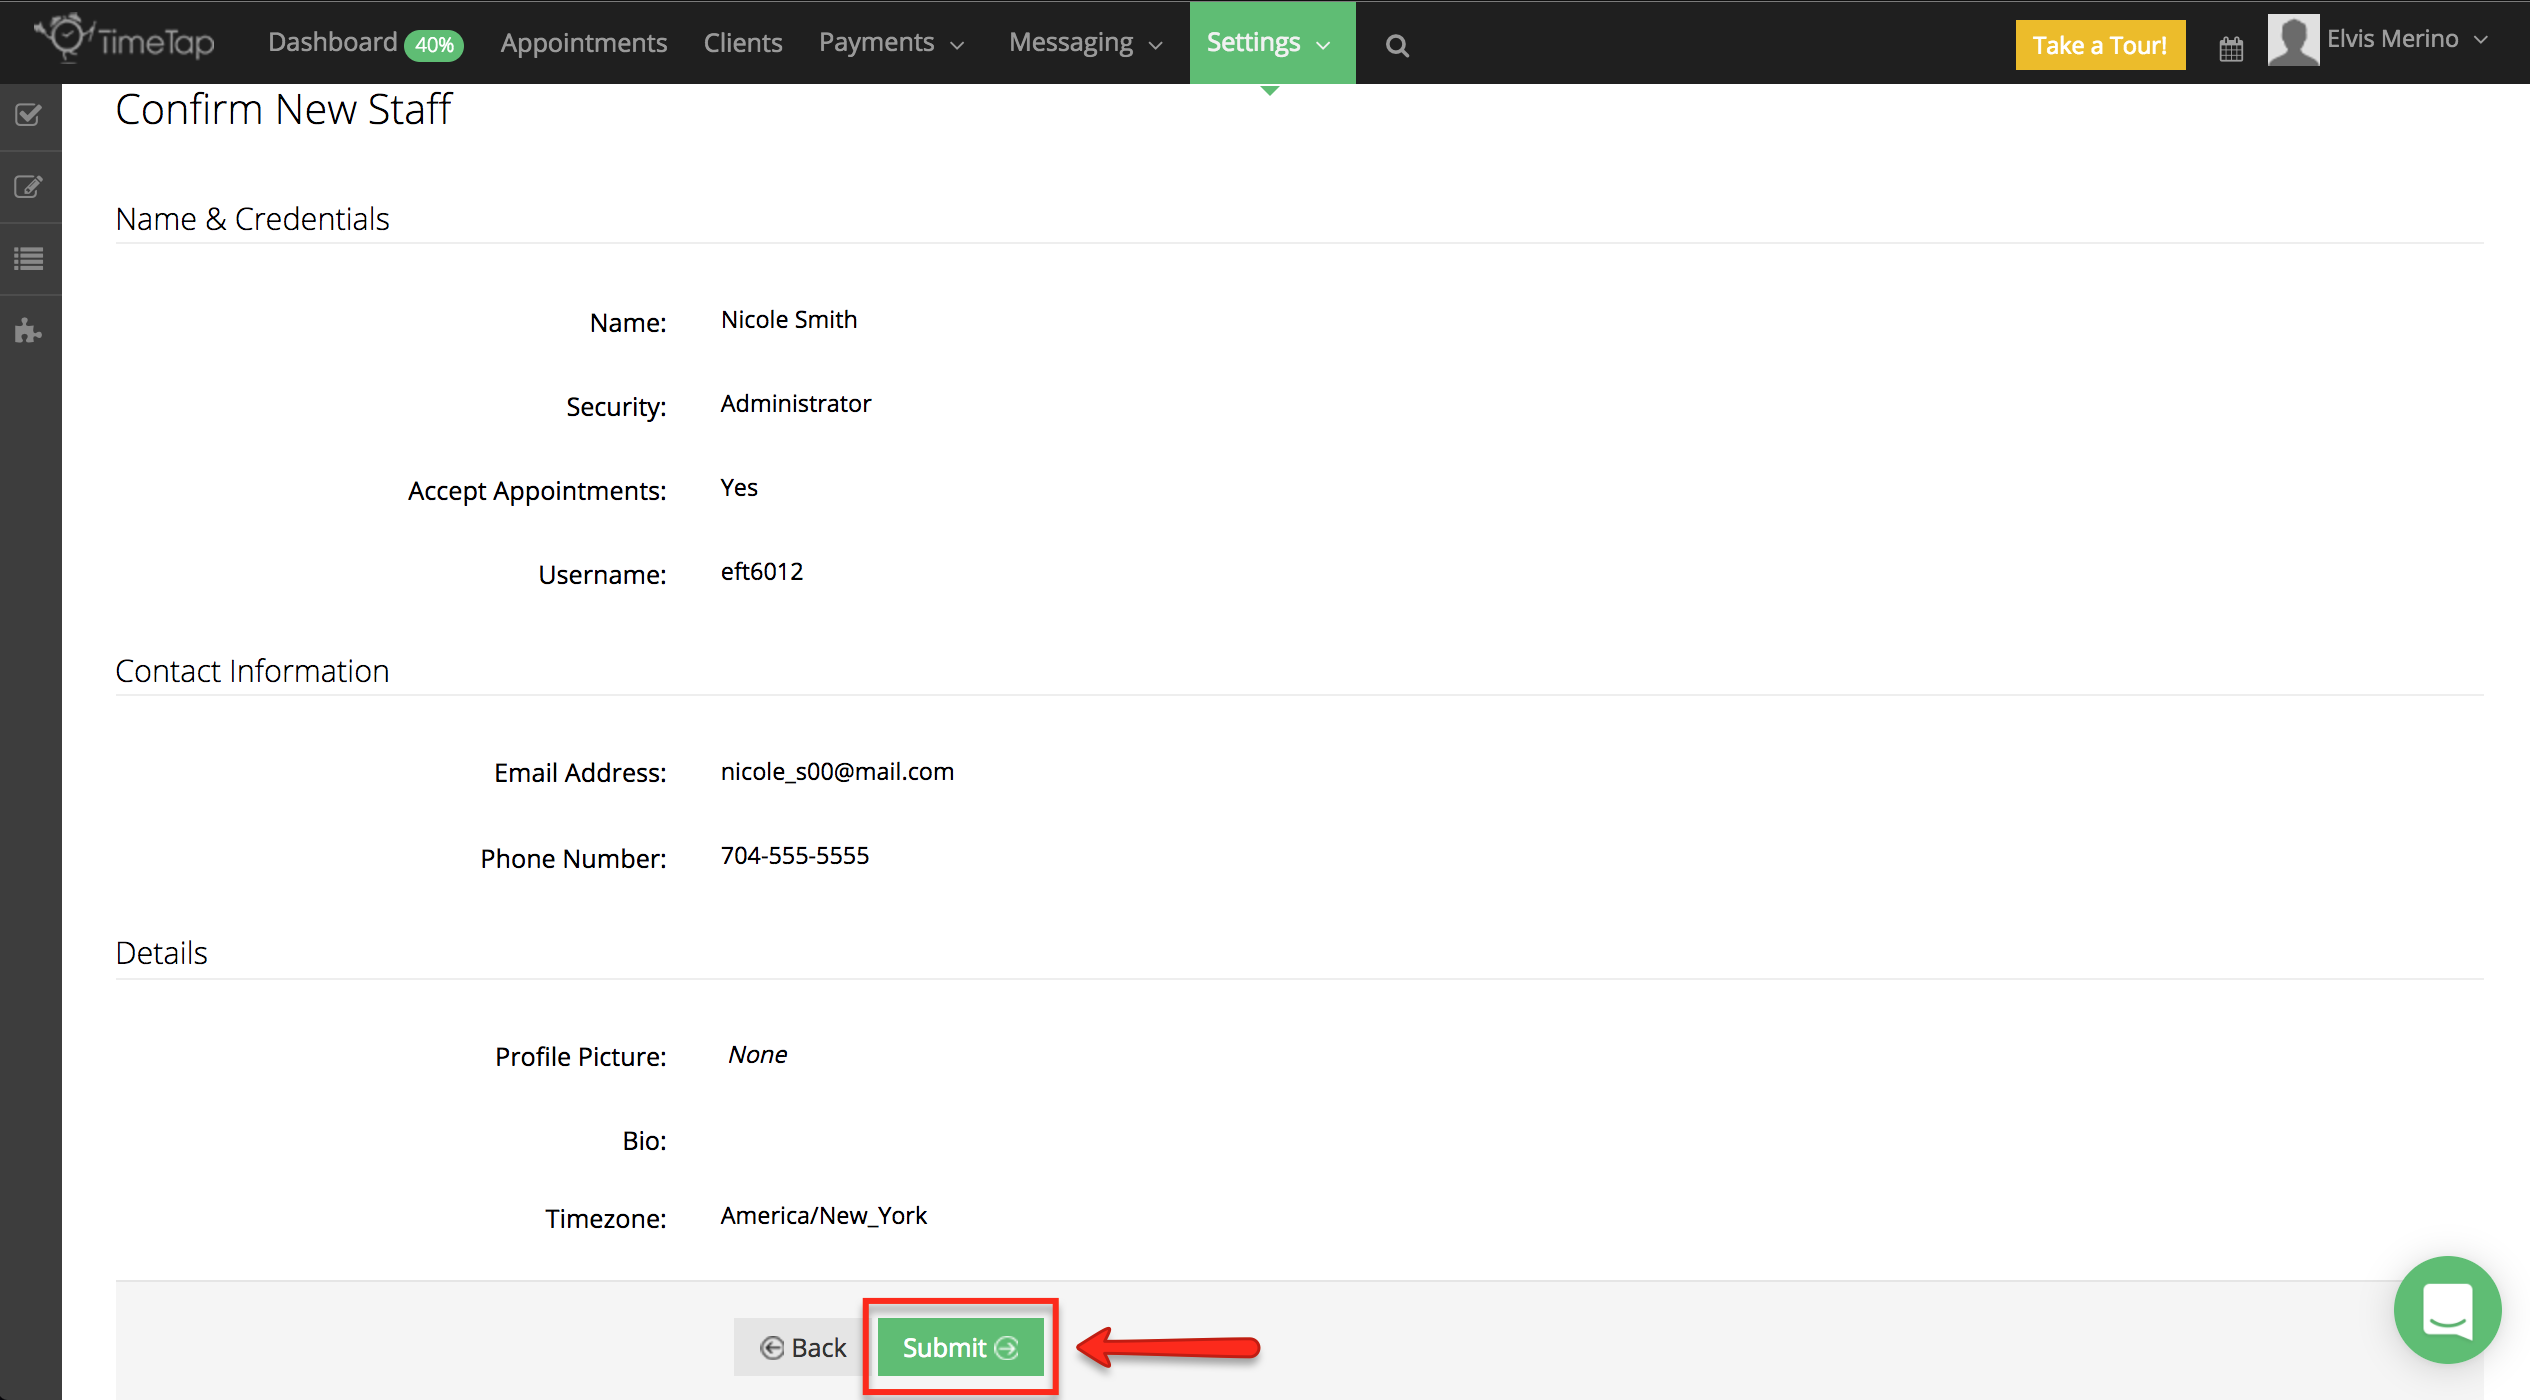
Confirm the staff in the final step:
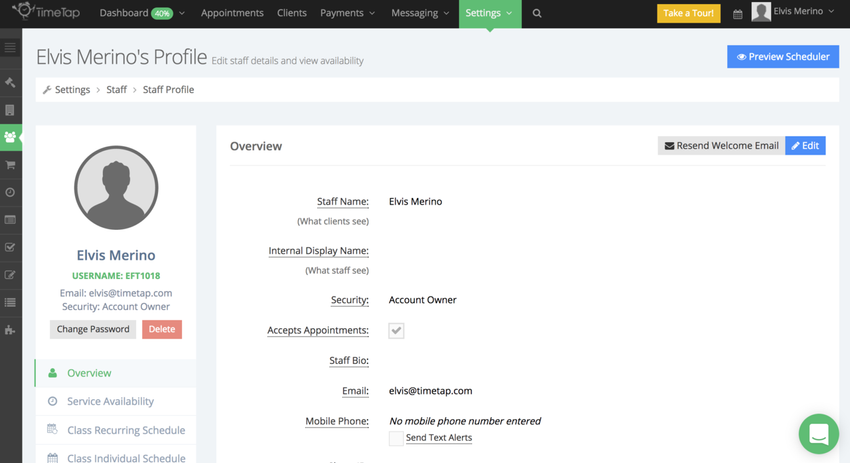
After confirming the staff's information you will be taken to his/her profile, here you'll have the option to add working availability. This will determine when the staff is available to accept appointments.flow, which we have covered in a different page:
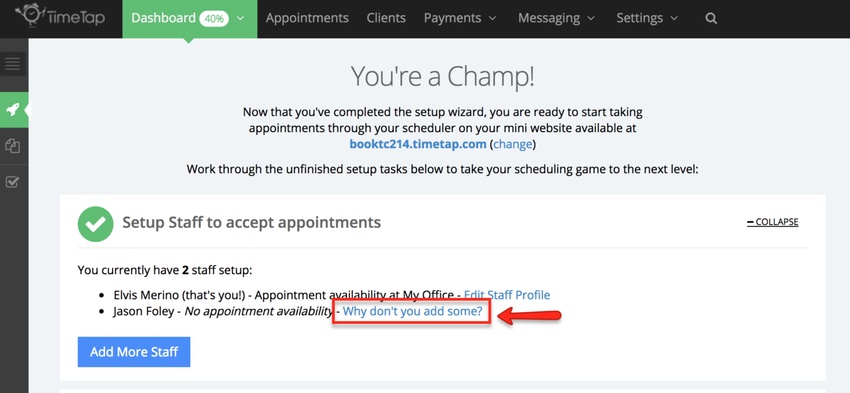
After you've added a new staff you will be prompted to add his/her service availability, but just in case you forgot or decided to this later, you can either go to the staff's profile > Service Availability, or from the Quick Setup Guide, expand the "Setup Staff to accept appointments" section and click the link "Why don't you add some?" next to the staff's name who doesn't have any:
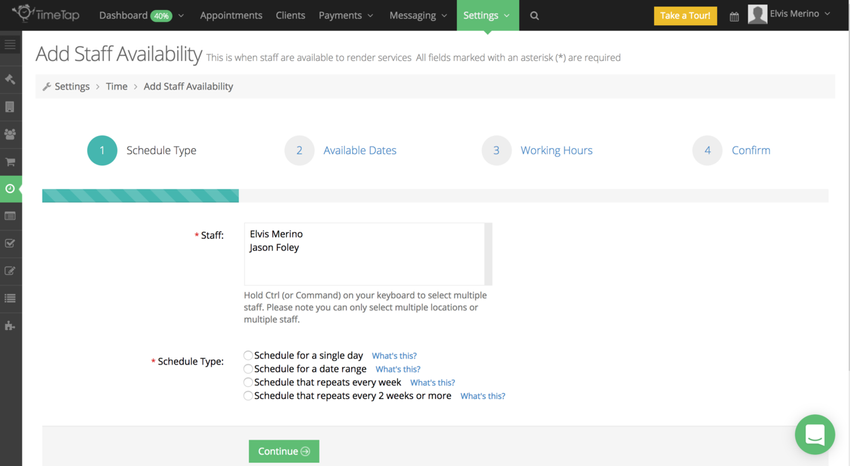
After you click the link you will be redirected to the Add Staff Availability flow:
Lastly, if you need to make changes to a staff's profile you can go to their profile, Settings > Staff > View Details, or you can click the link "Edit Profile" next to their name under the "Setup Staff to accept appointments":
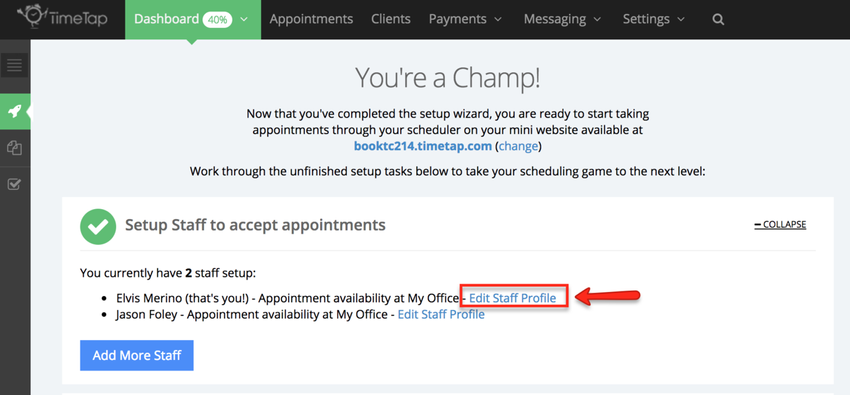
After clicking this link you will be redirected to this staff's profile where you can make the necessary changes: