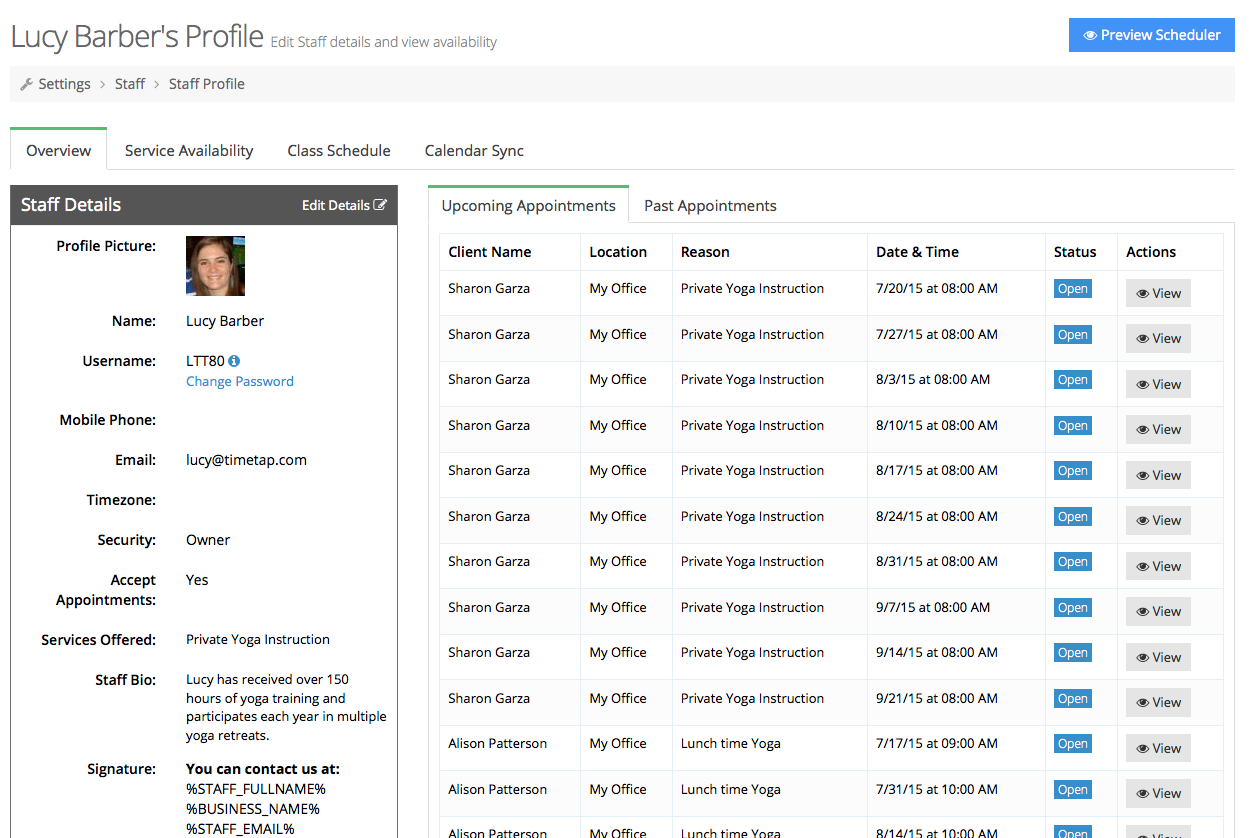
Every staff person on your account has his/her own staff profile. There are 3 tabs on the staff profile: Overview, Availability, and Calendar Sync. On the Overview tab, you can see specific details relating to that staff person like their name, email address, and phone number which may be shared through the Staff Signature of the email templates sent to clients. You'll also see a list of upcoming appointments as well as past appointments.
The Availability tab shows the staff's dates and hours that are available to take appointments. This tab only appears if the staff is set to accept appointments. We talk about how you can customize Staff Availability on another documentation page.
The Calendar Sync tab is available to TimeTap Plus users who are set to accept appointments. It will allow you to run a two way sync with Google Calendar.
On this documentation we will go through:
TIMETAP PLUS FEATURE Staff Private Embed Codes
Before we dive too deeply into those aspects of this documentation, however, I wanted to let you know that if you are on at least TimeTap Plus plan type or higher and have added multiple staff to your account, you may have also added staff who do not accept appointments. As mentioned in some of the points above, staff who do not accept appointments have a slightly different looking profile than staff that do accept appointments.
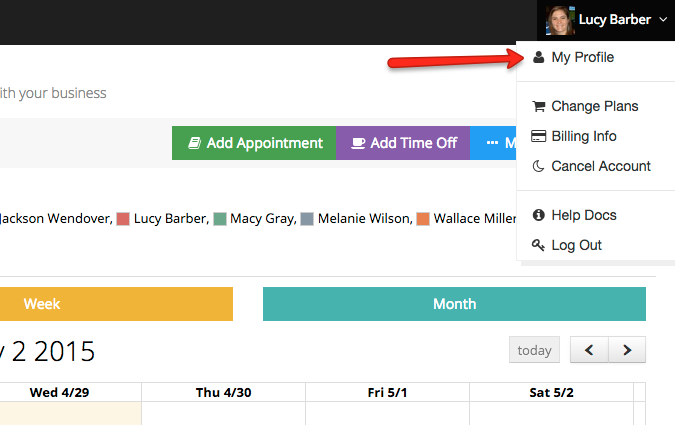
To find your specific staff profile, go to the top right of the application where you see your staff name listed and click the option to go to "My Profile":
This will take you to your specific staff profile screen view. If you accept appointments, your staff profile will look like this:
From your staff profile you can:
- Edit your staff details
- View your upcoming and past appointments
- Add availability for taking appointments
- Sync your Google Calendar with your TimeTap account
If you are an office assistant or have a similar role at a business and thus do not accept appointments, your staff profile will look like this:
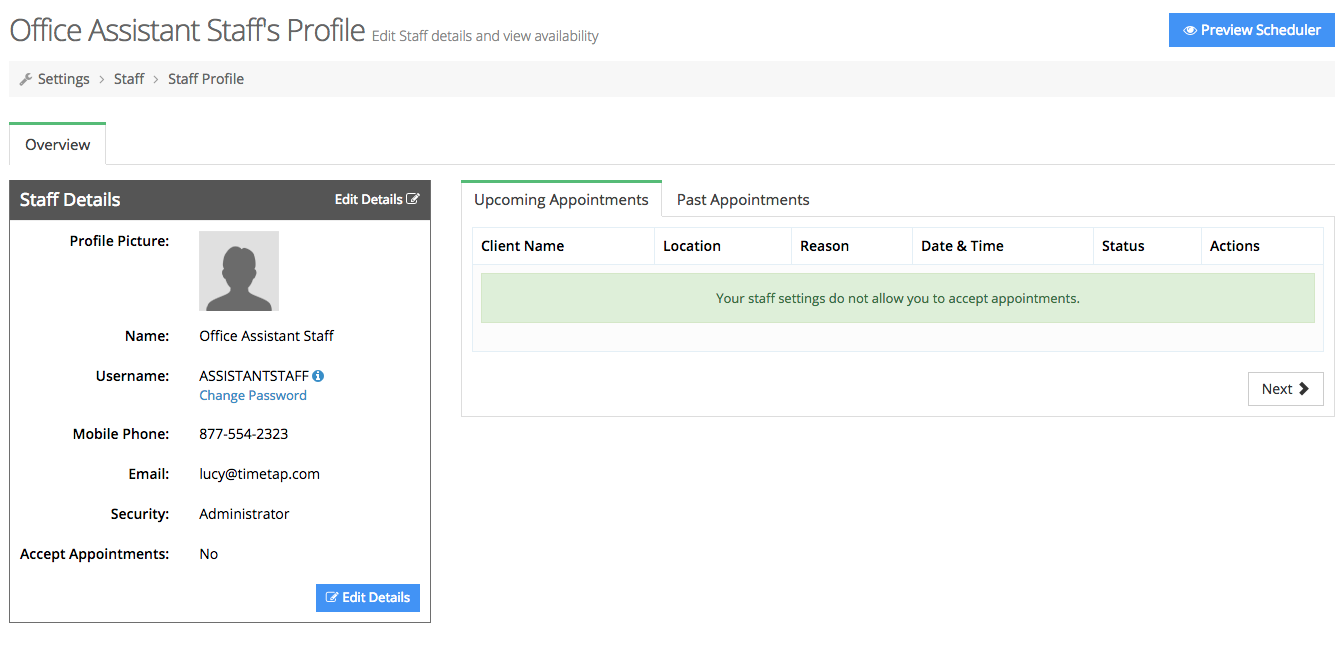
You'll notice that in the profile for staff who do not accept appointments, they will not have several options underneath the Staff Details (as those options are directly related to appointments) nor will they have the ability to add availability (again since you would only need to do this if you were accepting appointments) or sync with Google Calendar.
Your staff profile has several aspects to it:
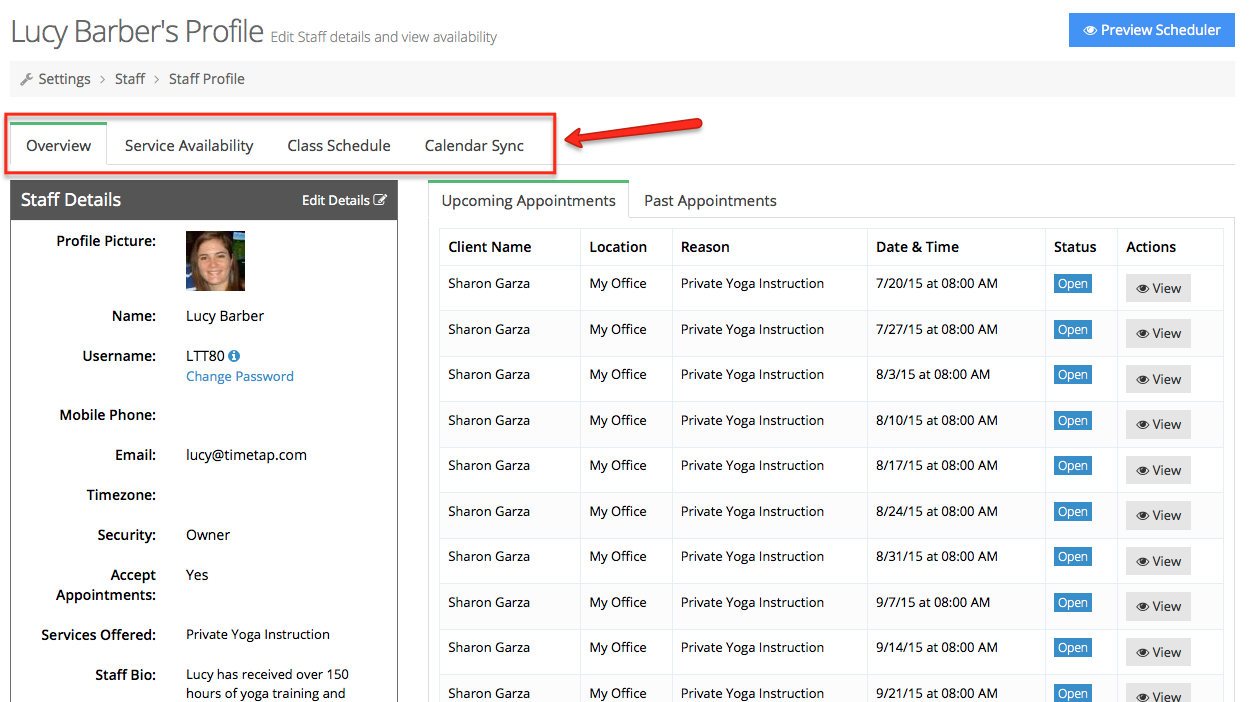
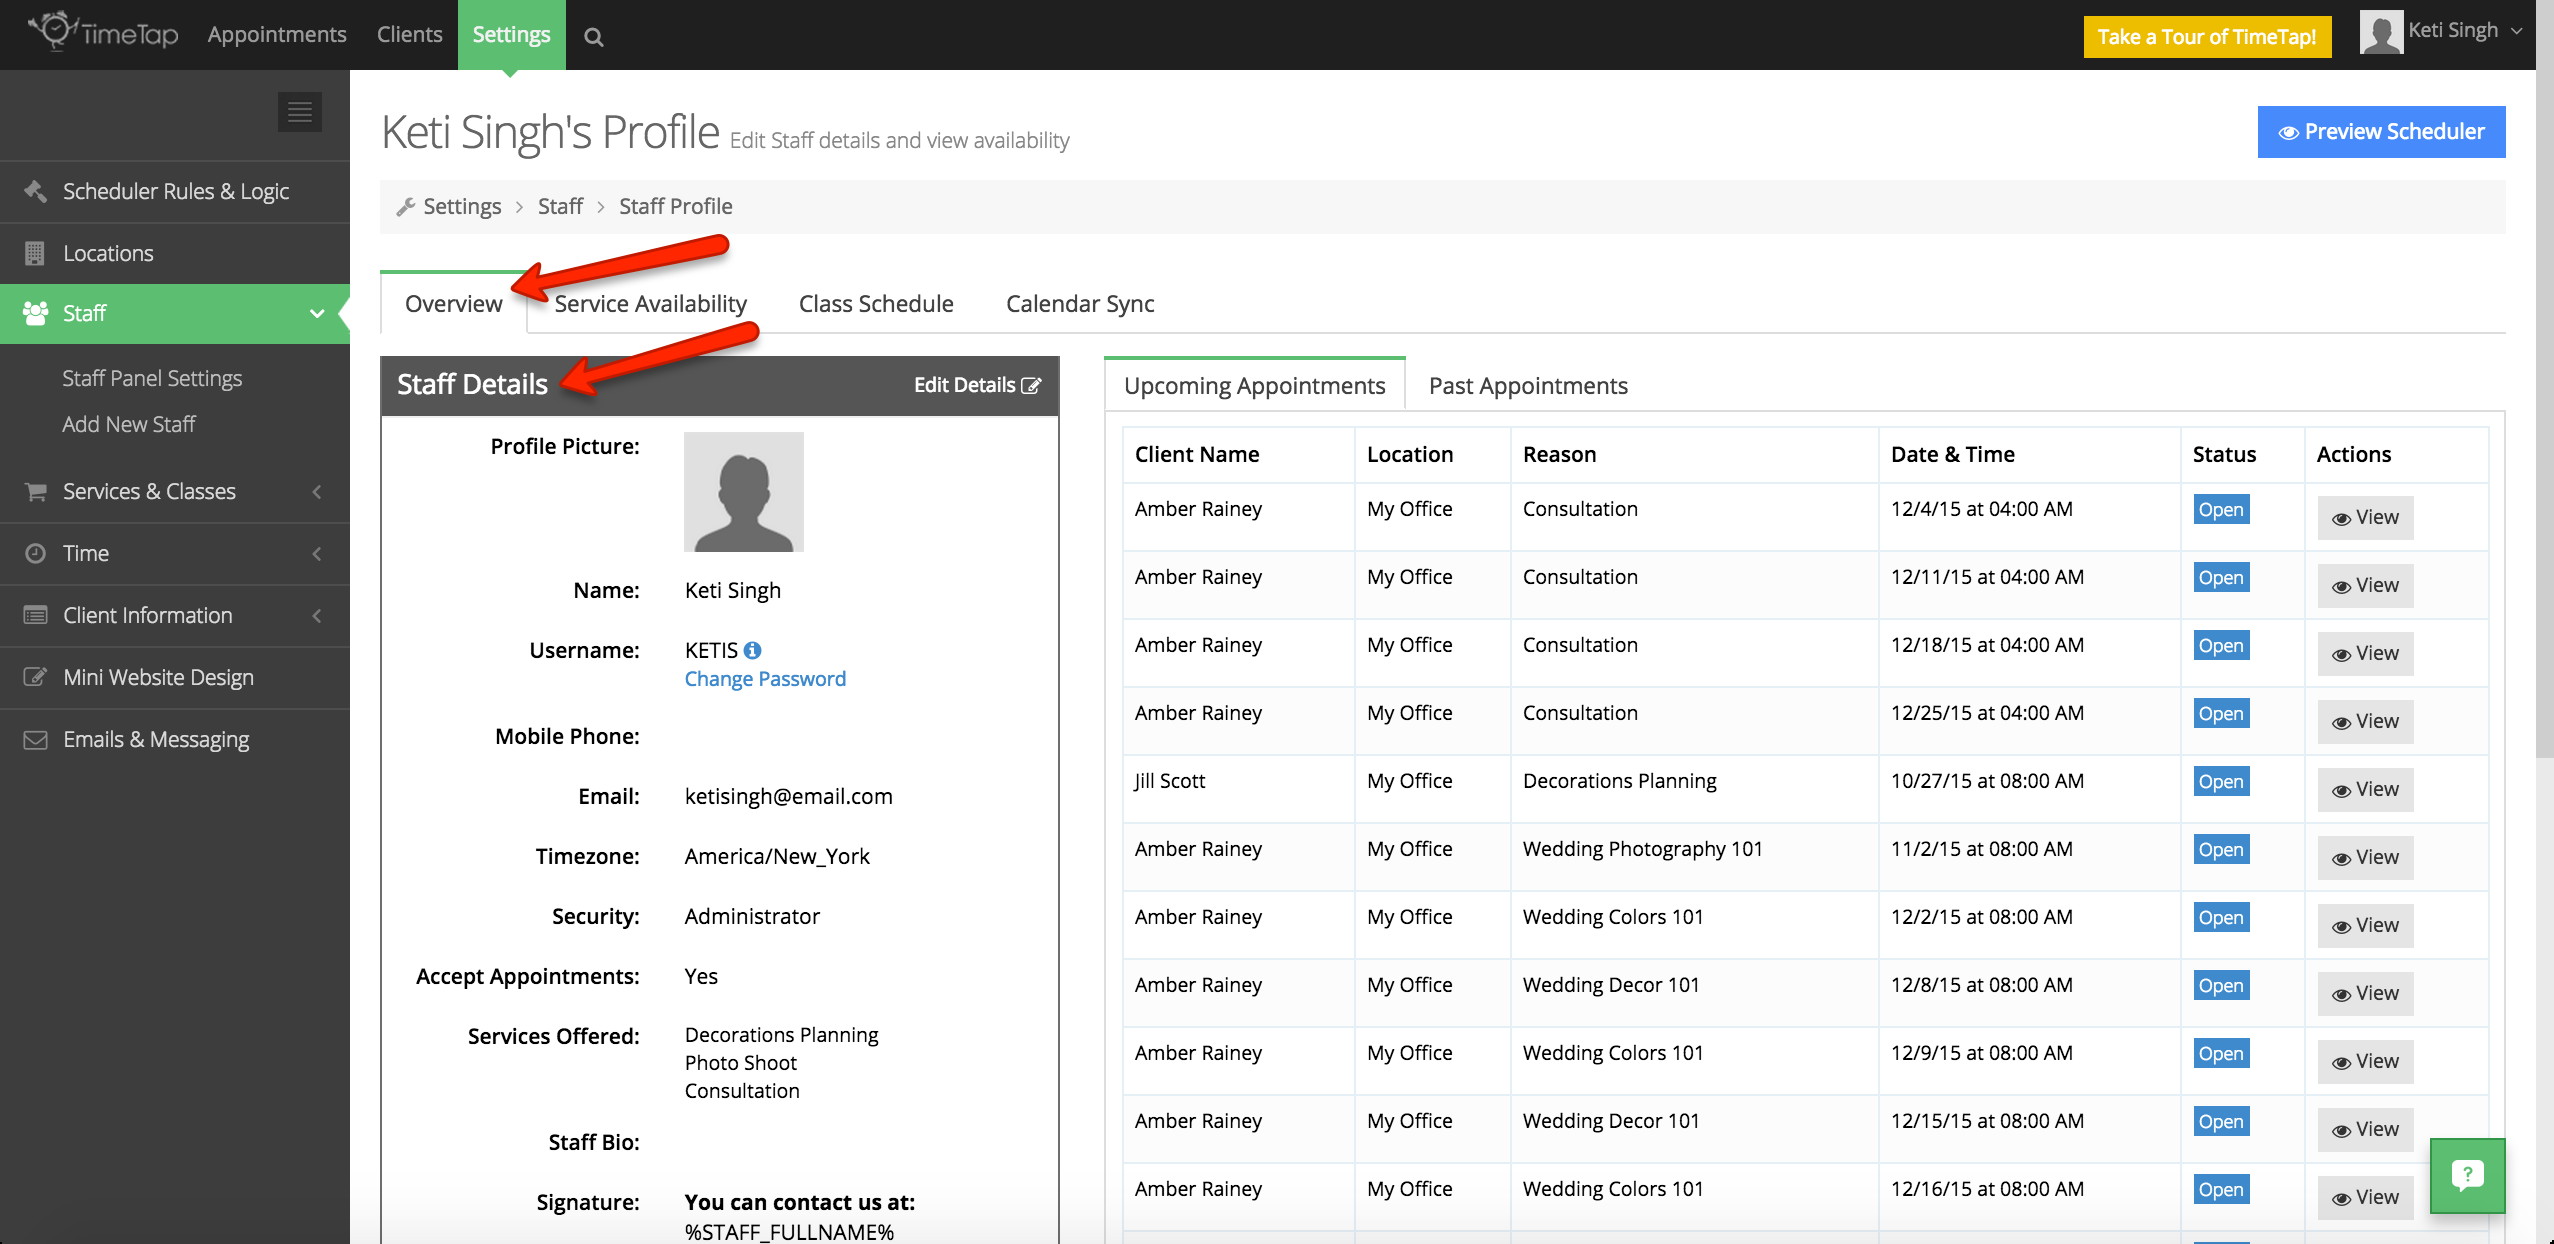
In your staff profile you'll see three tabs: Overview, Service Availability, Class Schedule, & Calendar Sync.
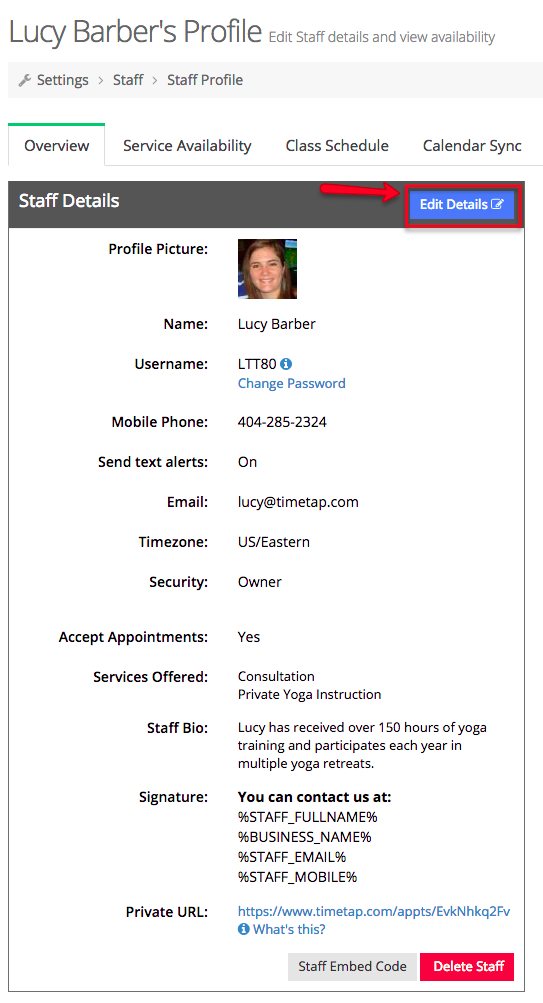
In your Overview tab, you'll see your Staff Details as well as your Upcoming & Past Appointments tables.
As mentioned in the intro to this documentation, we talk about viewing and managing your hours of availability for services in a separate piece of documentation. Here we will just say that to find it, go to the "Service Availability" tab in your Staff Profile.
Next is the "Class Schedule" tab where you'll find all the classes that have been added to the schedule for the staff person's profile you're currently looking at. We talk about how to view & manage your staff's class schedule on our documentation here.
In your Calendar Sync tab, you'll be able to sync your TimeTap account with your Google Calendar.
As with every page in the Settings section, there is also the "Preview Scheduler" button in the top right. You can click on this to be directed to your mini website and give your scheduler a test drive. This is useful after making changes to your availability to test out and make sure that everything looks proper.
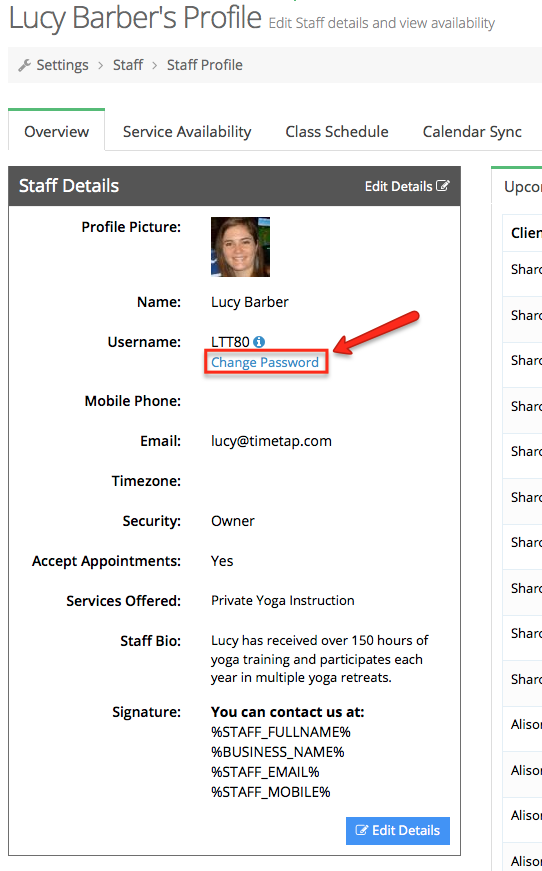
You can edit every part of your Staff Profile except for your username which you use to login to TimeTap. To edit your Staff Details, simply click the Edit Details button from the Staff Details section of your staff profile:
Once you click that button, you'll see a window pop up in your screen with three tabs up top: Basic Info, Services, & Description. Under the Basic Info tab, you'll be able to change the Staff Name, the avatar or profile picture associated with the staff, your mobile number, whether you want text alerts (if you are a TimeTap Plus user), email address, which time zone the staff person is in, as well as whether or not the staff accepts appointments:
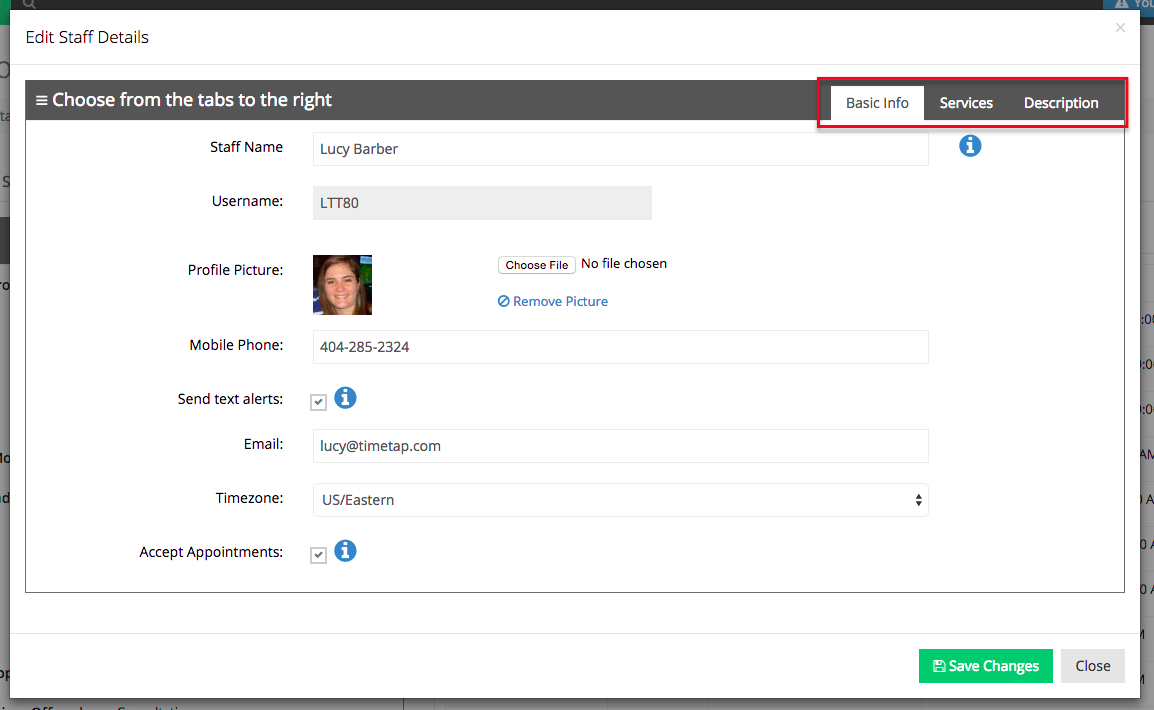
Please note: Changing the name as displayed in your Staff Details will change the name display in all the places within the booking process where clients see the staff name.
Under the "Services" tab you can check off which services any staff members who are marked as accepting appointments can offer:
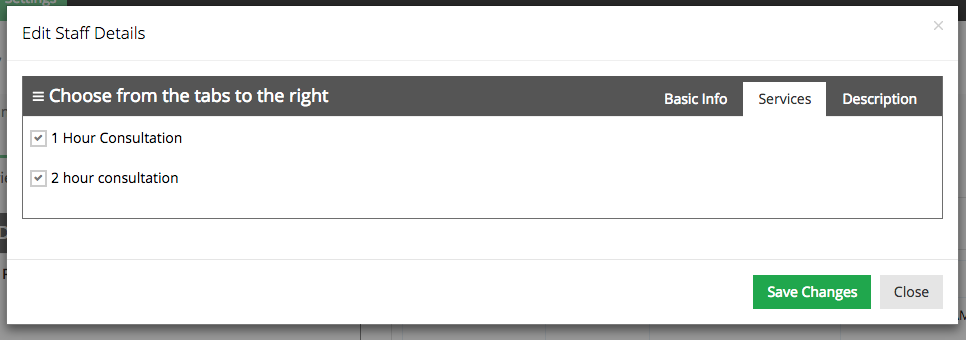
Please note: This tab will only be available if the staff person can accept appointments.
If you have multiple locations on your account and are in the profile for a location super user or user, you will also see a tab called "Locations" between Services & Description. This will allow you to say which locations the staff has access to for setting up hours of availability for services, a schedule for a class, or appointments on their schedule.
Under the "Description" tab you can change the Staff Signature which appears in all the emails that are sent out for that specific staff's appointments and you can update the Staff Bio which displays beneath the staff's name in the client scheduling flow:
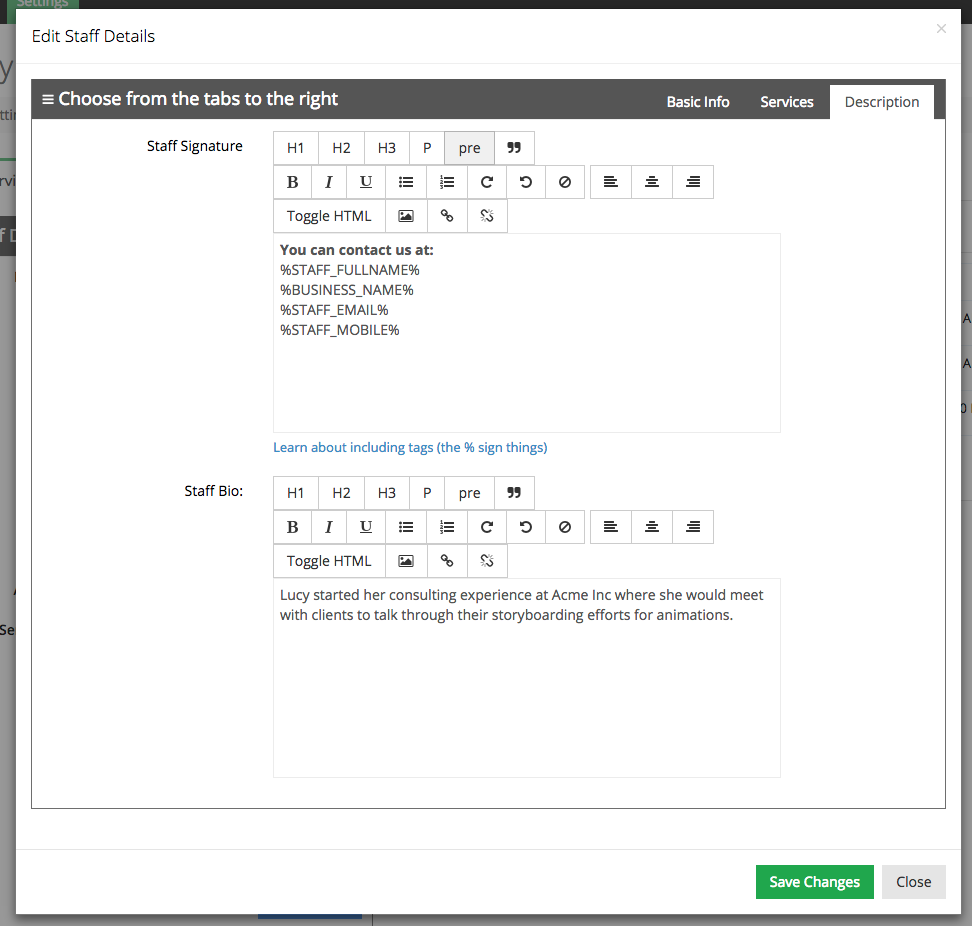
Please note: Your name, phone number, & email address are, by default, included in the staff signature of the emails that are sent to your clients. You can also apply fields from within TimeTap to your staff signature by using tags.
Once you have finished changing your profile details, just press "Save Changes" and your changes will be committed.
Changing your Password
To change the password you use to login to your account, simply go to your Staff Profile and on the Staff Details section select the "Change Password" link underneath your Username:
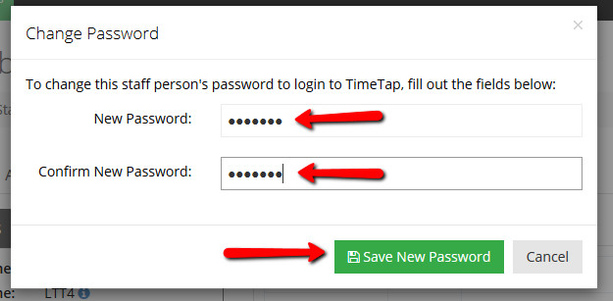
Once you click that link, you will get a small window that appears over your staff profile where you can type in a new password, confirm the password you just typed, and press "Save New Password":
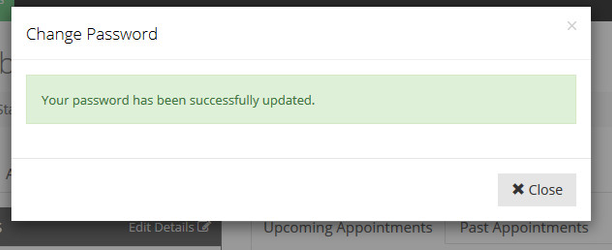
Once you press "Save New Password" you will get a confirmation message. You'll then start using that new password you created the next time you login to the application:
Our Staff Private URL & Embed Code features allow your staff members to be seen only by their clients for their particular services or classes. For instance, if you have a wedding planning business and have staff members who handle client consultations, decorations planning, and photography services, each staff member would be able to use their Staff Private URLs to show their clients the services that they offer. Clients would be unable to see the other existing staff members of your business by scheduling appointments through a staff member's private URL.
The Staff Private URL can be used on your website for a staff member's profile page, underneath a staff member's photo, or any other way that you can choose as long as a particular staff member is given focus.
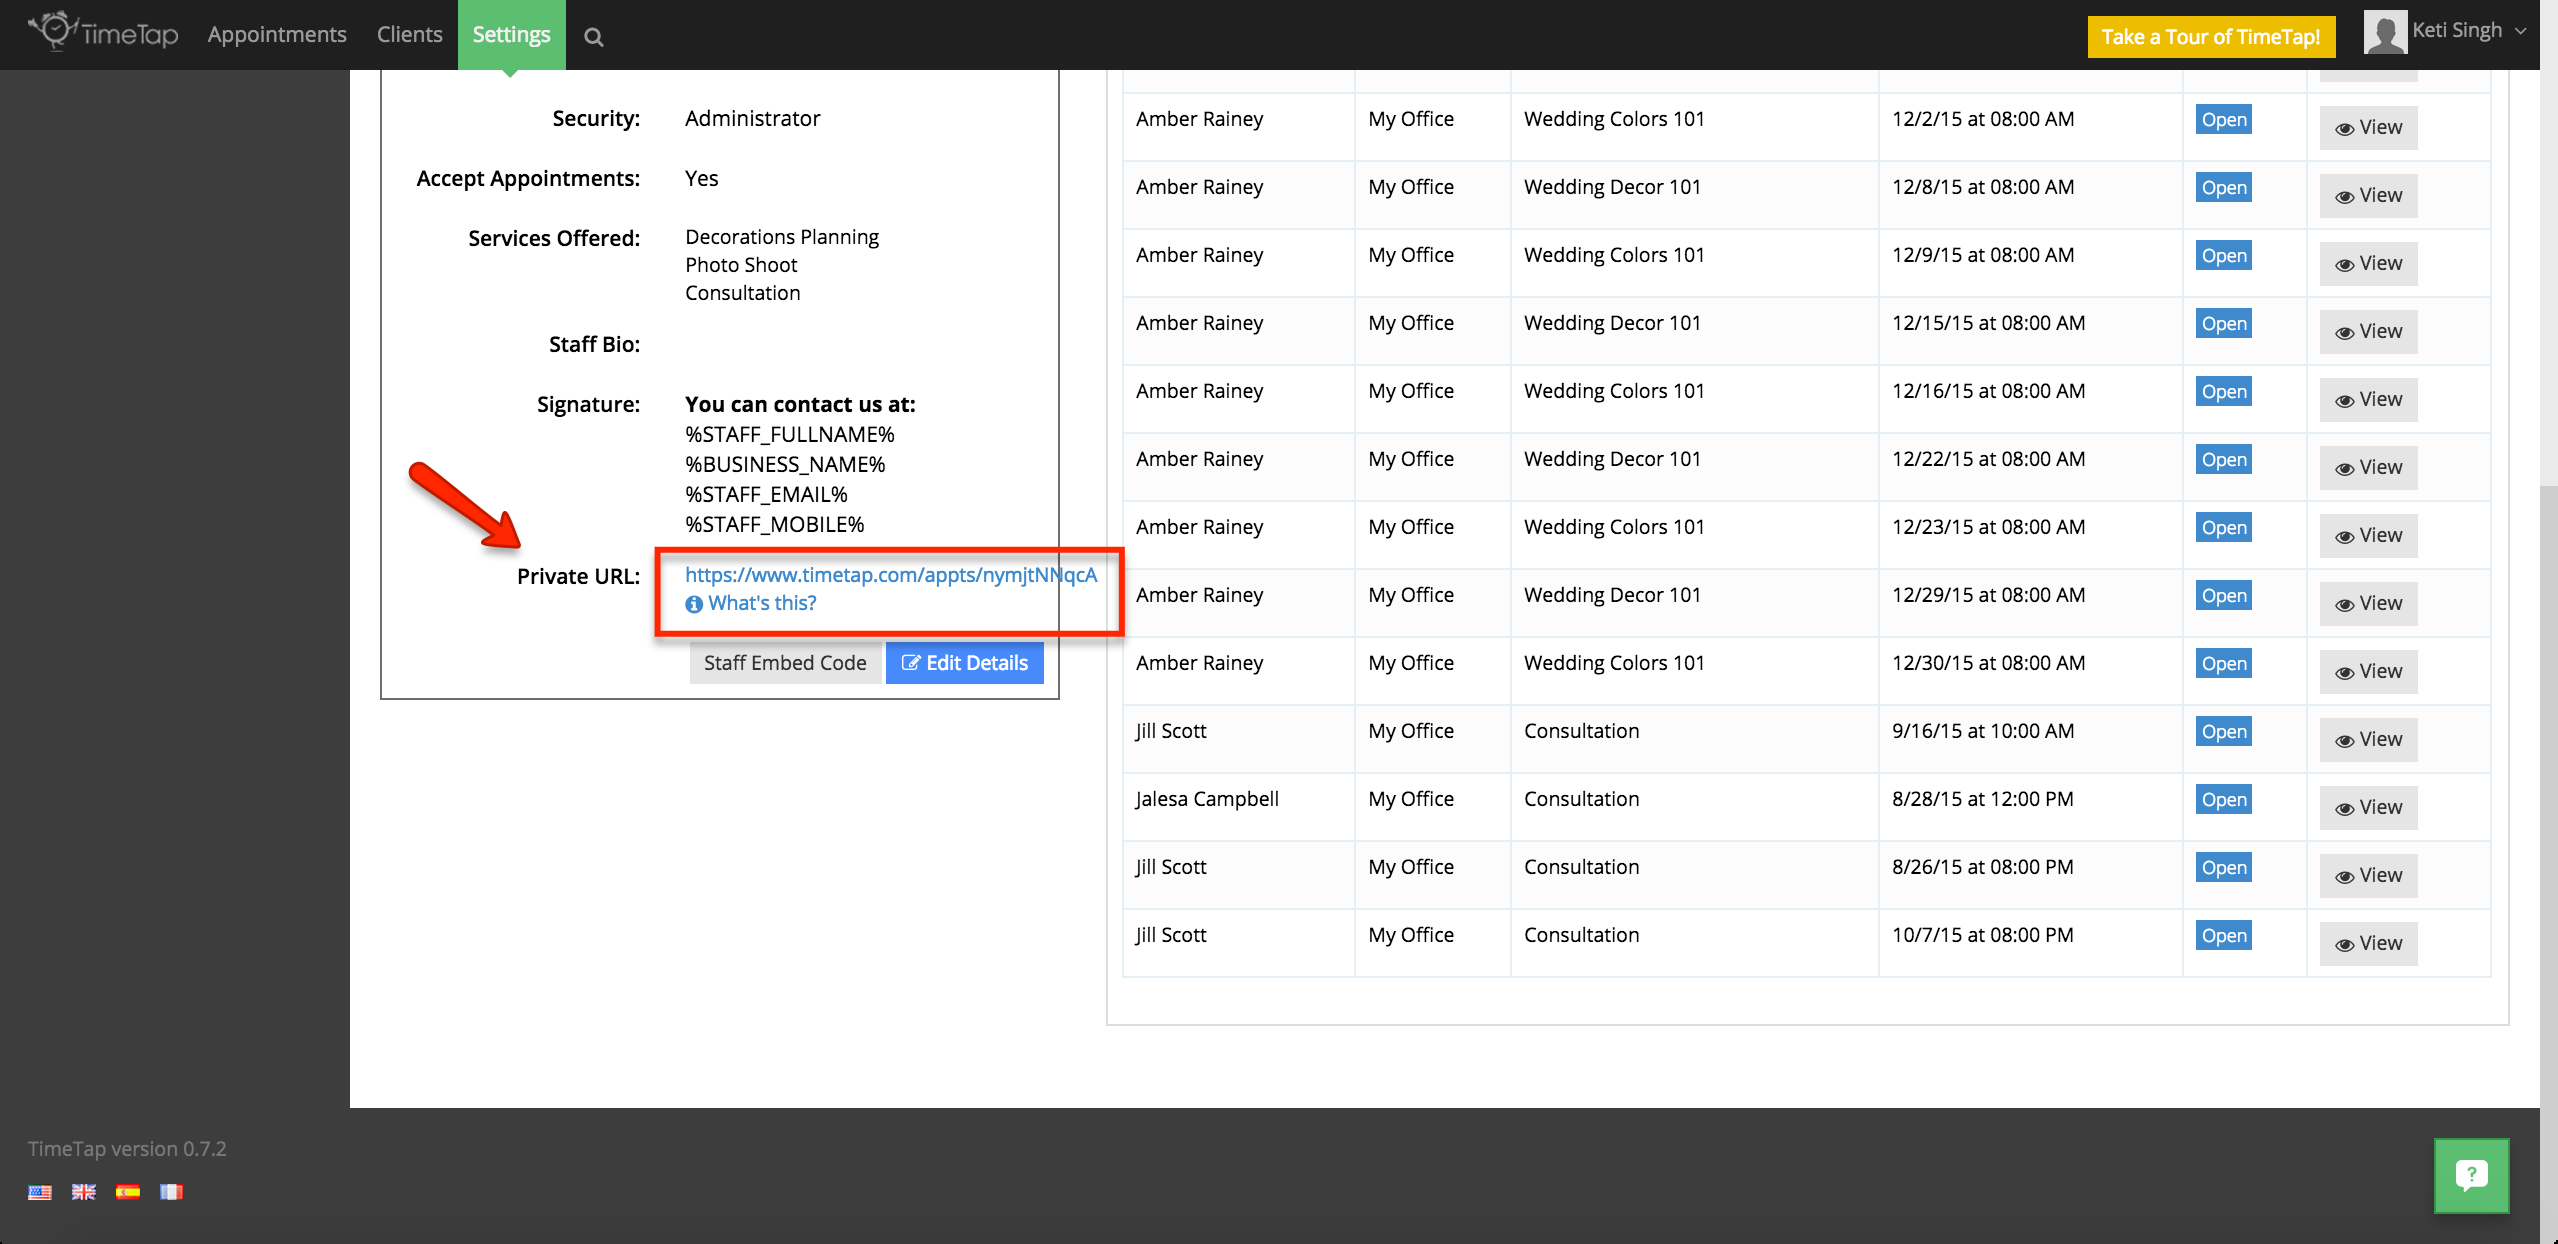
To find a staff member's private URL, make sure you are under the Staff Profile Overview tab and from there you'll see the Staff Details table on the left hand side of the screen.
Within the Staff Details table you'll find the label "Private URL", and to the left of this label is the URL that your clients can be directed to if you would only like for them to see this staff member as bookable.
On your website, you could direct clients to the Private URL for one of your staff members so that they are specifically booking with him or her. If you click on this link within Back Office, you will be taken to the web scheduler where your clients will be able to schedule an appointment with this staff member. Once your clients have chosen a service, time, and entered in their information, they can click "Save" and their appointment will be set.
Web Scheduler Through the Staff Private URL |
|---|
| There are no images attached to this page. |
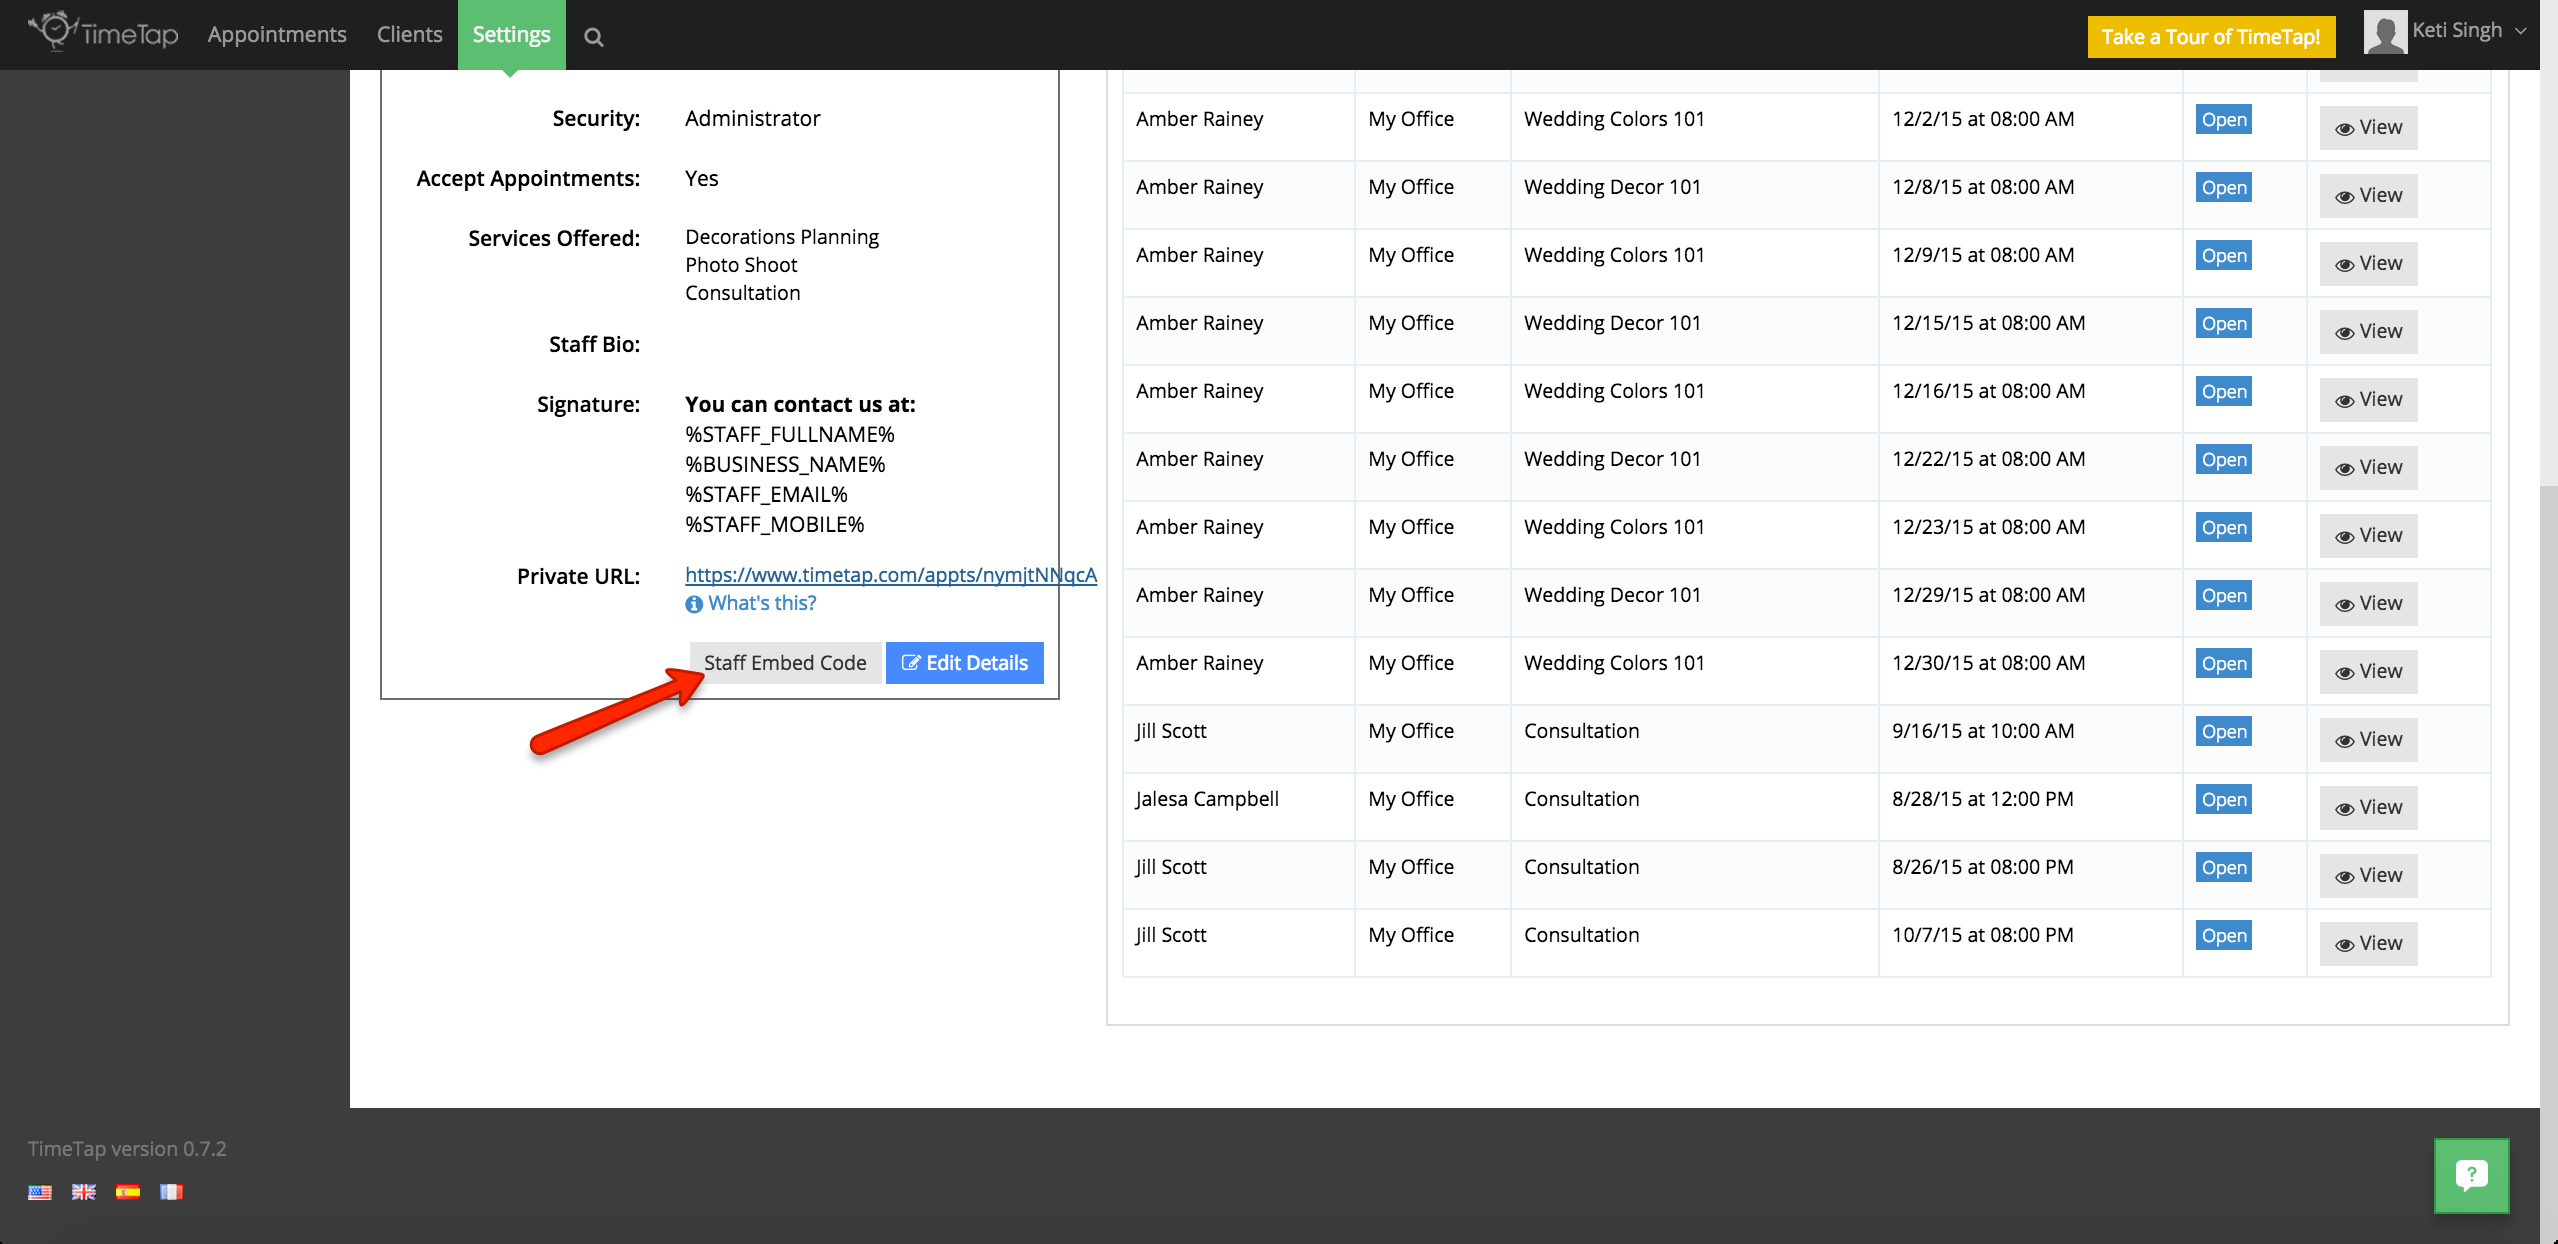
To embed a web scheduler that will allow clients to specifically book with a certain staff member, make sure you are under the Staff Profile Overview tab and look within the Staff Details table.
Underneath the private URL for your staff member, you will see the "Staff Embed Code" button which allows you to embed a web scheduler specifically for your staff member on your website, their profile page, or wherever your staff member is given focus.
By clicking this button, you will be able to copy the staff embed code to your clipboard and paste it on a webpage.
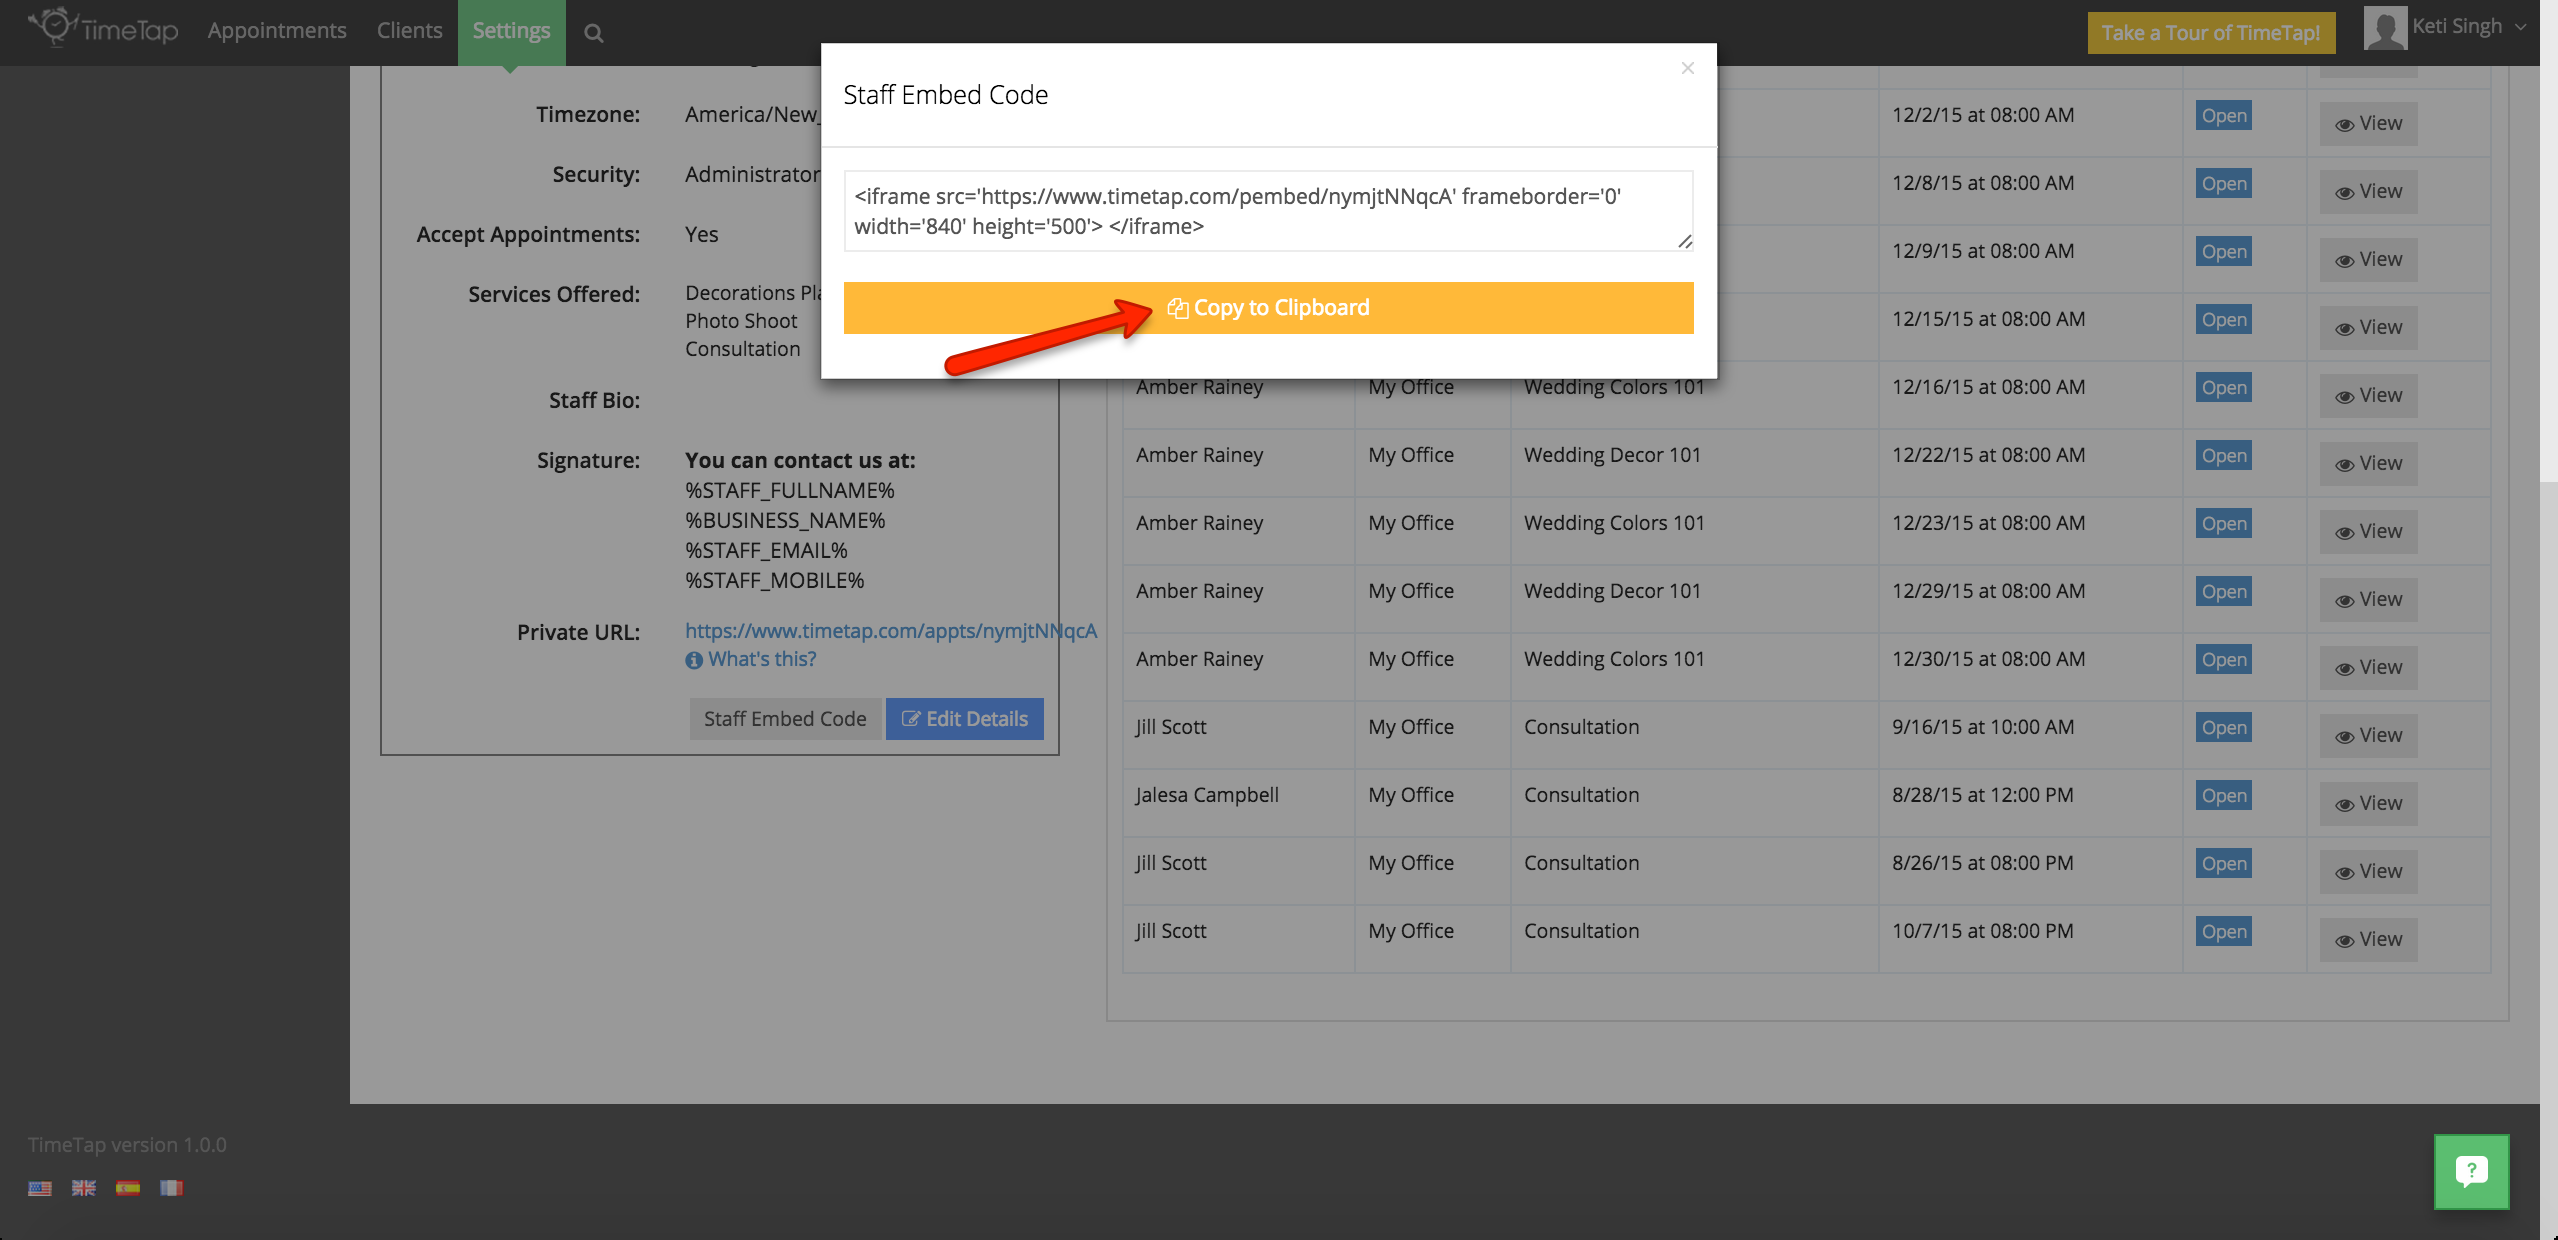
This will enable your staff members' clients to book directly with them through their web scheduler while only showing information for the classes or services they offer.
On the right hand side of your Staff Profile Overview tab, you'll see your Upcoming & Past Appointments table:
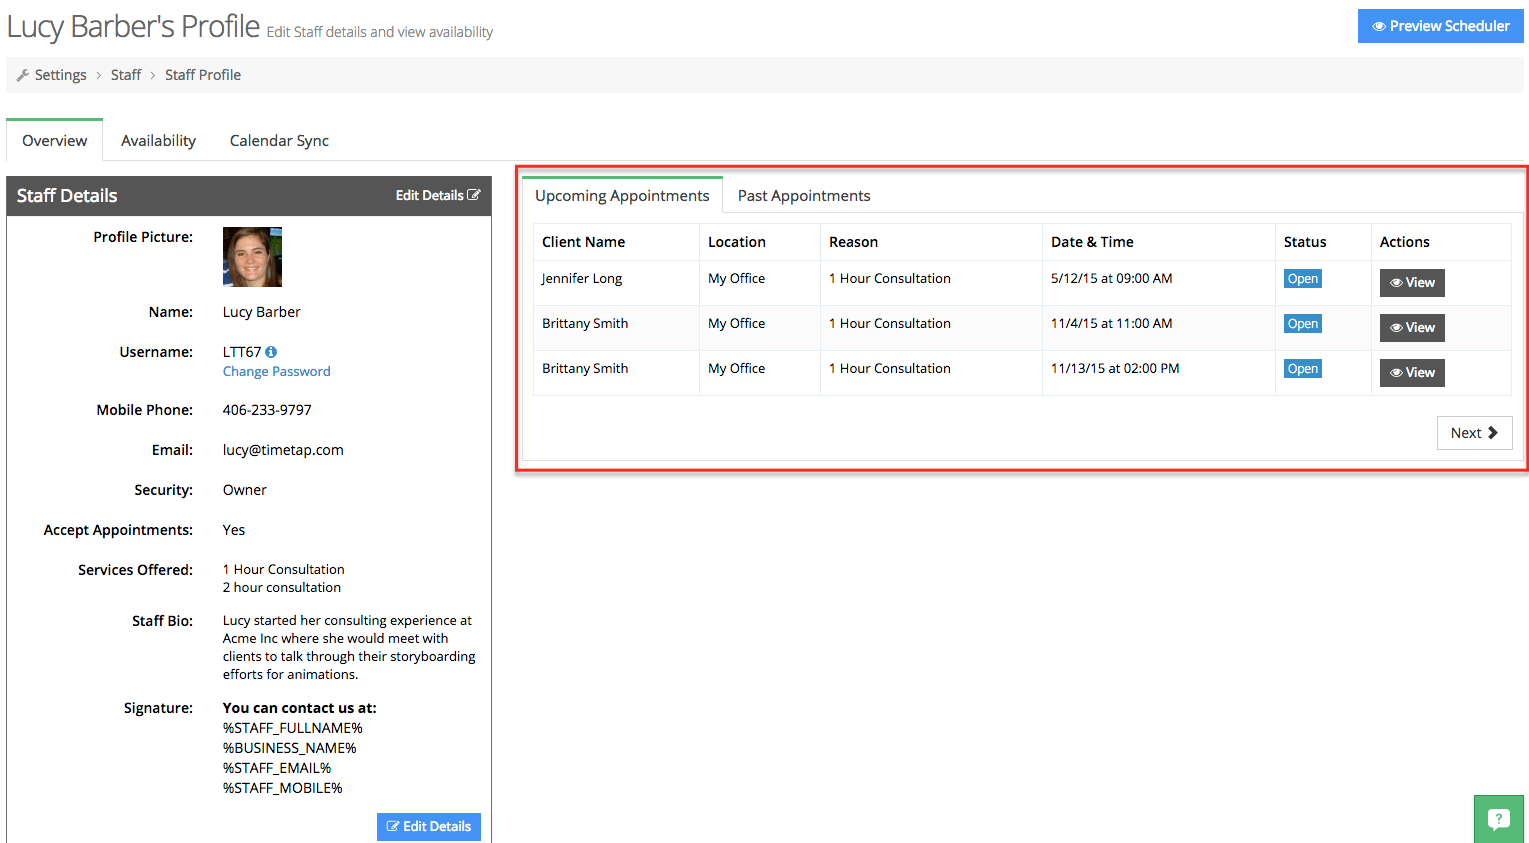
The appointments that will display in your Upcoming Appointments page are all of your appointments in Open status and Checked In status appointments. All of the appointments that display in your Past Appointments list are any appointments that have been marked as Completed, No Show, or Cancelled.