As the adage goes, a first impression can make or break a relationship. While the greeting message on your TimeTap scheduler may not be the first interaction your clients have with you or your business, it will be the first interaction they have with your online scheduling system. For some clients, it will be their first time making an appointment online at all. Your welcome message is a good place to set expectations and convince clients that this is going to be a quick & easy process.
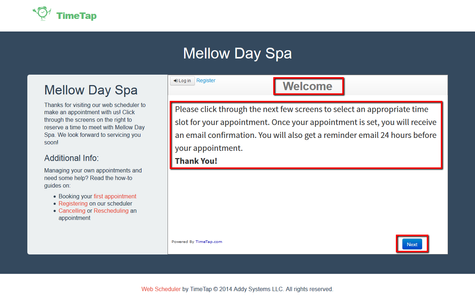
To give you a sense of where the greeting message is, if you visit your Mini Website, the greeting is the first thing that loads in the scheduler.
The portions of the image to the right that are highlighted by the red boxes will show you what text you can customize from the Greeting section under Scheduler Rules & Logic.
In this documentation, we'll go through how to:
- Customize the different elements highlighted in red from the mini website on the right
- Best practices in writing a Greeting & Configuration message
Once you have finished reading this documentation page, you should feel comfortable making changes to the front page of your scheduler through the Greeting section.
As always, if you have any questions that aren't answered here, please contact our support team and we'd be happy to assist.

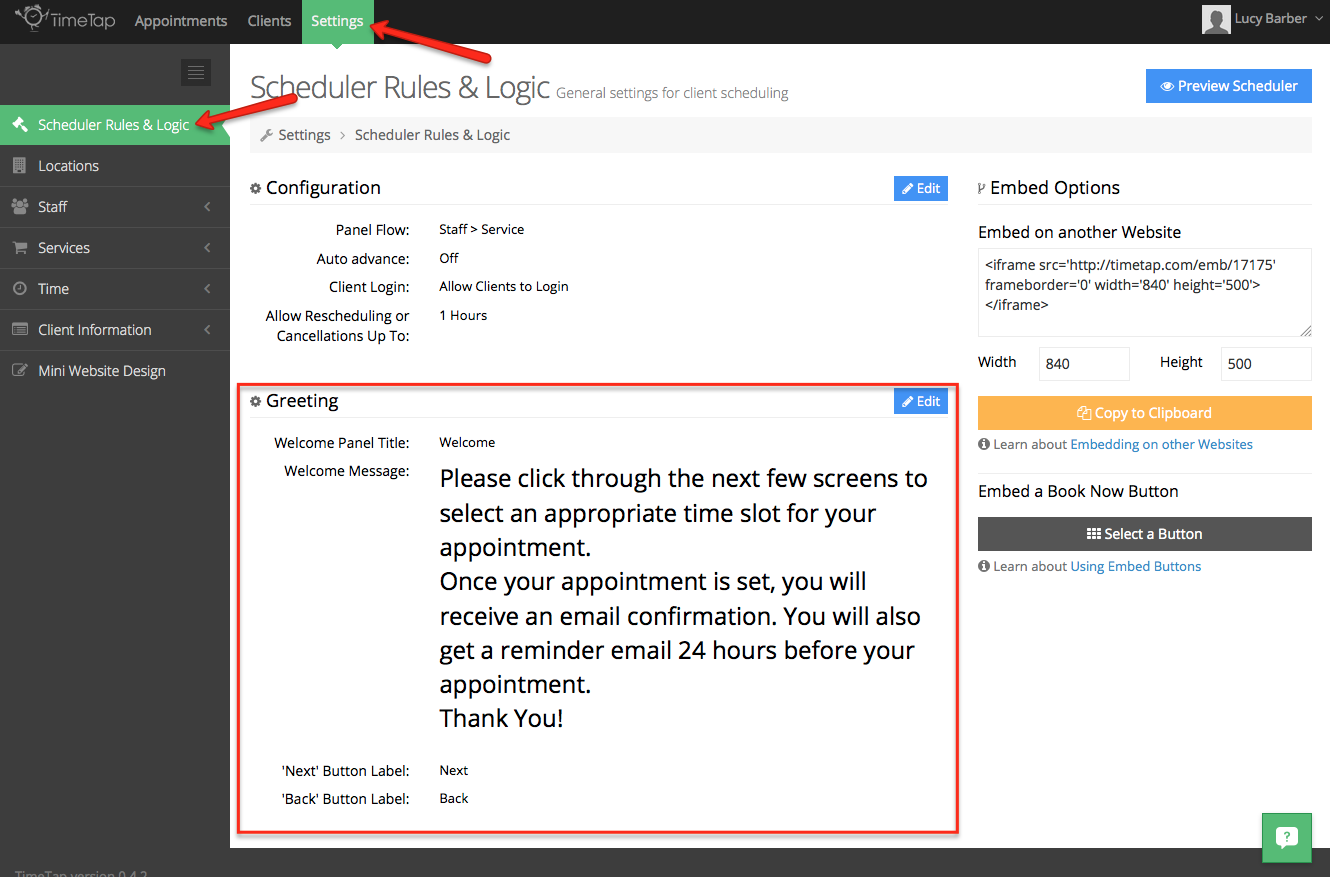
The "Greeting" section is found on the left hand side of your Scheduler Rules & Logic page underneath the Settings menu:

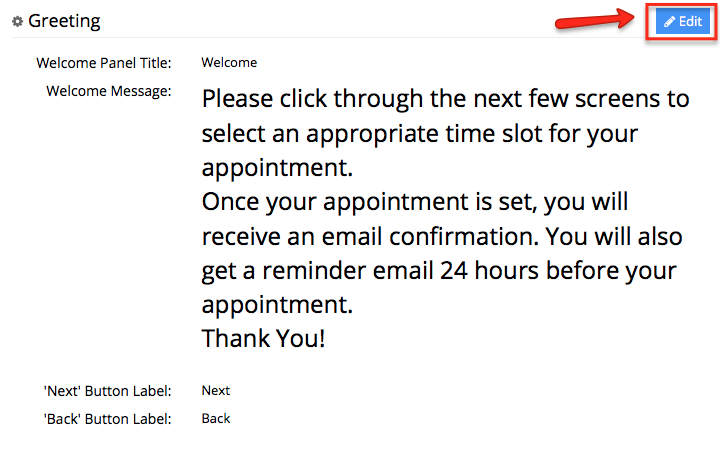
To customize any of the text you see in this section, click the blue "Edit" button in the top right corner of the Greeting area:

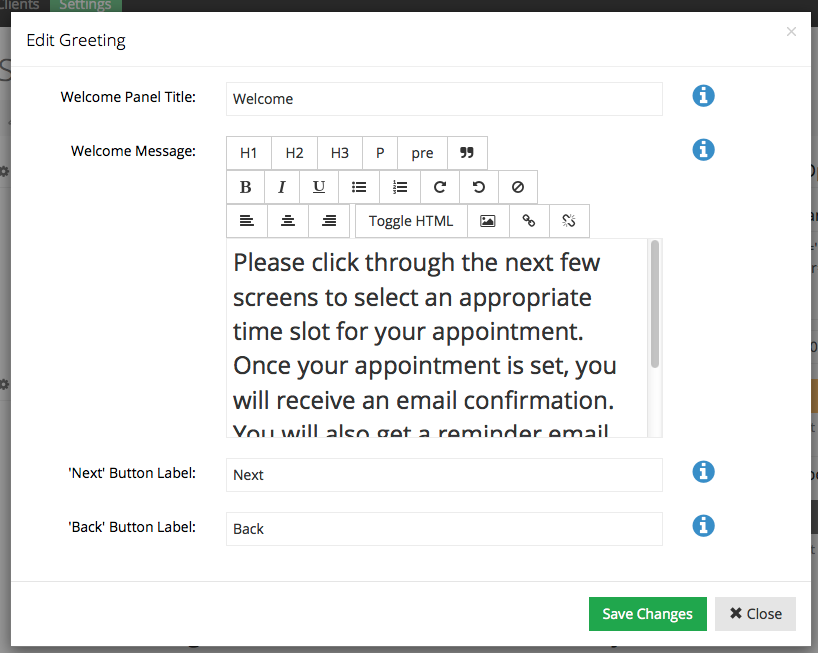
Clicking Edit will pull up the "Edit Greeting" window where you can change the Welcome Panel Title, the Welcome Message, and the Next & Back button labels:
Welcome Panel Title:
Out of the box your Welcome Panel Title will be labeled "Welcome". Some people prefer to change this to something more descriptive which you can do from the Edit Greeting window. You can have it say "Welcome to our Scheduler" or "Book an Appointment with Us" or "Our Scheduling Portal". Whatever you think will most familiarize your clients with the idea that this is the scheduler they can use to book with you, enter that as the header as it will likely be the first things clients see when they look at your scheduler.
Welcome Message:
By default, the welcome message will read "Please click through the next few screens to select an appropriate time slot for your appointment. Once your appointment is set, you will receive an email confirmation. You will also get a reminder email 24 hours before your appointment.
Thank You!"
This gives clients a good idea of what is coming as they click through the next few screens to secure an appointment, but it feels very canned and may not "sound" like the language your business or your brand uses. We have a few best practices that you should consider when writing your Welcome Message, and you can edit it at any time from this Edit Greeting window.
Next & Back Button labels
The client scheduling process is kept very simple so that clients only ever have one focus on any page that they are on while they're securing their appointment. The Next & Back buttons guide the client through the scheduling process. The labels "Next" and "Back" work for most folks, but if you would rather them read as something else (maybe you prefer Pirate's lingo or something: "Next Matey" & "Back, Aaargh!") you can type over the default labels and replace them with your own style.
Once you finish making the changes you want to in the Edit Greeting window, you can click the green "Save Changes" button at the bottom to commit your changes. If you click the blue Preview Scheduler button, you can see the changes you made to your Greeting take place immediately.
As mentioned above, your welcome message will be many of your clients' first interaction with your online scheduling system. You can use the message to reduce anxiety and set expectations. Here are a few quick tips for your welcome message:
- Keep it short: It's good advice for any writing, I know, but especially if you are promoting online scheduling as something that's quick and easy for your clients to do, don't weigh them down with a long intro that they have to read
- Don't be redundant: If you are using the Mini Website, you have probably already customized the right hand side of the scheduler with some text and messaging that represents your business. That's awesome, but you want to make sure that you're not just simply re-iterating what's already been said on your Welcome message.
- Give them a sense of what's to come: If you have your reminder emails set to deliver 24 hours in advance of the appointment, tell them that. If they can cancel or reschedule up to 12 hours before the appointment, tell them that. If they are required to login or register in order to book with you, tell them that. If you are not currently accepting new clients, tell them that. It's better to let clients know ahead of time what might surprise them as they get into the booking process. This way they have no excuse for not knowing.
- Use the formatting tools: Underlining, bolding, font size, lists, alignment. All of these tools are at your disposal when customizing your welcome message. Use them to help emphasize important parts of your message, but don't abuse them!
- Consider providing your contact info: Some of your clients might be terrible at organizing or finding past emails and will have thus misfiled the original appointment confirmation email you sent to them. They may, however, remember the web page they used to book their appointment and so including your email address or phone number on your welcome message may help clients who will have lost your email with your contact info.
