This waitlist feature allows you to give your clients the opportunity to join the waitlist for the first available appointment if you're completely booked up or if none of your available times slots work for them. In this page we will cover:
In order to allow clients to join the waitlist for the first available appointment your services and/or classes must allow waitlist, this can be set in the service/class profile:
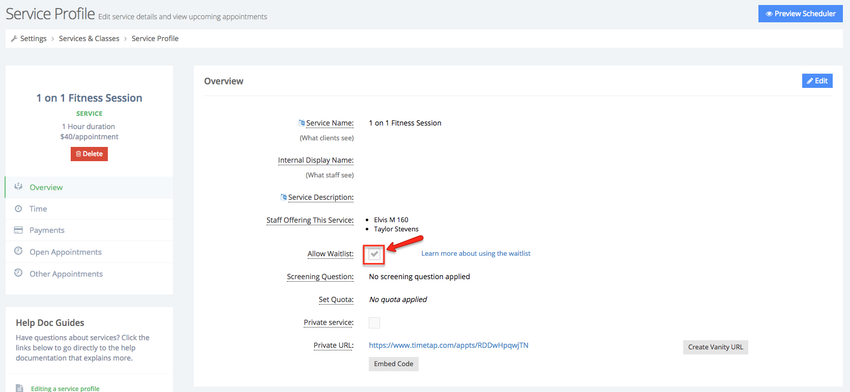
Once you've allowed a waitlist for your service, go to Settings → Waitlist, and click the Edit button in the Waitlist Settings section:
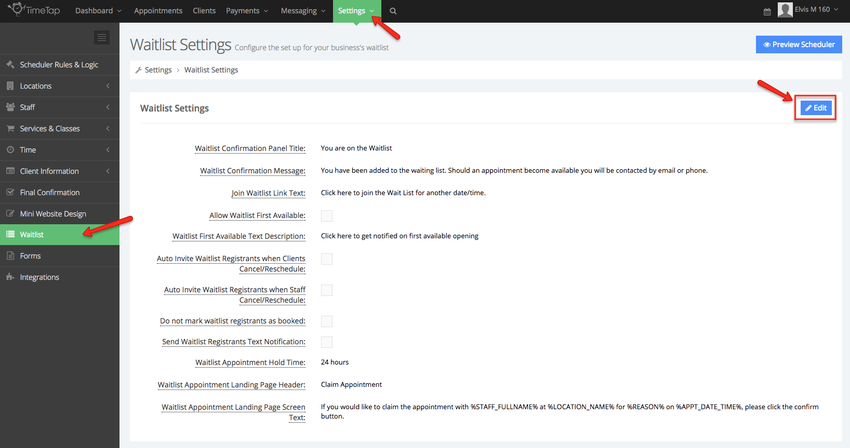
Once the Waitlist Settings section goes into edit Mode, select the the box next to Allow Waitlist First Available:

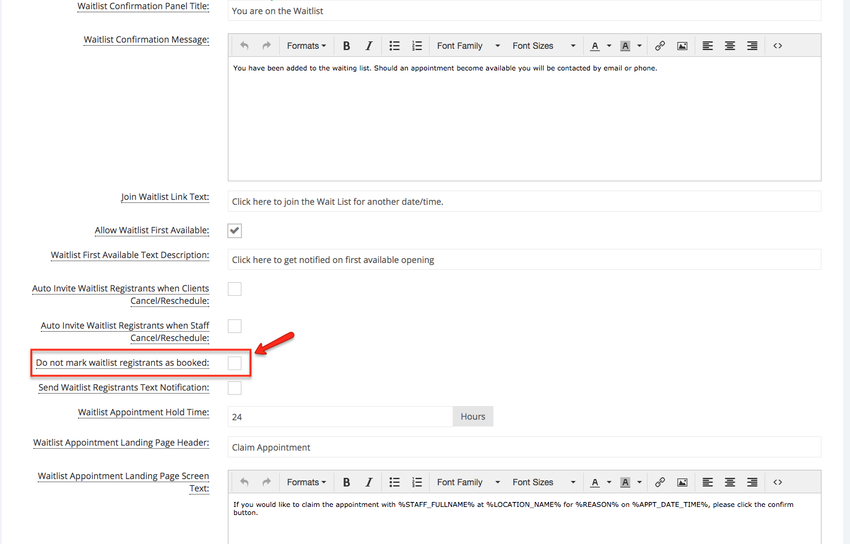
One more setting to keep in mind while setting up Allow Waitlist First Available is the "Do not mark waitlist registrants as booked". By Default after someone who has registers for the waitlist books an appointment, TimeTap marks that waitlist registration as 'Booked' and will not send out any more prompts to book appointments until they re-register for the waitlist. You can check the box next to this field if you'd prefer to email to email clients for dates even if they have already booked off the waitlist. In this example I will leave this option uncheck, I want clients to be marked as 'Booked' and not be notified if another appointment becomes available after they have booked an appointment using the link in the waitlist email/text:
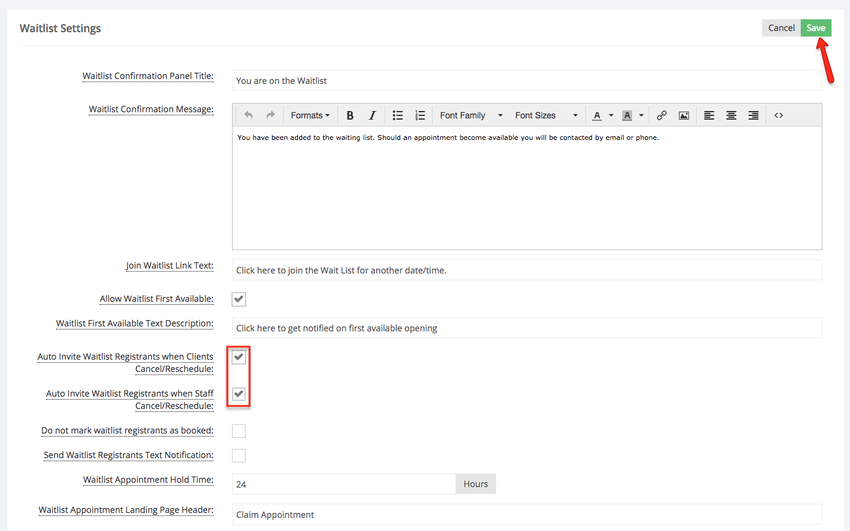
You can read more about each waitlist option our waitlist documentation. In this example I've also chosen to automatically invite clients to book the newly available appointment if a client or staff cancels, click Save to apply the changes:
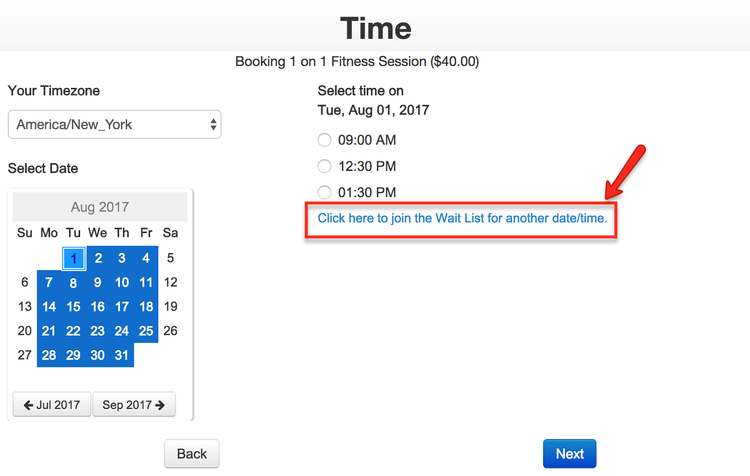
After you've setup your waitlist to allow clients to sign up for the first available appointment we will cover how your clients can sign up for the first available appointment. Once clients reach the Time panel within your scheduler they will see the link to join the waitlist (this text can be modified in Settings → Waitlist → Join Waitlist Link Text). In this example, the client checked the available time slots for the next few days and decided that none of those times work for him, so he decided to join the waitlist and wants to be notified when a new appointment becomes available and claim it if the time fits his schedule:
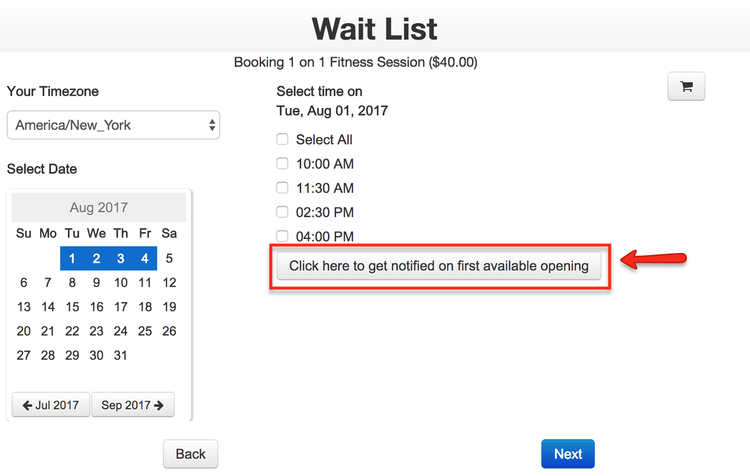
After the client clicks the link to join the waitlist, he will have the option to join the waitlist for specific times or click the button below the listed times to be notified on the first available opening (the text in this button can be modified in Settings → Waitlist → Waitlist First Available Text Description):
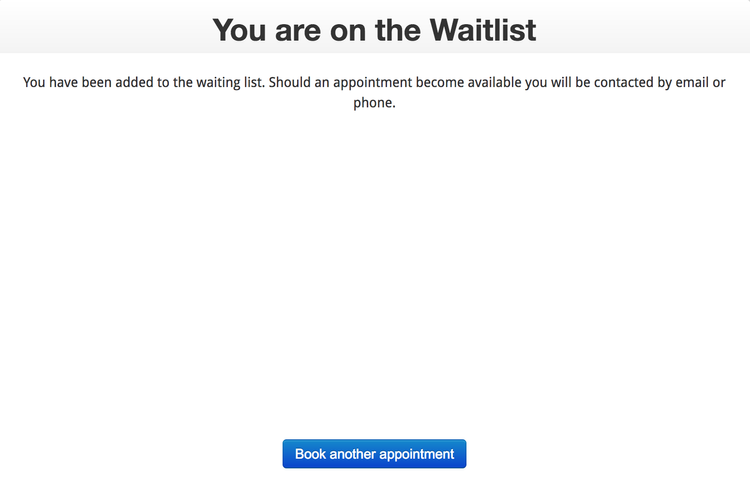
The client will then be asked to enter his information in the Client Information panel and he has clicked Save, the will see the waitlist confirmation message (this text can be modified in Settings → Waitlist → Waitlist Confirmation Message):
Once the client has been added to the waitlist, you will be able to find him under Appointments → Waitlist:
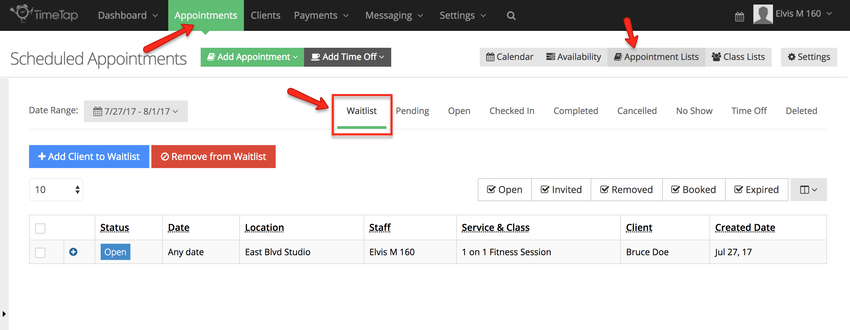
If "Any date" is listed under the Date column, this means that the client chose to be notified on the first available appointment:

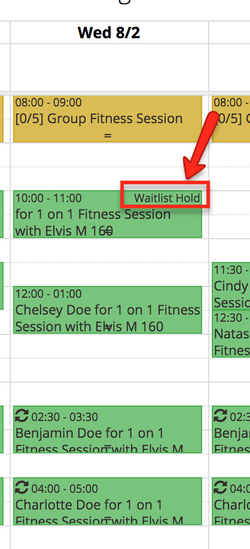
After the client has been added to the waitlist and chose to be notified on the first available appointment, if any appointment is cancelled the time slot will be put on hold until a client claims the appointment or the hold is removed the staff:
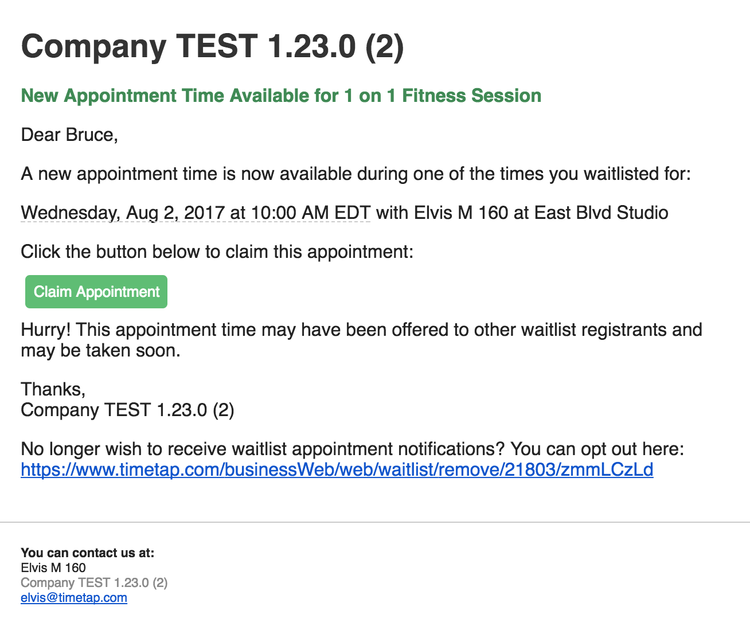
After the newly available time slot goes on hold an email and text (if selected in Settings → Waitlist → Send Waitlist Registrants Text Notification) notification will be sent to the client which will allow them to claim the newly available appointment. The "Waitlist New Appointment Times Available" template will look like the example below by default, the client will have to click the Claim Appointment button to book the newly available time slot:
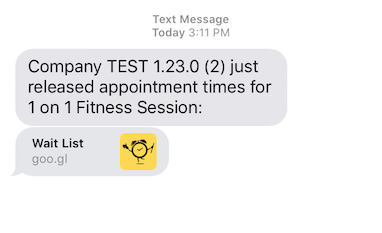
The "Waitlist New Appointment Times Available Text Message" template will look like the example below by default, the client will have to click the link within the message to book the newly available time slot:
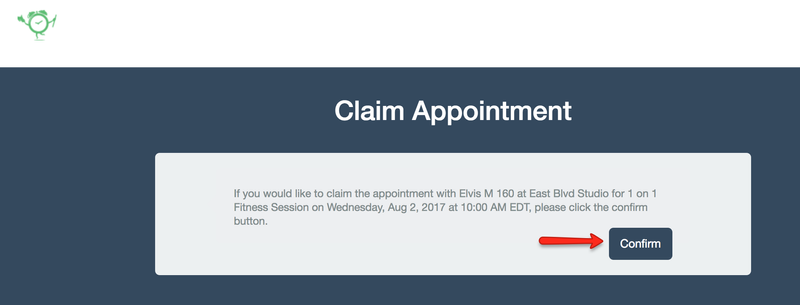
Once the client has chosen to claim the appointment they will be taken to the "Claim Appointment" landing page (title can be updated in Settings → Waitlist → Waitlist Appointment Landing Page Header), within this landing page they will see the default message in Settings → Waitlist → Waitlist Appointment Landing Page Screen Text, and if the clients clicks the "Confirm" button they will claim the available appointment:
After the client has claimed the appointment, the status of his waitlist will change from Open to Booked, this new status indicated that he will not be notified if a new appointment becomes available:
