Virtual locations are intended to allow your clients to schedule appointments with you and your staff to take place over the phone, a video conference, or any other type of virtual meeting service. In this page we’ll guide, we will discuss how to setup set up your location and or staff profiles so you can share your virtual meeting information prior to the time of the appointment.
We’ll cover the following scenarios:
| Table of Contents | ||||
|---|---|---|---|---|
|
Add the virtual link to the staff profile
In this example we’ll assume that our business offers consultation appointments over the video conferencing platform Zoom. Each staff member has their own unique meeting room URL and meeting room ID. We want to setup set up our account so that if a client schedules an appointment to take place in Zoom, the information of the staff they’ll be meeting with is sent to them in the confirmation email.
We’ll begin by going to the staff’s profile, and while in the Overview tab click Edit:

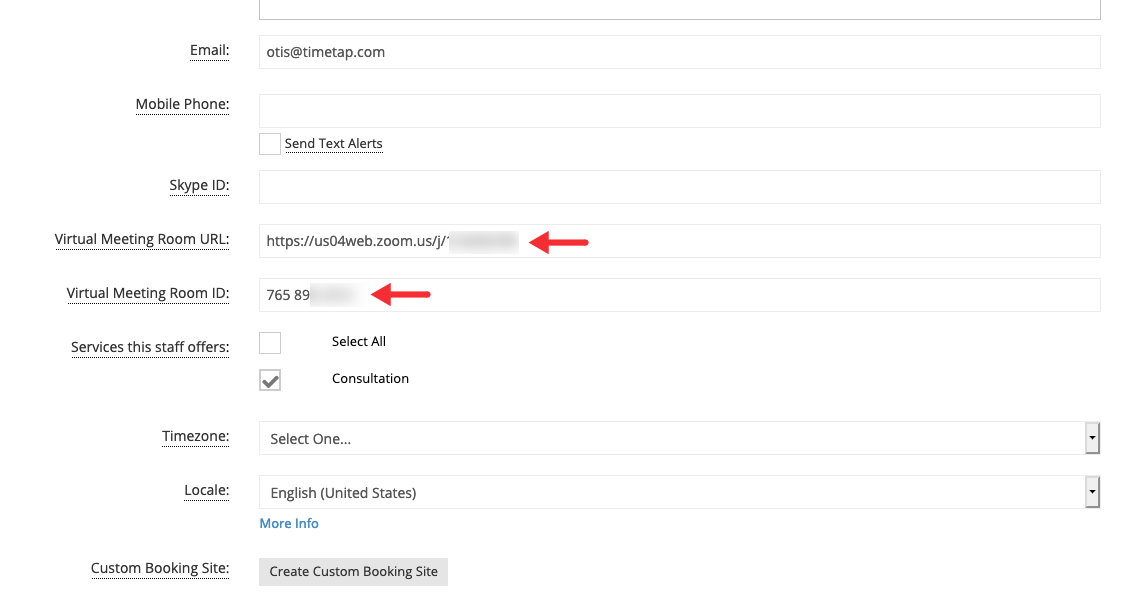
While in edit mode, paste the meeting room URL and in the Meeting Room URL field and the meeting room ID in the Meeting Room ID fields and click Save:
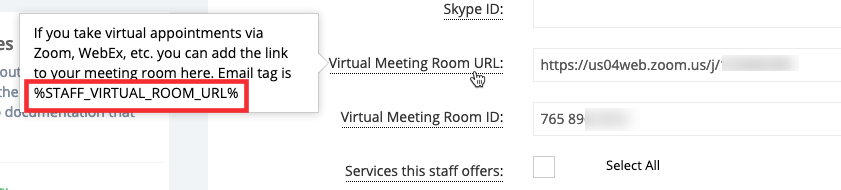
Move your cursor over the Virtual Meeting Room URL and Virtual Meeting Room ID to see helpful tooltips about the email tags we need to use to populate the information we just entered in our appointment templates. To populate the virtual meeting room URL use %STAFF_VIRTUAL_ROOM_URL% and to populate the meeting room ID use %STAFF_VIRTUAL_ROOM_ID%:
Add the virtual link tags to your messaging templates
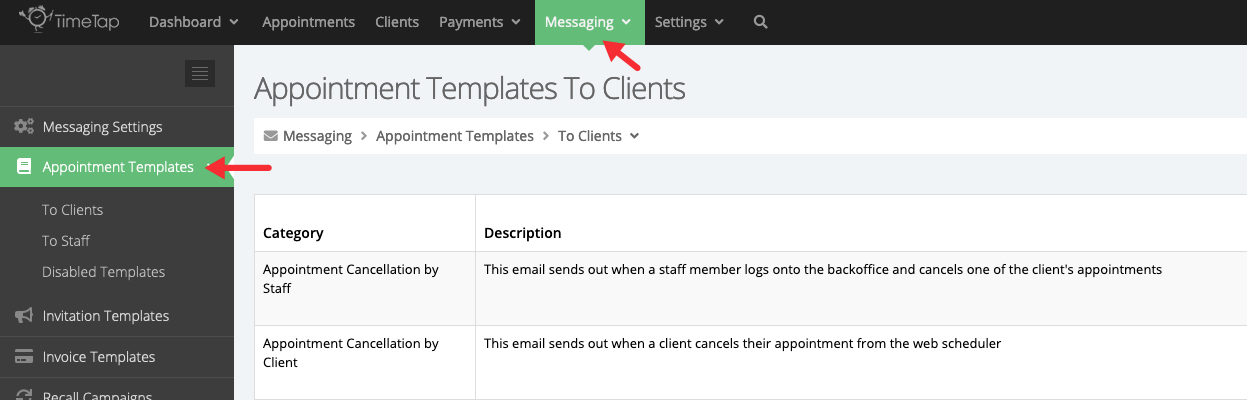
Next, we’ll add the email tags corresponding to the Virtual Meeting Room URL and Virtual Meeting Room ID fields in the confirmation email template, these tags can also be added in the other appointment related templates such as the appointment reminder. We’ll go to Messaging > Appointment Templates:
We’ll then locate the New Appointment by Client template and click View, after view is clicked we’ll be directed to the Templates in Category section, click View next to the reason or language specific template you want to update (optional), in our case we’ll click view next to the default template:

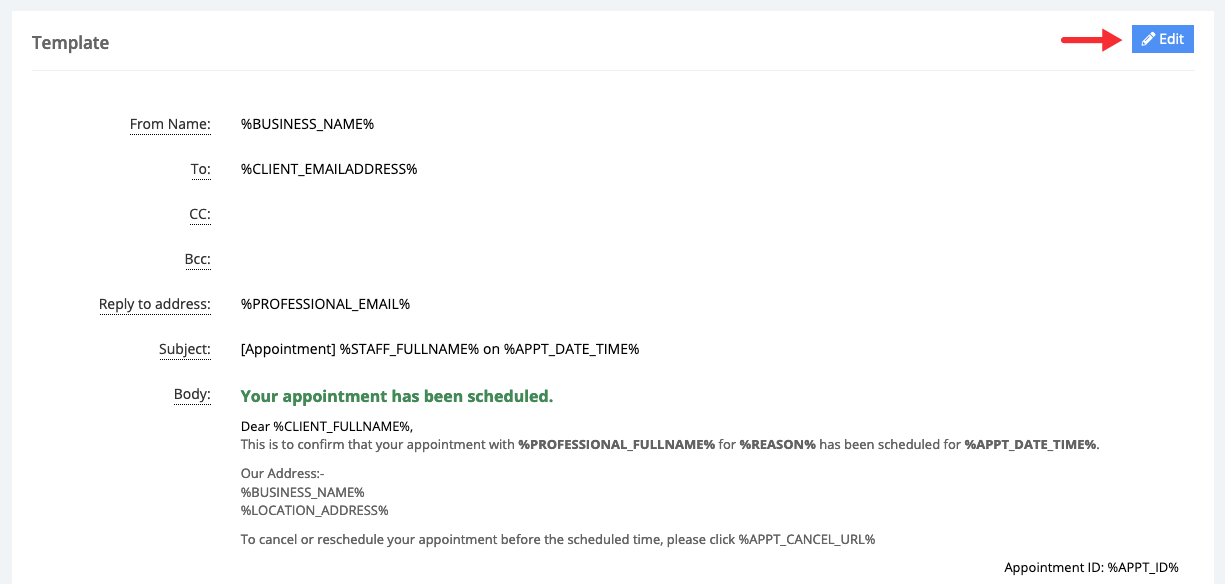
Once in the template profile, we’ll scroll down to the Template section and click Edit:
After entering
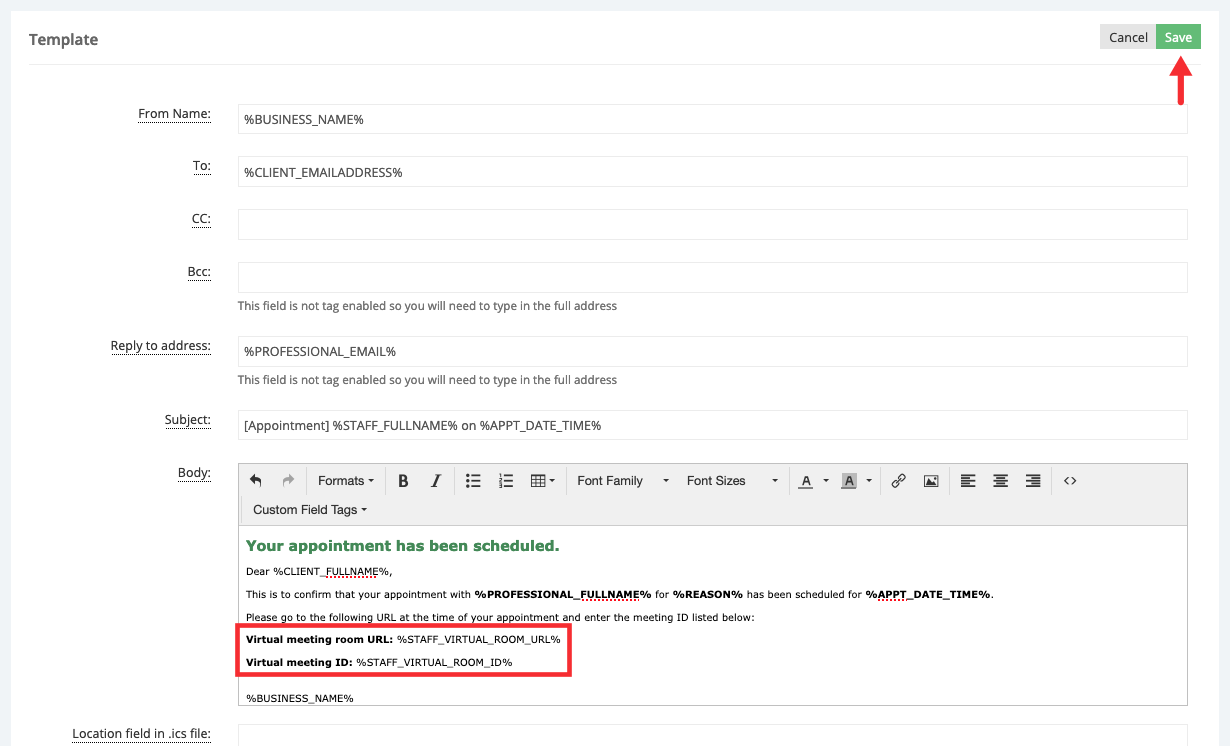
Copy the following tags and then paste them into the desired location in the body of that template:
Virtual meeting room URL: %STAFF_VIRTUAL_ROOM_URL%
Virtual meeting ID: %STAFF_VIRTUAL_ROOM_ID%
After adding the virtual meeting instructions, we’ll click Save to update the template:
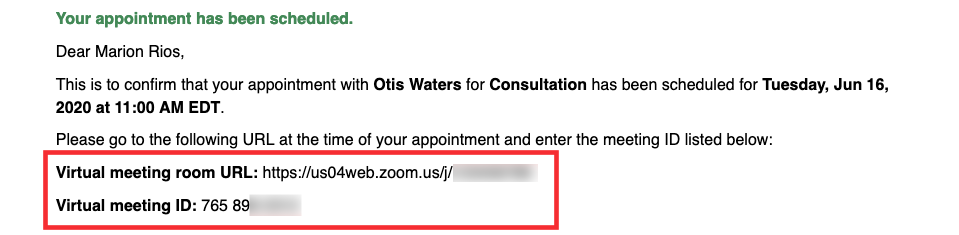
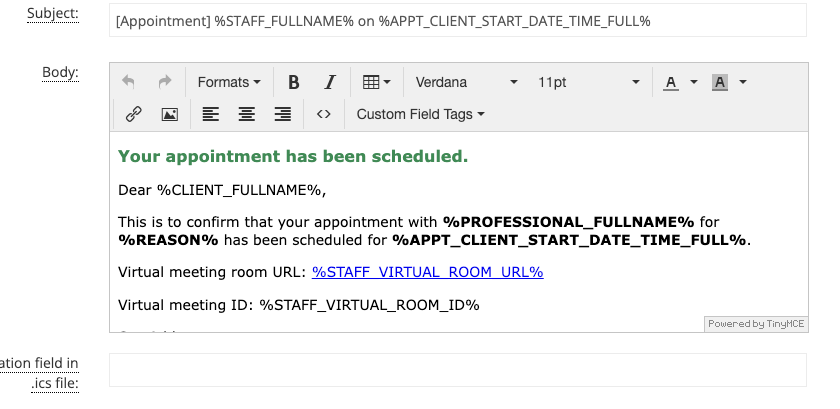
Now, when a client schedules an appointment with this staff member, the staff’s virtual meeting information will be added to the confirmation template that the client receives:
Add the virtual link to the location profile
In this scenario we’ll cover how to share the virtual meeting information with your clients if you and your staff share one virtual room for appointments.
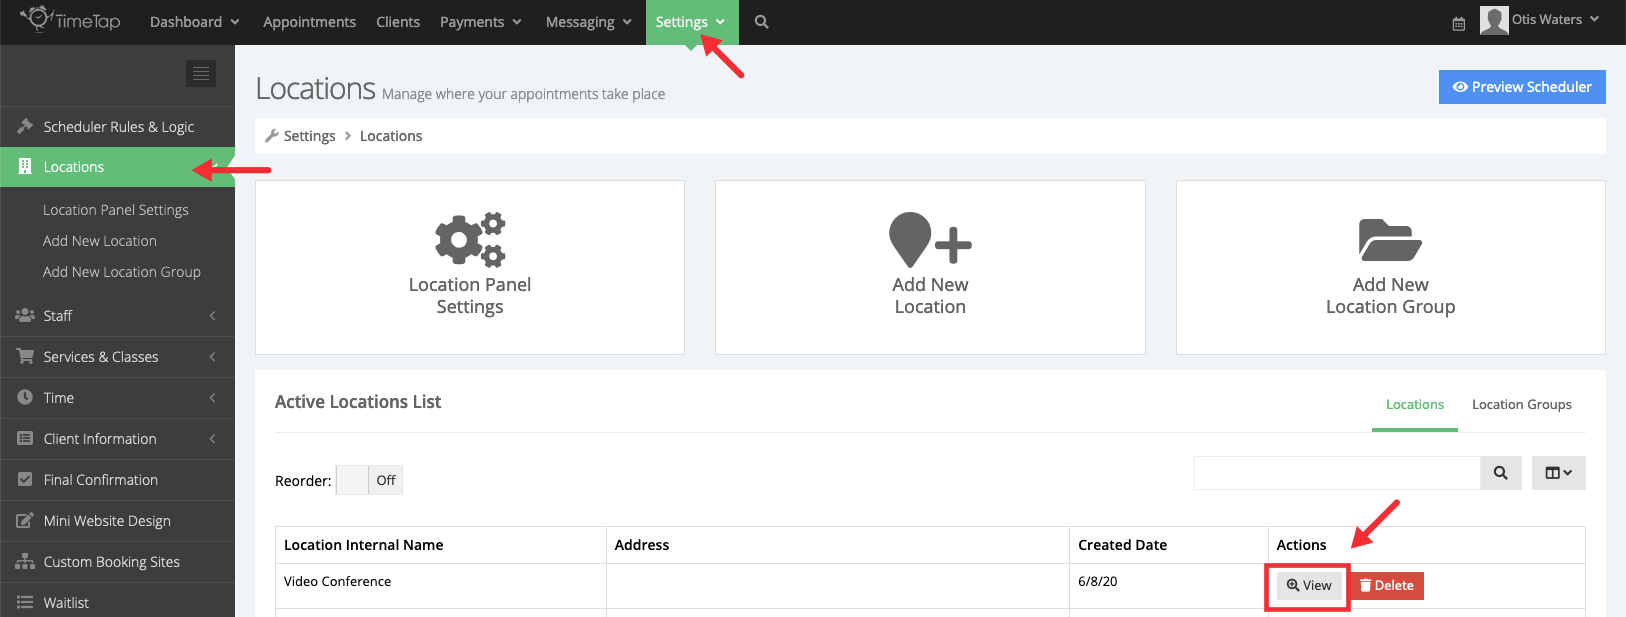
We’ll begin by ensuring that our location type is set to Virtual, go to Settings > Locations > and clicking View next to the location we want to update:
Once in the location’s profile, click Edit in the Overview section and ensure that the type is set to Virtual Location, notice that when you make this selection the fields “Virtual Location Type”, “Virtual Meeting Room URL”, and “Virtual Meeting Rom ID” will appear:
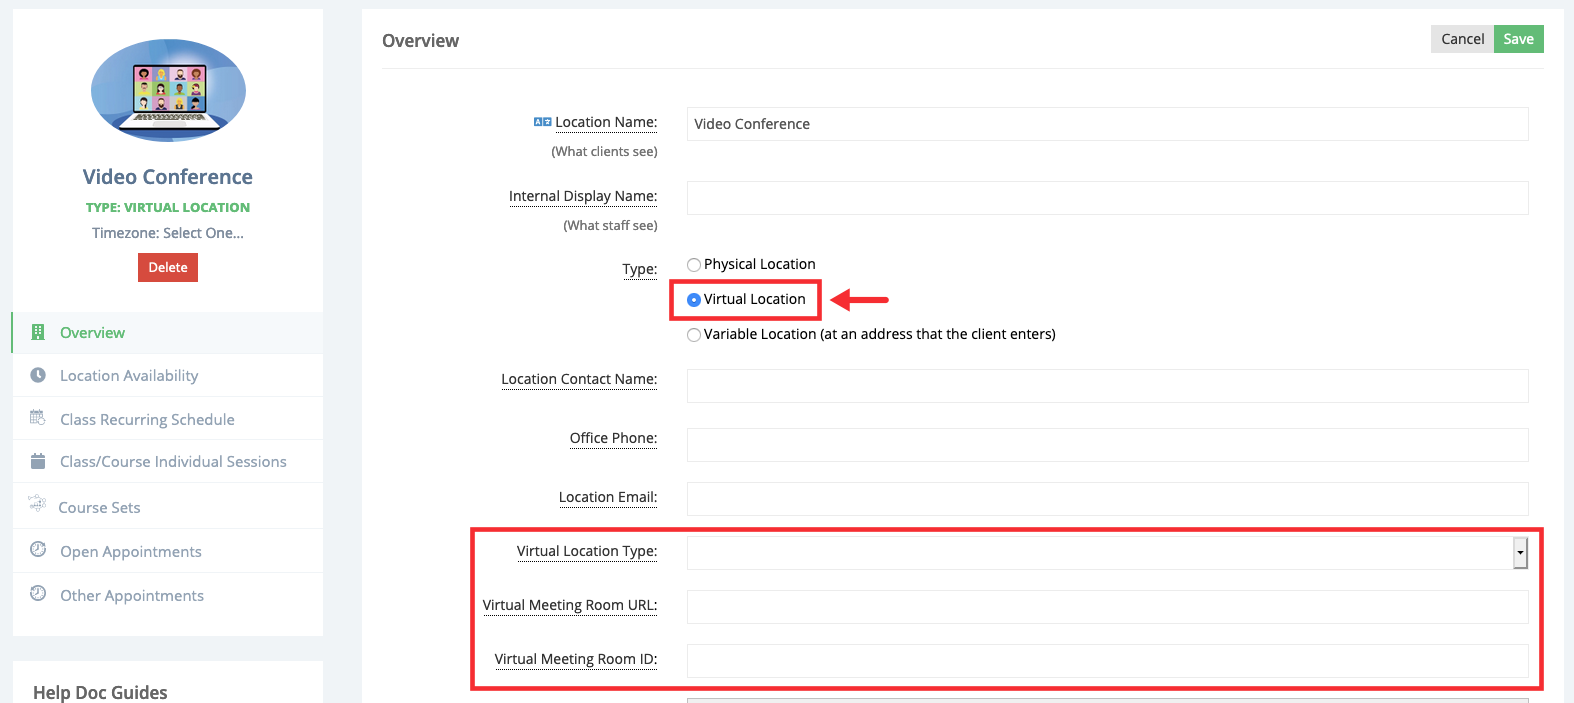
For this example we’ll select Zoom as the virtual location type, enter the meeting room URL and meeting room ID, then click Save:
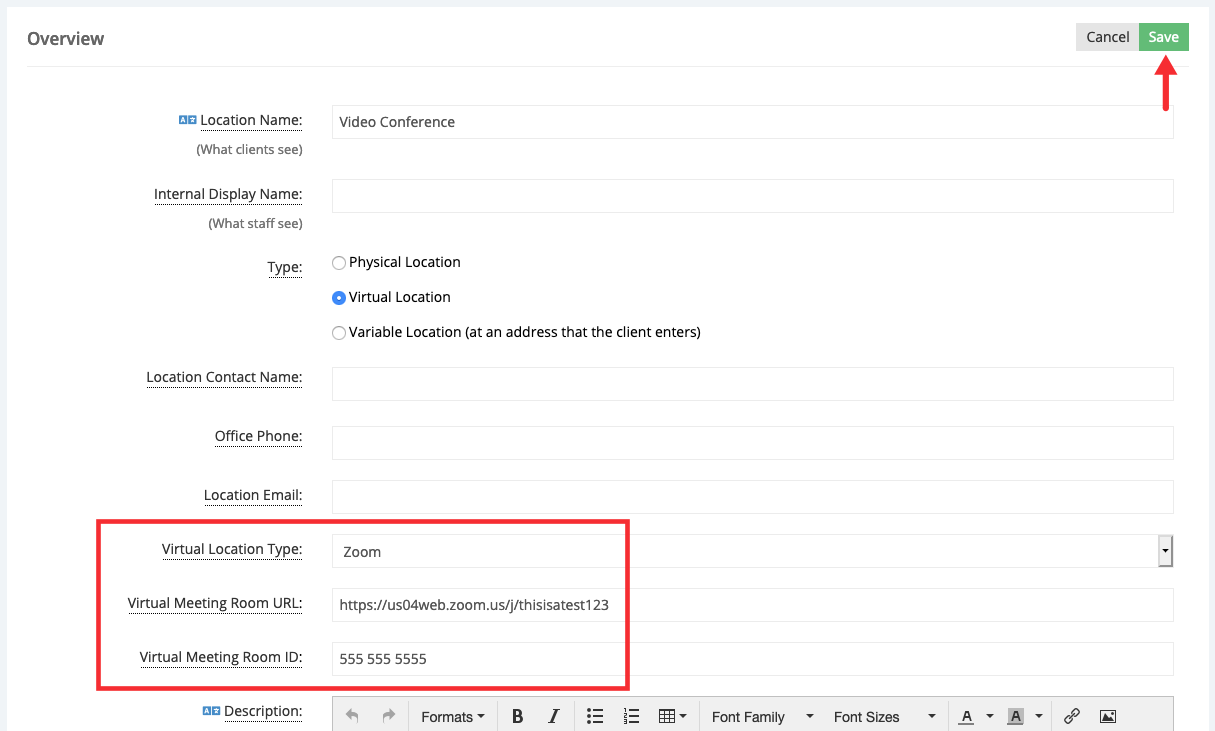
Move your cursor over the Virtual Meeting Room URL and Virtual Meeting Room ID to see helpful tooltips about the email tags we need to use to populate the information we just entered in our appointment templates. To populate the virtual meeting room URL use %LOCATION_VIRTUAL_ROOM_URL% and to populate the meeting room ID use %LOCATION_VIRTUAL_ROOM_ID%:

Add a resource for that virtual room
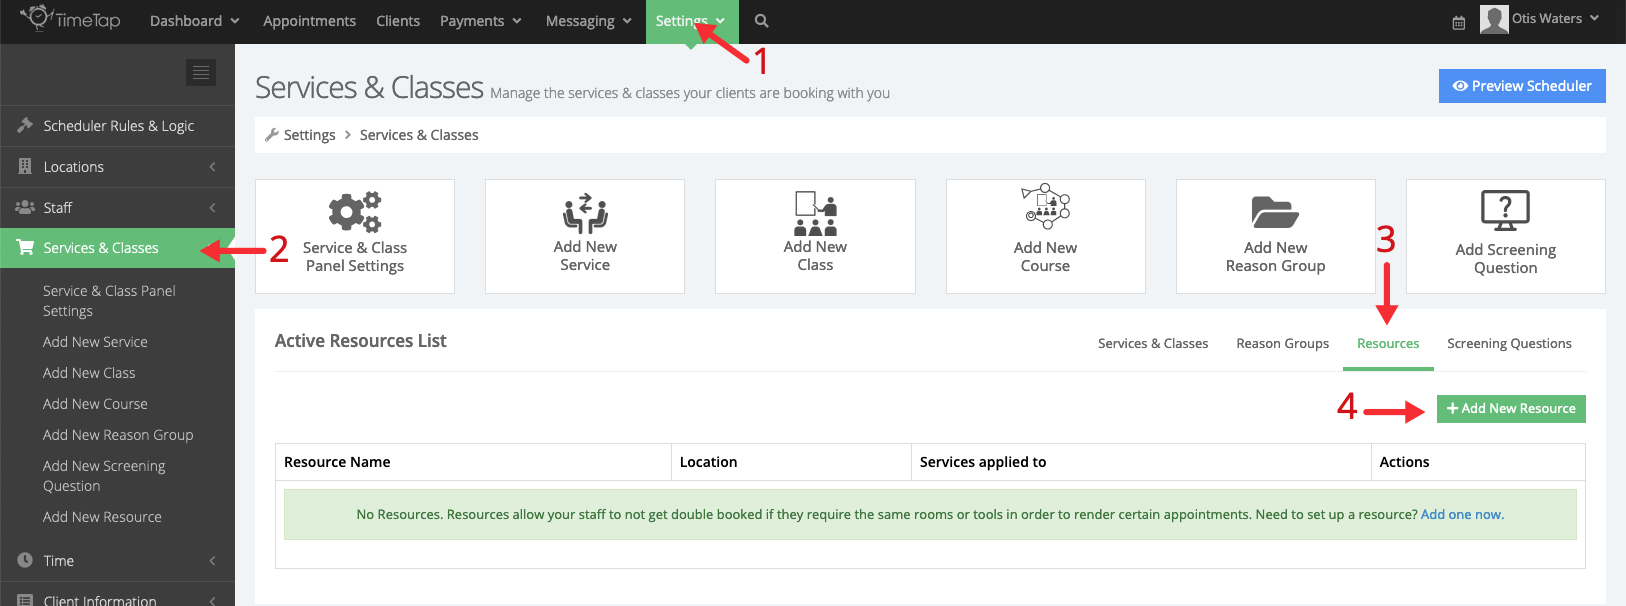
Next, we’re going to create a resource so that appointments are not double booked at the virtual meeting room, we wouldn’t want clients to join meetings that are not pertinent to them. We’ll go to Settings > Services & Classes > select the Resources tab and click Add New Resource button:
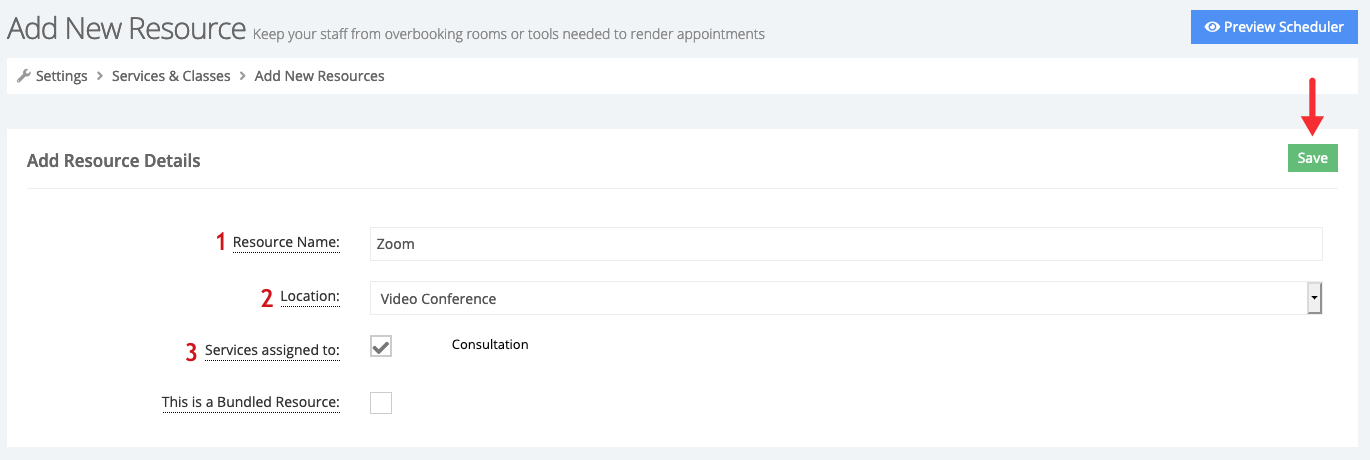
In the Add New Resource screen, we’ll name our resource (1), select the location where the resource is being utilized (2) and assign it to the service(s) that utilize this resource (3), then click Save:
Add the virtual link tags to your messaging templates
Finally, we’re going to add the tags %LOCATION_VIRTUAL_ROOM_URL% and %LOCATION_VIRTUAL_ROOM_ID% in the confirmation email template, these tags can also be added in other appointment related templates, such as the reminder template. We’ll go to Messaging > Appointment Templates
We’ll then locate the New Appointment by Client template and click View, after view is clicked we’ll be directed to the Templates in Category section, click View next to the reason or language specific template you want to update (optional), in our case we’ll click view next to the default template:
Once in the template profile, we’ll scroll down to the Template section and click Edit:
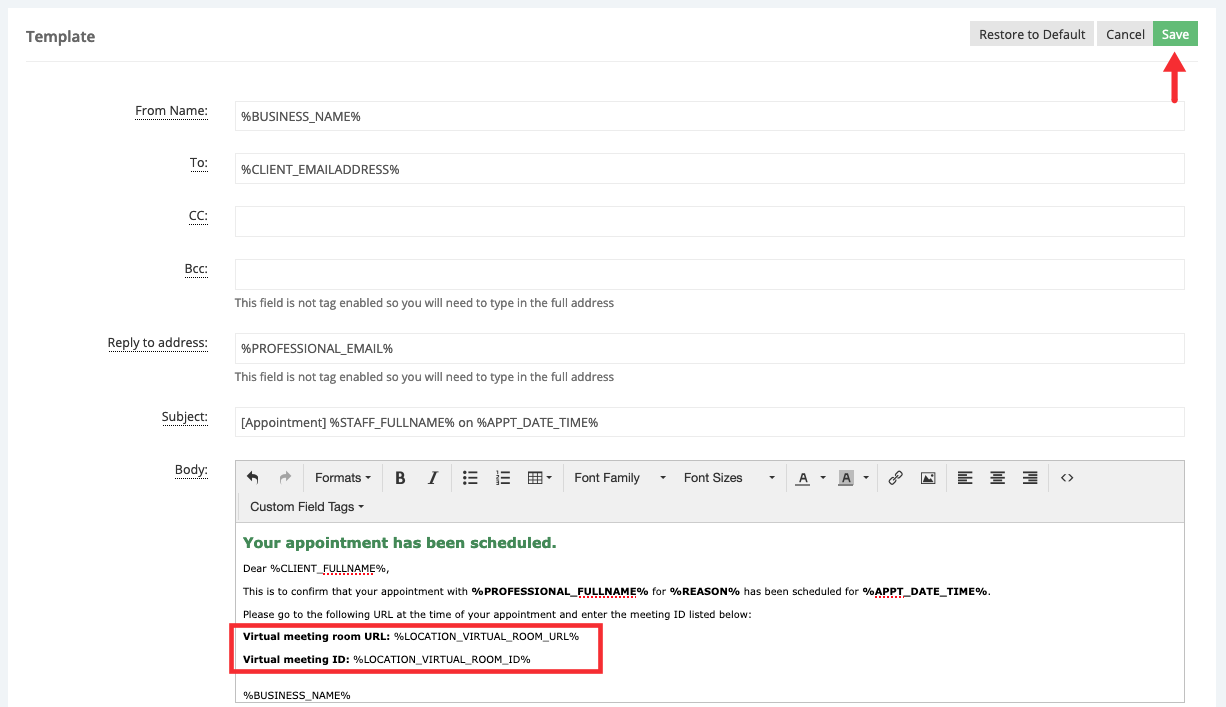
Copy the following tags and then paste them into the desired location in the body of that template:
Virtual meeting room URL: %LOCATION_VIRTUAL_ROOM_URL%
Virtual meeting ID: %LOCATION_VIRTUAL_ROOM_ID%
After entering the virtual meeting instructions, we’ll click Save to update the template:
Now, when a client schedules an appointment at the virtual location, the location’s virtual meeting information will be added to the confirmation template the the client receives:

Make your virtual link “clickable” in your emails
If you’d like to allow your clients to click on the meeting link that populates in the virtual link tag that you include in the messaging template, you can hyperlink the virtual link tag to that text. We will explain this using the virtual link tags from the staff profile, but the same process will work when using the location virtual link tags in your messaging as well.
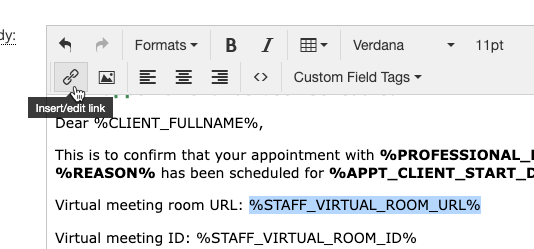
When editing the body of that messaging template, highlight the tag you’d like to hyperlink and click the “Insert/edit link” button.
Copy the tag from the “Text to display” field, and copy it into the Url field of the Insert Link panel.
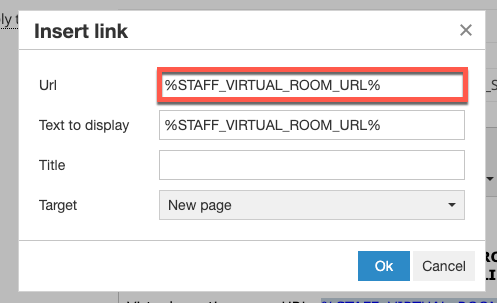
After confirming that change, the text in your message will change to blue and underlined to confirm that the tag is now properly hyperlinked.
Once this message is sent out for an appointment, TimeTap will pull the virtual link from that corresponding profile and direct the user to that link once the text is clicked.
Add the virtual link to the Location field of client calendar events
A calendar invite file (.ics file) is attached to each New Appointment and Appointment Reminder email that is sent to the client. If you’d like your virtual meeting link to populate in the Location field of those calendar invites, then you can add that same virtual meeting tag to the “Location field in .ics file” field that is located at the bottom of each messaging template.
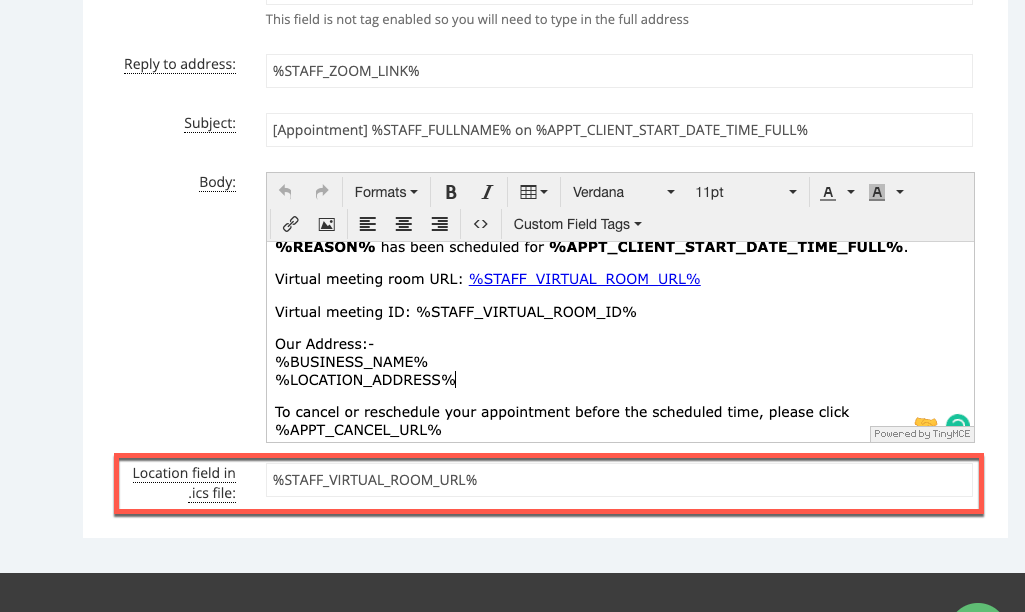
Once this field on the template is updated with that tag, the virtual meeting link from your profile will be shown in the Location field of the calendar event that is added to a client’s calendar.