...
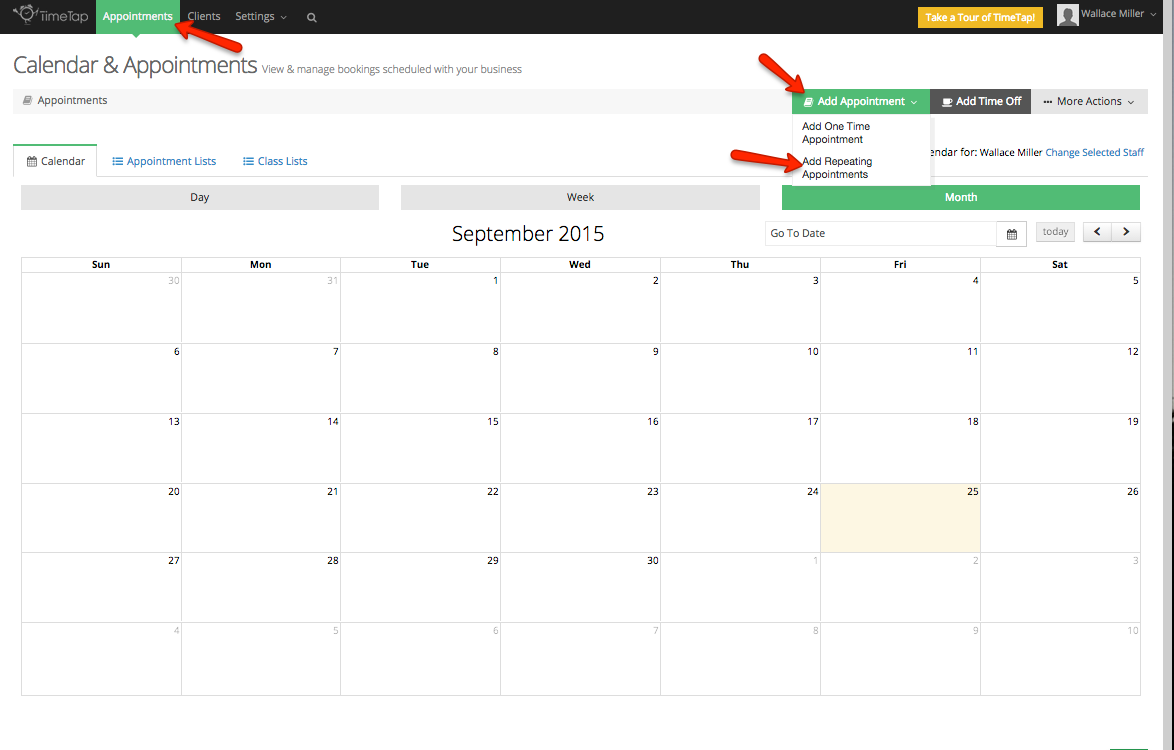
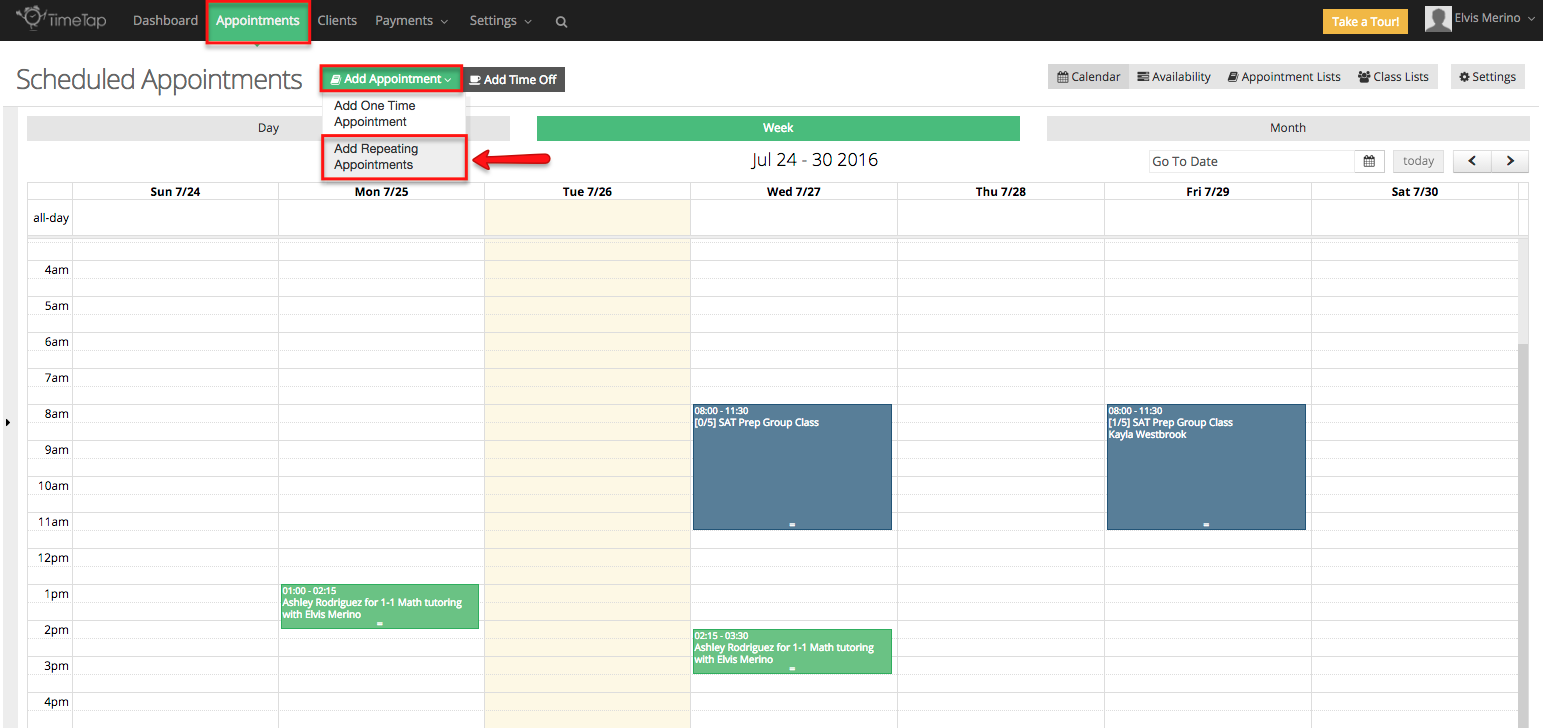
To set up a repeating appointment for a service, you will start by selecting the option to "Add Repeating Appointments" from the Add Appointment button dropdown on the main Appointments screen:
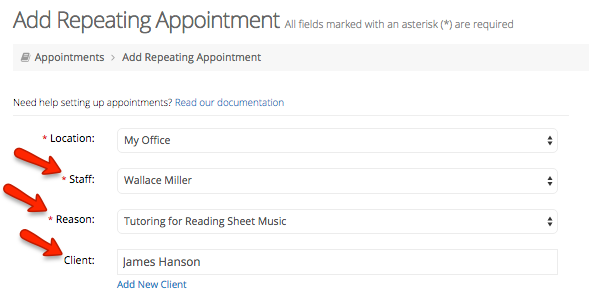
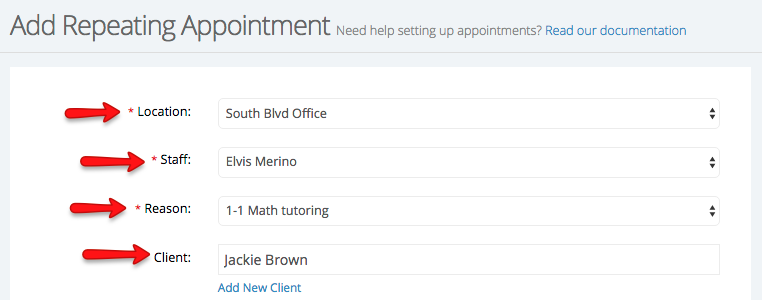
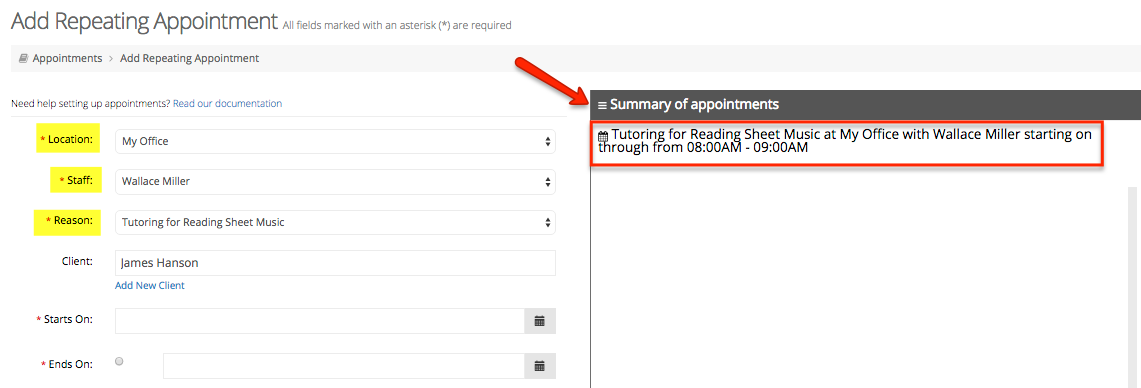
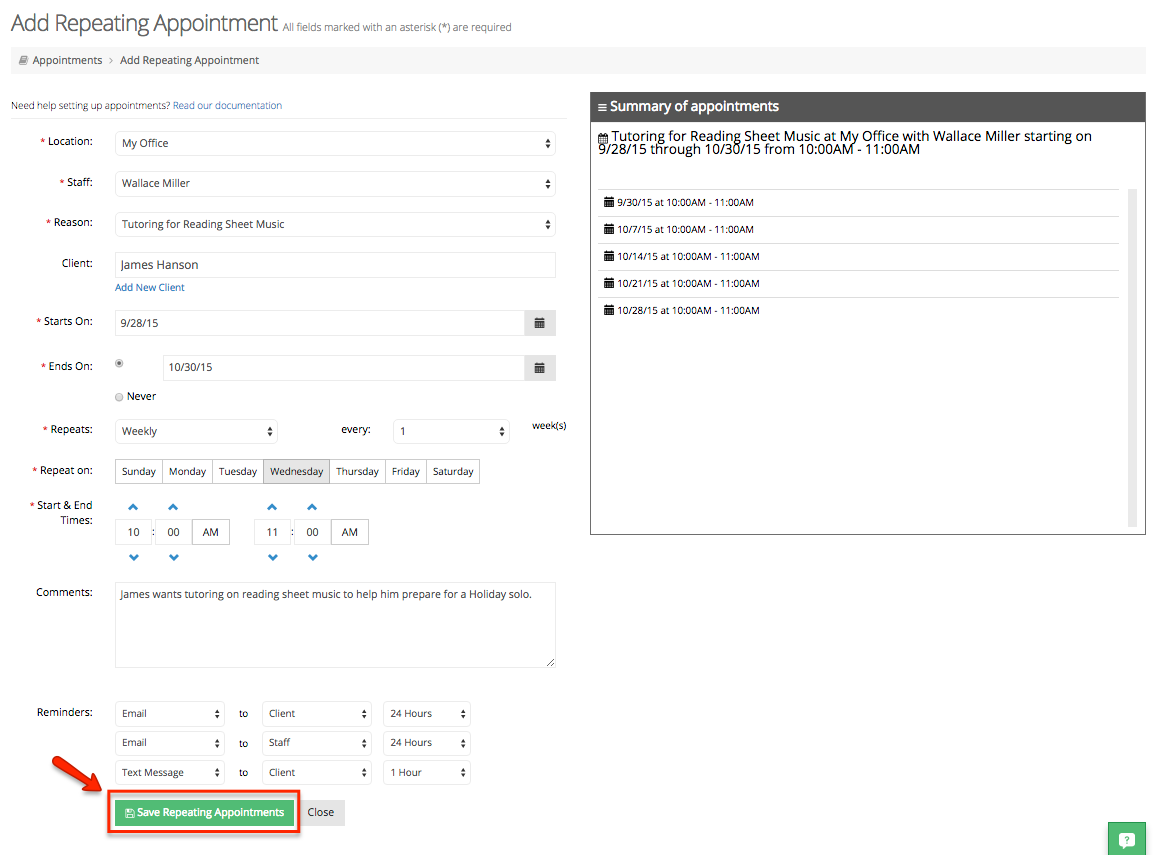
This will bring you to the Add Repeating Appointment screen where you will add in the base information (location, staff, reason, client) for the repeating appointment. This is where you will be able to choose whether you would like to set up a repeating appointment for a service or a class. In this case, you are setting up a repeating appointment for a service.
After setting the Location, Staff, & Reason for the appointment, you'll see the "Summary of Appointments" tab update to reflect the information you put in. This table will ultimately display a full list of the appointment dates and times that will be included in the repeating appointment once you've filled in the remaining information on the page:
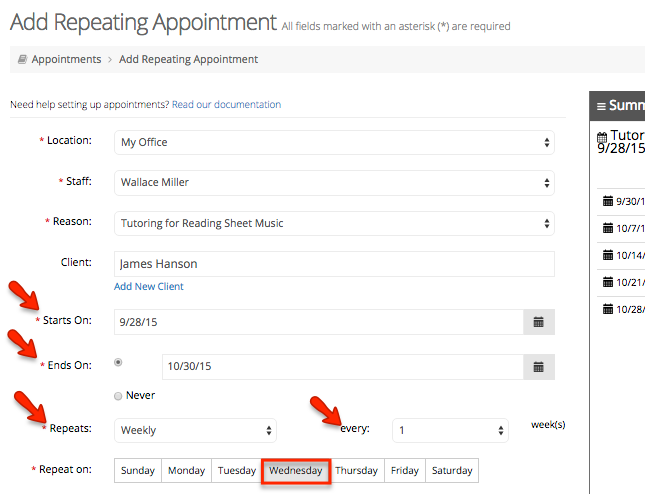
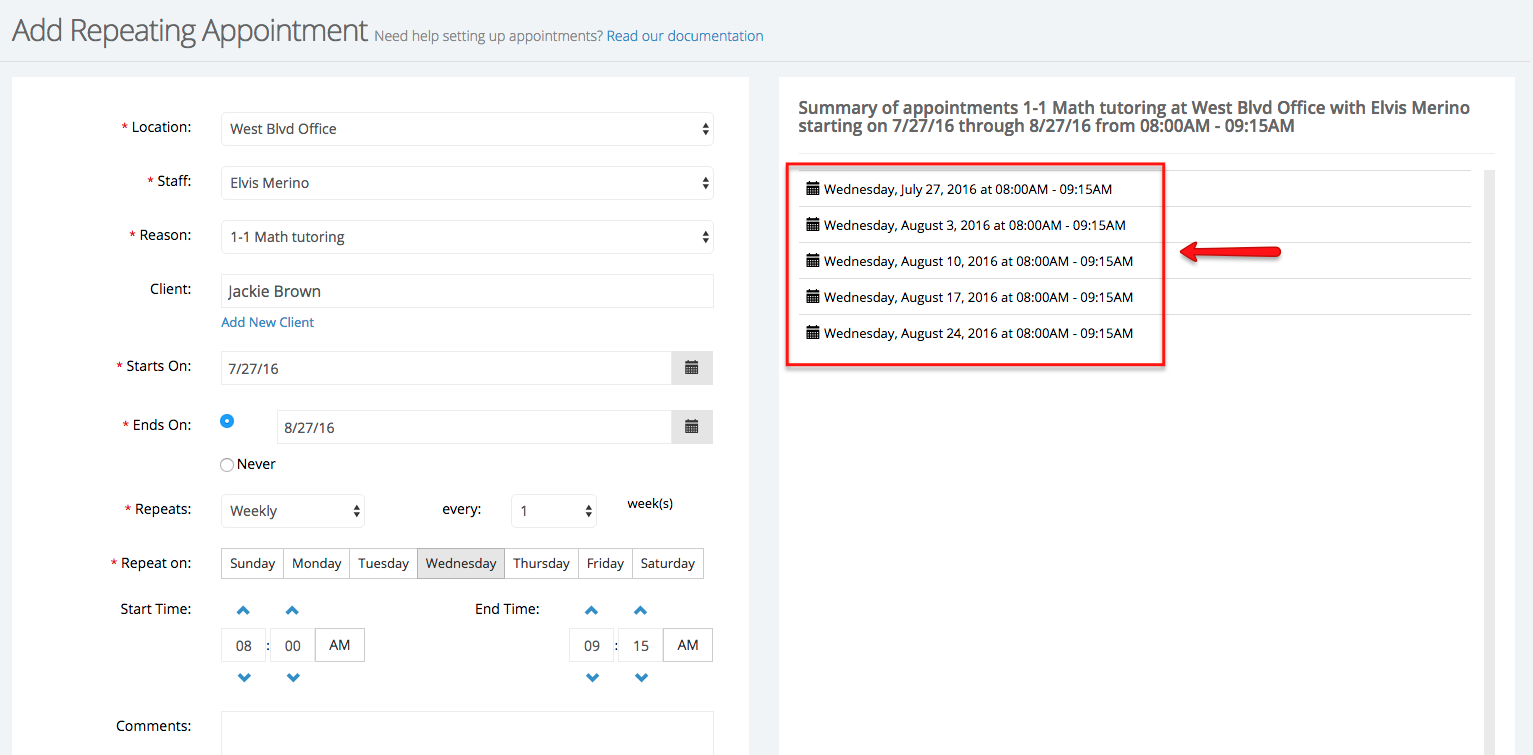
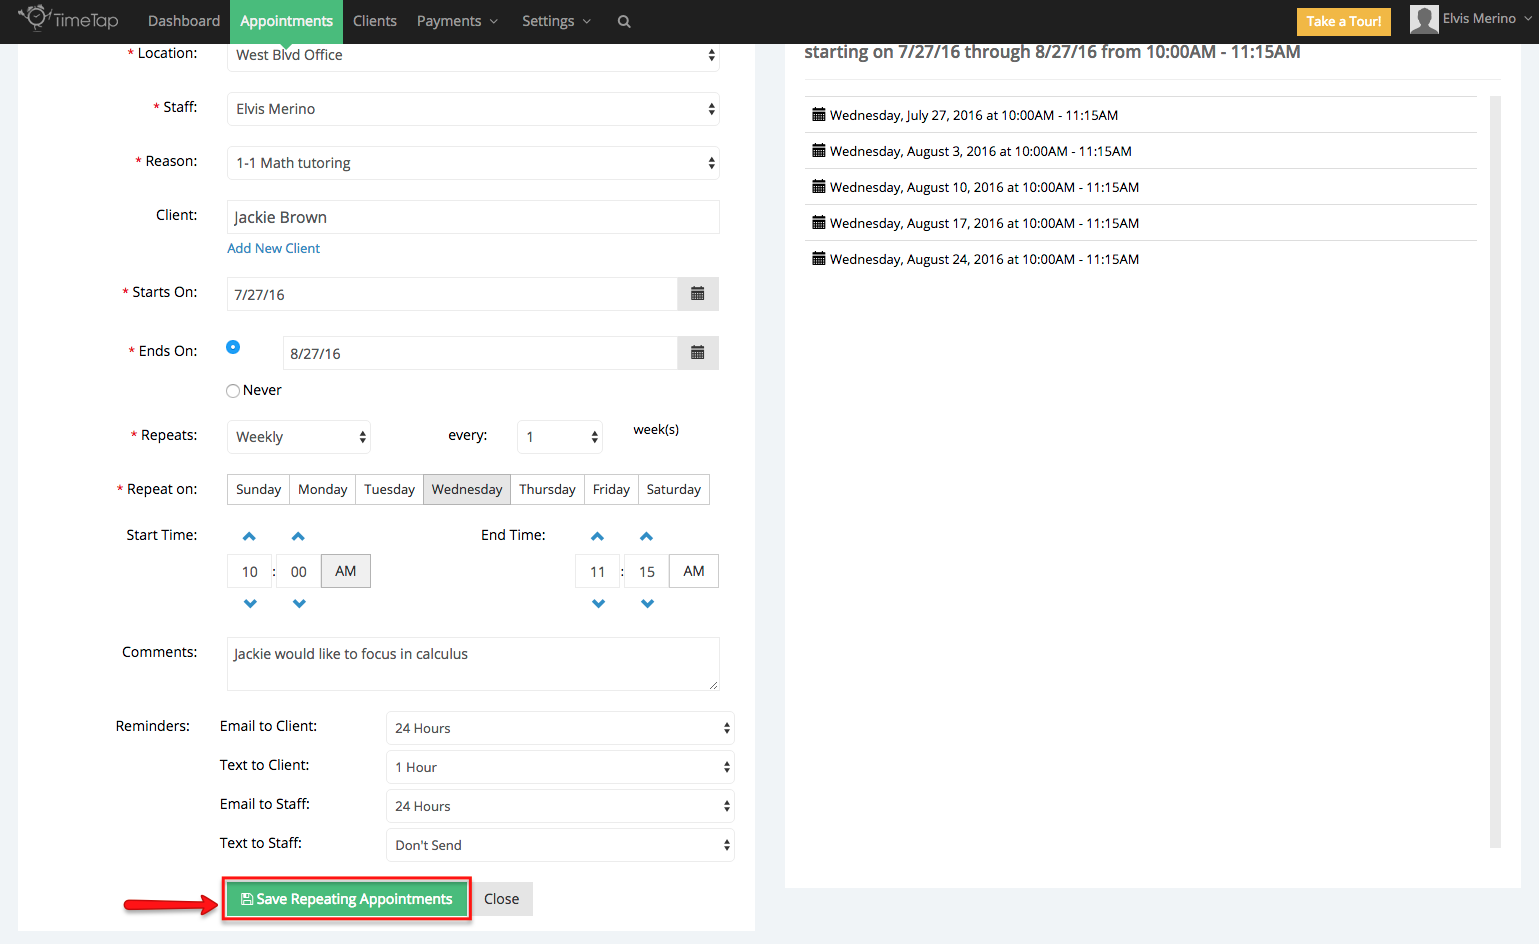
Once you have the location, staff, reason & client filled in, it's time to setup the date range within which the appointment repeats as well as the frequency and day it repeats on. In the demonstration for this piece of documentation, I'll be setting up an appointment for tutoring on reading sheet music every 1-1 Math tutoring every Wednesday from September July ___, 2015 2016 to October August ___, 2015. To do this I'll:
- Define my date range as starting on 97/2827/2015 2016 and ending on 108/3027/20152016
- Set my "Repeats" frequency to weekly and choose it to be every week
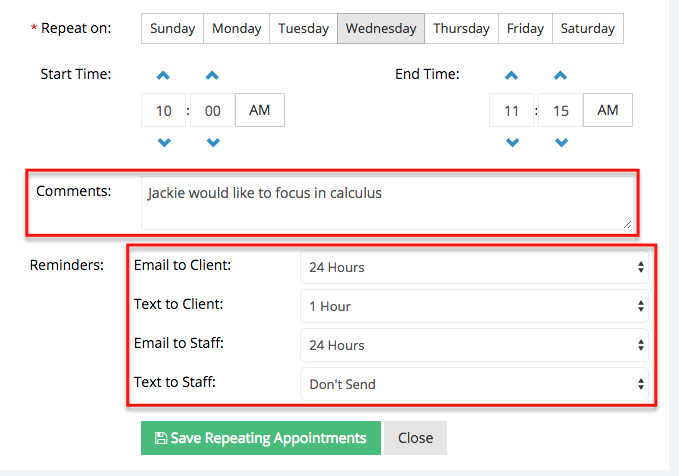
- Choose "Wednesday" as the day of the week that the appointment will "Repeat on"
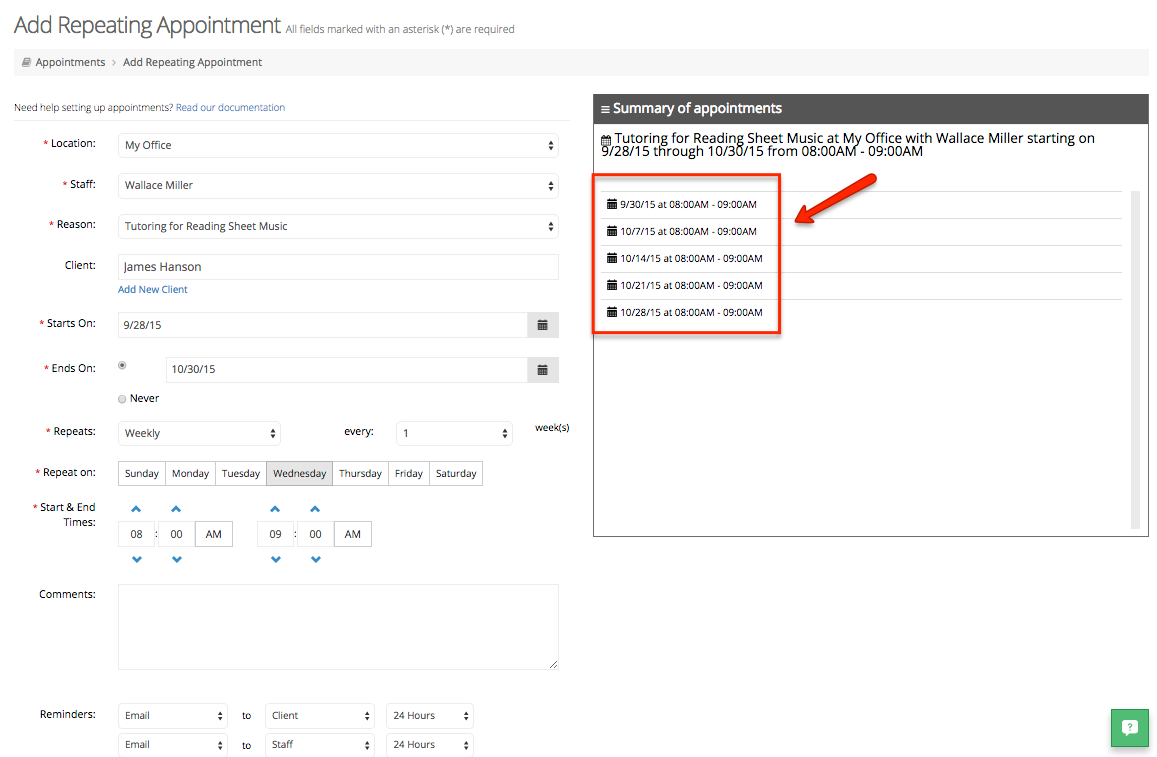
You'll see that the Summary of Appointments table has now updated with all the appointment dates that will occur based on the date range and frequency that you've set:
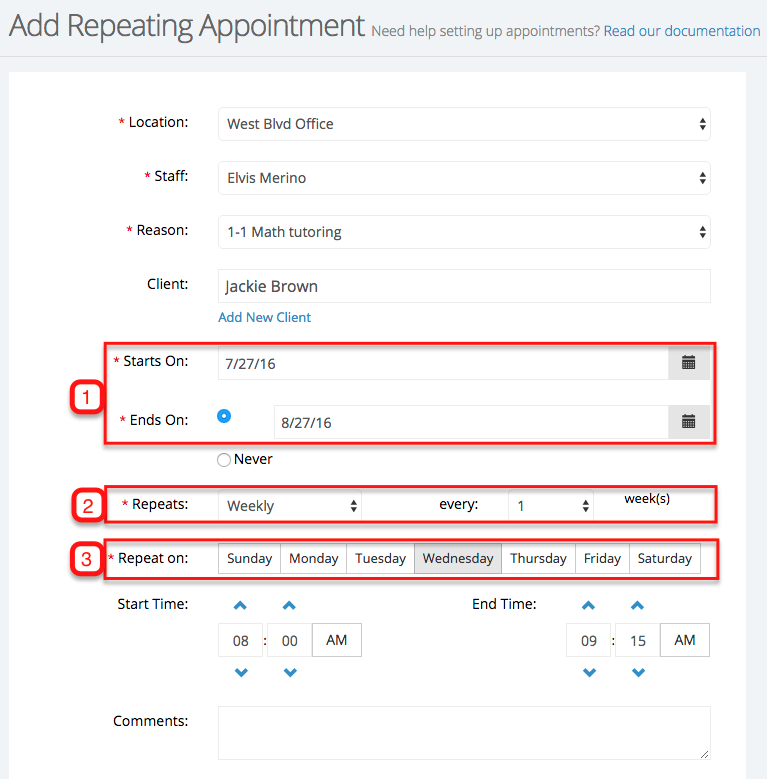
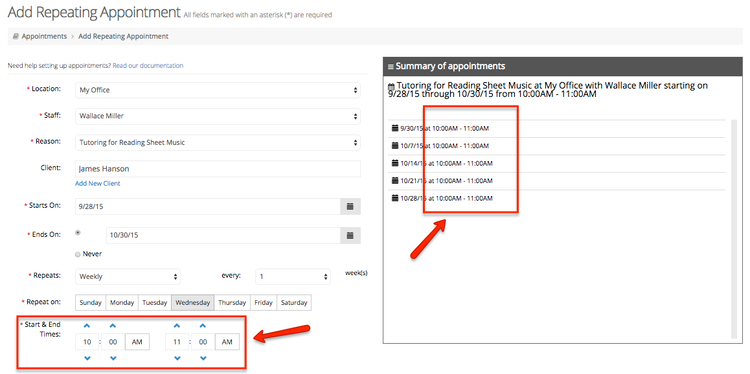
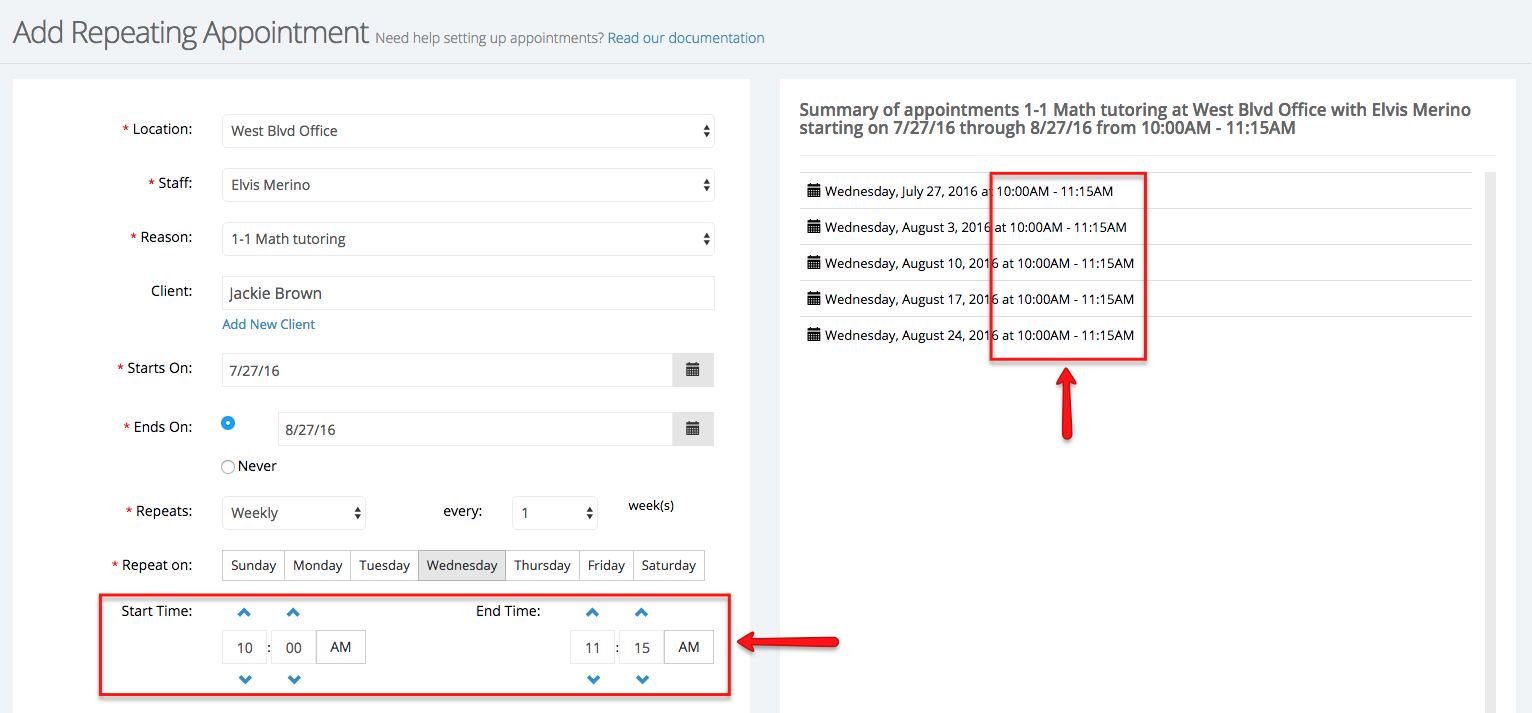
The last thing you'll want to do is set the start and end times for the appointment. By default they are set to start at 8:00am but you can change that by either typing over the 8:00am value with whatever time you want it to be, or by using the up and down arrows to adjust the time. Once you adjust the start time, the end time will update automatically based on the duration that the selected "Reason" has, but you can override that end time and enter your own end time if you'd like:
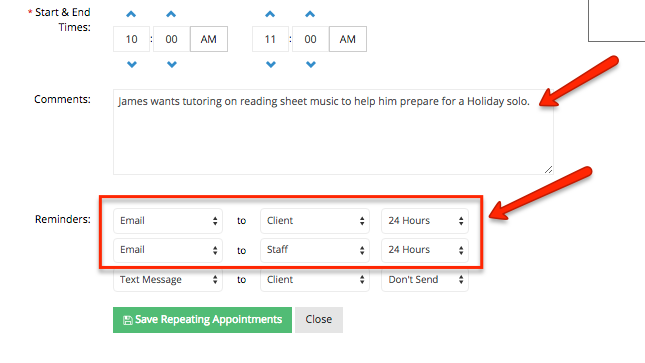
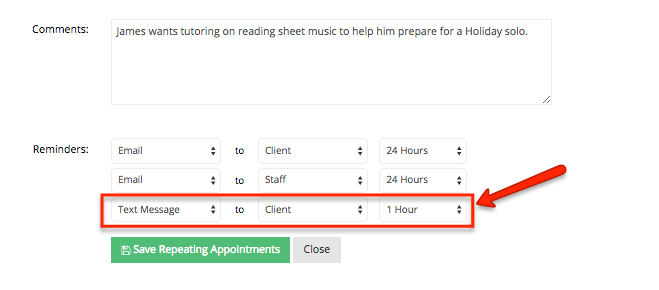
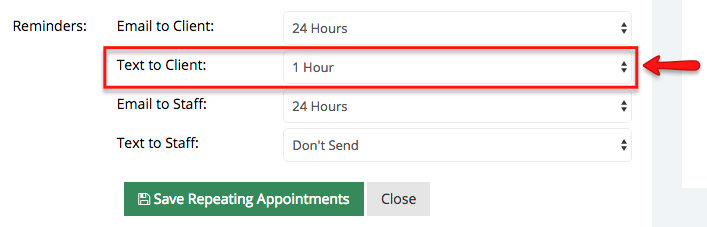
The last step on setting up the repeating appointment is to fill out any of the custom Appointment Fields that you have set up and make sure the reminder emails are set up to send out at the proper time intervals. Each individual appointment in the repeating appointment series will have a reminder email sent out before it at whatever time is set here:
| Status | ||||
|---|---|---|---|---|
|
*Please Note: For clients to receive text message reminders by scheduling appointments through your Web Scheduler, you would have to make sure that you've turned on the "Clients can request text message" option under Settings → Client Information → Edit Client Info Settings. Please view our documentation on how clients can request text message reminders to learn how this feature can be used through your Web Scheduler
Now everything is set for your repeating appointment series and you're ready to save it! Just click the green "Save Repeating Appointments" button at the bottom of the screen to commit the appointments:
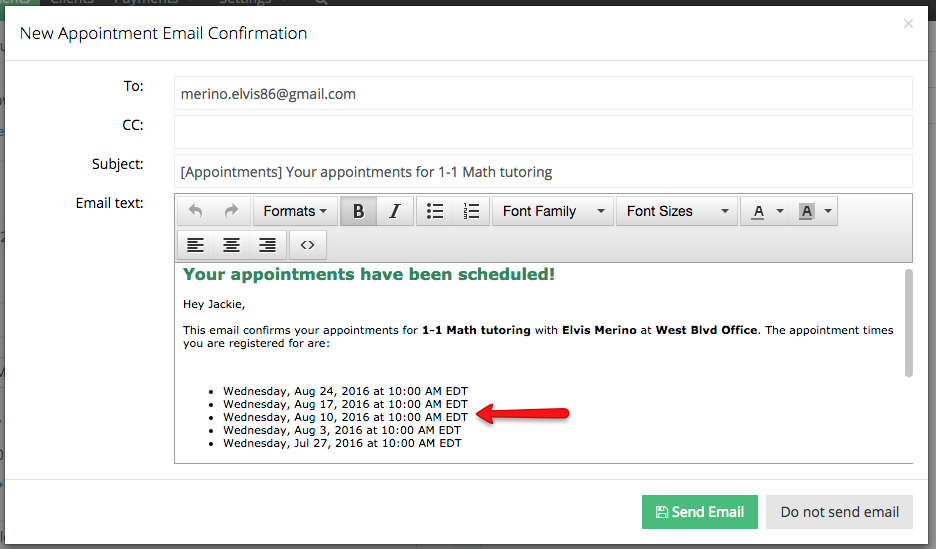
You'll be prompted about whether you want to send out an email about the new appointments. If you’re new to TimeTap, then the email checkboxes will be unselected; however, if you have made selections before, then TimeTap remembers those selections and will pre-select the previously checked boxes. The email that gets sent out will have a complied list of all the appointments in the repeating appointment series. You can also enter in a note which will be plugged into the email that's being sent out to the client. If you are a TimeTap Professional or TimeTap ProfessionalBusiness user, you also have the option to Edit the email to your client before it gets sent; this checkbox will also be pre-selected if you have checked it before, as TimeTap remembers your last selected email options:
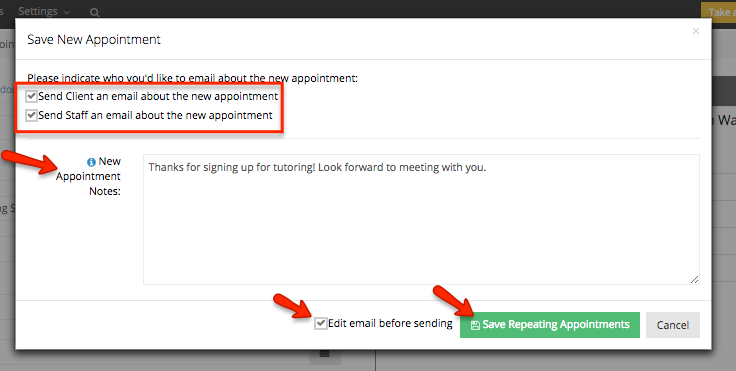
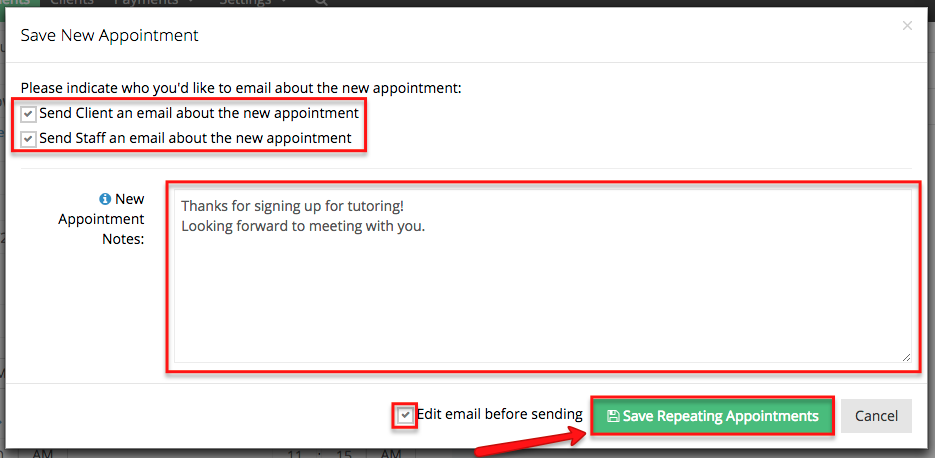
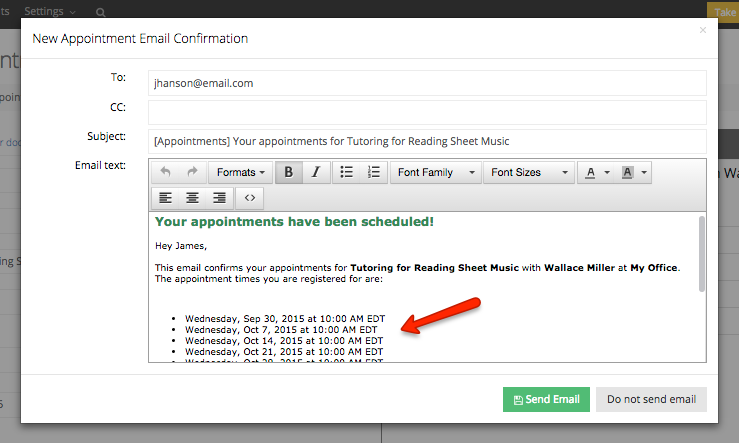
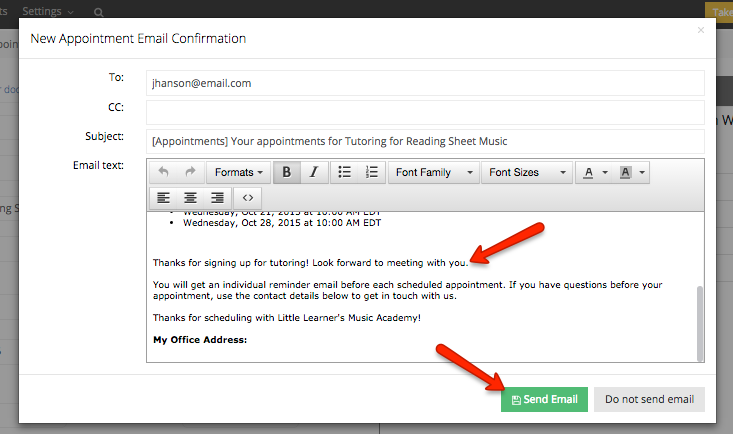
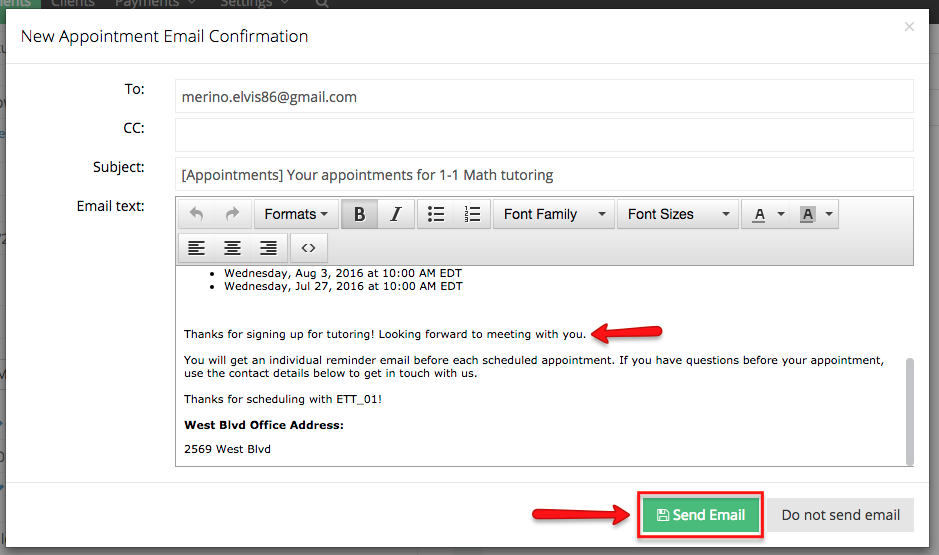
If you select to edit the email before sending, you'll see the list of appointments there as well as the new appointment note you entered. You can review the email and when you're ready click "Send Email":
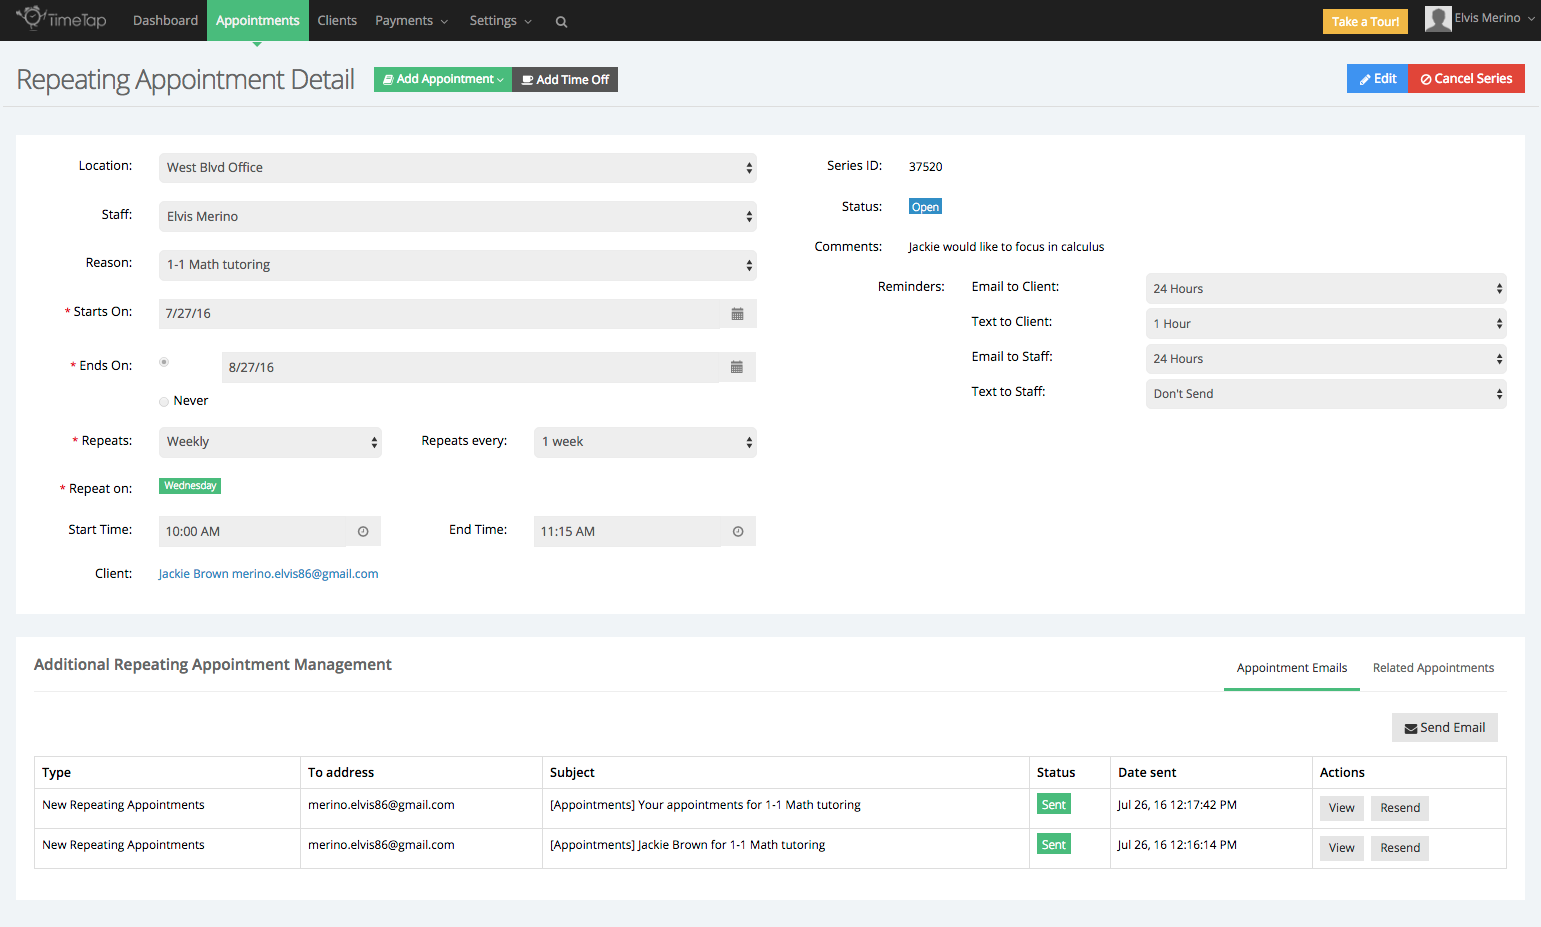
Once you've entered in these elements and saved the appointment, you will be taken to the "Repeating Appointment Detail" screen where you can see all the individual appointments in the series:
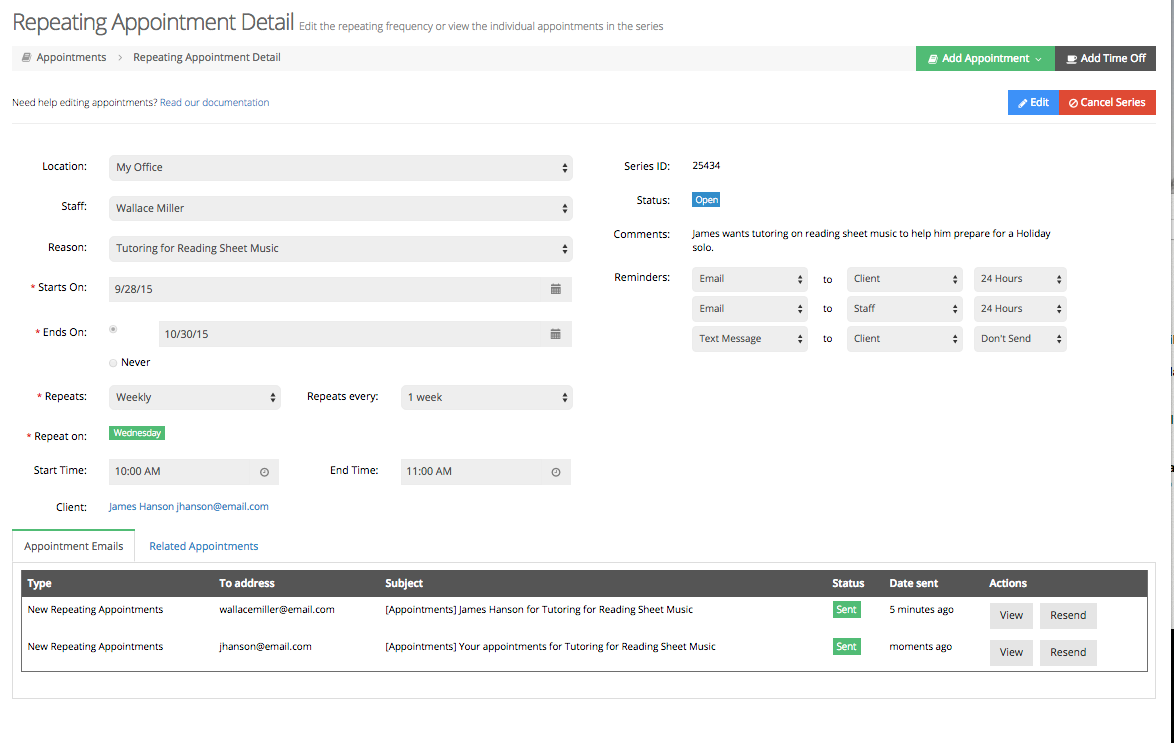
You'll be able to edit and manage the repeating appointment series from this screen, too. There's more on editing repeating appointments available here.