| Anchor | ||||
|---|---|---|---|---|
|
This basically creates "Folders" for your services and/or classes so clients don't have to browse your entire list of appointment types at once.
This is great if you have a whole lot of services and classes that you offer. Say you're a nail salon and you offer 10 different types of manicures, 15 different types of pedicures, 10 different types of waxing treatments, and so on. You wouldn't want to display all of these in one long list! Instead, you would create a group called "Manicures", a group called "Pedicures" and a group called "Waxing Treatments" and then sort the respective services and/or classes (if applicable) into these groups.
In this documentation, we'll cover:
- How to create a service and class group
- Editing a service and class group
- How to include service and class groups in your scheduler flow
I will use the above nail salon example for context. This could extend to any industry, I just think this is a pretty easily understood example for this feature. If you do have questions after reading through this documentation, reach out to our support team and we'd be happy to answer them.
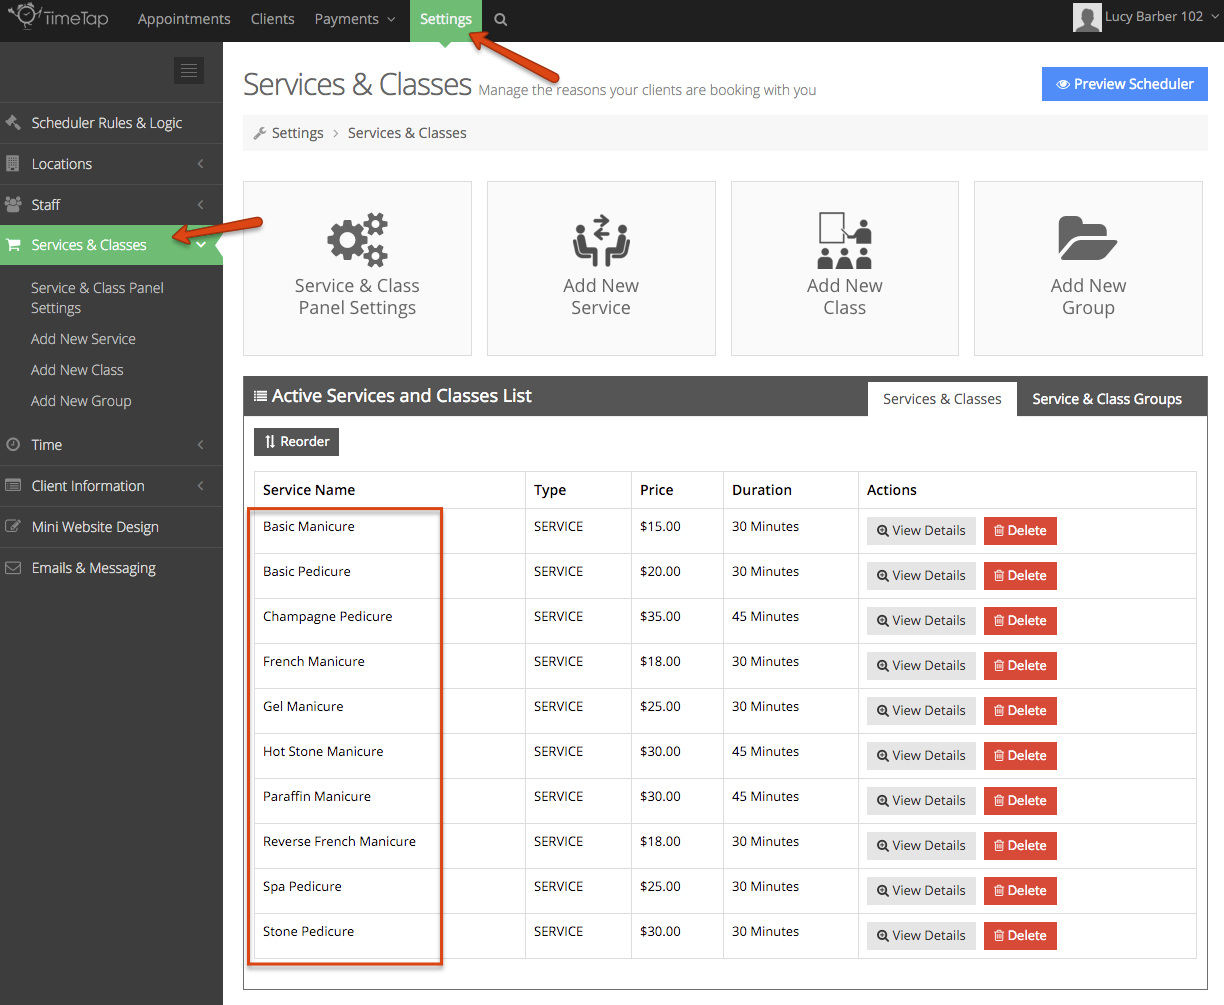
Let's say we run a nail salon business and we have a ton of different pedicure and manicure options as you can see from our list of services in our account:
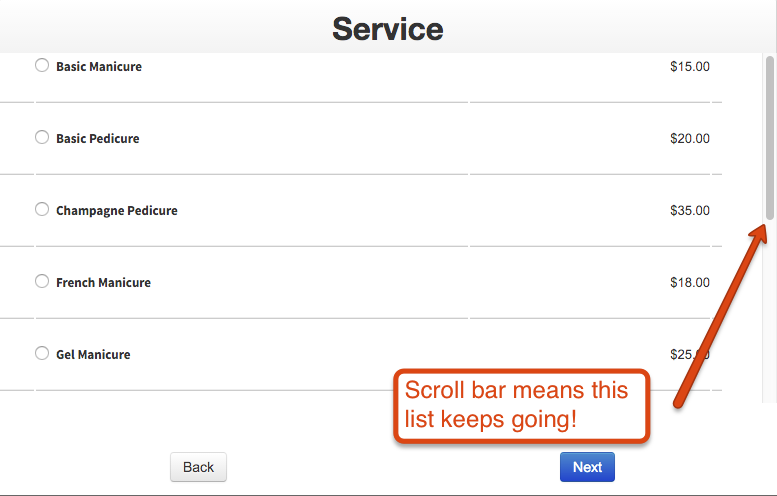
This gets to be a lot when clients go to your scheduler and end up seeing a long list of jumbled services:
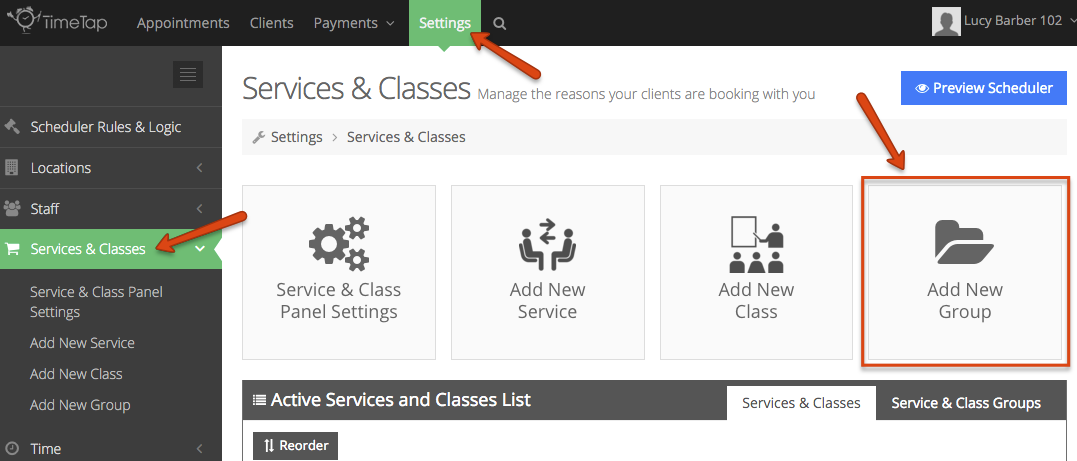
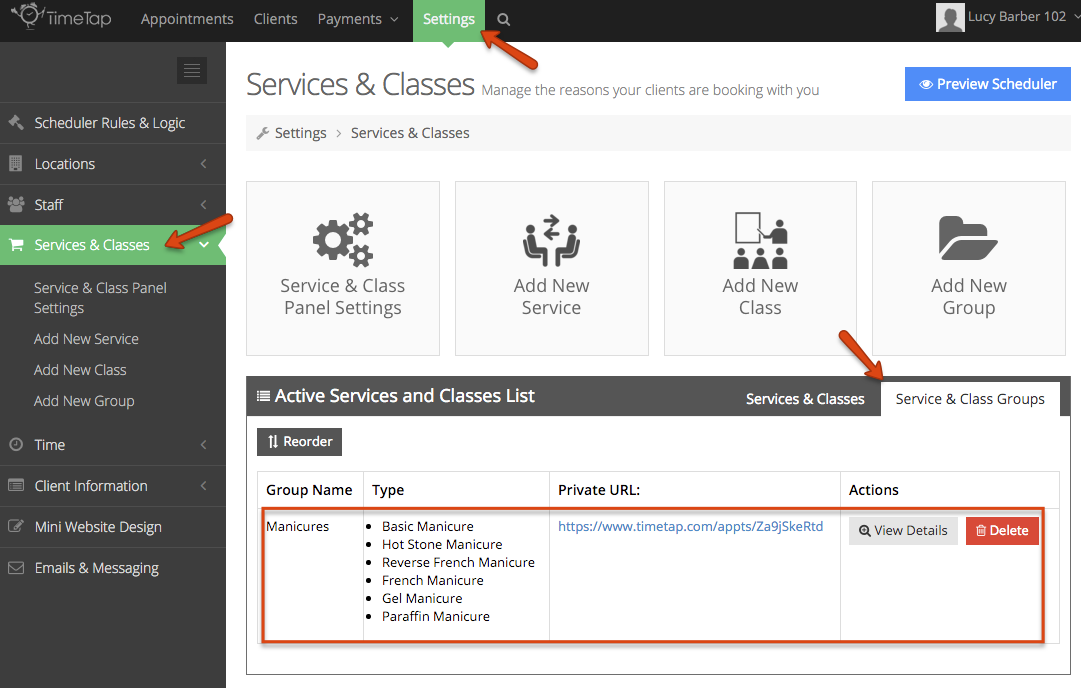
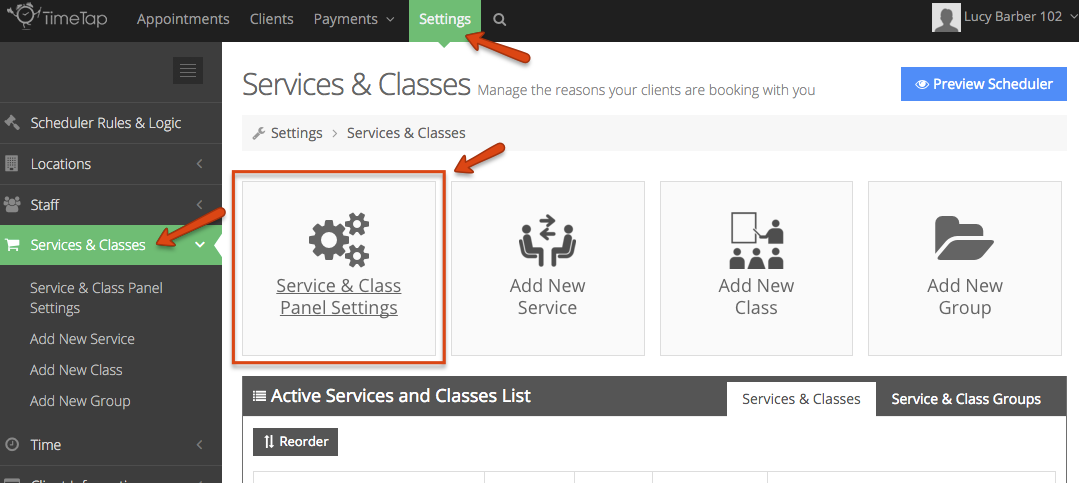
To make it easier for your clients, let's add in some service groups so that before they get to the service page, they can select which type of appointment they are looking to book. To do this, click the button to "Add New Group" from your Settings → Services & Classes page:
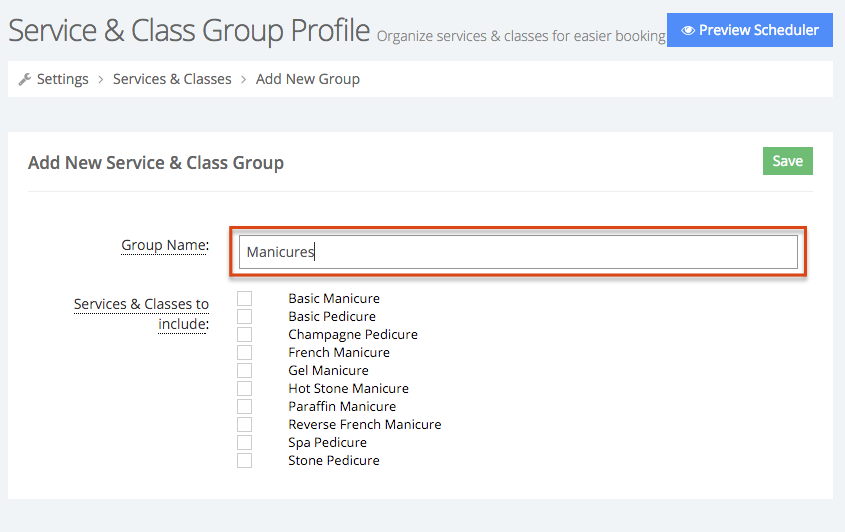
Set up your new group by first giving it a name. In this case I'll name the group "Manicures":
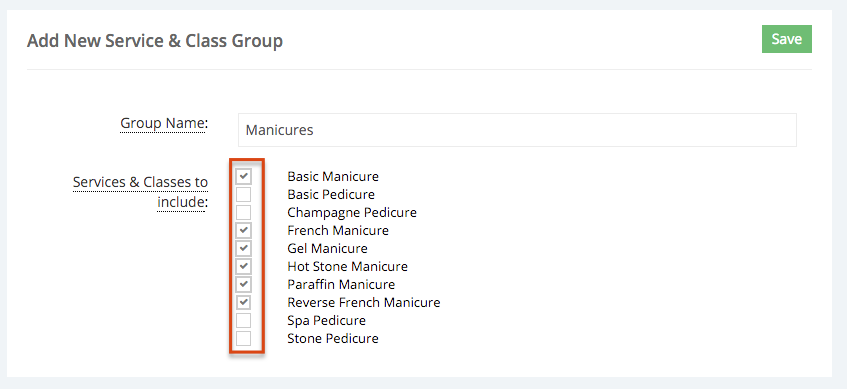
Next, select off the services you want to include in this group. In this case, I'll select all the Manicures:
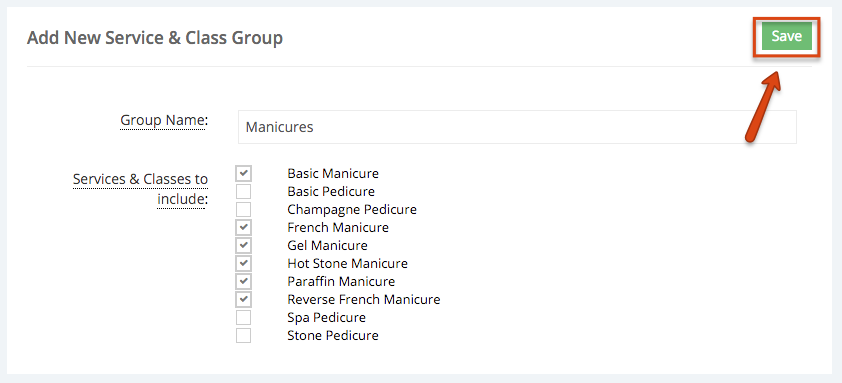
Finally, click the "Save" button in the top right to save your new service group to your account:
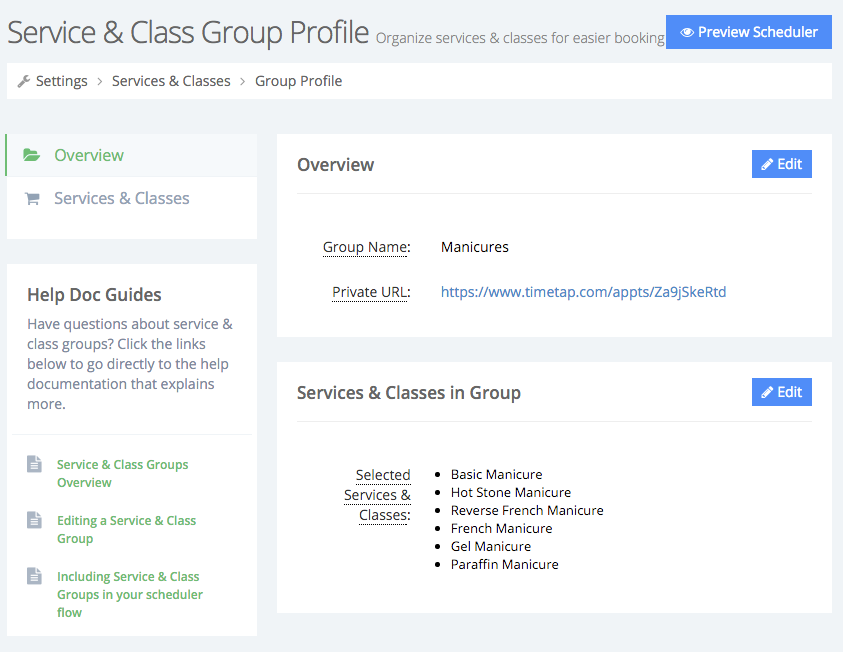
This will take you to the profile view for the saved group:
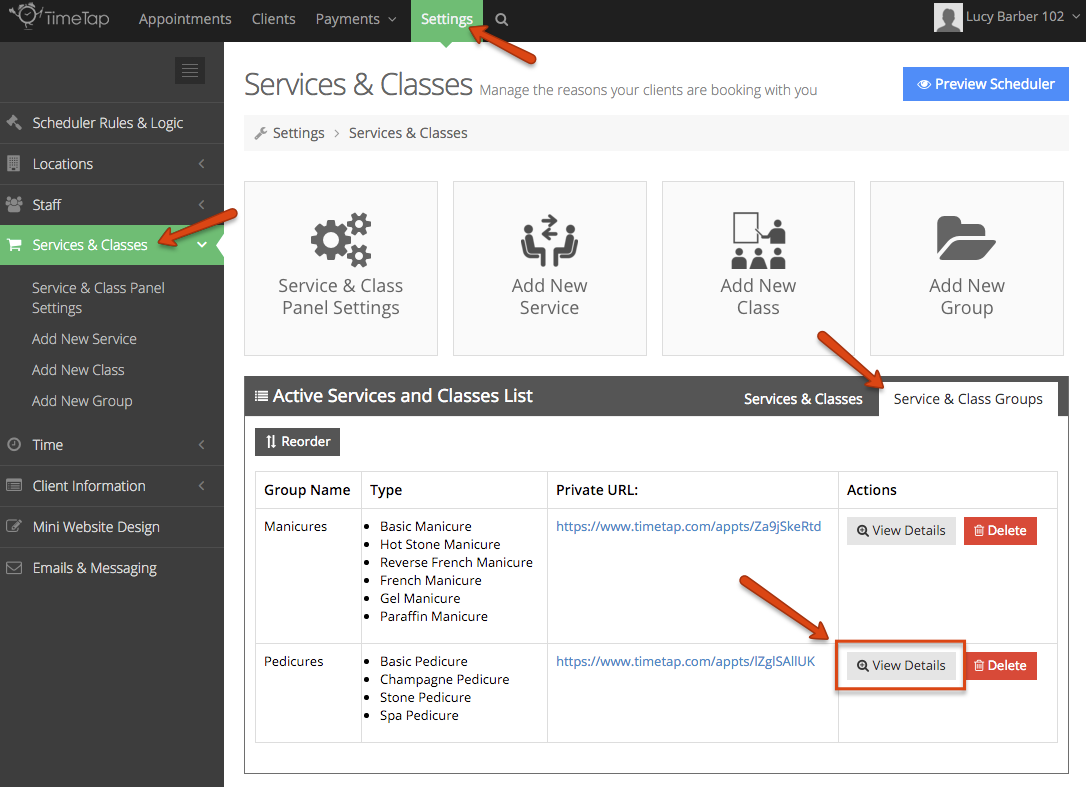
I'll now be able to find this group under my Settings → Services & Classes → Service & Class Groups list view:
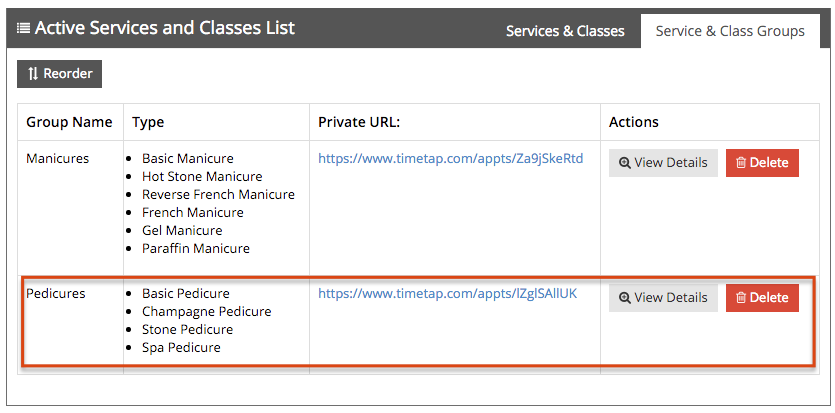
For this example, I'll also want to create another new group called "Pedicures" so that clients can choose whether they want to book a manicure or a pedicure before seeing the list of options for each. I'll do this the same way I created the Manicures group above. Once I'm done, the Pedicures group will also show up under my Service & Class Groups list:
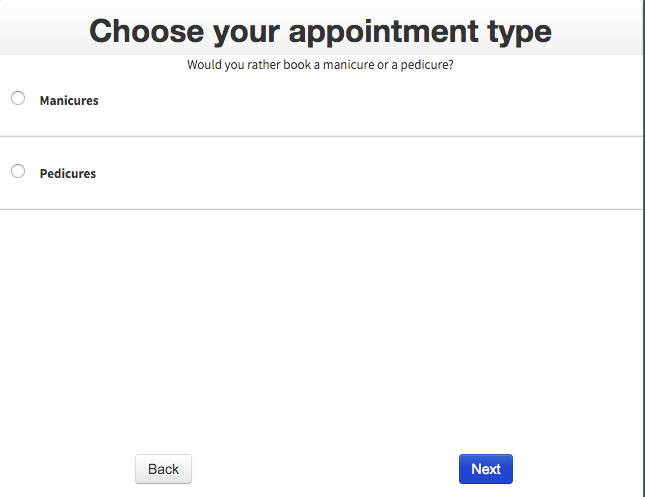
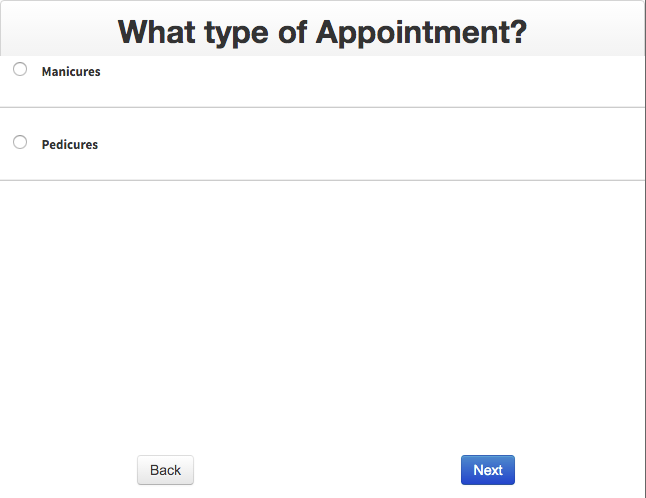
Now, so long as I have made sure to enable service groups in my scheduler's flow, then before clients get to the list of services on my scheduler, they'll first get to choose whether they are looking to book a manicure or a pedicure:
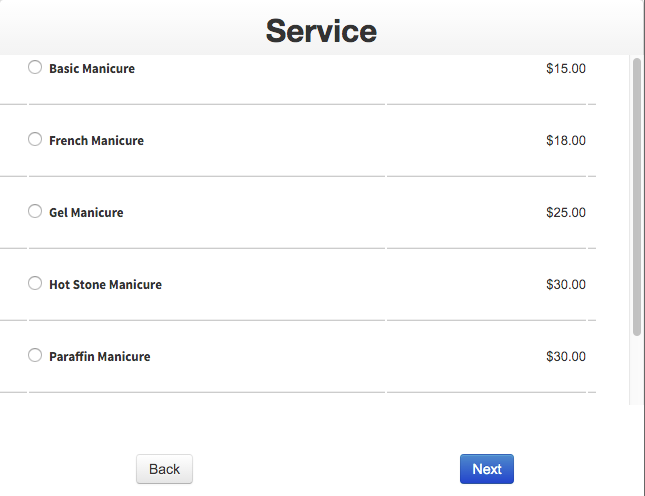
if they chose Manicures from the above image, the next page would show only the Manicure appointment types, none of the Pedicures:
And if they had chosen Pedicures they would only see the Pedicure appointment types:
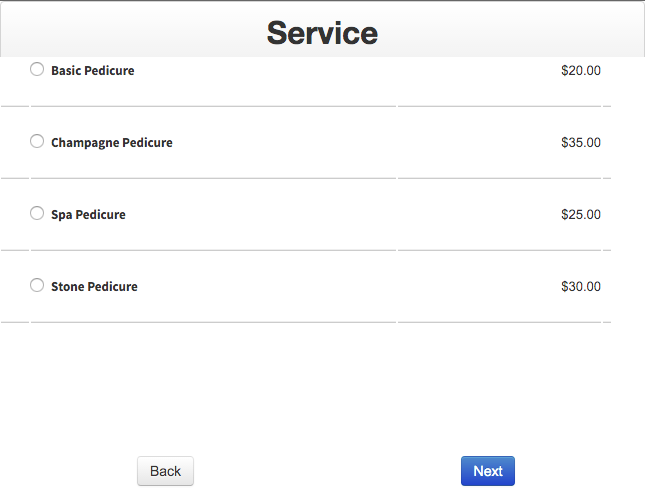
Much easier on the eyes, wouldn't you say?
Continue reading to learn how to:
Once you've established a group, you may, at a later date, decide to add another service or class that you want to include in that group.
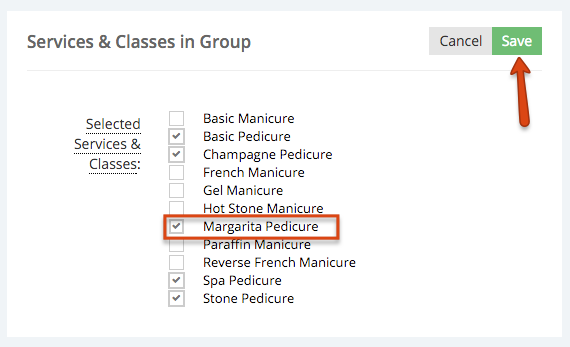
Let's say I've got my nail salon all set up on TimeTap and we decide to add in a new type of pedicure called a Margarita Pedicure. I've already created the service, but now I need to include it in my existing Pedicures group.
First, I'll navigate to Settings → Services & Classes → Service & Class Groups list view and click the "View Details" button next to my group that's named "Pedicures":
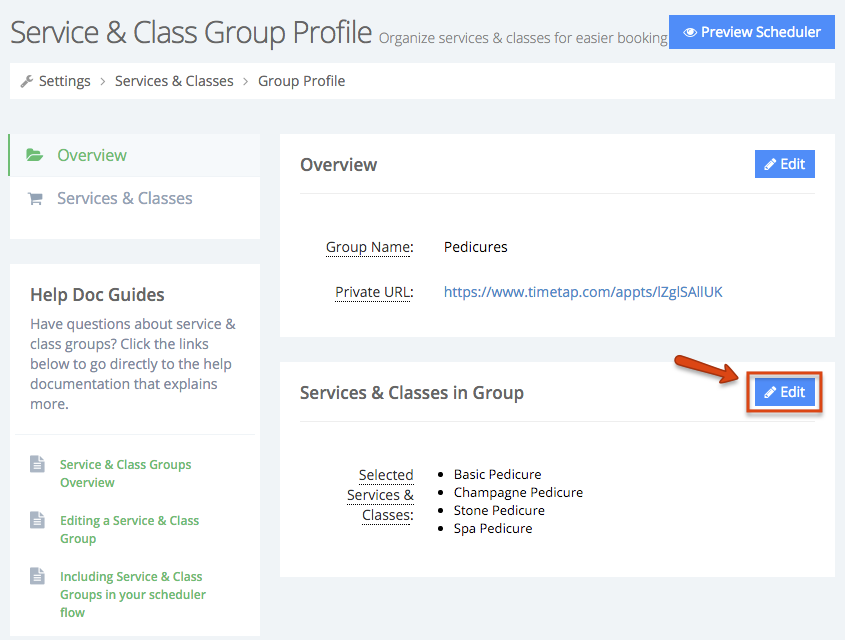
This will take me to my group profile view which shows the groups current name, it's private URL, and the current selection of services and classes in that group. To edit the selection of services and classes in the group, I'll simply click the "Edit" button next to the Services and Classes section of the page:
At first only the existing services and/or classes in the group will have a check mark next to them:
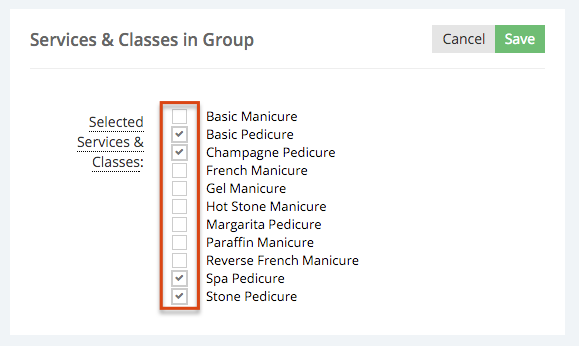
To include a new type of service, I'll simply check off that service and then click "Save" in the top right:
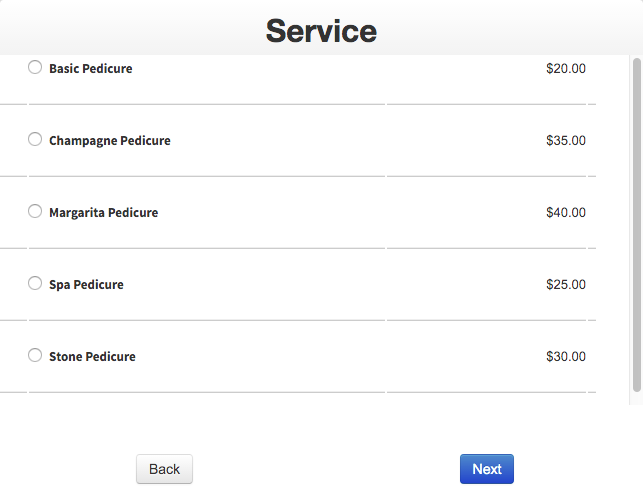
Now when that service group is pulled up in the scheduler flow, you'll see that new service among it as well:
If you've added service and class groups on your account, then most likely you'll want to include them in your scheduler's flow as well. This means that before clients see your list of services and classes, they'll first see the list of groups that you have, select a group, and then see only the filtered services and classes that are in that group.
To include service groups in your scheduler's flow, follow these steps:
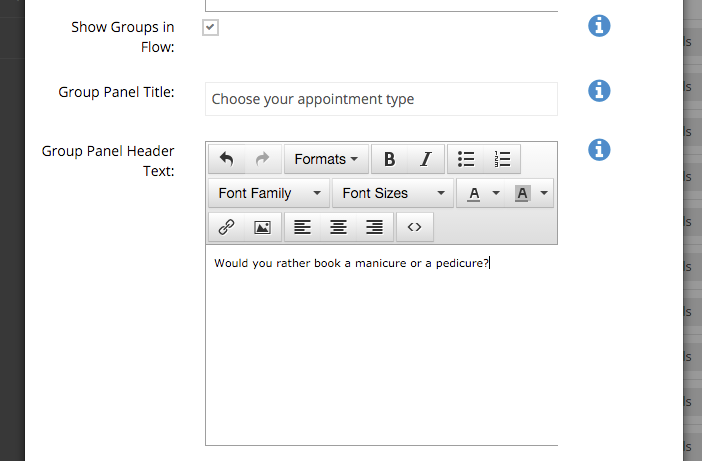
Go to Settings → Services & Classes and click "Service & Class Panel Settings":
On the window that appears, check the checkbox next to "Show groups in flow":
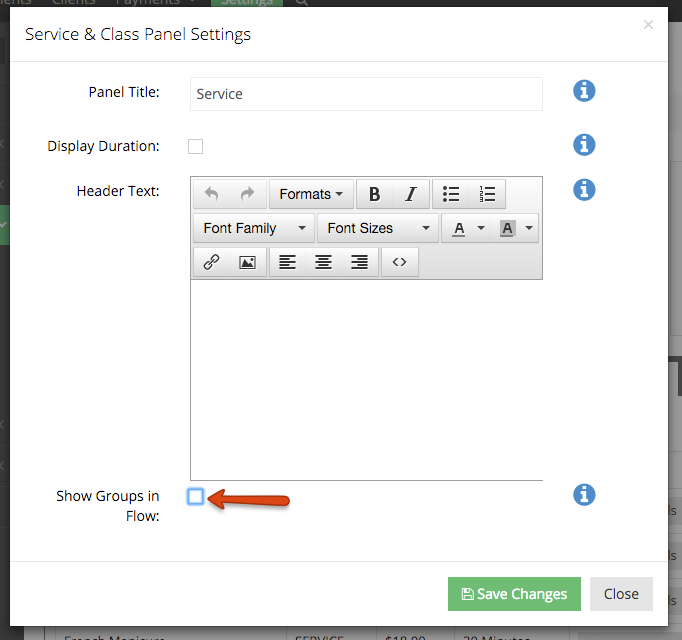
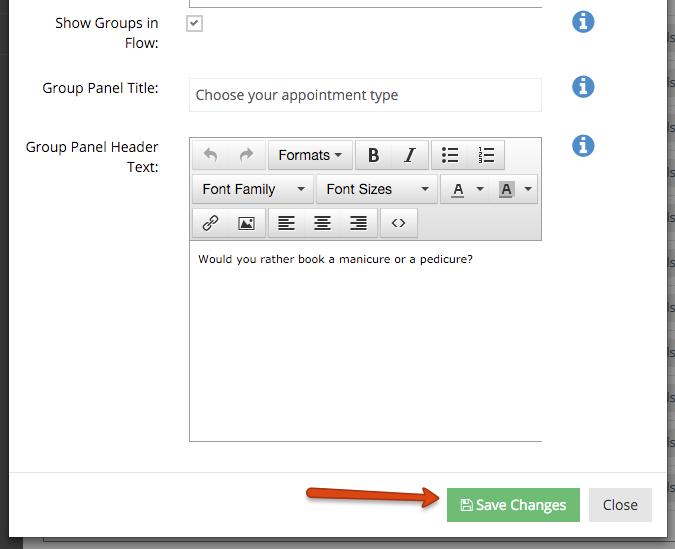
This will give you the option to rename the title bar for the service groups panel as well as add some header text if you'd like:
Once you've entered in these options, click the "Save Changes" button at the bottom of the "Service & Class Panel Settings" window:
Now your service groups will show up in your scheduling flow with whatever title and header text you set: