| Anchor | ||||
|---|---|---|---|---|
|
In this page we'll cover the following:
| Table of Contents | ||
|---|---|---|
|
Before we can allow clients to purchase packages we must enable the "Store" portion of the scheduler, to accomplish this go to Settings → Mini Website Design → Color Scheme & Styling:
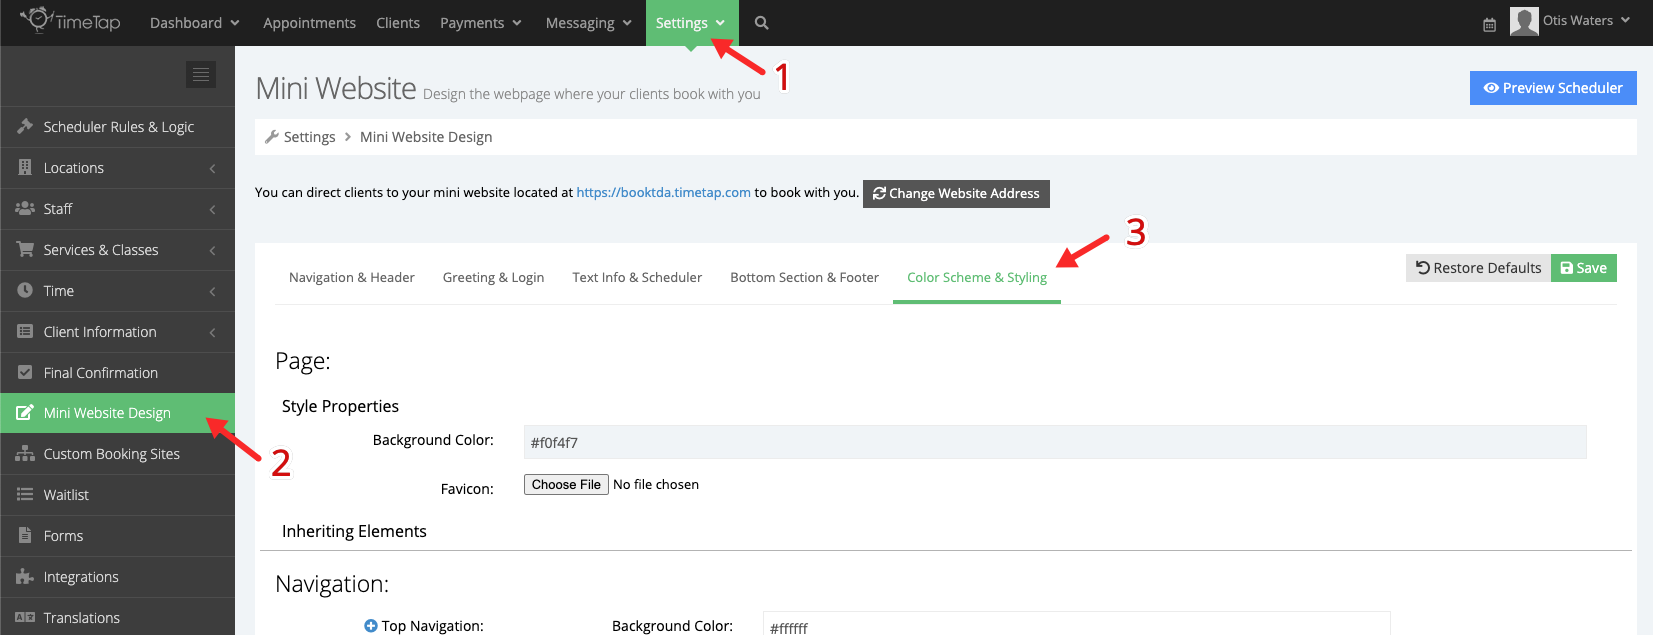

Locate the "Store" category, check the "Enable" box in the "Style Properties" section, the box next to "Packages" should check automatically, scroll to the top of the page and click Save:


Now that we've enabled the Packages for clients, when they reach your scheduler they will see a Packages option in the navigation menu:
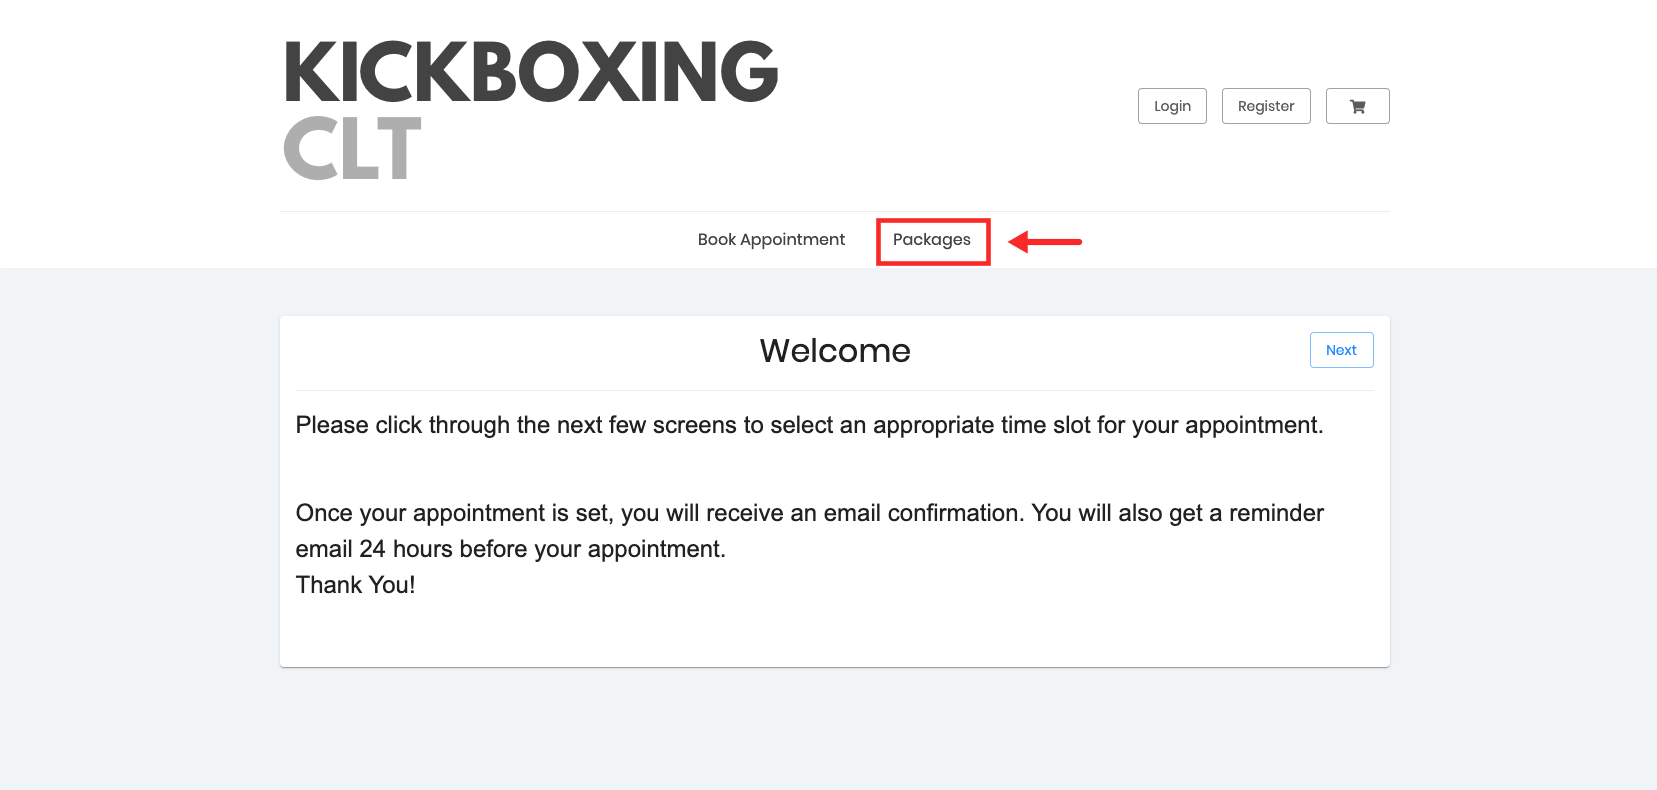

Note: In order for clients to purchase and redeem packages they must register if they are a new client, or login using their email and password if they are returning clients.
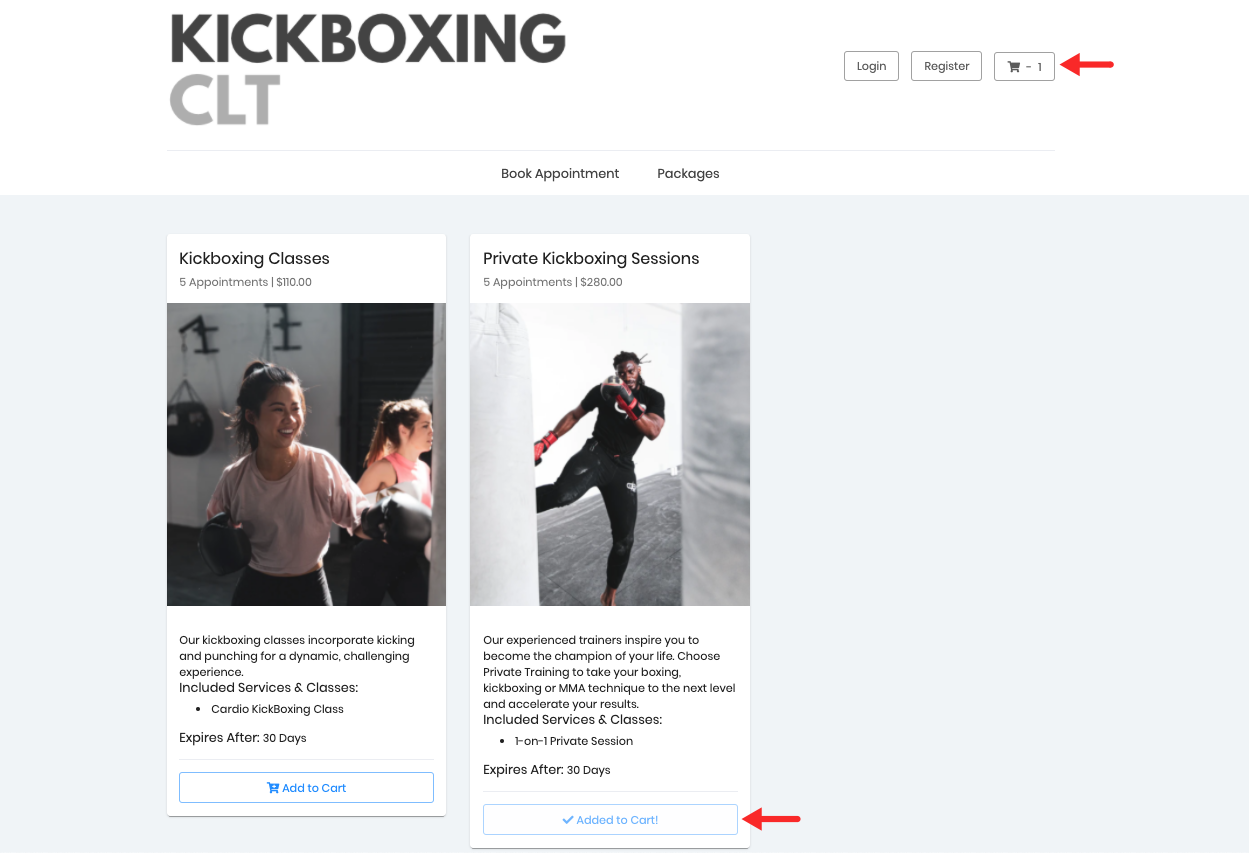
For this example where we'll assume that our business offers kickboxing classes as well as private lessons, we created 2 packages, one for each type of service. When clients go to our mini website and click the Packages option in the navigation menu, they will see the 2 packages we created:
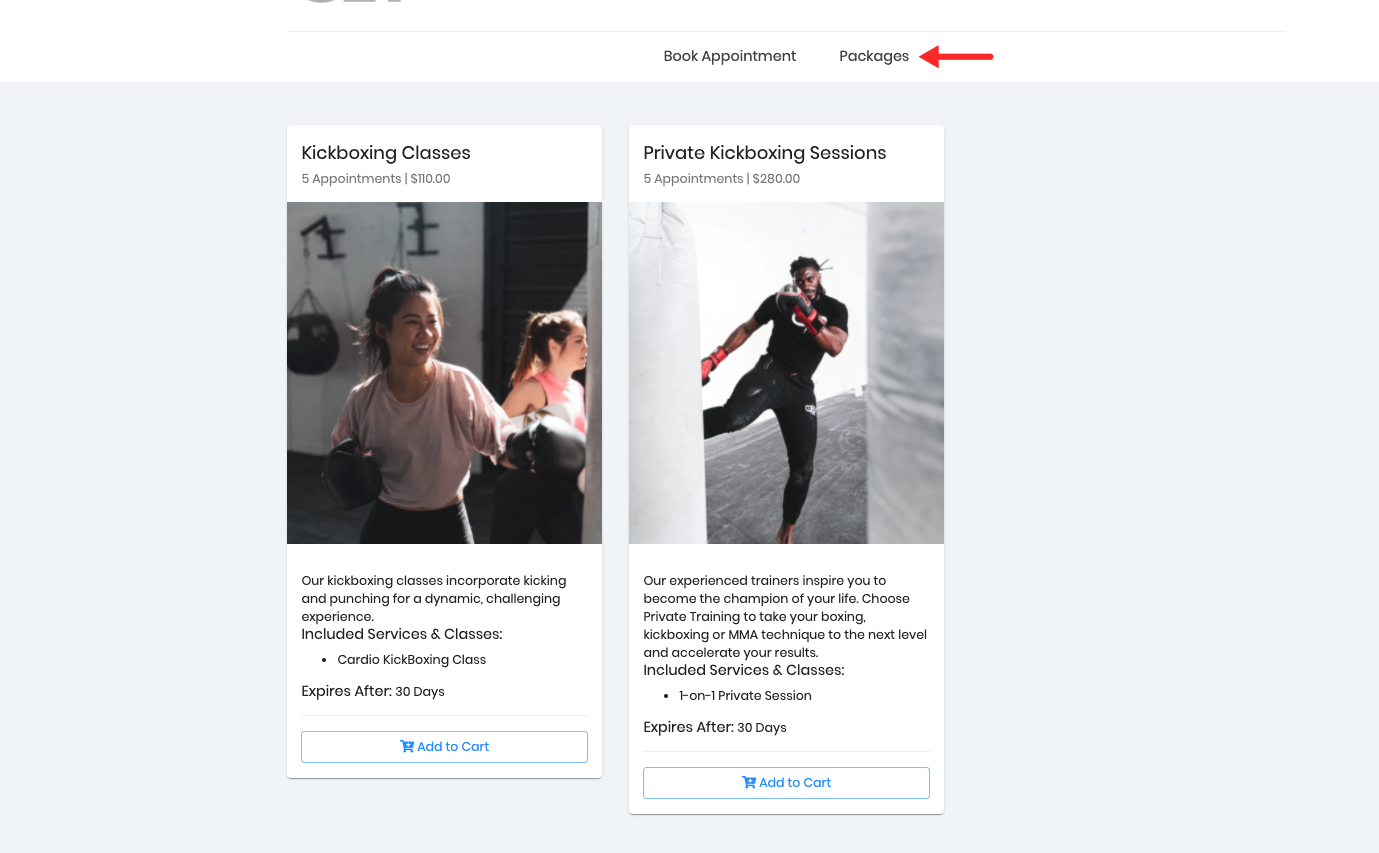

Packages will show the following information:
Package Name
Number of Appointments in Package
Price
Package Image (optional)
Package Description (optional)
Services & Classes Included in Package
Expiration
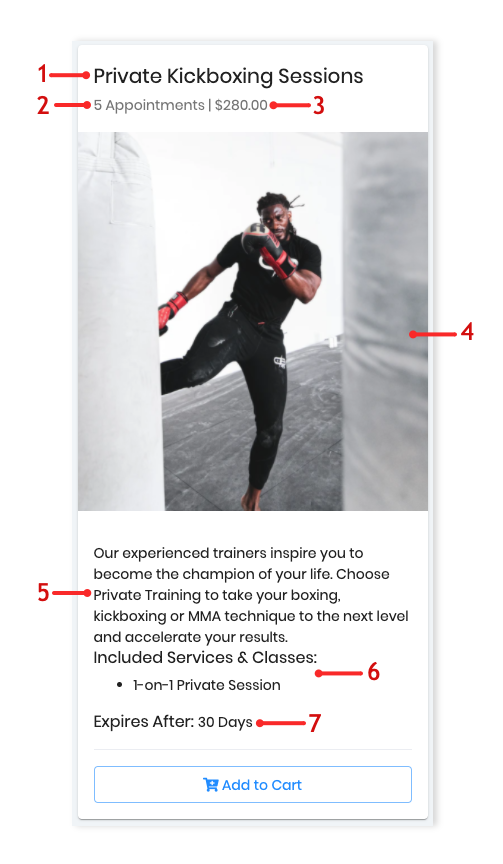

Clients may purchase one or multiple packages - when they decide on which package(s) they want to purchase and click the Add to Cart button below the package card, the packages will be automatically added to the cart:

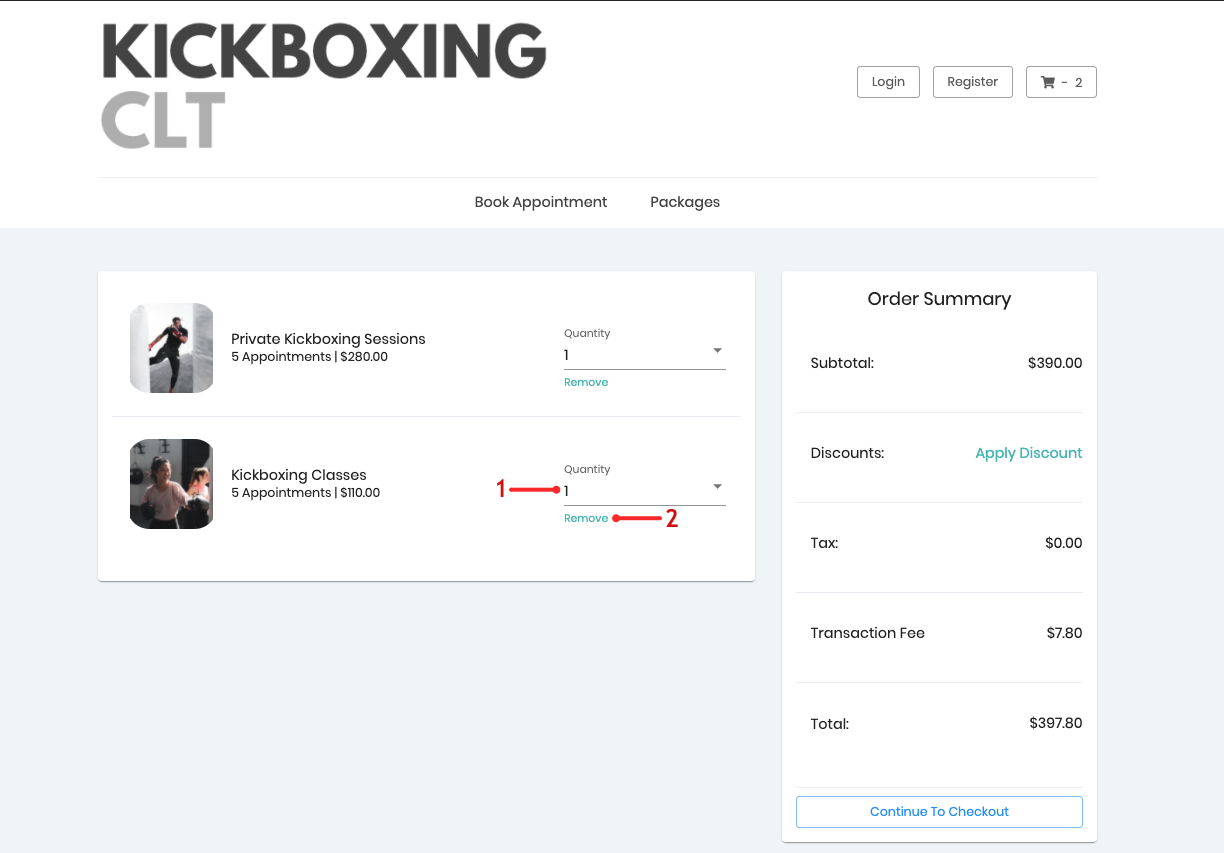
While in the cart, clients will see the packages they have selected listed on the left side of the screen. Within this section they have the option to increase the quantity of packages they want to purchase (1) or click the "Remove" option to remove the package from the cart (2):
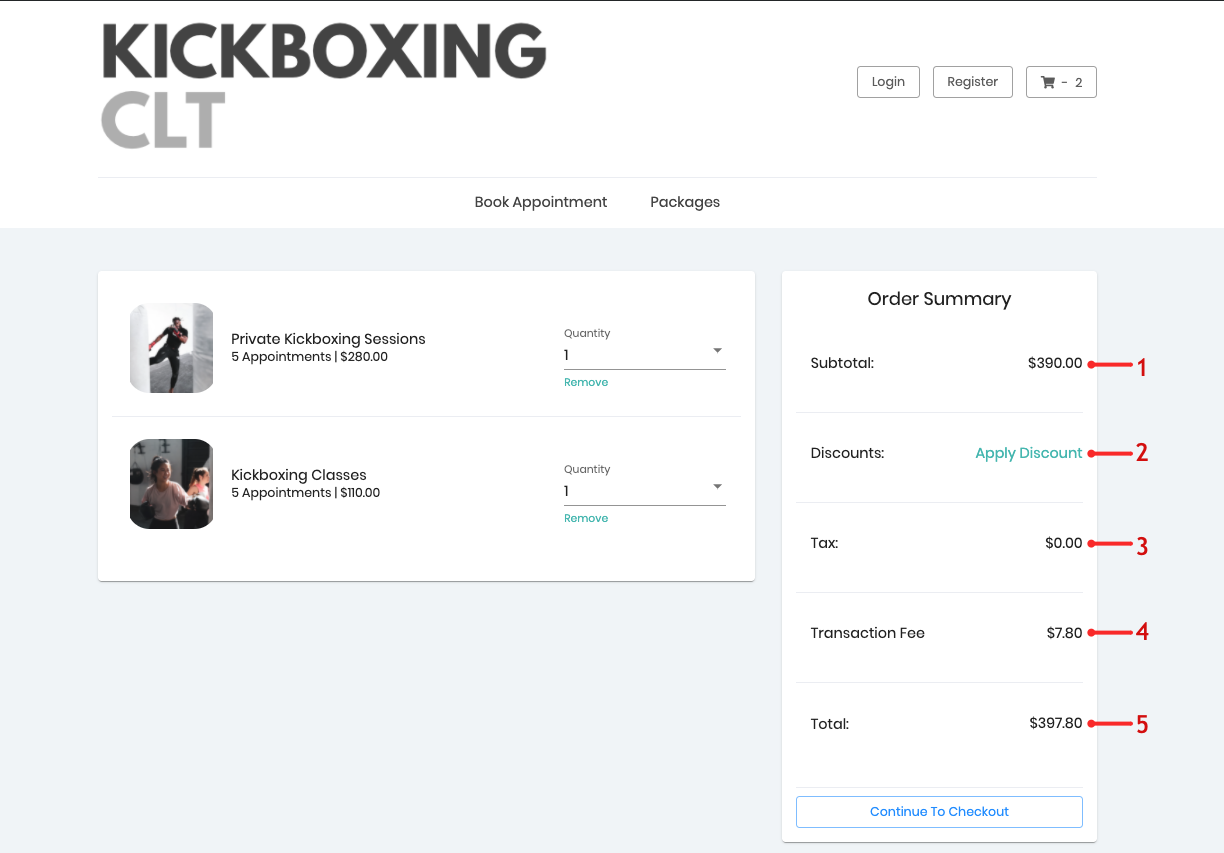
While the left portion of the screen displays the packages the client added to the cart, the right portion of the screen will display the Order Summary. In this section clients will see the Subtotal (1), apply coupons (optional)(2), tax (optional)(3), transaction fee (optional)(4), and total (5). To begin the checkout process the client must click the Continue to Checkout button at the bottom of the Order Summary section:

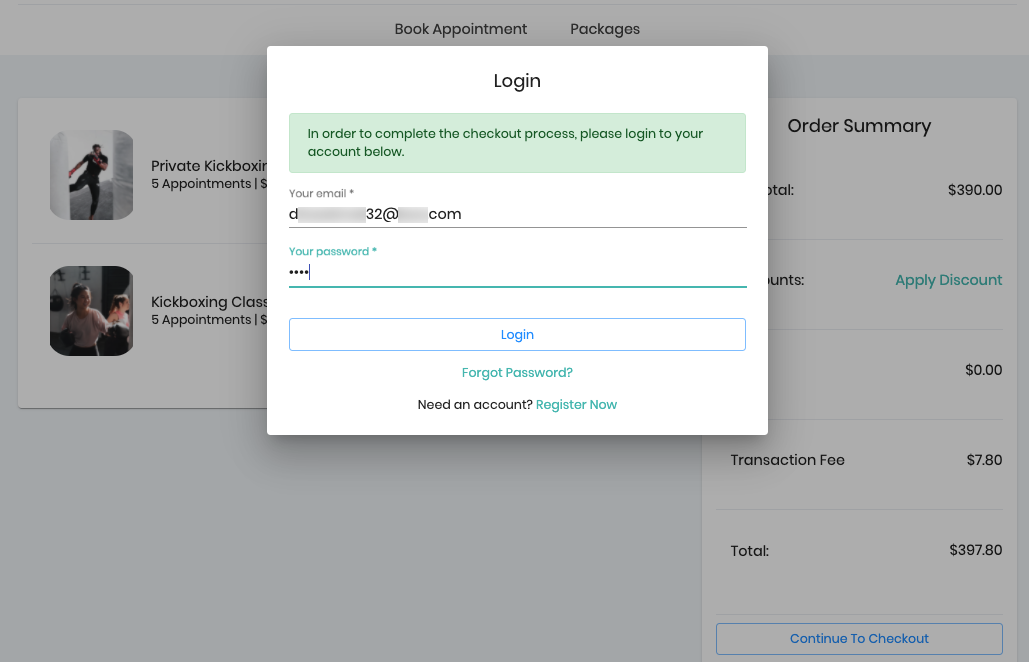
After the "Continue to Checkout" button is clicked the Client Login window will appear - here clients will have to option to enter their email and password to continue the checkout process or register if they're a new client. For this example, we'll assume that the client purchasing the packages is an existing client:

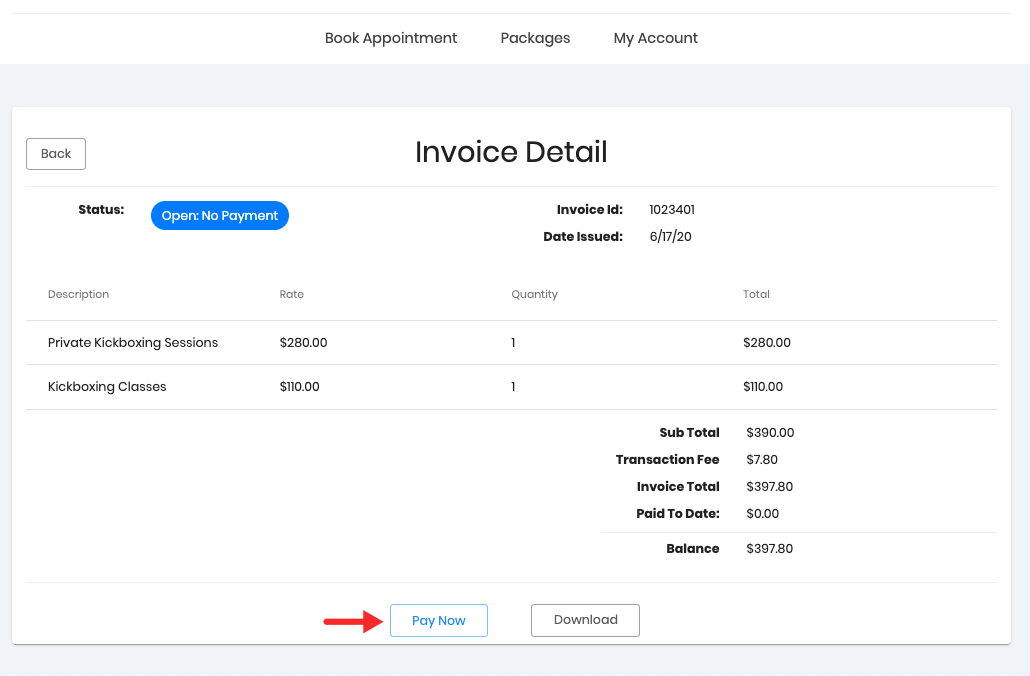
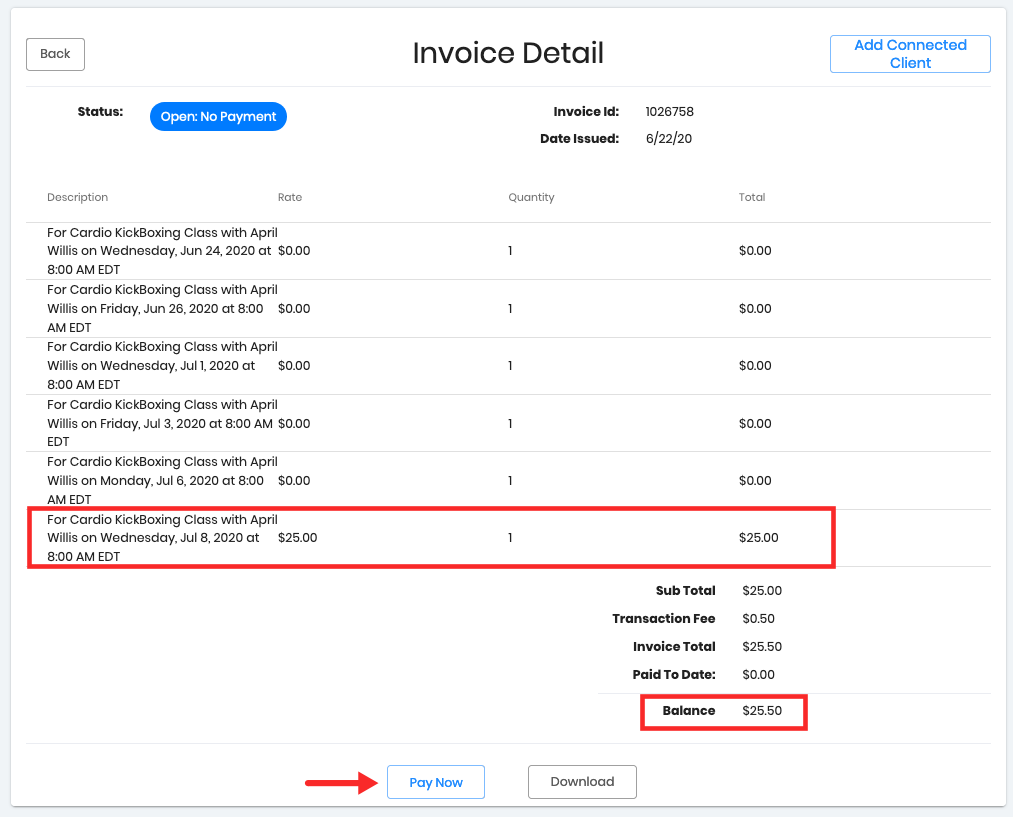
After the client logs in, they will be redirected to the Invoice Detail panel where they will see a summary of the charges and have the option to pay and download their invoice. To continue to the next step of the checkout process the client must click Pay Now:

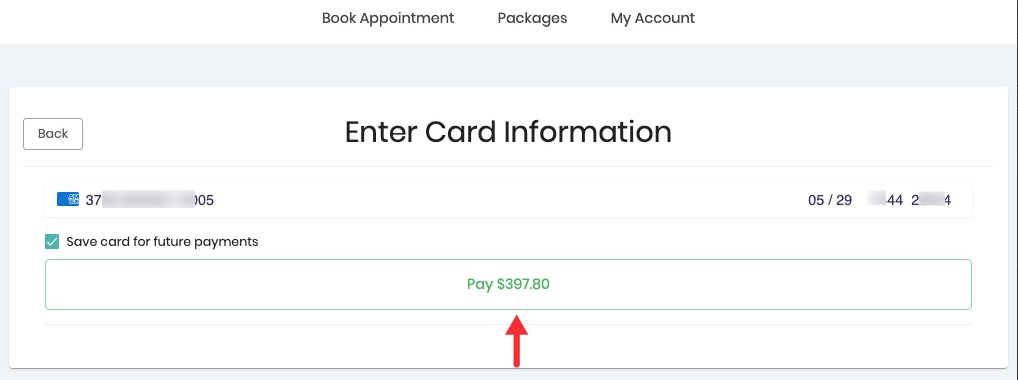
In the Card Information panel the client will enter their credit card information, save the card for future payments (optional if using Stripe or Square), and click the Pay button:

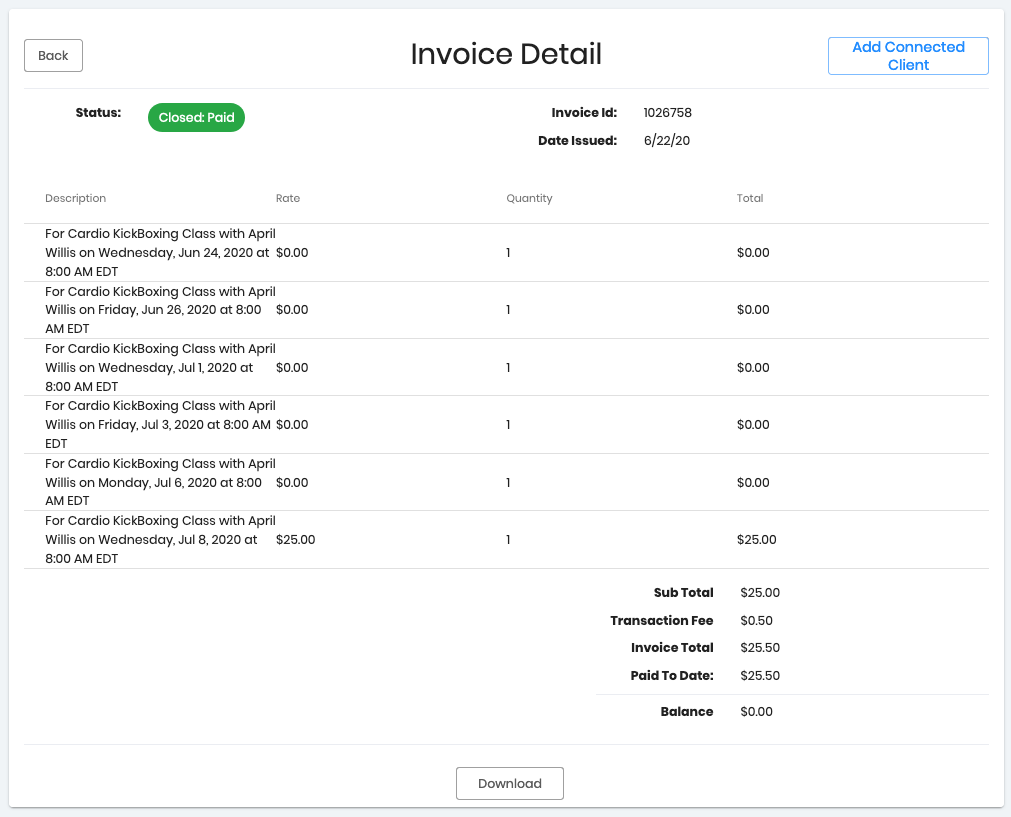
After the payment is processed, the client will see the Invoice Detail panel where the invoice status will now appear as "Closed: Paid", and the client will once again have the option to download a copy of the invoice for their records:


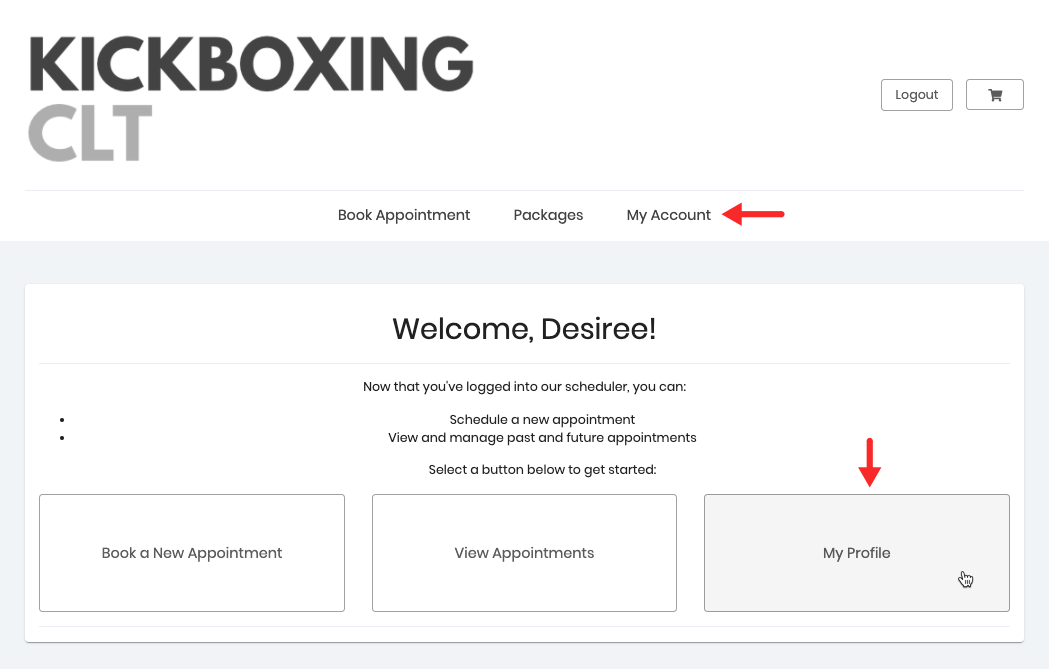
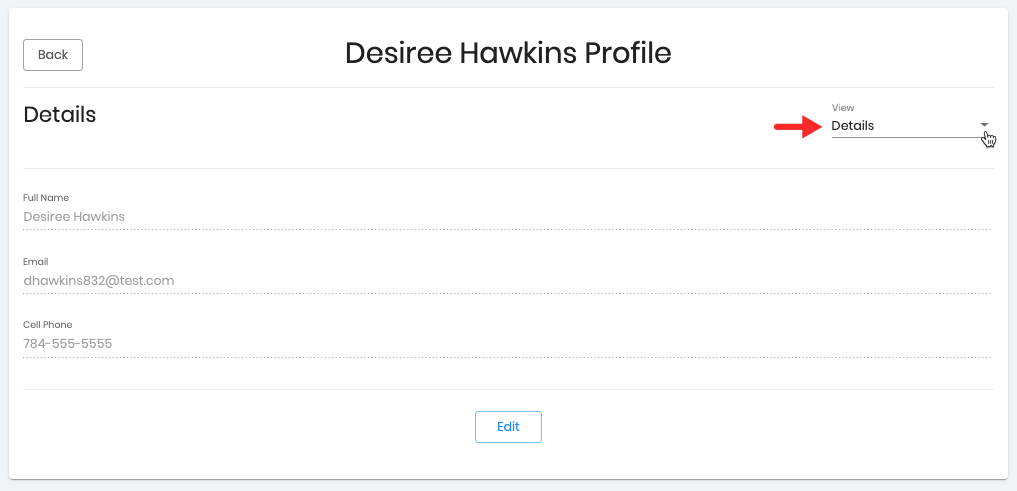
The client can choose to view the packages they just purchased by selecting "My Account" in the navigation menu and then choosing My Profile:

Once in their profile, they can click the "View" dropdown and select Packages:

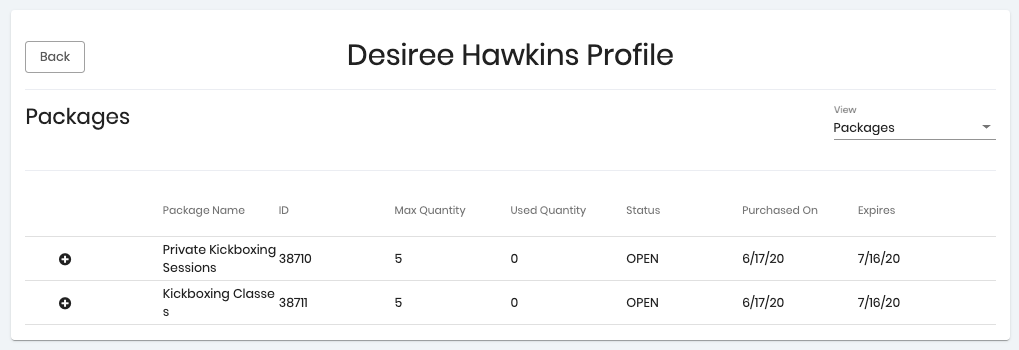
In the Packages panel the client will see relevant information regarding their packages as well as the appointments they have redeemed with their packages, which we will cover in the next section:

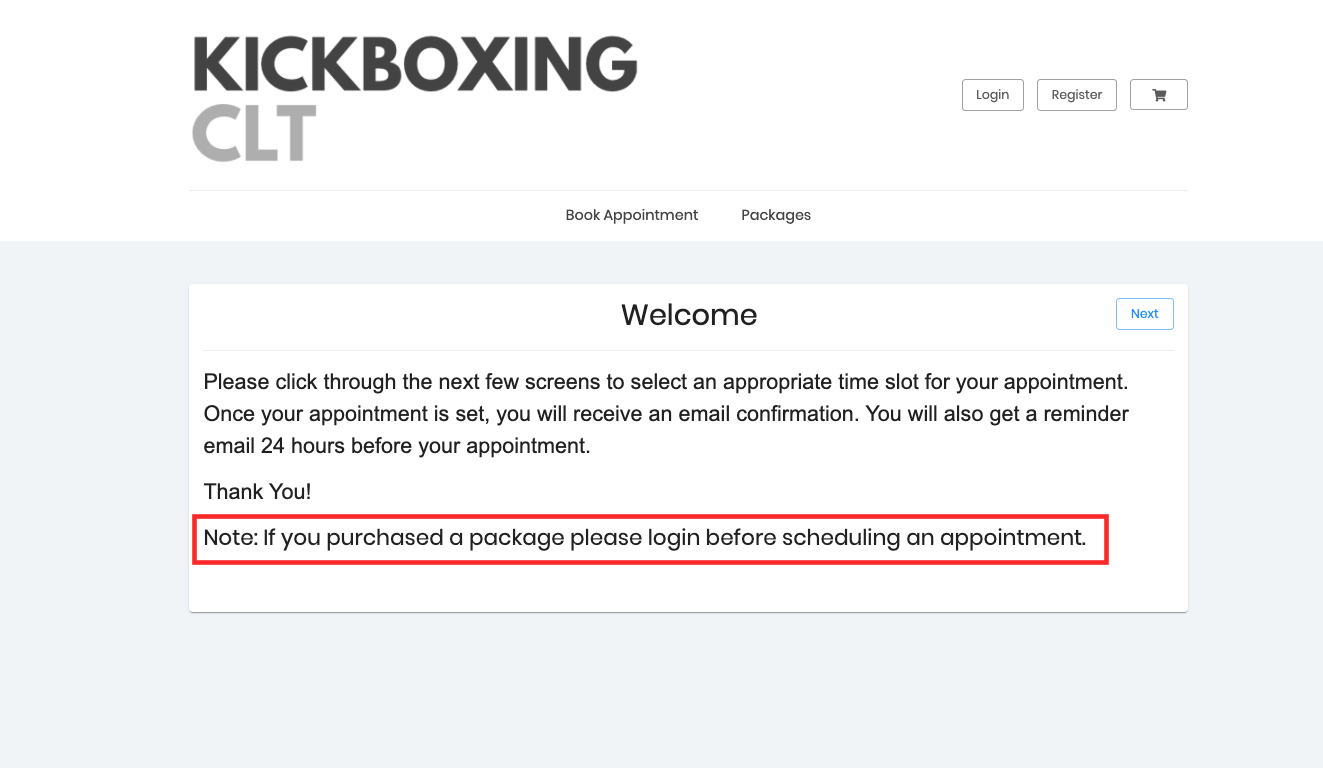
In this section we'll cover how clients can redeem packages when scheduling one or multiple appointments. In this particular example we've added a brief note in the Welcome Message (Settings → Mini Website → Greeting Login → Welcome Message) where we ask clients who have purchased packages to login to the scheduler before booking their appointment. You may choose to communicate this step using other methods:

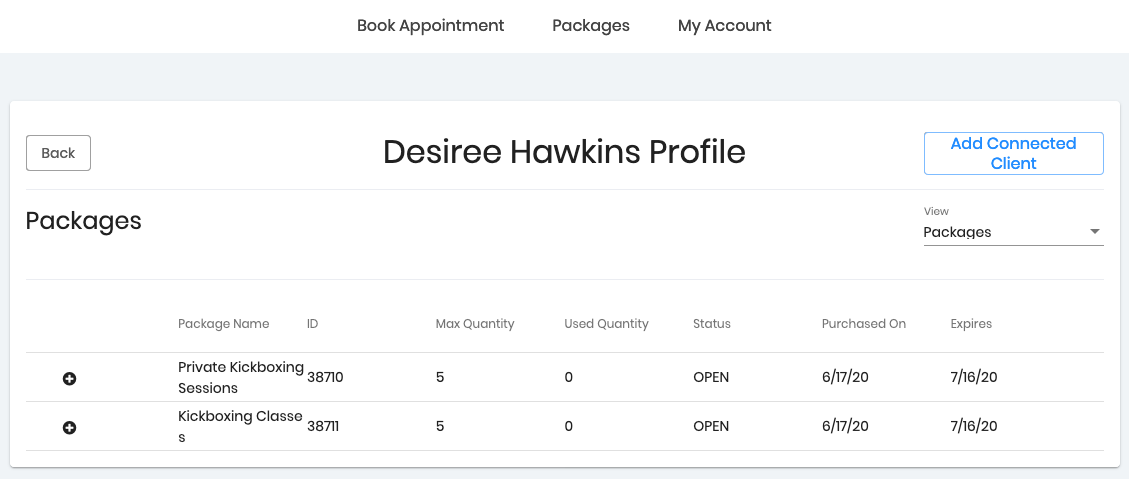
In this example our client Desiree has purchased two packages, one for private kickboxing sessions and another for kickboxing classes:
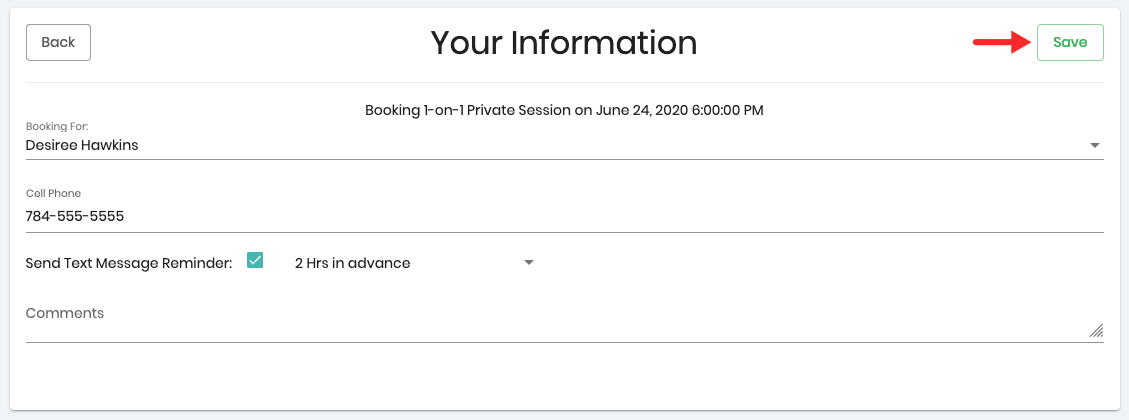
The client has chosen to schedule one private kickboxing session, and this session requires payment at the time of booking. After selecting the date and time of the appointment, the client will click the "Save" button in the Client Information panel to begin the checkout process:

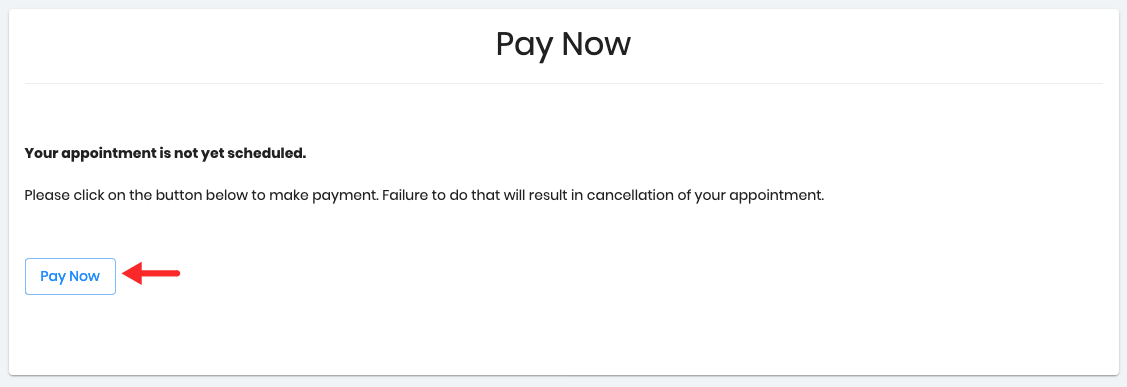
While in the Payment panel the client will click the Pay Now button:

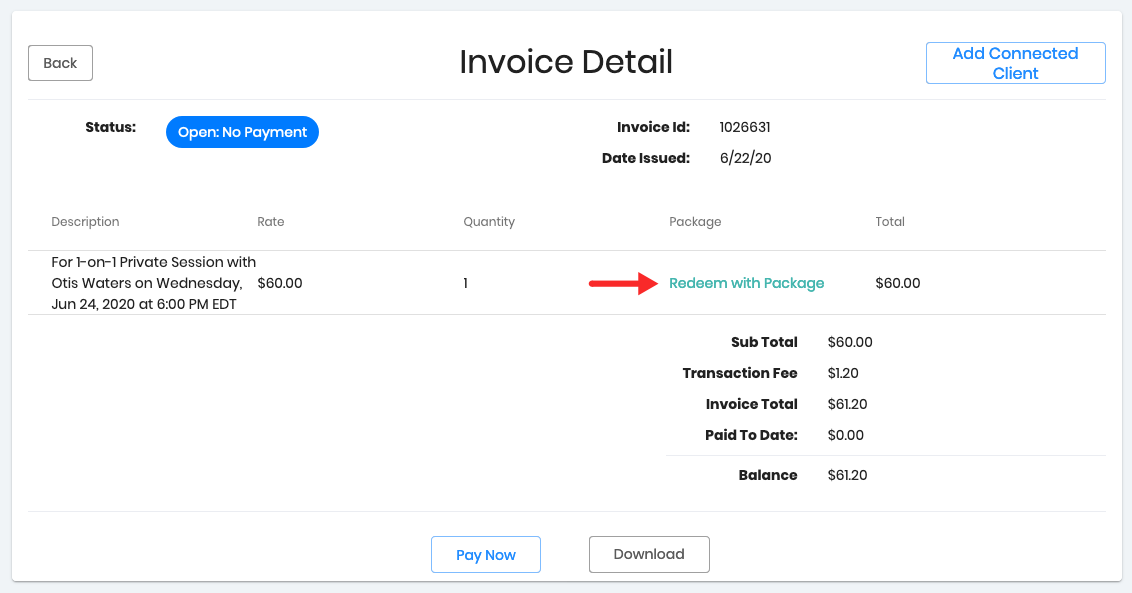
The client will then be redirected to the Invoice Detail panel, where they'll have to click "Redeem with Package" to apply the corresponding package to their appointment.

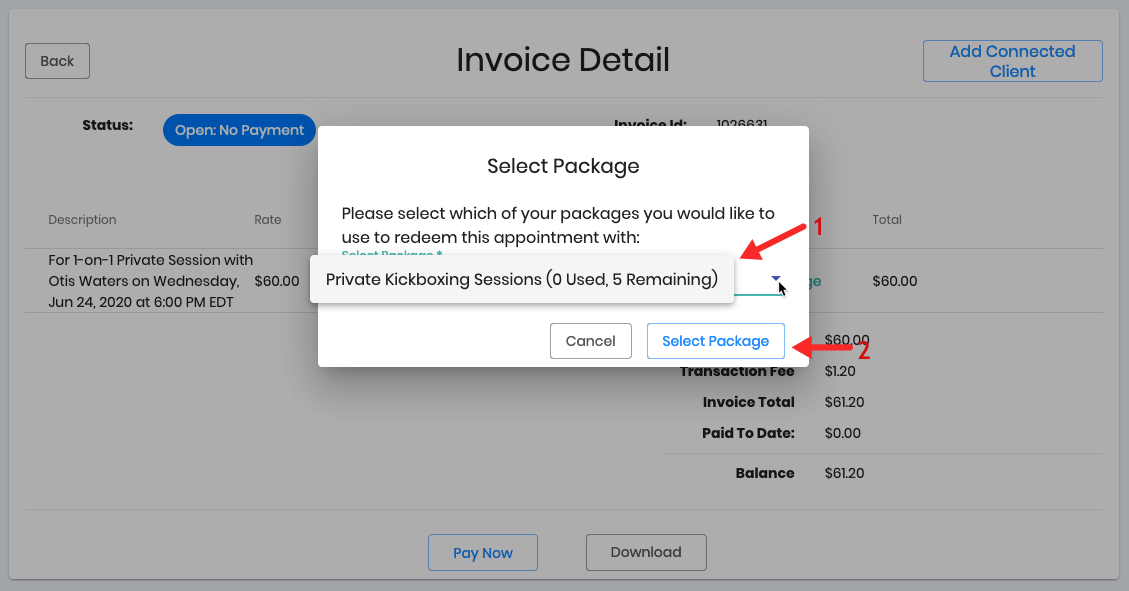
When the "Select Package" dropdown appears they'll have the option to choose the package they would like to redeem. Only packages that are applicable (based on the service selected) and with remaining unused sessions will be displayed. The dropdown will not display expired packages or those that do not have any remaining sessions to be redeemed. After the client chooses the package, they'll click "Select Packages":

Finally, the client will have to confirm that they want to apply the package to the appointment:
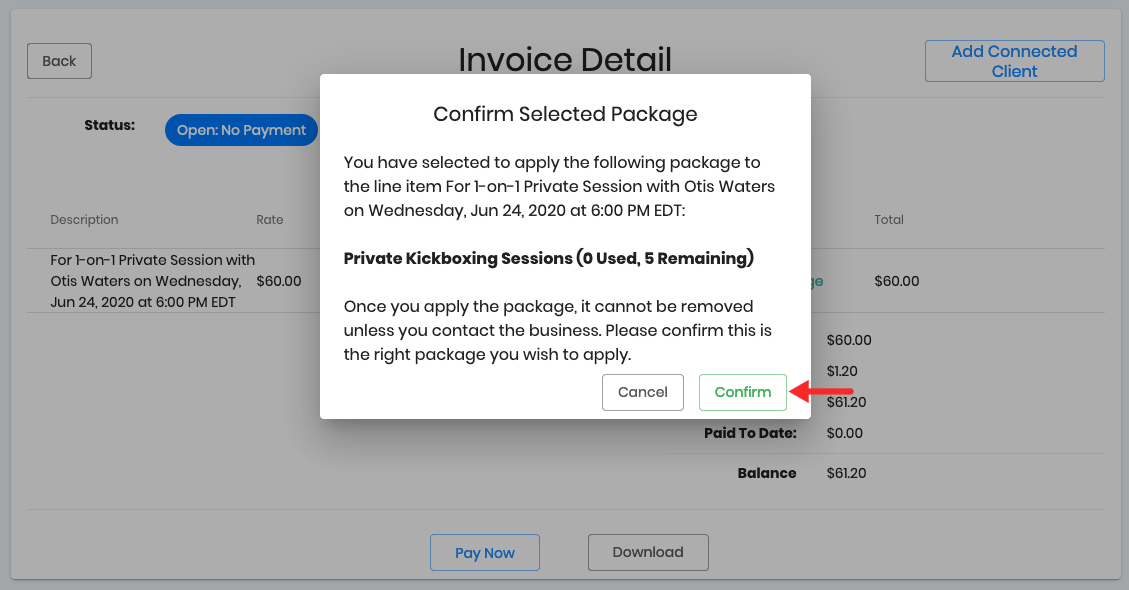

Note: Once the client applies the package, it cannot be removed unless they contact you or your staff and you take action in the backoffice.
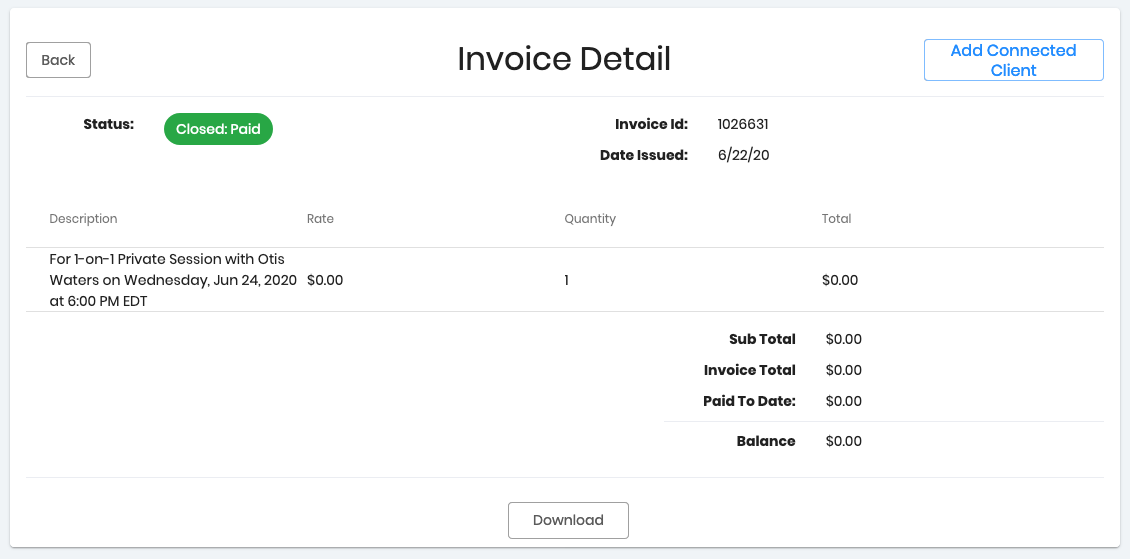
After the package is applied to the appointment, the status of the invoice will change to "Closed: Paid" and the balance will be set to $0:

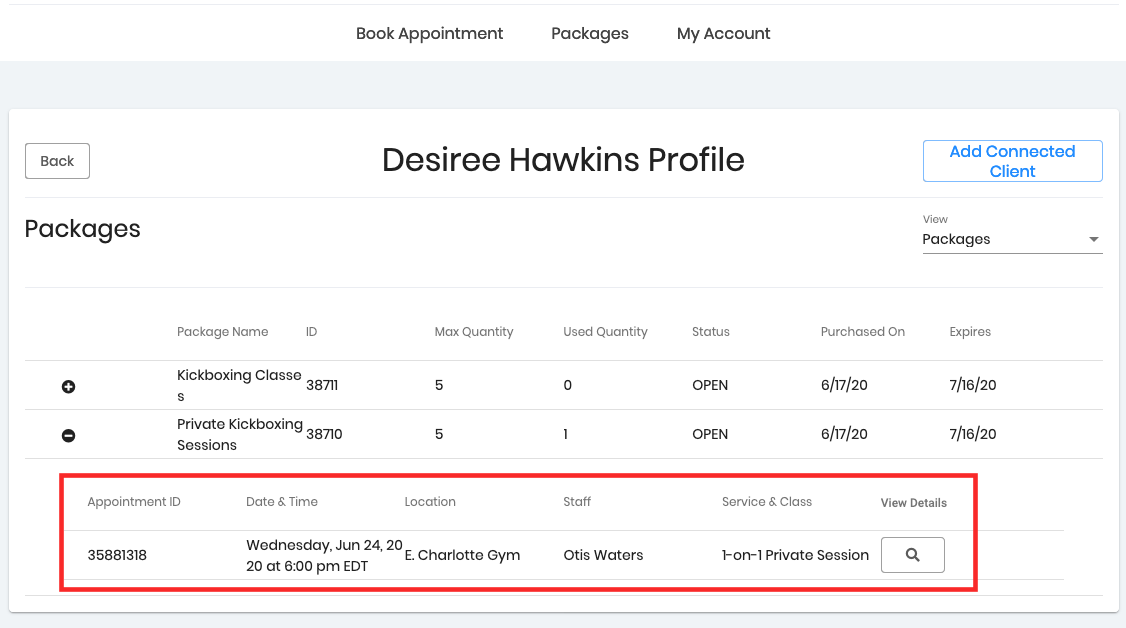
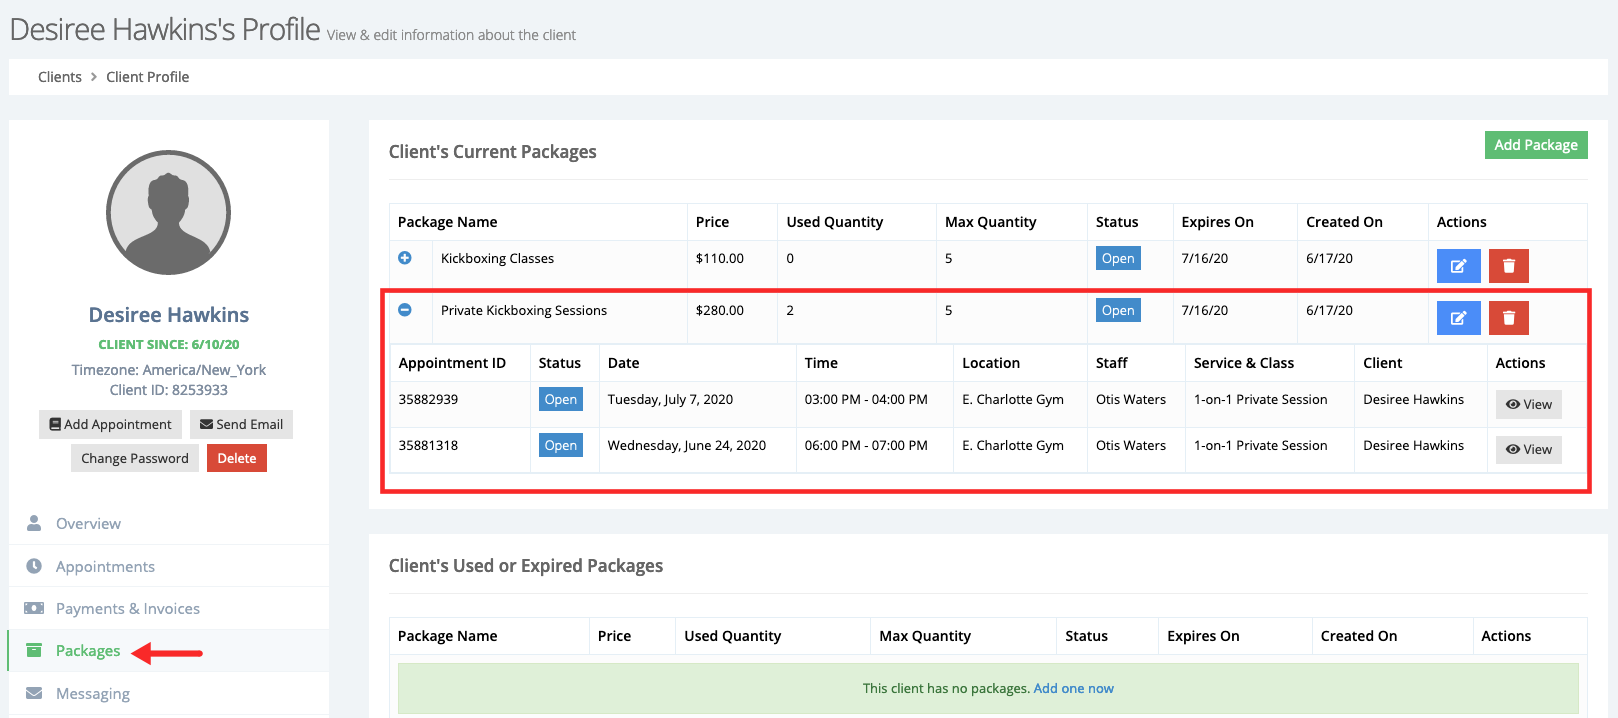
If the client wants to confirm that the package was applied successfully or just wants to use the appointments that were redeemed with the package, they can head over to My Account > My Profile > Packages, where they can click the + button to left of the package ( ) expand the details and see which appointments were redeemed with the package:

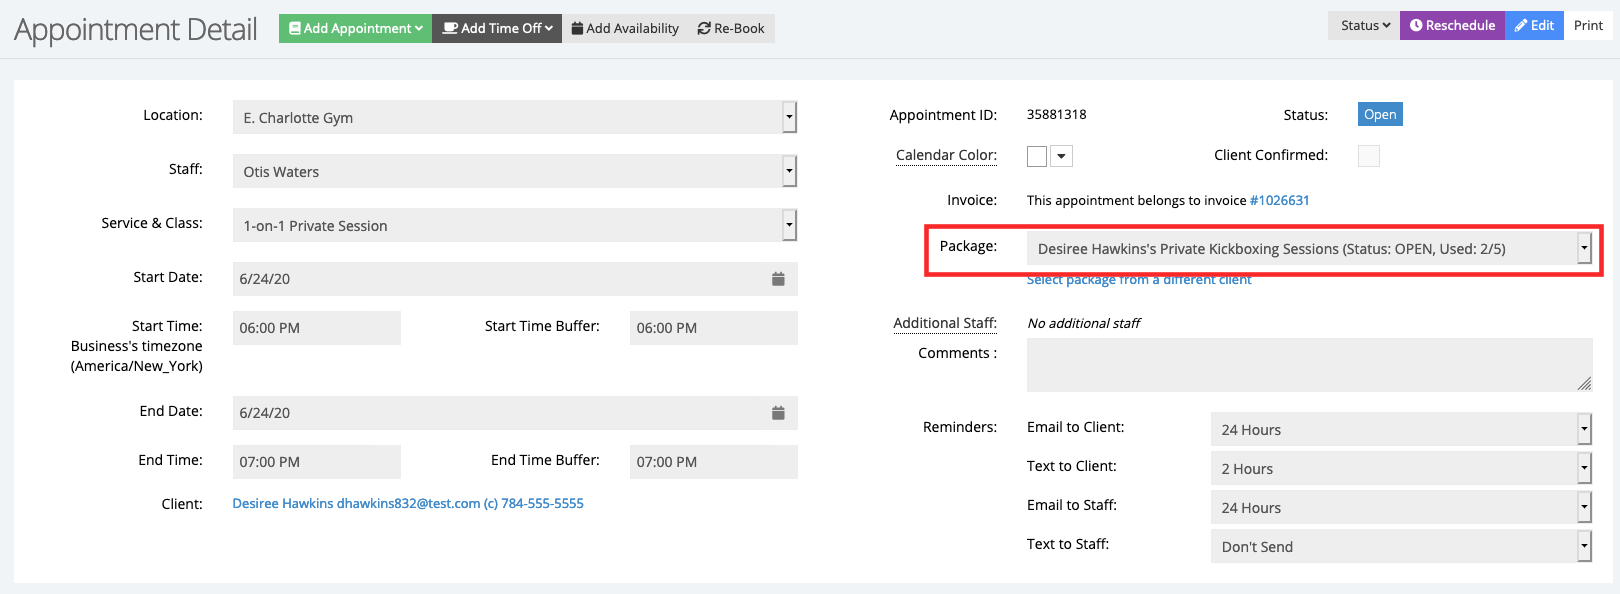
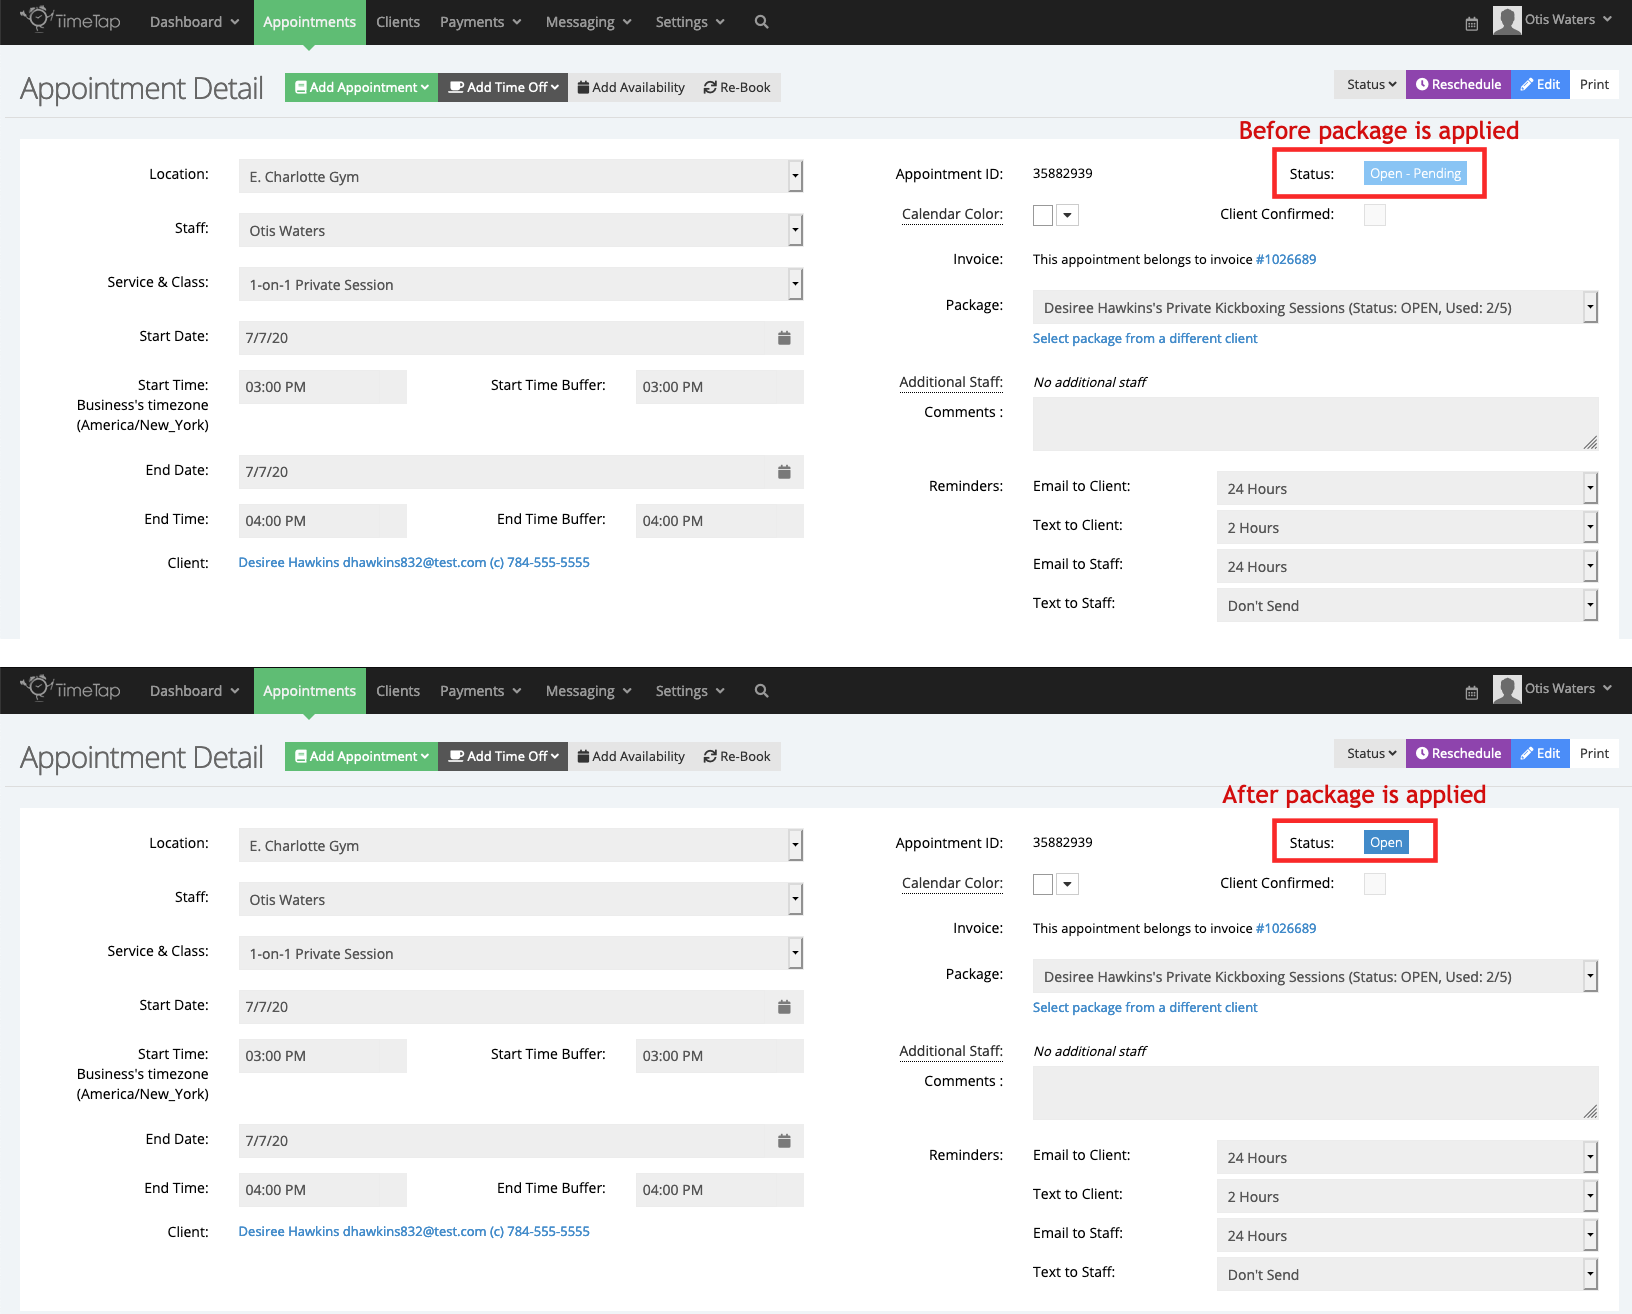
When you locate the client's appointment in the backoffice, you'll notice in the Package dropdown that the package was applied to the appointment:

You can also find the package information and the appointments that were redeemed with it while in the client's profile > Packages:

Before the package is applied, the appointment has the status "Open - Pending" because payment is required for this service at the time of booking. After the package is applied by the client, the status of the appointment is changed to Open:

Note: Cancelling an appointment will remove the package from the appointment. Appointments marked as No Show will keep the package applied.
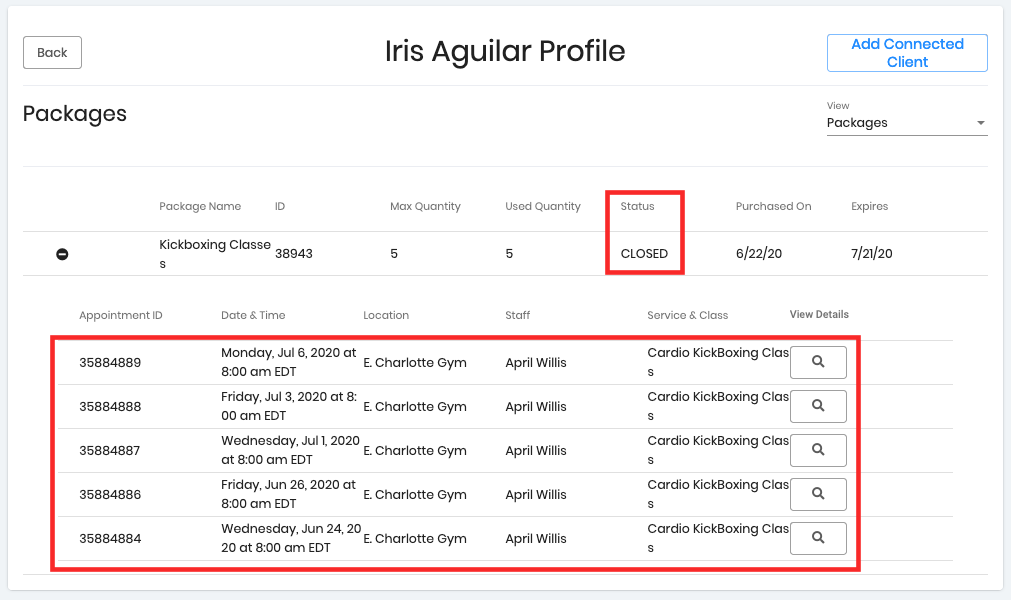
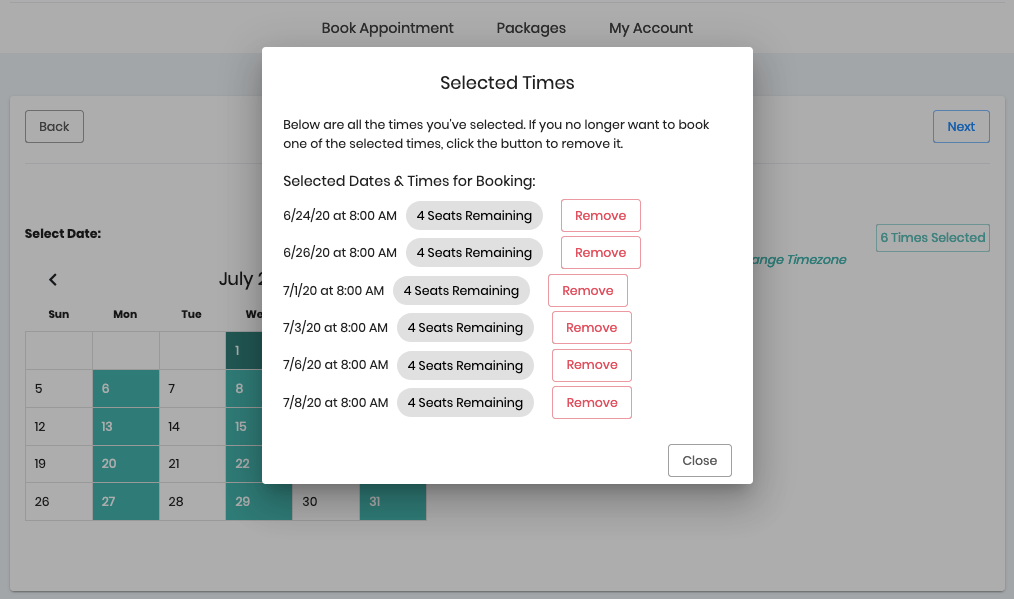
Next, we'll cover how clients can redeem multiple appointments with a package at the time of booking. In the following example we'll assume that we offer kickboxing classes in a repeating schedule, and we allow clients to schedule multiple appointments at a time. Our client Iris purchased a package for 5 kickboxing classes and she wants to schedule her sessions, and then redeem the sessions with the package.
Our client has selected 6 different class sessions, one more than limit allowed in the package she purchased. In this case, the client can redeem 5 sessions and pay for the 6th:

After she clicks "Save" in the Client Information panel and selects the Pay Now button in the Payment panel, she'll be redirected to the Invoice Detail panel. In this panel the client will choose which appointments she wants to redeem with her package by clicking the "Redeem with Package" next to each appointment:
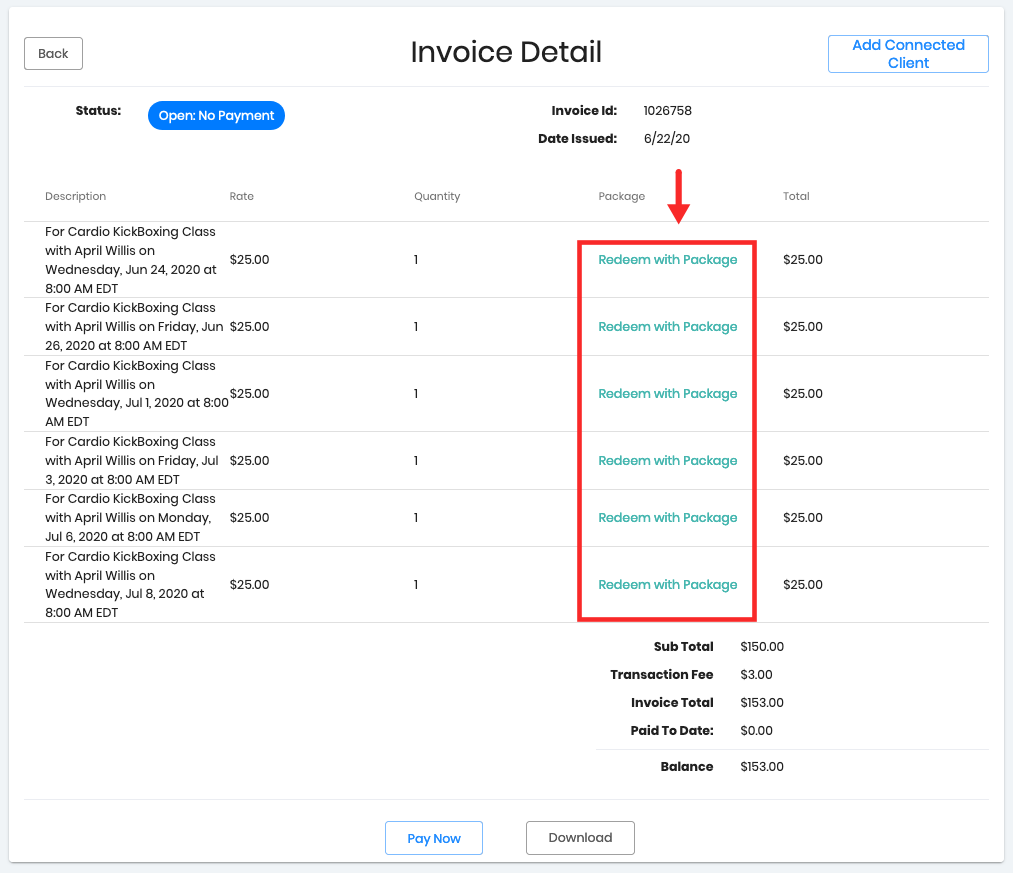

After the client redeems 5 appointments with her package, the option to redeem is removed and the balance reflects the cost of one class session (plus fees, optional). The client can now click the "Pay Now" button to continue with the checkout process:

After the clients pays for the remaining class session, they'll be directed to the Invoice Detail panel where can download a copy of their invoice:

The client can now go to My Account → My Profile → Packages to see an overview of the appointments that were redeemed with the package. Notice that the status of the package is now listed as Closed, which means that no more appointments can be redeemed with this package: