Create Packages
For the following example we are going to assume that I run a personal fitness training business and I offer private and semi private sessions. I want to be able to offer my clients packages of 10 private sessions for the price of 9. Each private sessions has a cost of $40, so booking 10 individual sessions would equal to $400. The package that I'm creating will allow clients to pay $360 for 10 sessions.
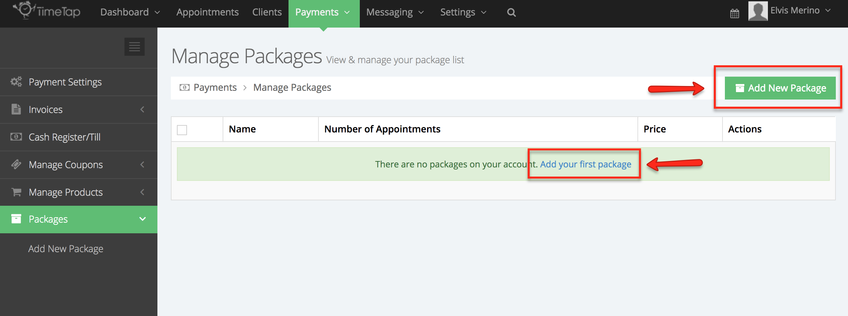
To add a new package go to Payments → Manage Packages:
If you have not added a new package you will prompted to a new package by clicking the "Add your first package" link or you can click the "Add New Package" button:
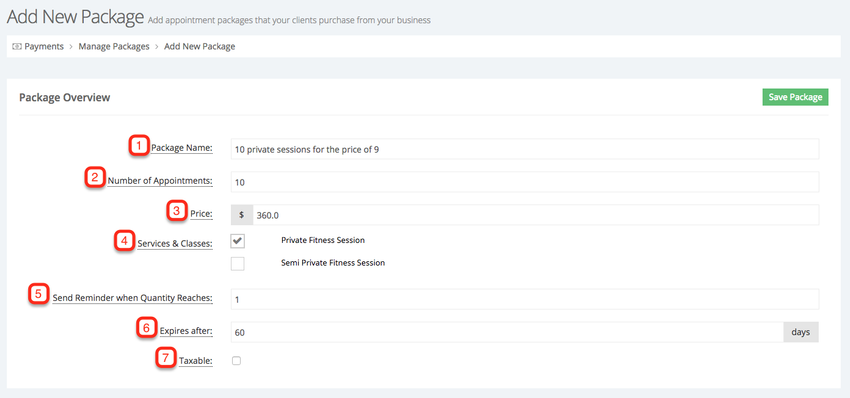
Within the Add New Package screen you will be able to add the following:
- Package Name: This is the name of the package that you're selling. It is what will appear as the line item in your invoice and in the appointment screen when you're redeeming the package
- Number of Appointments: This is the number of appointments a client can redeem by buying this package
- Price: This is how much the package costs to purchase
- Service & Classes: In this section you will select which services and/or classes the package can be used for
- Send Reminder when Quantity Reaches: If you want the client to receive a reminder when the number of appointments remaining in the package reaches a certain level, you will have to enter that number in this section. If you don't want to send a reminder, you can leave this field blank
- Expires after: If all appointments in the package have to be redeemed in a certain period of time, you will have to enter that value in days in this field
- Taxable: If your business tax rate needs to be applied on this item, then check this box and TimeTap will total it when the package is added to the invoice
For this example I named my package "10 private sessions for the price of 9" (1), set the number of appointments to 10 (2), set the price to $360 (3), selected to only be able to apply this package to Private Fitness Sessions (4), selected to send a reminder to the client when he/she has one appointment left in the package (5), set an expiration time frame of 60 days (6), and chose not to apply my business' tax to this package (7):
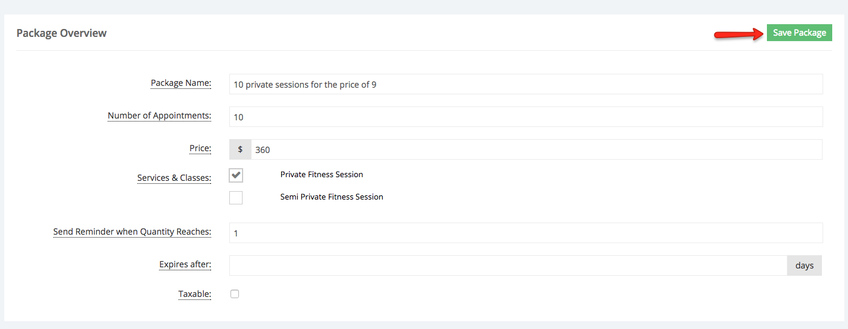
Once I've entered all the necessary information I will click the "Save Package" button to add this package:
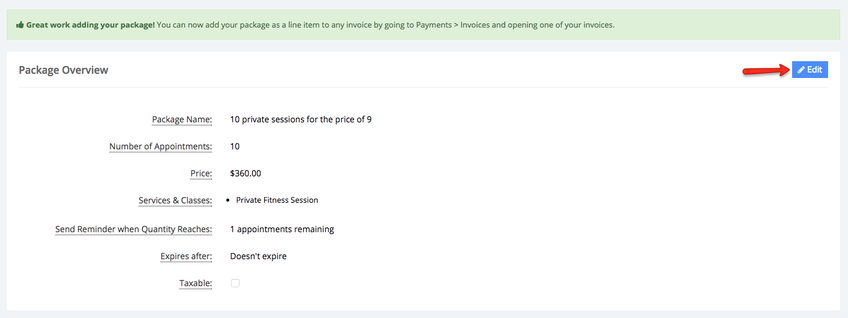
If you need to make changes after the package has been added, click the Edit button:
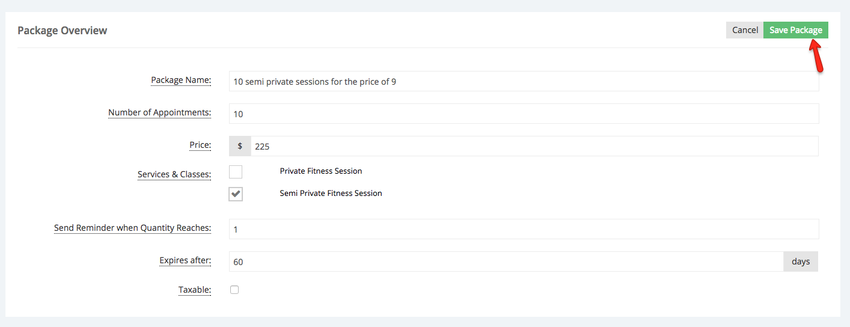
Now that I've added a package for the private fitness sessions, I will also add another package for 10 semi private sessions for the price of 9. In this case semi private sessions are classes, meaning that if the client registers for a class and they have purchased this package they will not have to submit payment for the class appointment. The price for each semi private session is $25, if the clients were to pay for 10 separate semi private sessions the price would be $250, but if they purchase this package the would only pay $225.
I will create the package for semi private sessions by cloning the "10 private sessions for the price of 9" package. While in the Manage Packages screen click the Clone button in the Actions column:
This will create a copy of the private sessions package:
I will then click View under the Actions column to make change changes to the package details and change the name:
I will click the Edit button to start making changes:
I will change the name of the package, the price, the service for which this package can be applied for and set the expiration to 60 days, then click Save Package to commit to the changes:
Both packages I added will be listed in the Manage Packages screen:
We will cover how to invoice and redeem packages in another page.

