If you are a Business Account user you can use the waitlist feature to let clients sign up for the waitlist for a class session or services once all seats in the class session are taken or your availability for the service is completely filled.
In this section we will cover:
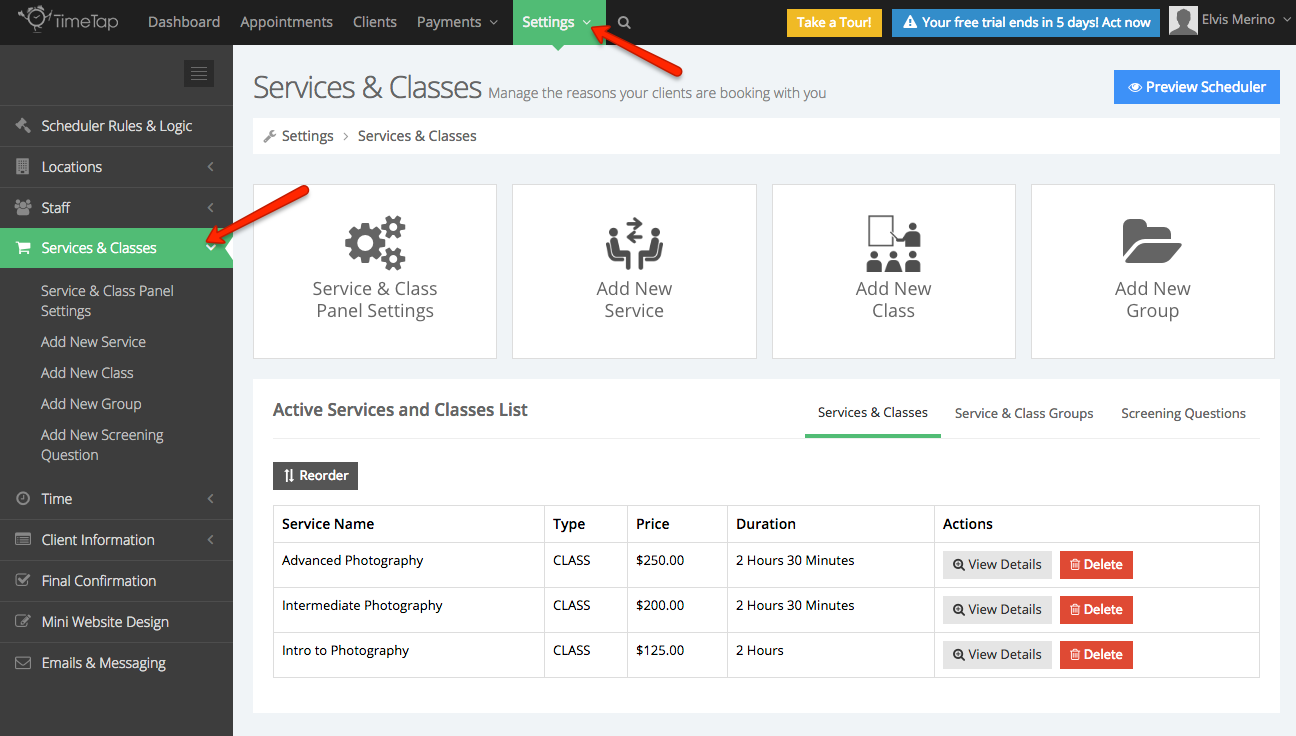
To enable the waitlist feature go to Settings →Services & Classes
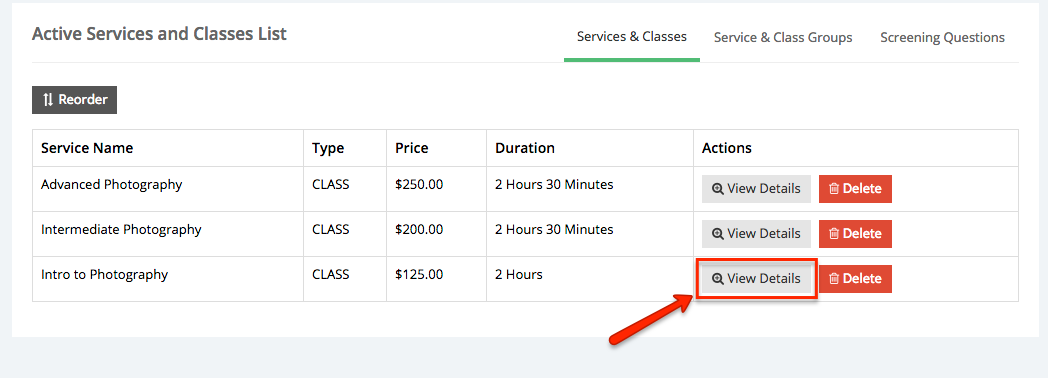
Once in the Services & Classes screen, select the class to which you would like to enable the waitlist, in this example I will add a waitlist to Intro to Photography:
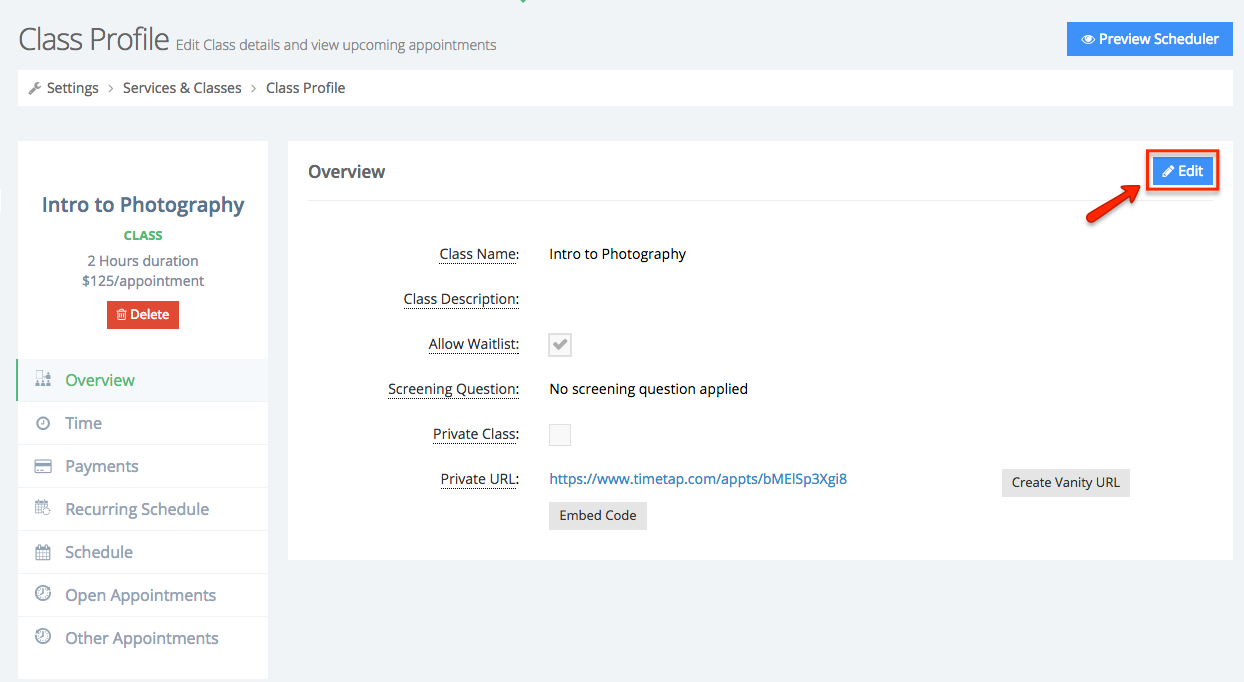
You will then be taken to the class profile, in the Overview screen click the Edit button on the top right corner:
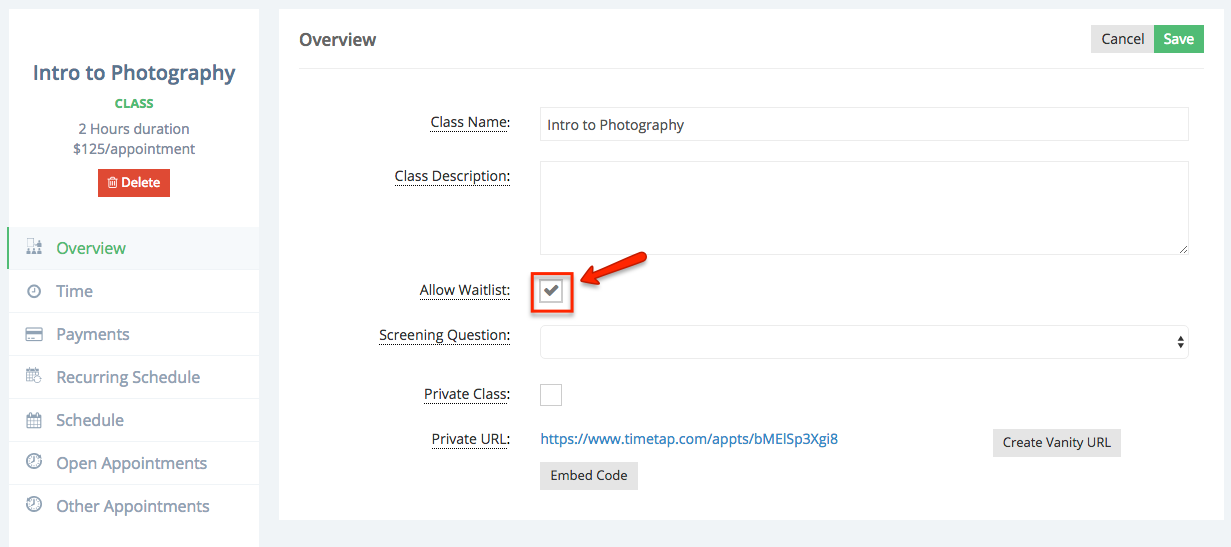
Then check the box Allow Waitlist:
After checking off the check box, remember to press Save.
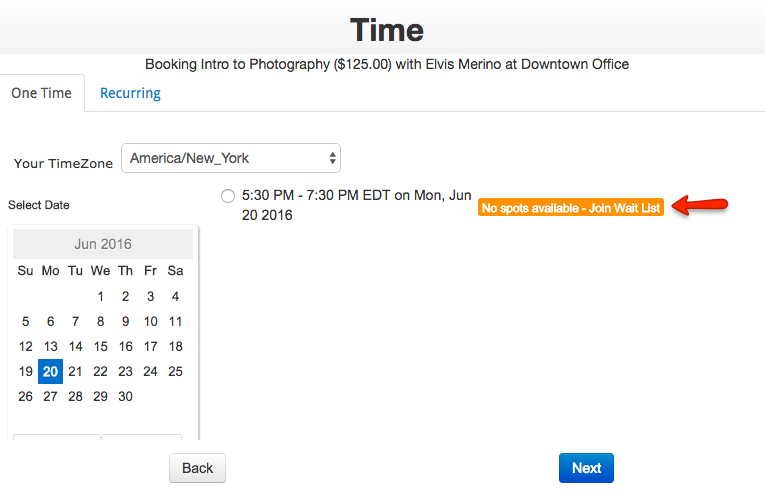
Once the wait list is enabled, then any class sessions that have reached their max capacity will automatically prompt clients to join the waitlist:
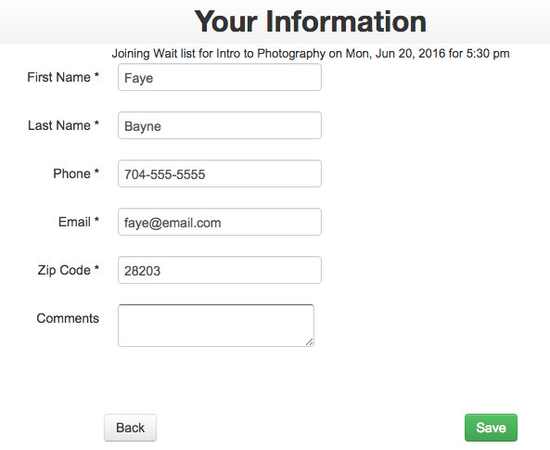
If clients select your filled class or booked service and clicks "Next", they will be prompted to fill in their information on the Your Information screen:
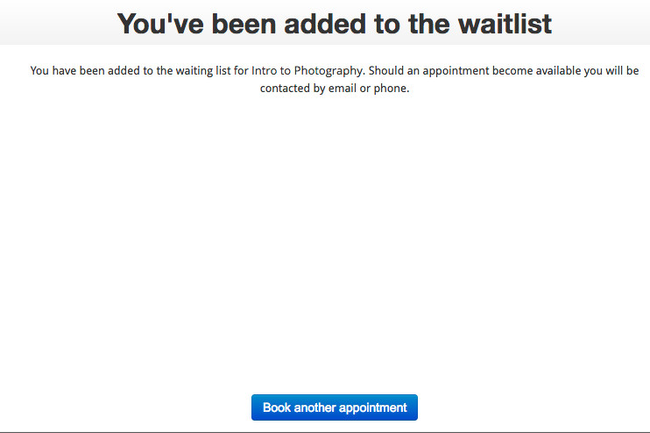
Once your client clicks next they will be shown a message informing them that they have been added to the waitlist:
You and the client will receive an email notification that they have been added to the waitlist for the class.
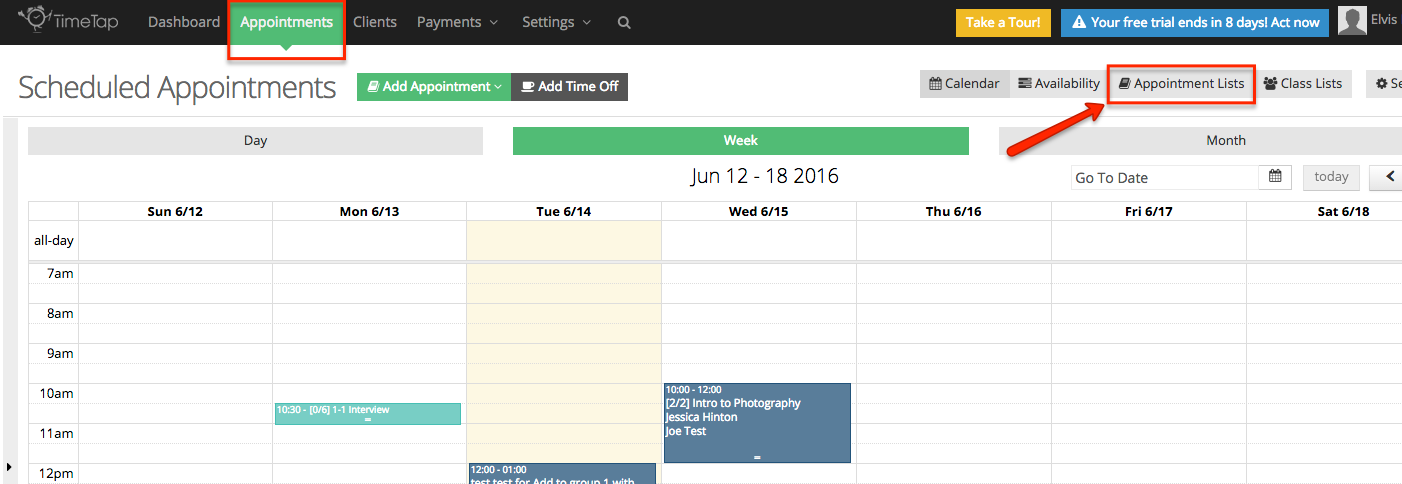
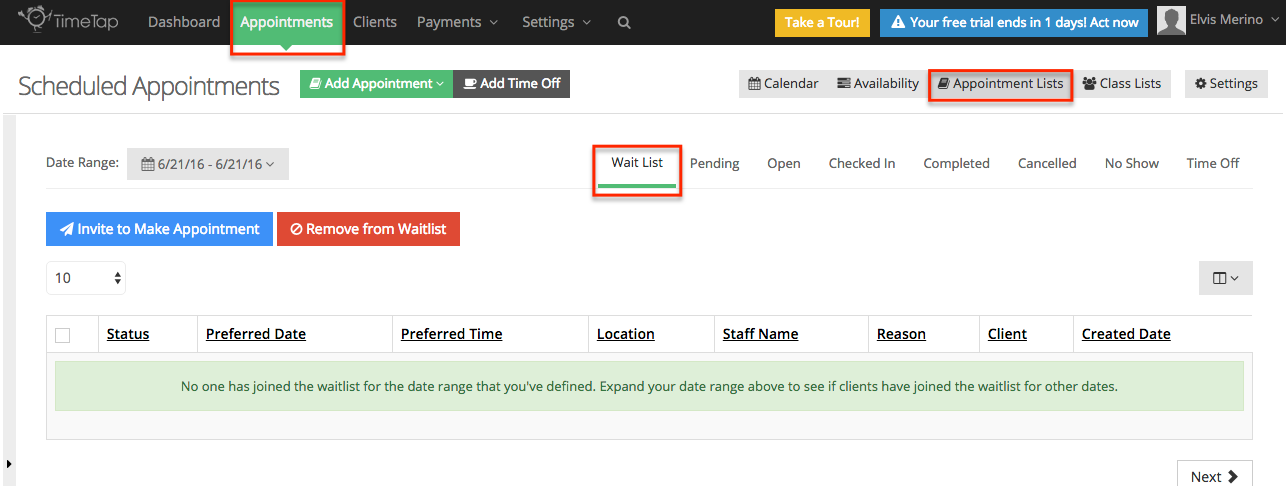
If you would like to see which clients have added to different waitlists, go to Appointments then click Appointment Lists:
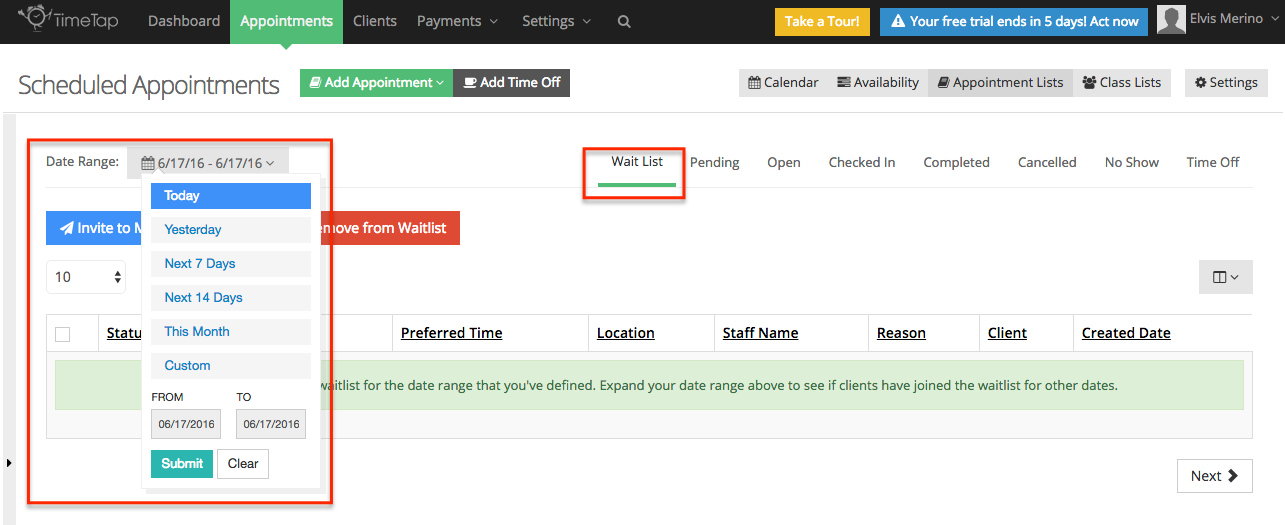
Once in the Appointments Lists window select Waitlist and determine a Date Range. The Date Range sorts the waitlist registrants by the date that their registration was created:
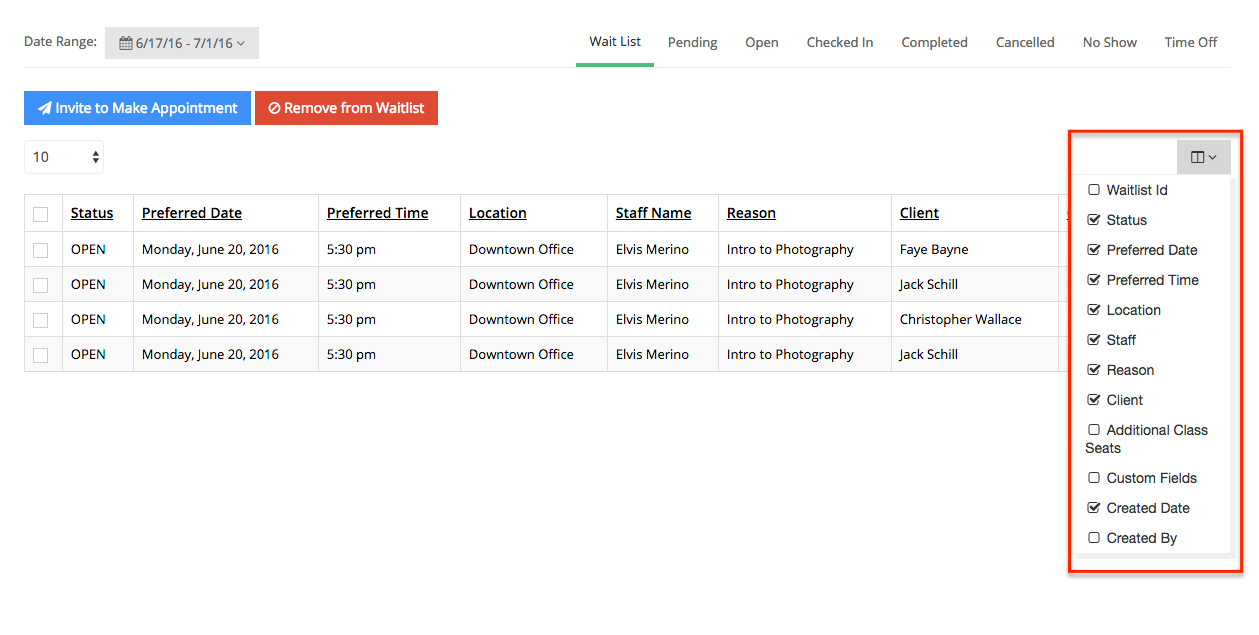
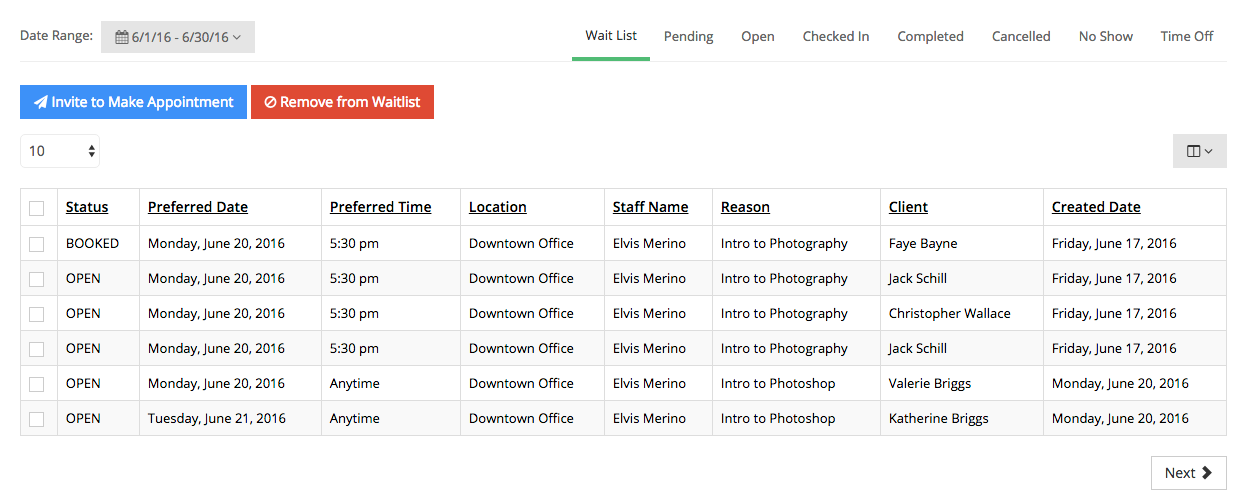
Once you have determine the Date Range, you will the be able to see a list of all your clients who have been added to the waitlist. You can user the dropdown box menu to the right of the screen to determine what information you would like to see in the waitlist results:
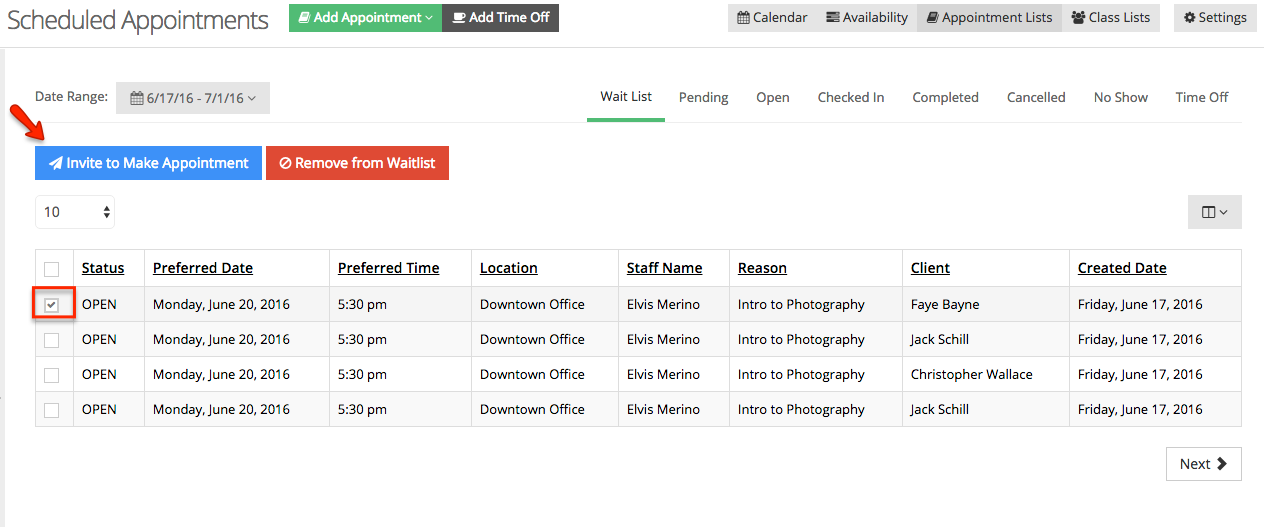
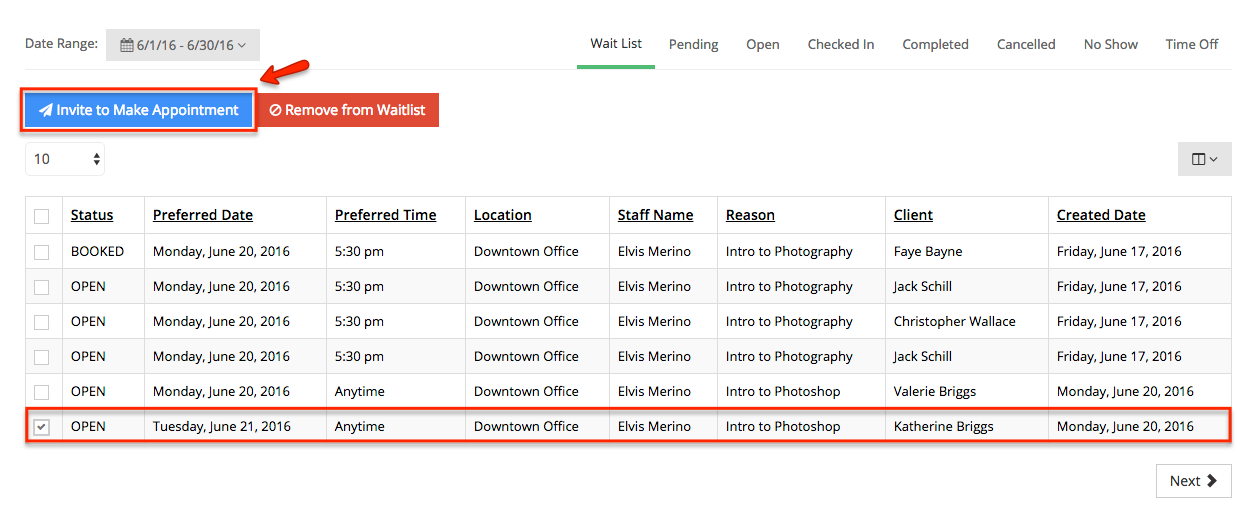
If a client has cancelled an appointment for a service that has a waitlist and you would like to invite a another client in the waitlist to book an appointment, select the client and click Invite to Make Appointment:
Please note: You can turn on the auto-invite setting under Settings → Final Confirmation which will automatically send an invitation to registered waitlist attendees whenever the date they've requested for the reason they've requested opens up. If you have the auto invite turned on, you may not need to manually send invites with this method.
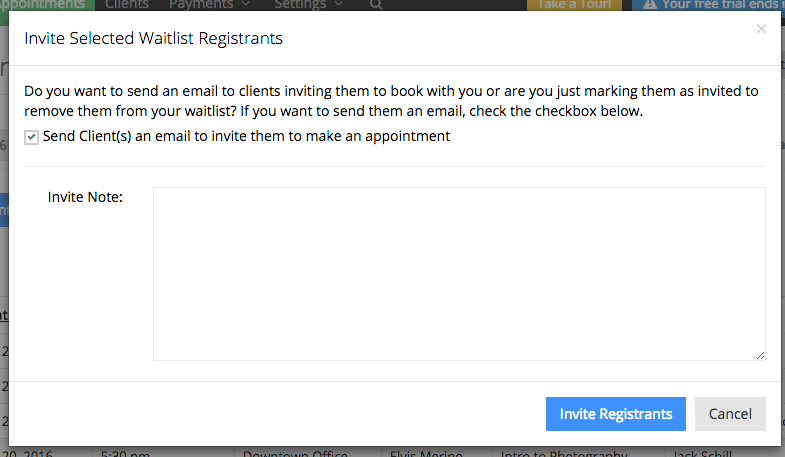
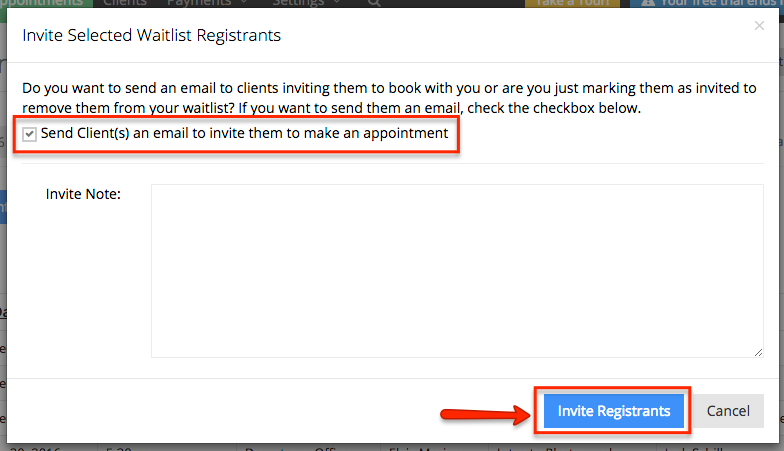
A new window will open asking you to confirm your invitation:
The invitation email will contain a link where your client can book an appointment or opt out of the waitlist:
If a class is popular and you have a large number of clients registering to the waitlist, you can increase the number of seats available for a class session and invite clients to attend the class session. First go to Settings > Services and Classes and select the appropriate class:
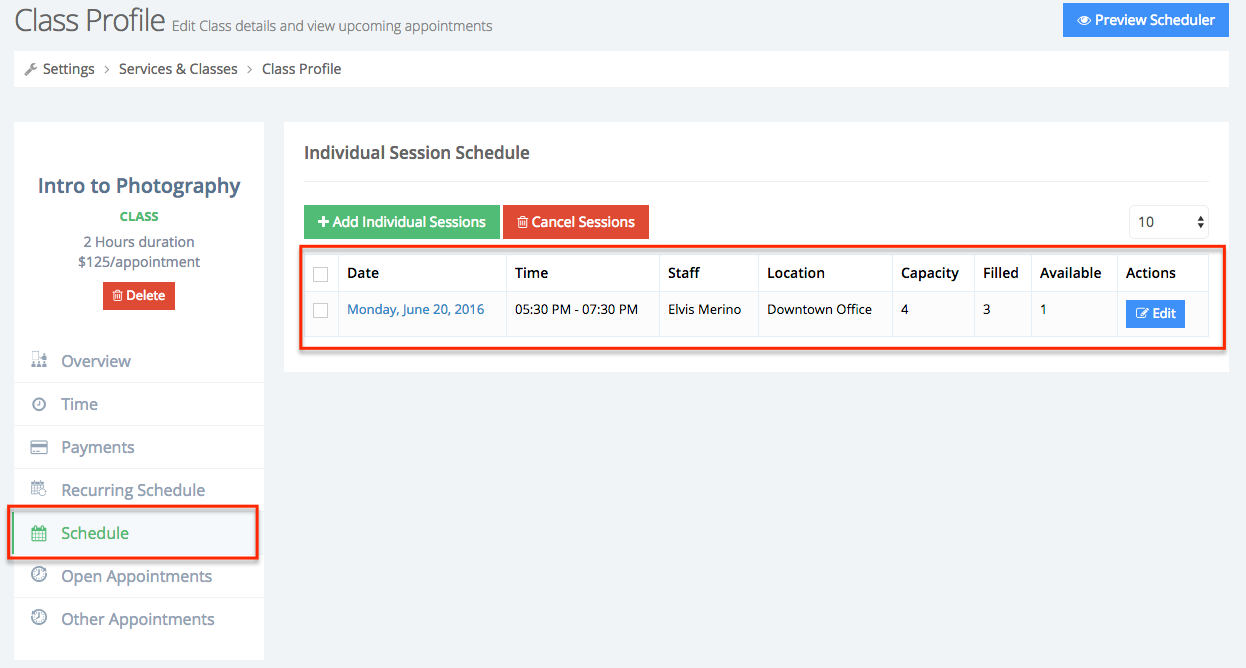
Once in the class profile go to the class's Schedule view. Here you will all open class sessions, click the date of the class session (hyperlinked in blue) to go to that class session's attendees' list screen:
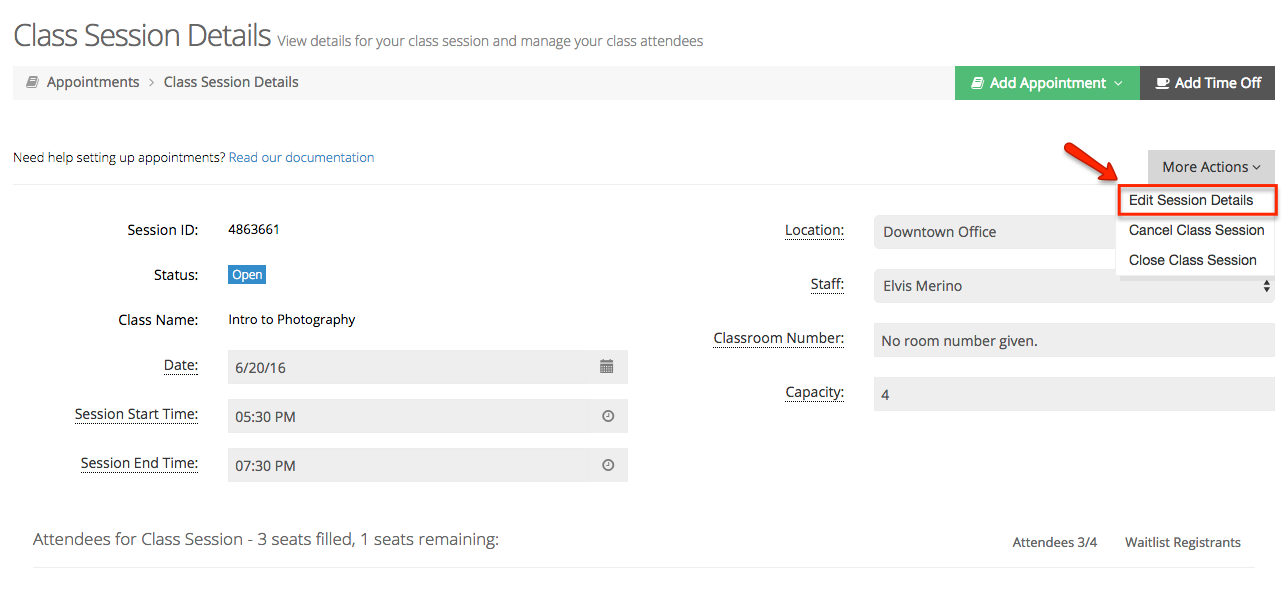
Once in the Class Session screen use the More Actions dropdown menu and select Edit Session Details:
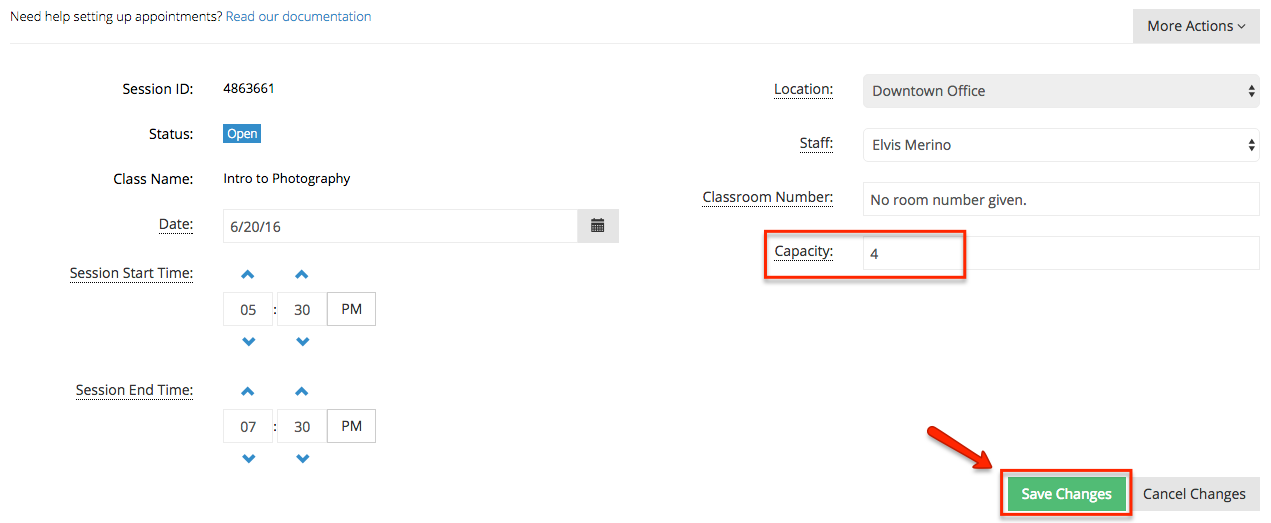
Increase the number of attendees and Save Changes:
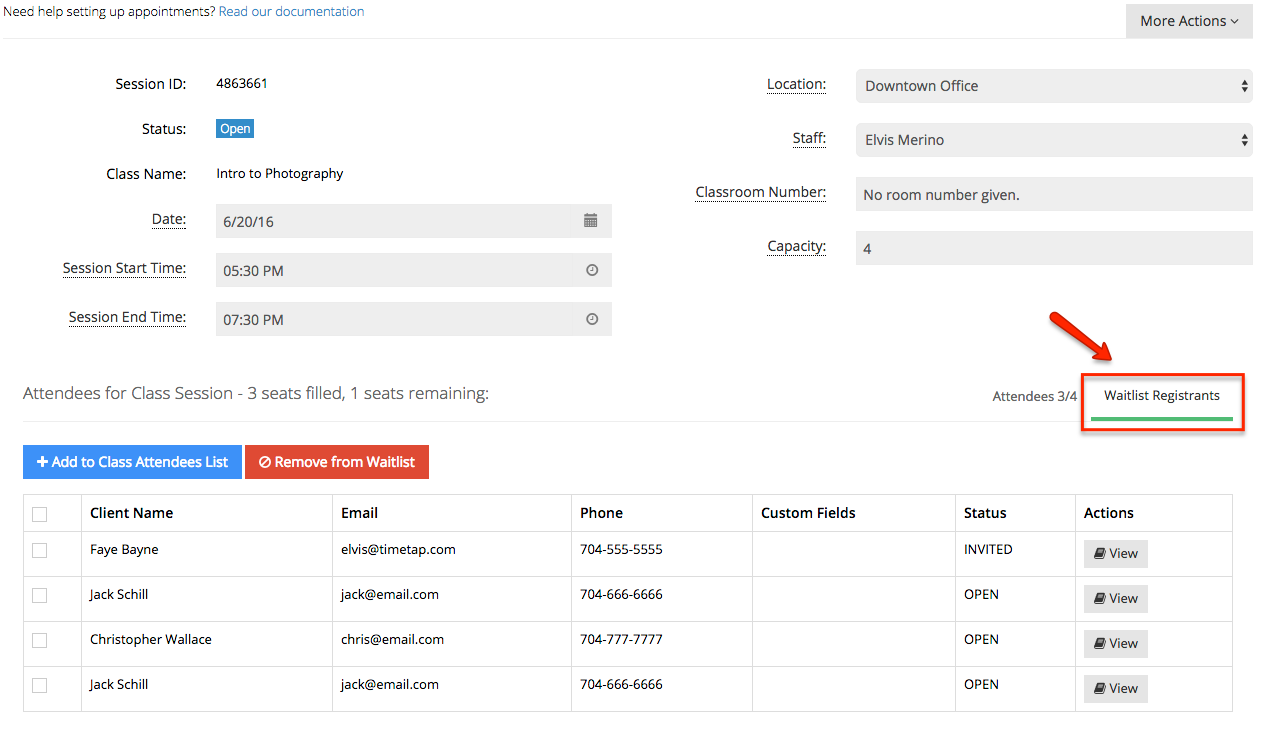
Now that you've increased the number of seats available you can add a registrant to the list of attendees. Go to the Waitlist Registrants tab at the bottom of the class session's attendees screen. Here you will be able to see the clients that have been joined the waitlist for this class session:
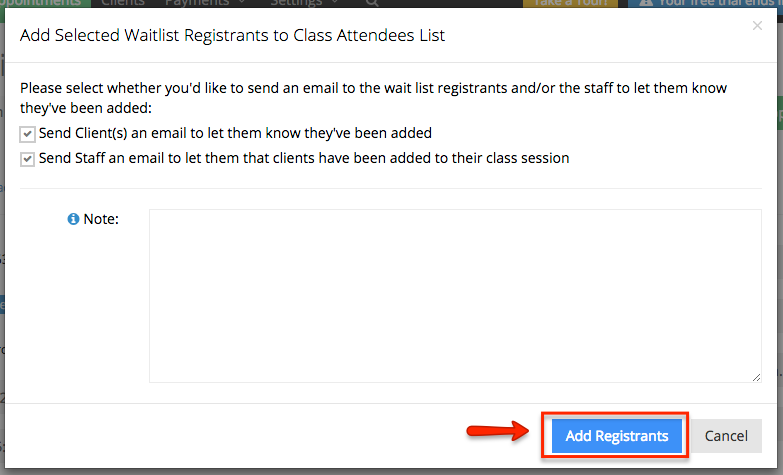
You will be able to add registrants to the list of attendees or remove them from the waitlist. In this case in order to add a registrant to the class select the client you would like to add and click 'Add to Class Attendees List'. You will then be given the option to send an email to the staff member offering the class and the client to notify them that they have been added to the class session:
The client you selected will then be added to the list of attendees:
Turning on the waitlist for a service is very similar to turning on the waitlist for a class. To enable the waitlist feature go to Settings →Services & Classes
Once in the Services & Classes screen, select the service to which you would like to add a waitlist, in this example I will add a waitlist to Intro to Photoshop:
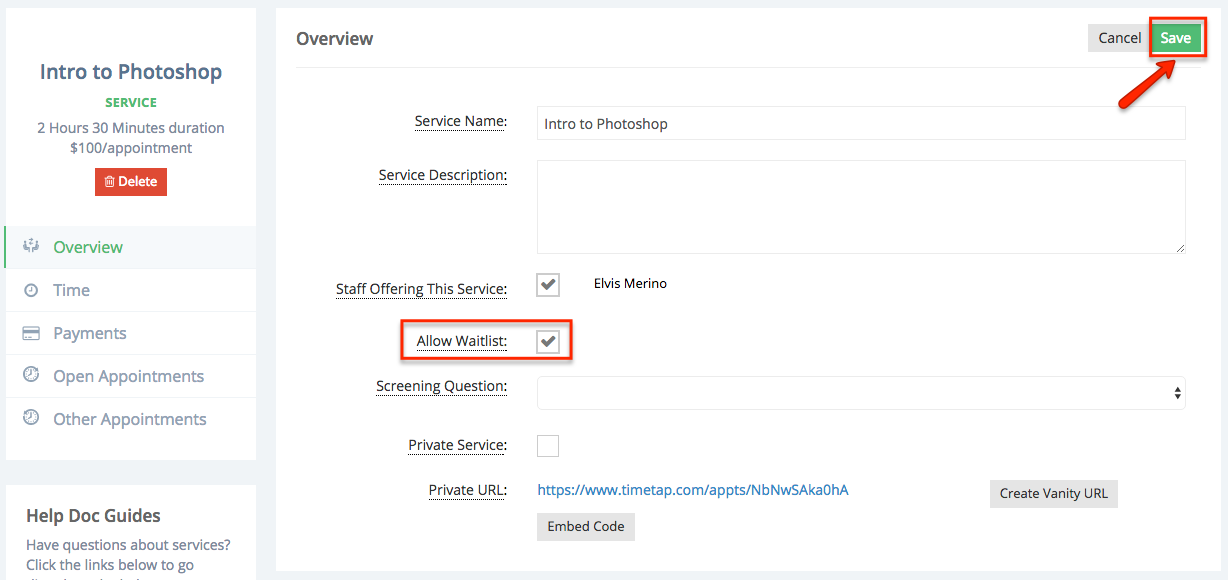
You will then be taken to the service's profile. In the Overview screen, click the Edit button on the top right corner, then check the box Allow Waitlist and click Save:
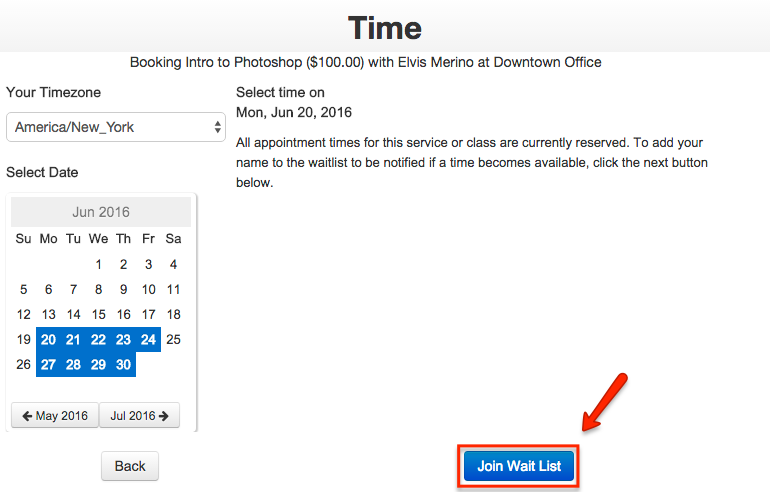
Once the waitlist is enabled, then any service that has been fully booked will automatically prompt clients to join the waitlist:
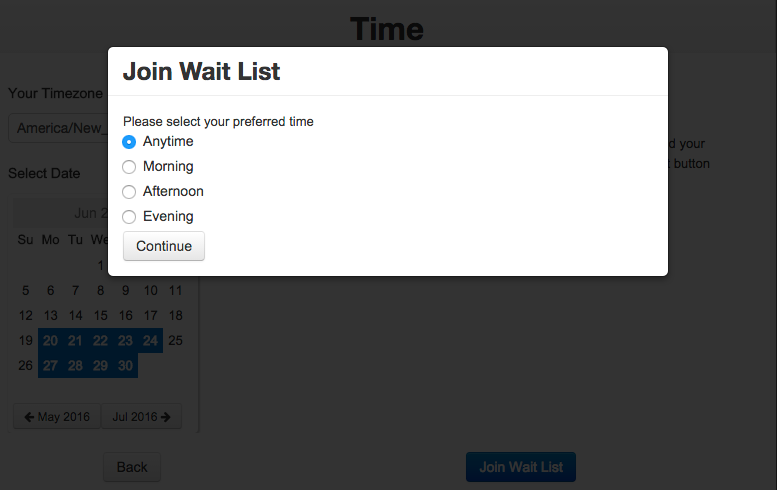
When clients click "Join Wait List" they'll be asked what time of the day they would want an appointment on the day they are joining the wait list for. Once they select the time, they'll press the Continue button at the bottom of the pop up:
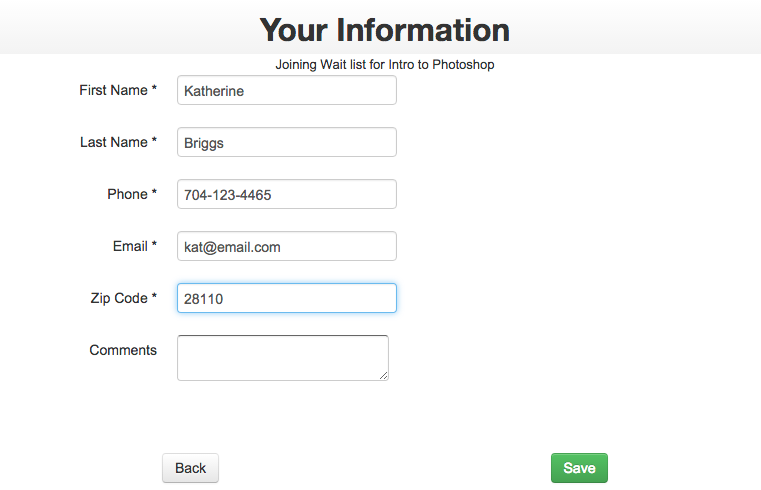
Once they press continue, they will go to the Your Information screen where they will enter in the information you require of them:
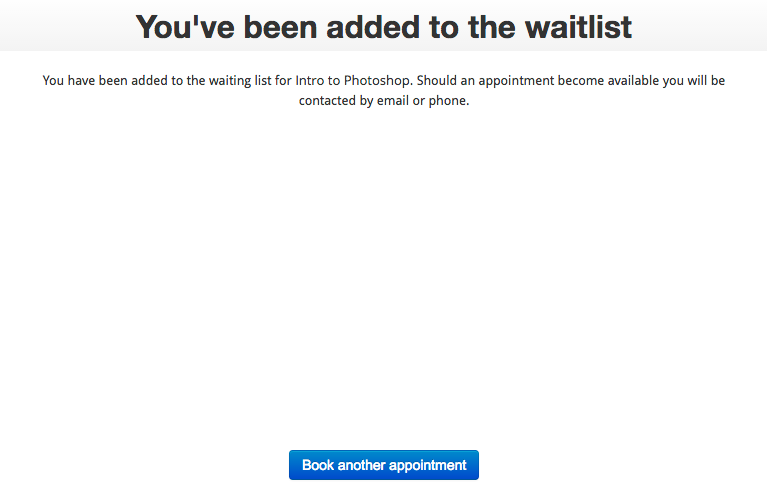
After pressing save, they will get the confirmation screen which has a custom message that you can change by going to Settings → Final Confirmation → Waitlist Confirmation Panel Settings:
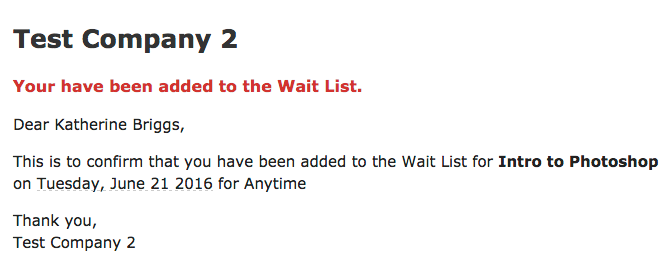
Your client will receive an email that he/she was added to the waitlist. You will also receive an email that the client was added to the waitlist:
- Selecting to 'Auto Invite Waitlist Registrants' in the Final Confirmation
- Manually send an invitation to a client
If 'Auto Invite Waitlist Registrants' is selected then when an appointment is cancelled on the day that a client has registered for the waitlist, TimeTap will automatically send an email to any clients added to the waitlist for that day (permitted there is enough time to allow for the service they are waitlisted for) asking them to book an appointment. If this option has not been selected you can manually send an email to a client asking them to book an appointment.
First select the client from the list of registrants in the waitlist and click Invite to Make Appointment:
