Now that we've cover what are resources, how resources work, and how to apply resources to services, we'll cover how to assign resources to classes.
We will cover:
- How to apply a resource to a recurring class schedule
- How to apply a resource to a one time class session
First we begin I recommend reading our documentation on how to create a resource.
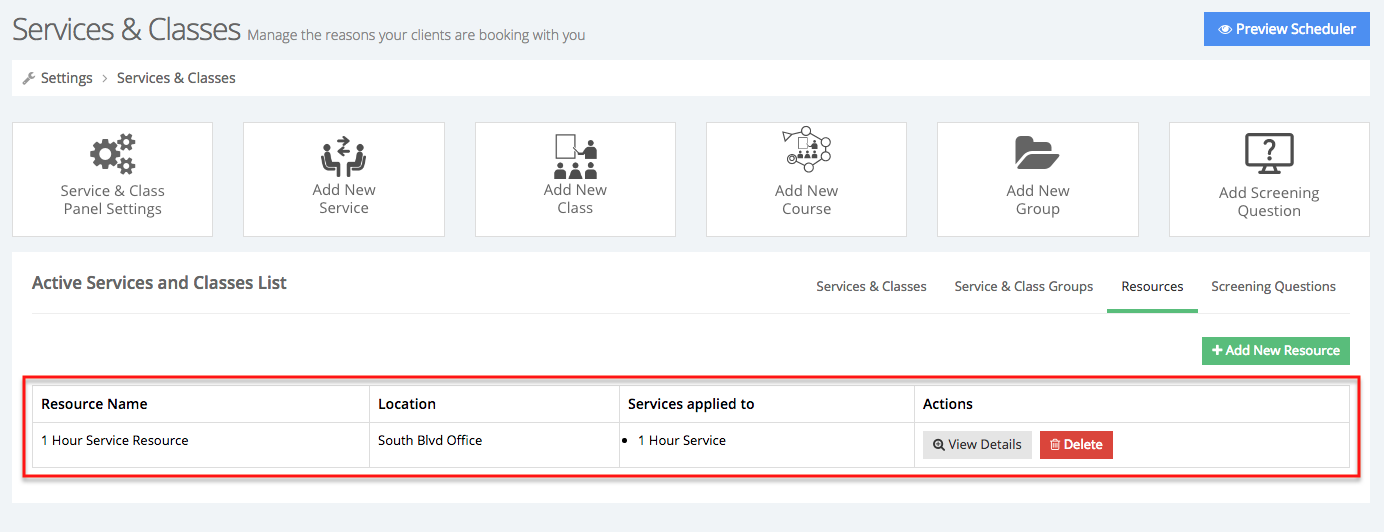
After you've created keep in mind in which one of your locations this resources is located, in the example below the "1 Hour Service Resource" is located in my South Blvd. Office and is applied to the "1 Hour Service":
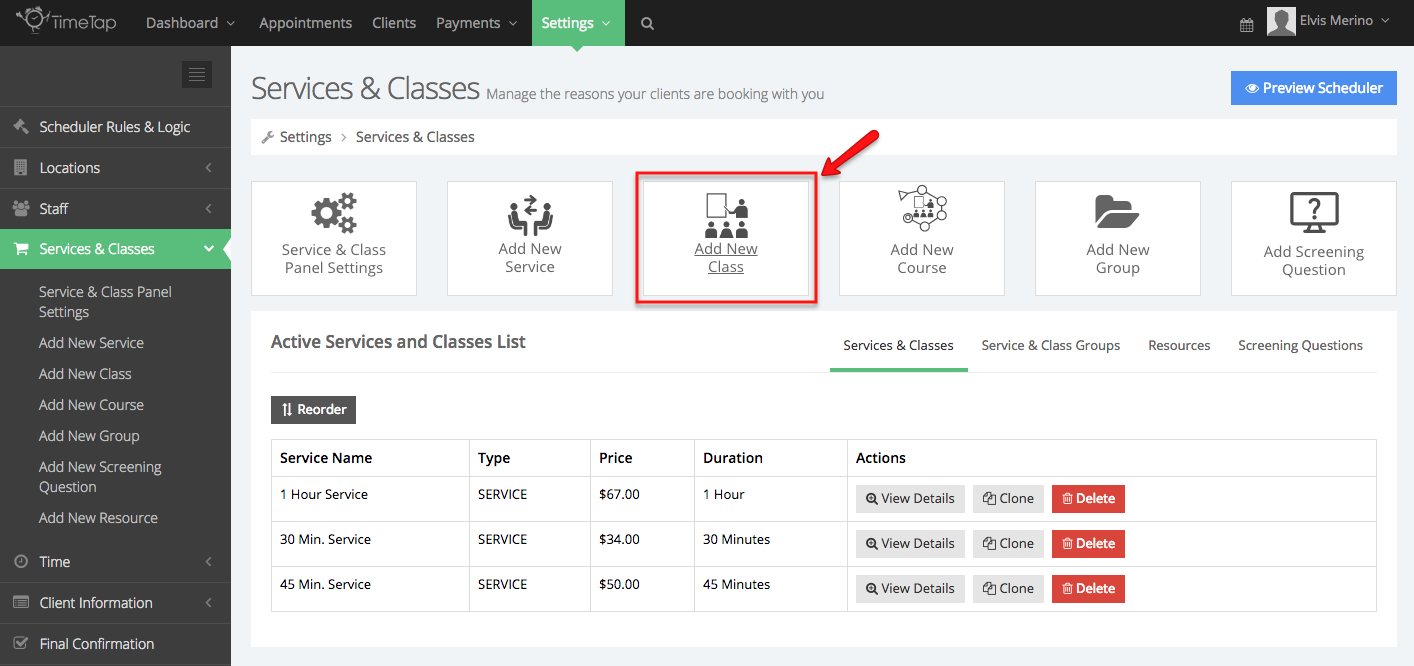
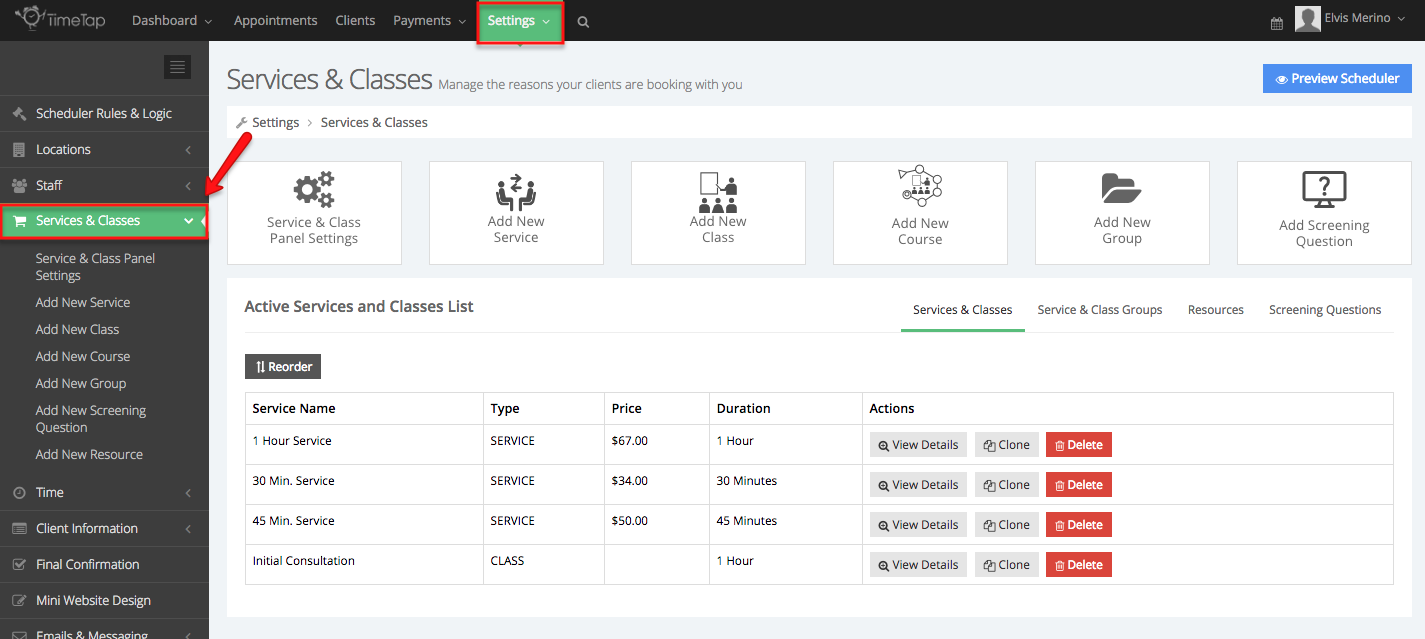
Now that the resource has been created, add a new class by going to Settings → Services & Classes, then select the Add New Class button:
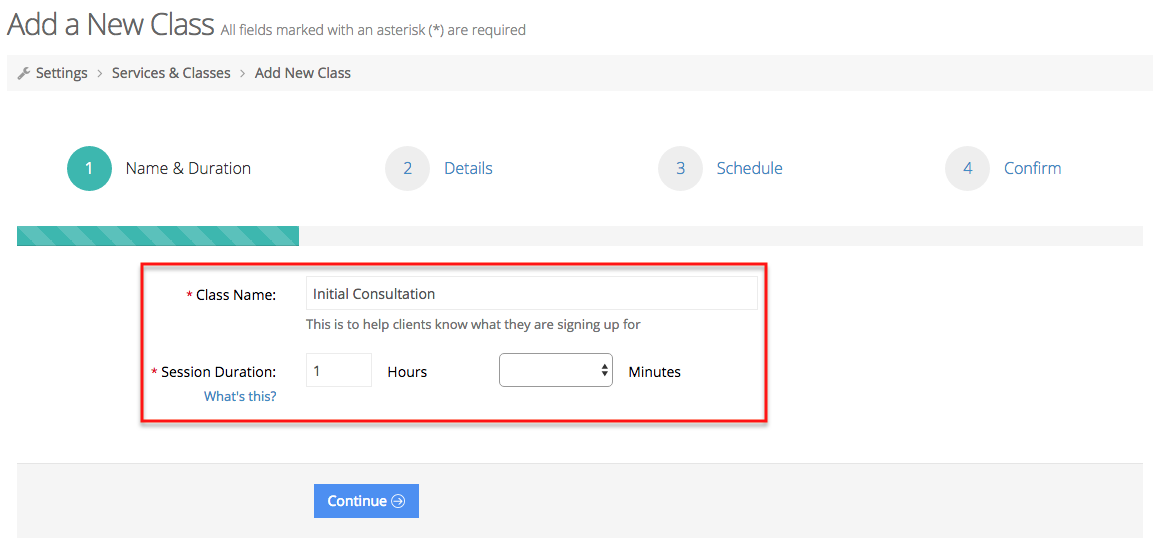
Begin by assigning a name to the class and determining the duration of the class session(s):
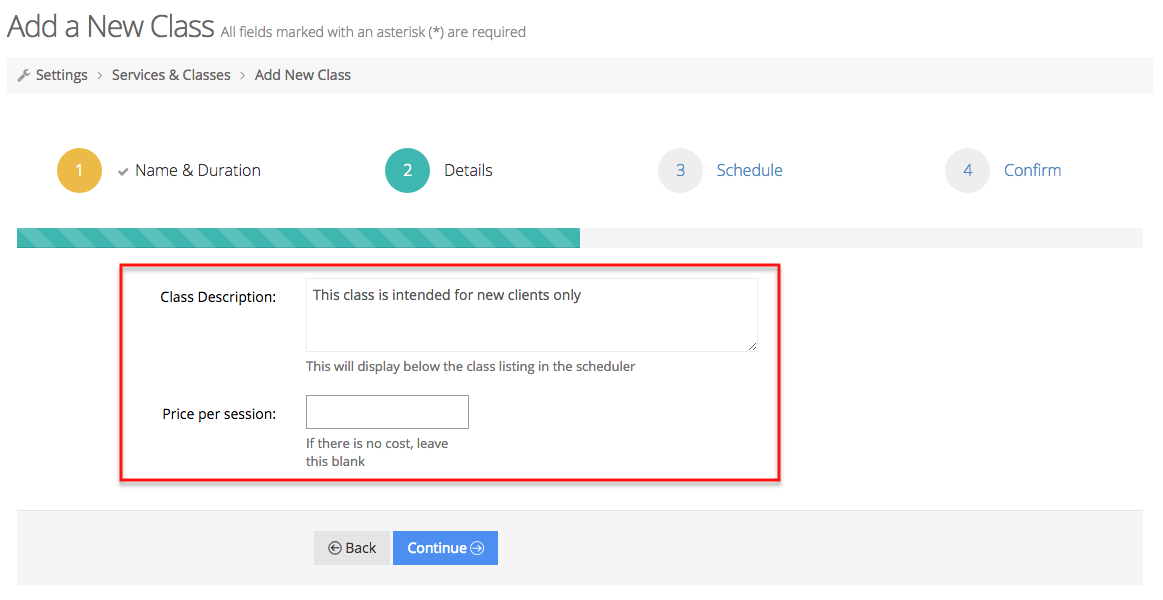
In the next panel enter a class description and assign a price (optional):
In the following screen you'll determine when the class session(s) will take place, you can read more about adding classes here. In this example I want this class to repeat (1) starting on 02/06/2017 (2) trough 02/27/2017 (3) from 4pm to 5 pm (4). This class will repeat every Monday on a weekly basis (5):
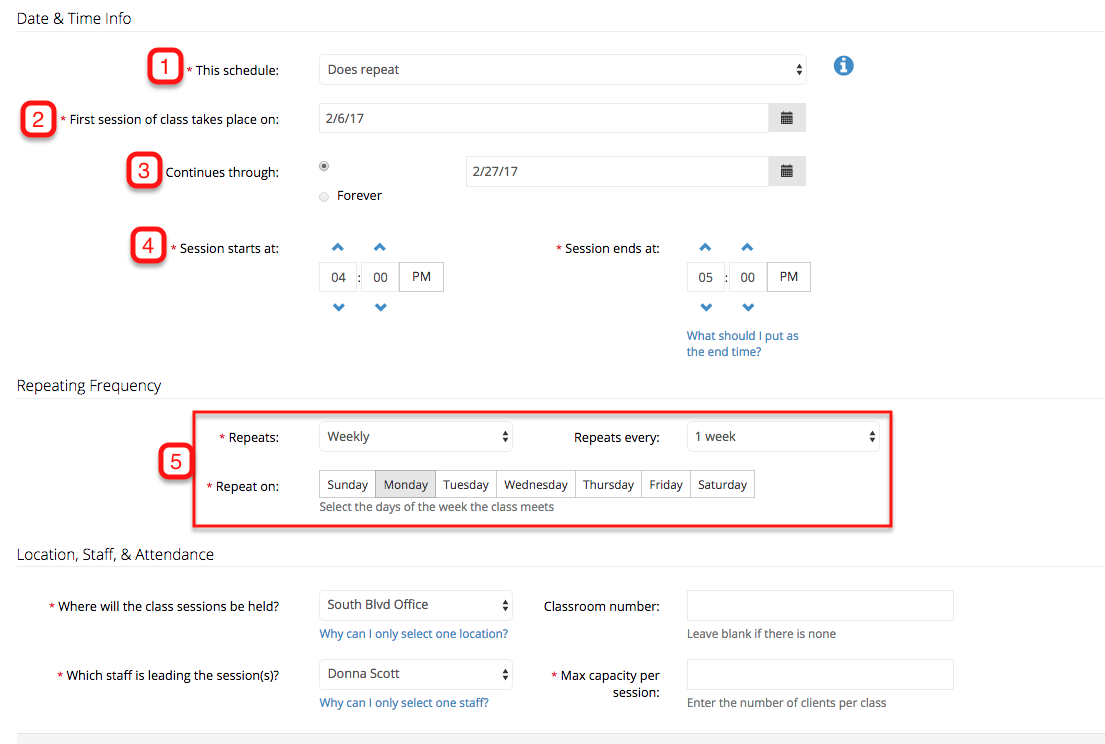
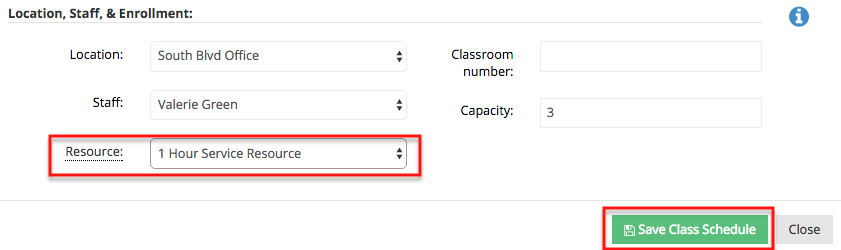
Now I will select the location where the resource is located (6), determine which staff member is leading the class sessions (7), assign a classroom number (optional)(8), and set a maximum capacity per session (9):

After creating the class and the class schedule has been created, you will immediately be taken to the class profile, once here click the Recurring Schedule tab:
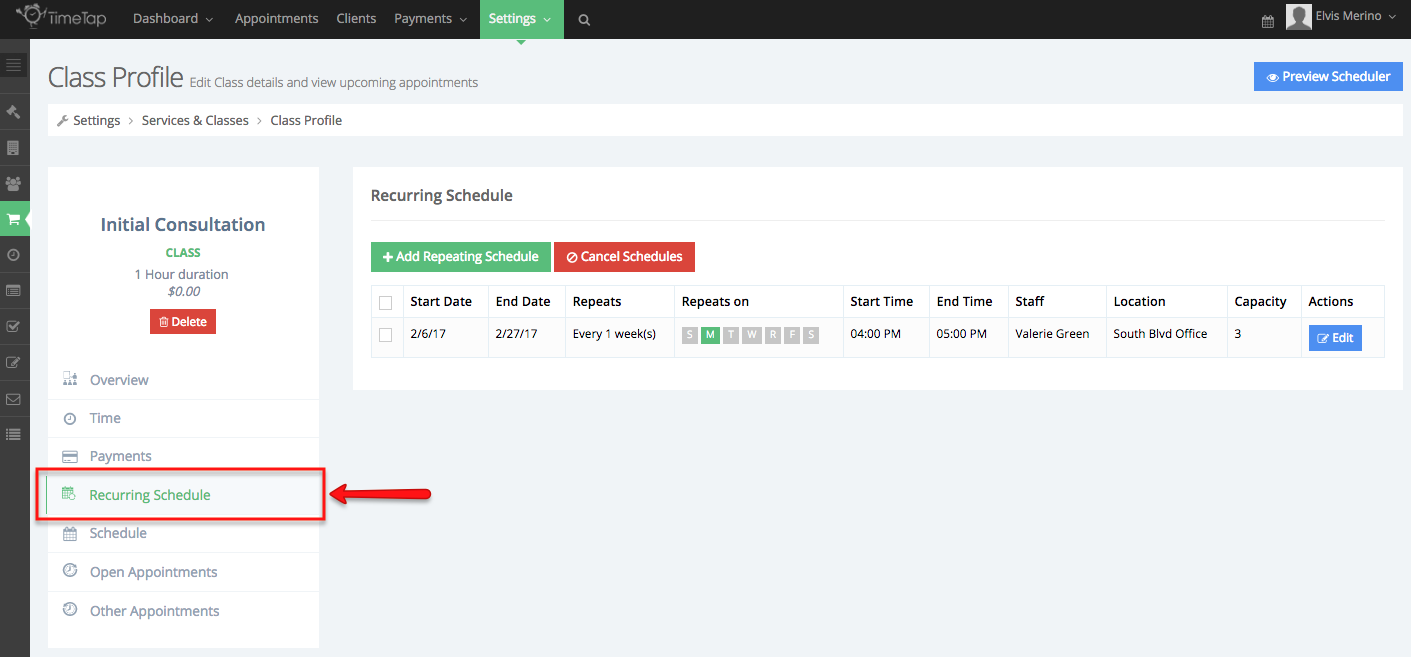
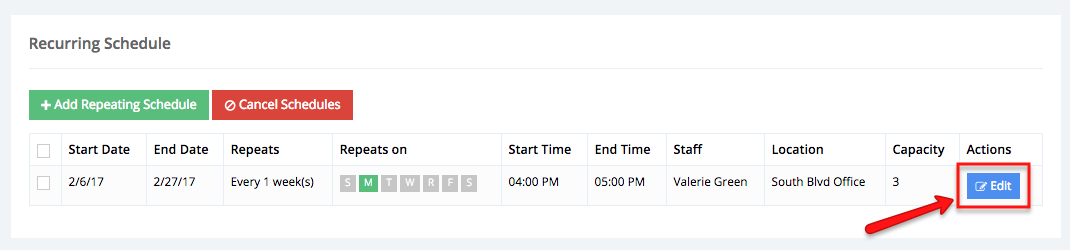
In the Recurring Schedule tab you'll see any schedule of repeating class sessions, now click the Edit button located under the Actions column:
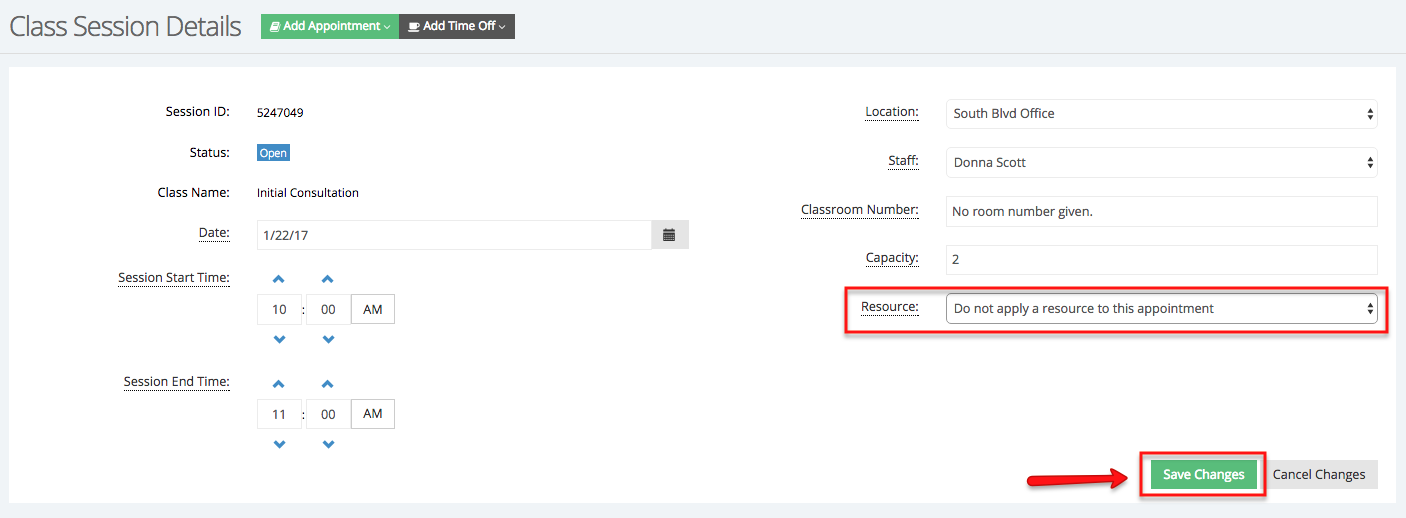
A new window will appear where you'll be able to make changes to the recurring schedule you created when you added the class. You'll notice that that the option next to Resource says "Do not apply a resource to this appointment":
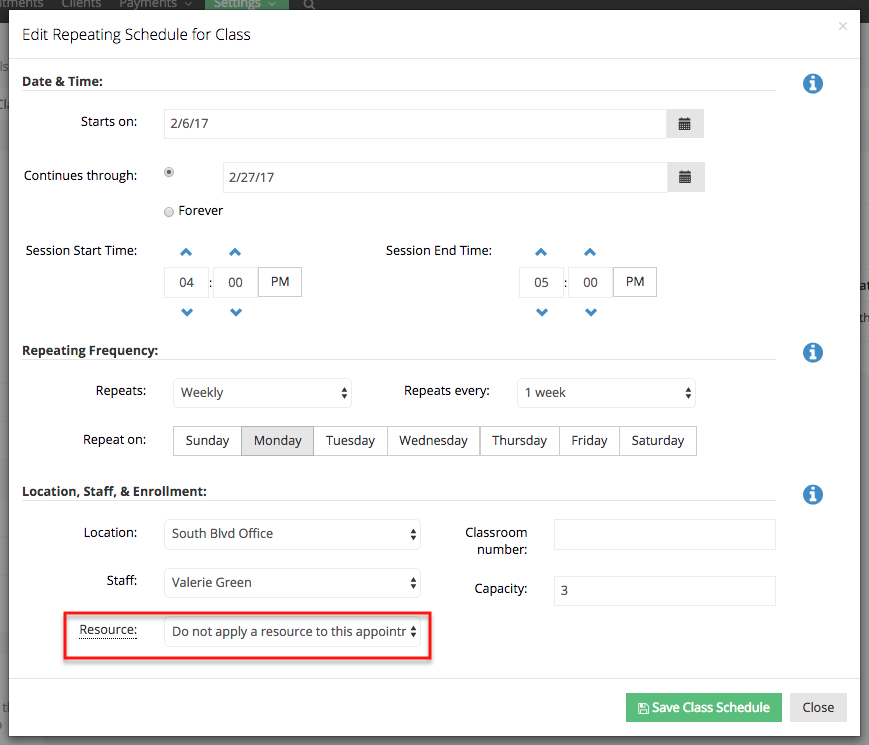
From the dropdown menu next to Resource, I'll select the resource located in the location I selected when I created the recurring schedule and click Save:
After saving the changes you can to the Schedule tab in the class profile to view all the class sessions created by the recurring schedule:
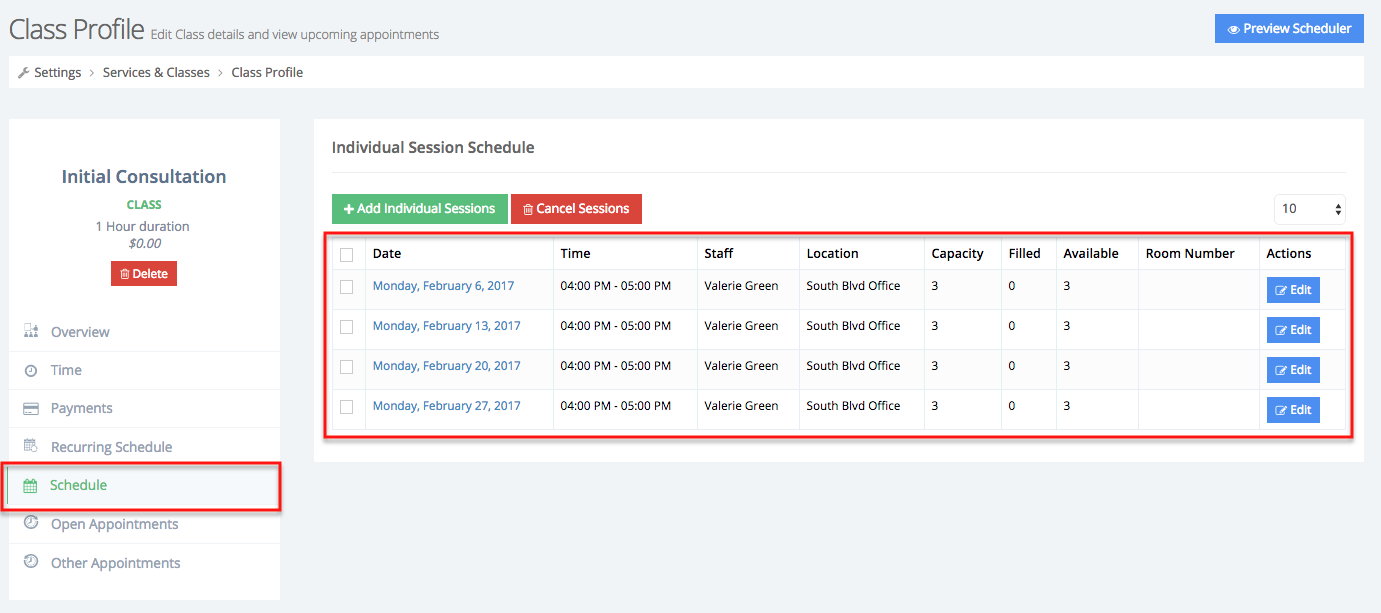
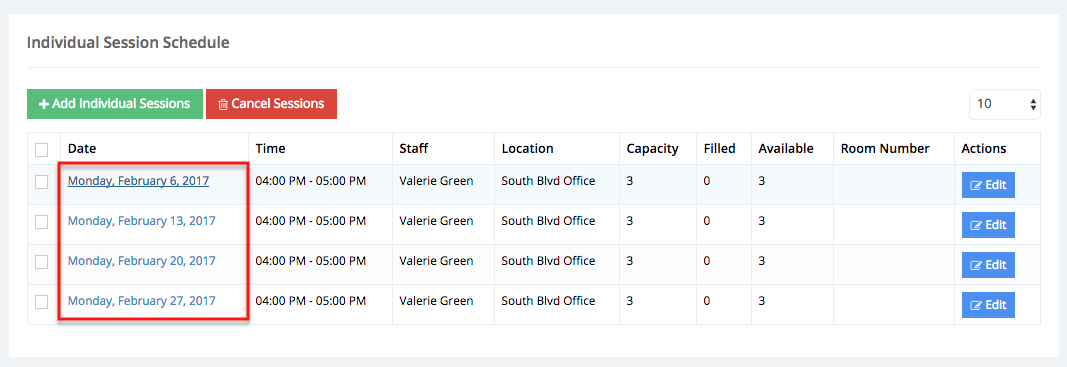
Now, click a date a class session is taking place:
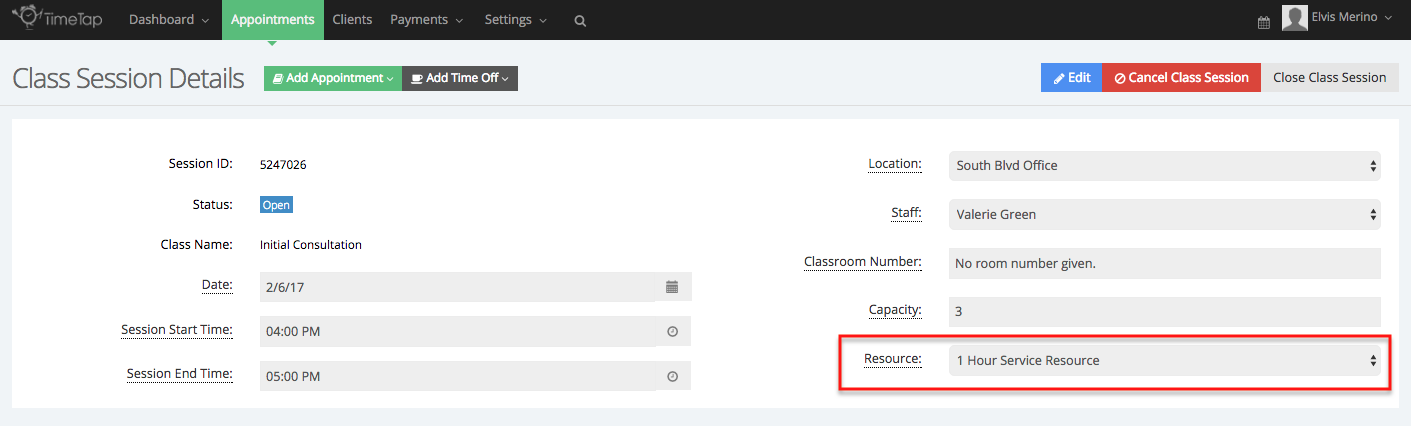
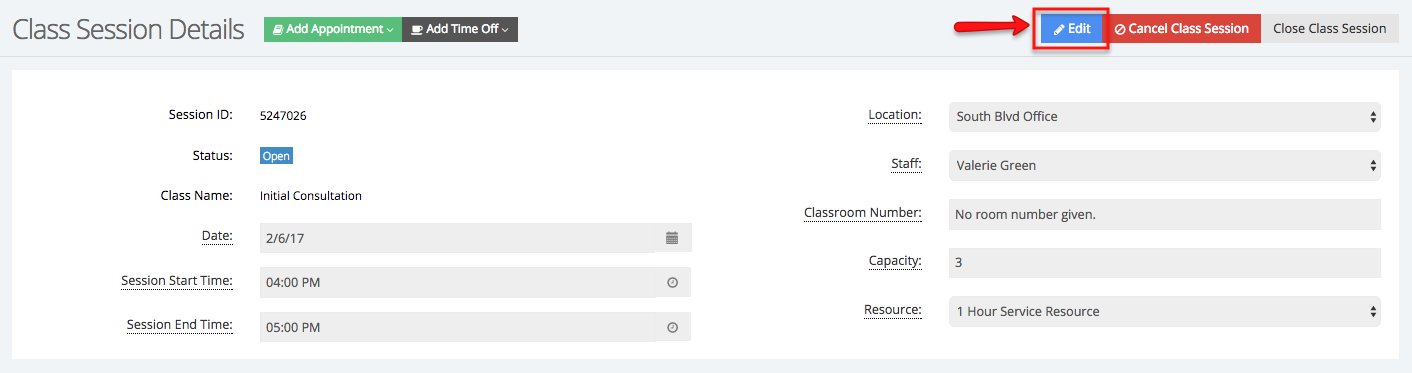
You will then be taken to the Class Session Details screen where you'll see that this class sessions has the resource applied. This means that because this class sessions is utilizing the resource no appointments for services that also require this resource can be booked on the same date and time:
Once in the Class Sessions Details screen you can choose to not apply the resource to this class session to by clicking the Edit button:
Select "Do not apply a resource to this appointment" from the dropdown menu next to Resource and click Save Changes:
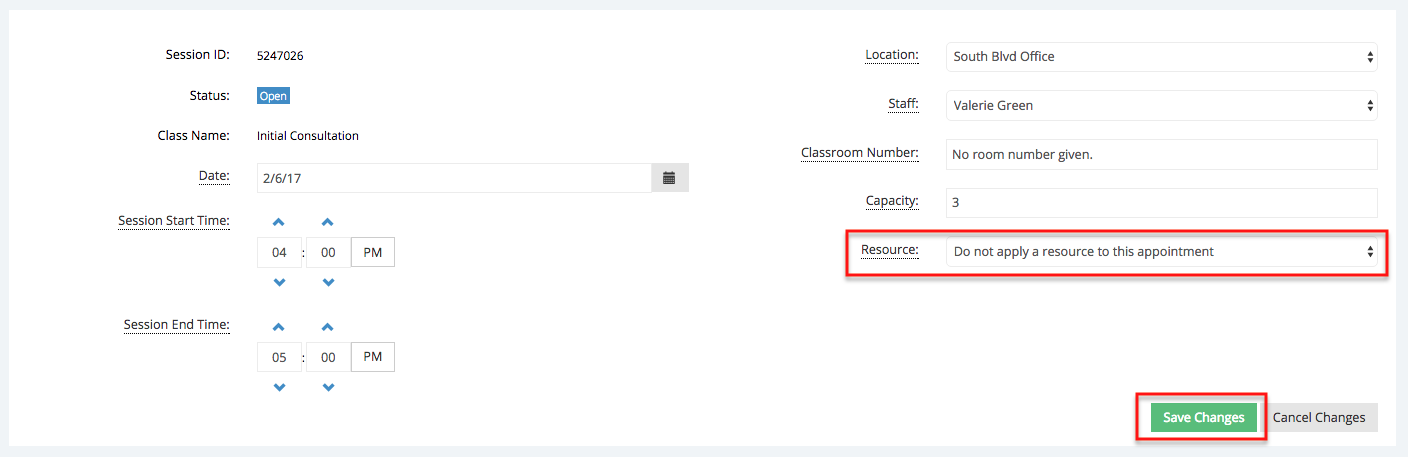
A new window will appear where you will confirm your changes, after the changes have been made you've freed up the resource for another appointment to be booked for a services that requires the use of the same resource.
If you would like to not apply the resource to all the class sessions with in the repeating scheduler, go to the class profile > repeating schedule > select the repeating schedule you would like to modify > select "Do not apply resource to this appointment".
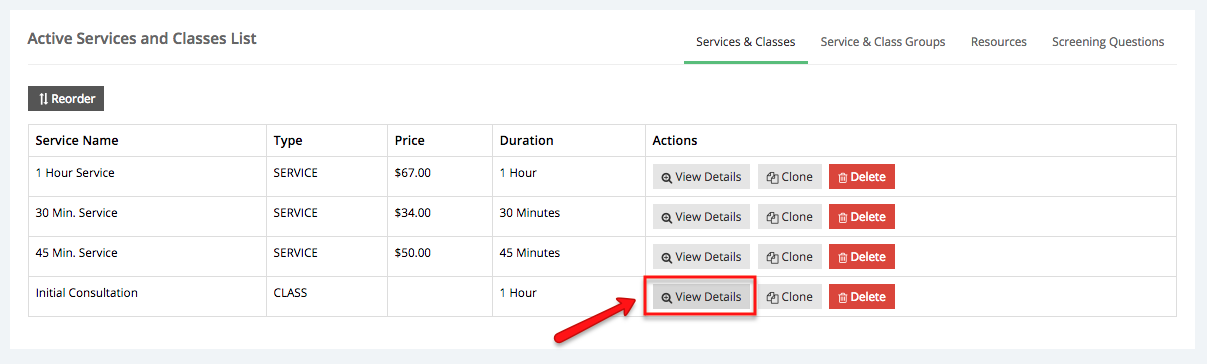
After you've created a new class you can add individual class sessions an apply a resource to them. Begin by going to Settings → Service & Classes:
Then click View Details next to the class to which you would like to add a new one time session:
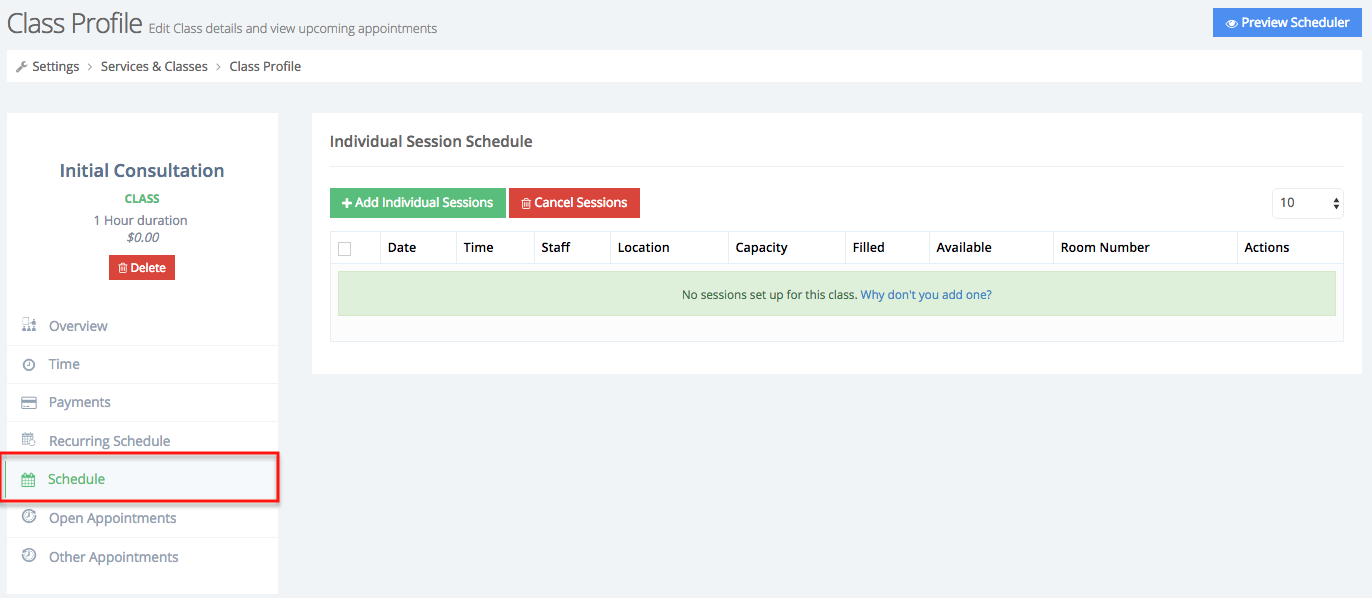
Once in the class profile click the Schedule tab, here you'll see any class sessions created by recurring schedules or any one time sessions you decide to add:
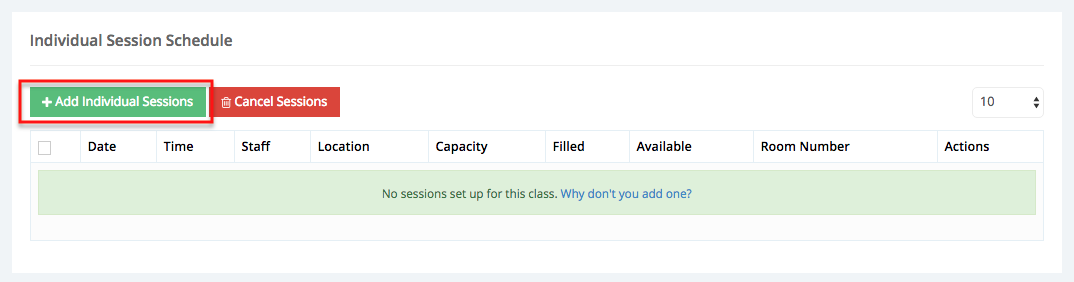
Click the "Add Individual Sessions" button:
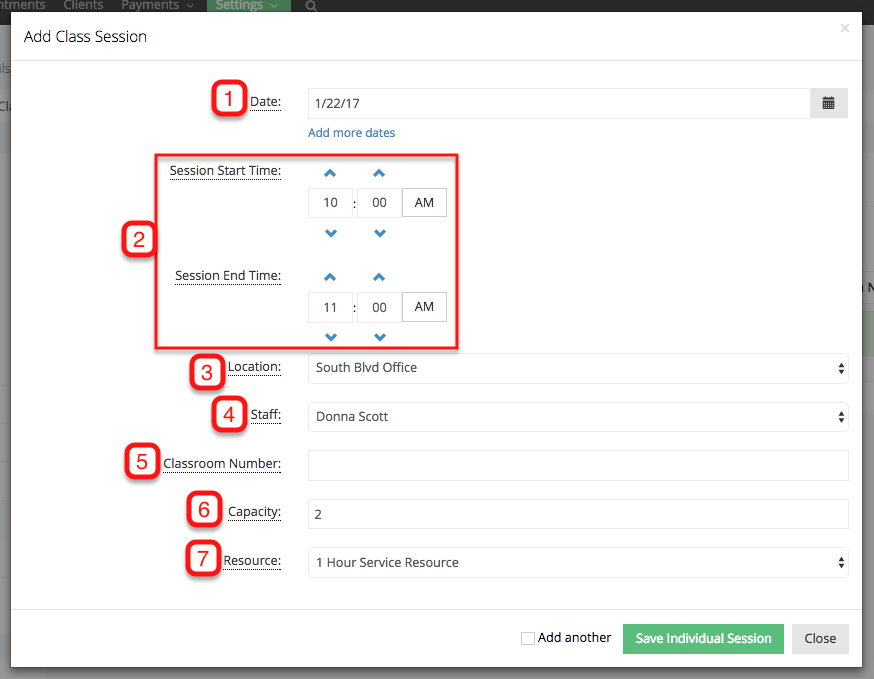
A new window will appear where you will determine the date in which the session takes place (1), set the start and end time (2), select a location (make sure to select the location where the resource you would like to apply is located)(3), assign the staff who will be leading the session (4), assign a classroom number (optional)(5), set the maximum capacity (6), and choose to apply or not apply a resource (7):
Now that you've created a new class session and applied a resource, this means that no appointments for a service that requires the same resource can be booked at the same time the session is taking place.
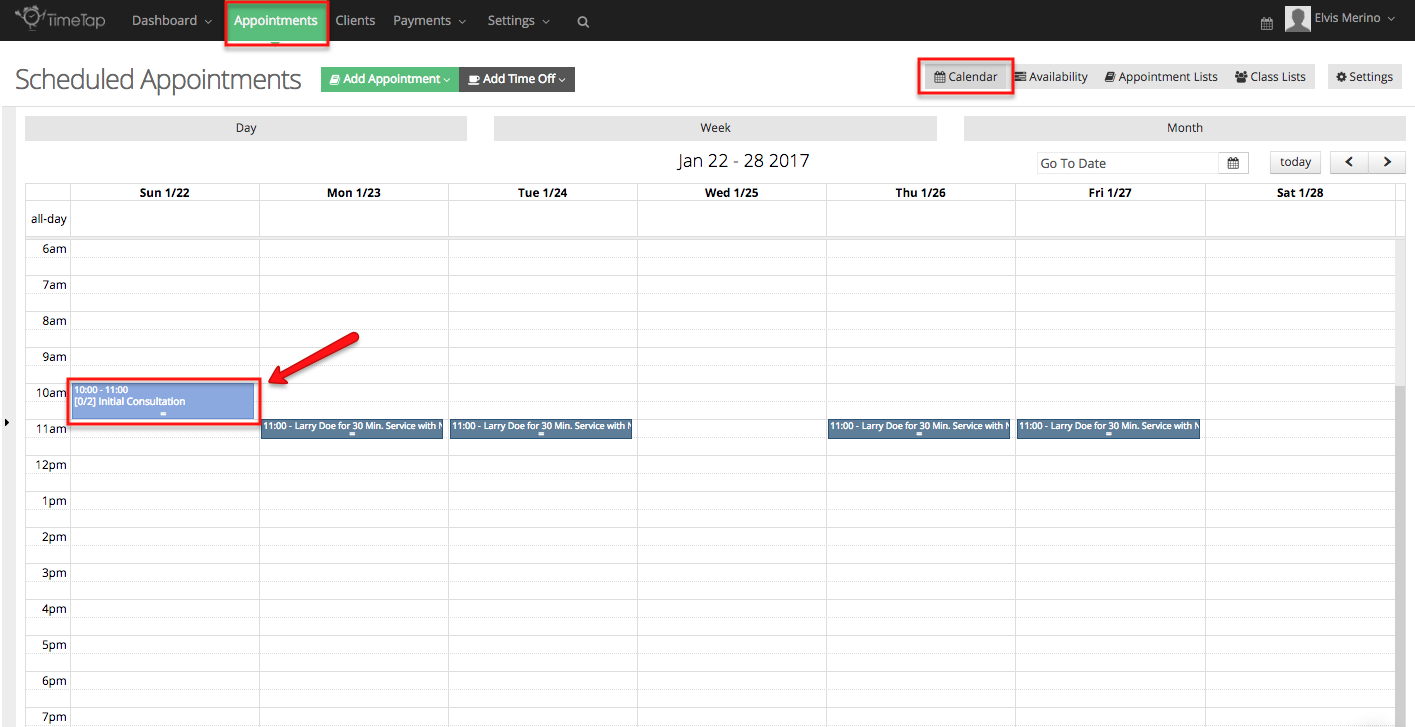
You now have to option to edit the class sessions and not apply a resource you go do it directly in the class profile within the Schedule tab or go to the Calendar view and click on the class session:
Once the Class Session Details screen click the Edit button on top right corner of the screen and select "Do not apply resource to this appointment" from the dropdown menu next to Resource, don't forget to click Save Changes to apply any changes you've made:
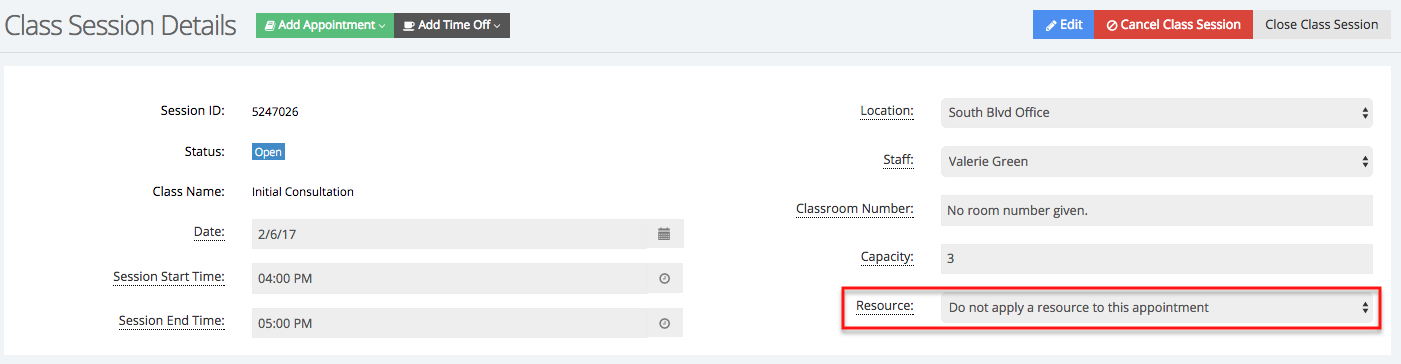
Now that you've chose to not apply a resource to this class session, you're allowing others to book an appointment at the same time and location for a service that the requires the use of the resource you had assigned to this class session.