In our Messaging > Marketing Templates section, you can create new templates to send out to clients in mass or individually.
For this example, let's say we want to send out an email to our clients to let them know of a special we're offering. In this message I want to provide a link to my scheduler and a description of the coupon code. To do this, I'll simply follow the steps below:
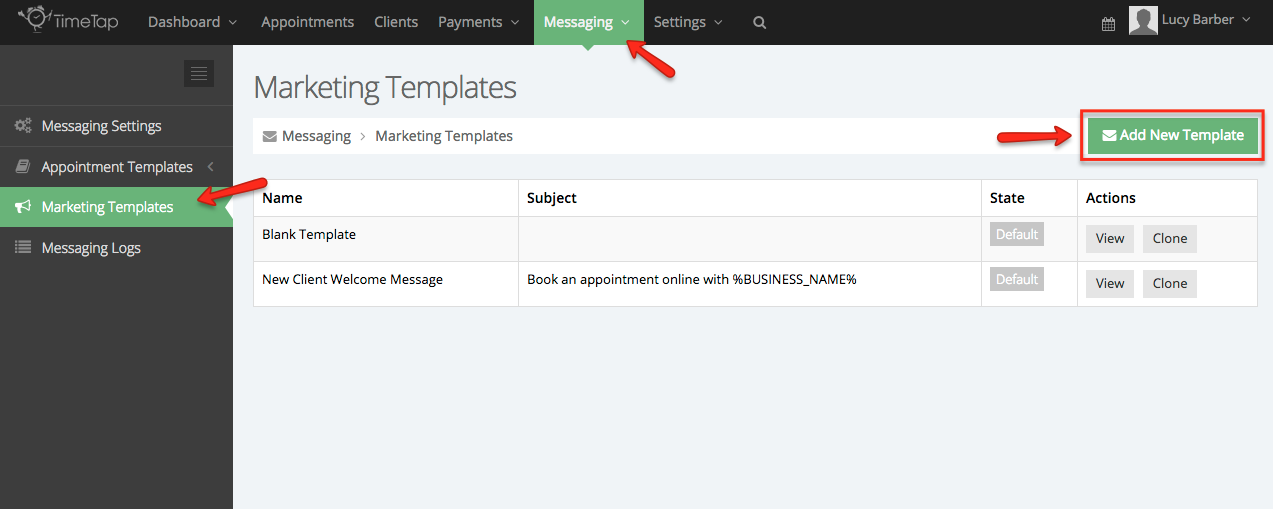
Step 1: From Messaging > Marketing Templates, I'll click the green button to "Add New Template":
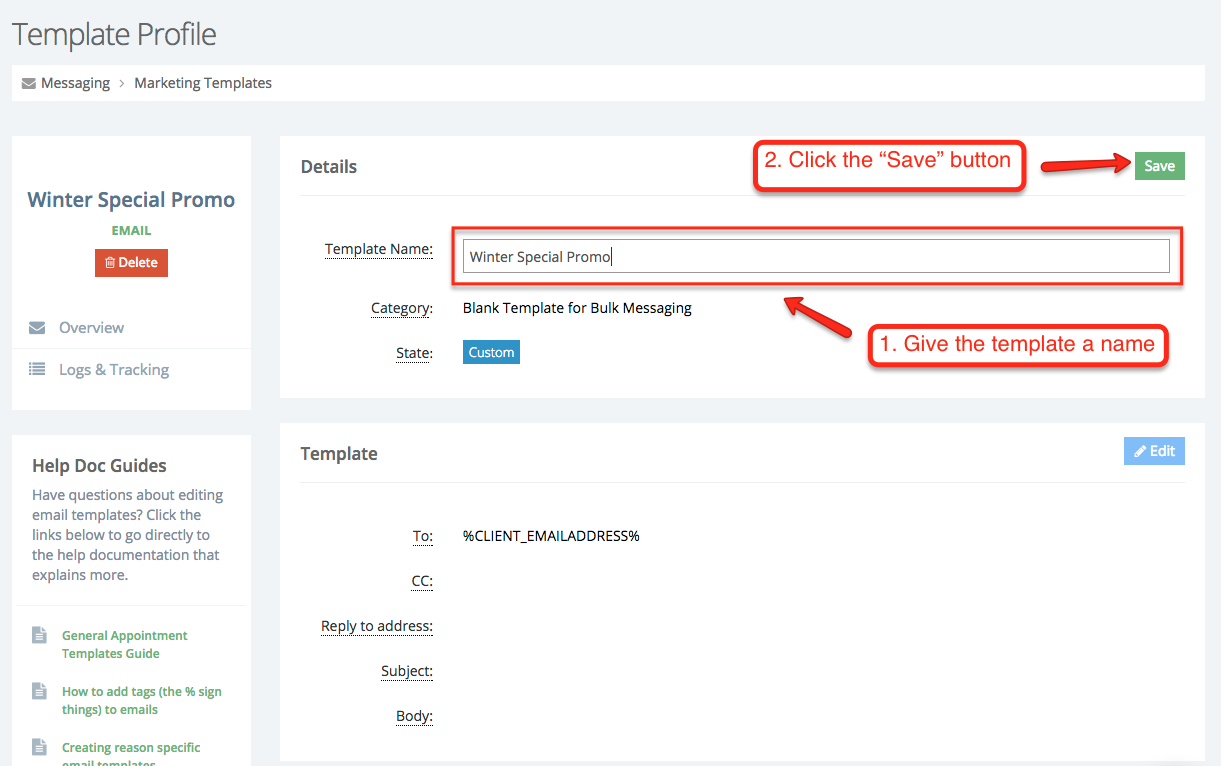
Step 2: I'll first give my template a name and then save it:
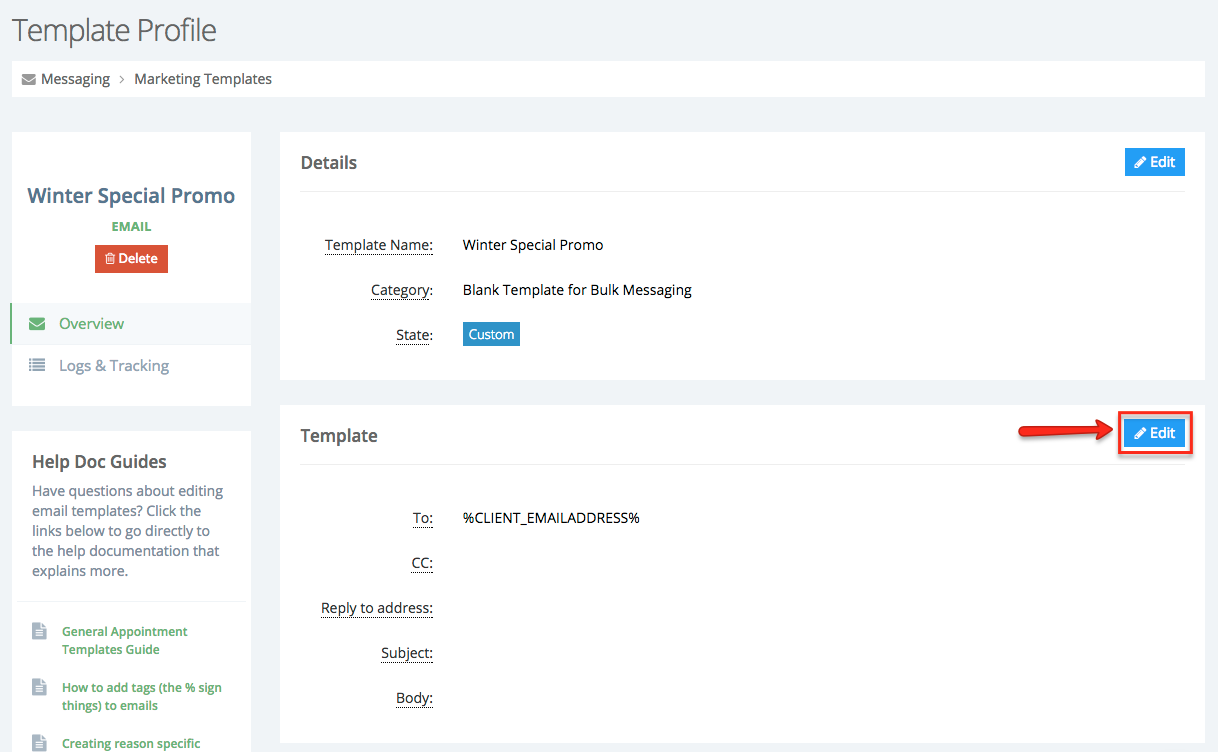
Step 3: After I've saved the template with a unique name, I'll then click the "Edit" button next to the "Template" section:
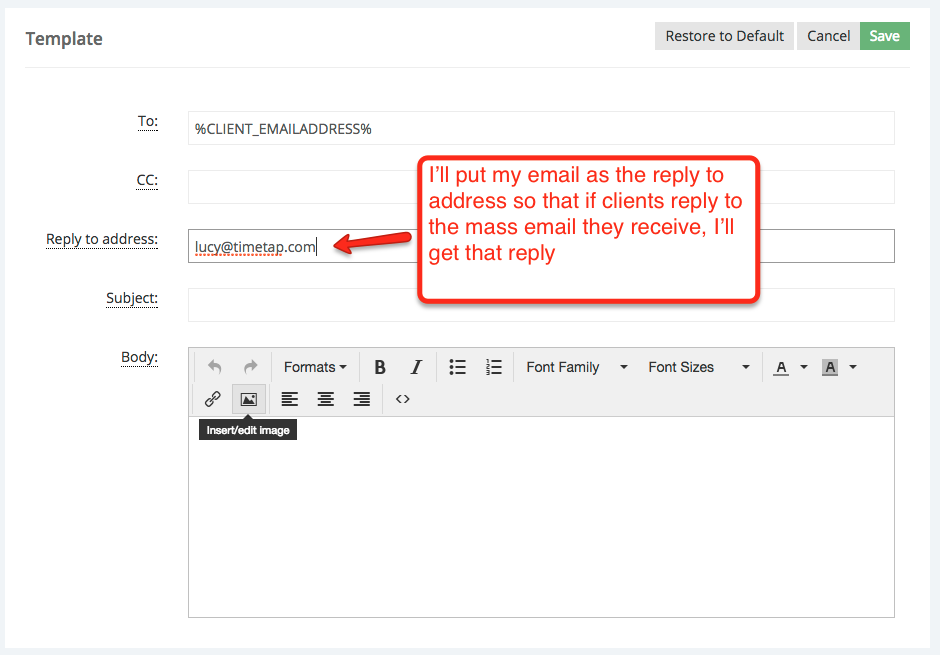
Step 4: I will live the "To" address as the tag %CLIENT_EMAILADDRESS% as (I want this to go to the client's email), and will put my email address in the reply to field so that if any clients reply to the email, it will go to me:
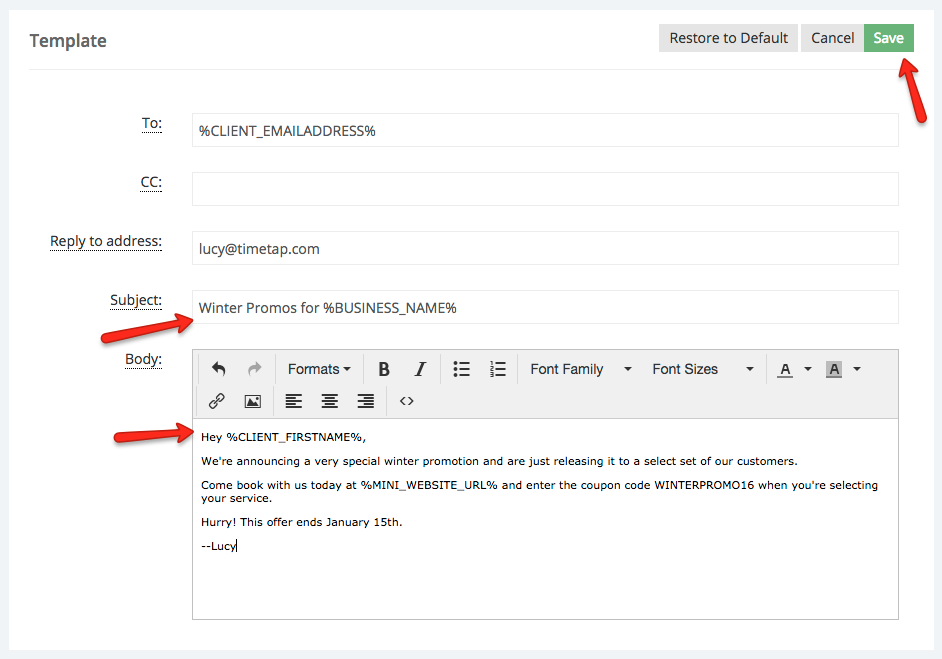
Step 5: Finally, I'll fill out the subject and body of the email (using some custom tags) and press "Save":
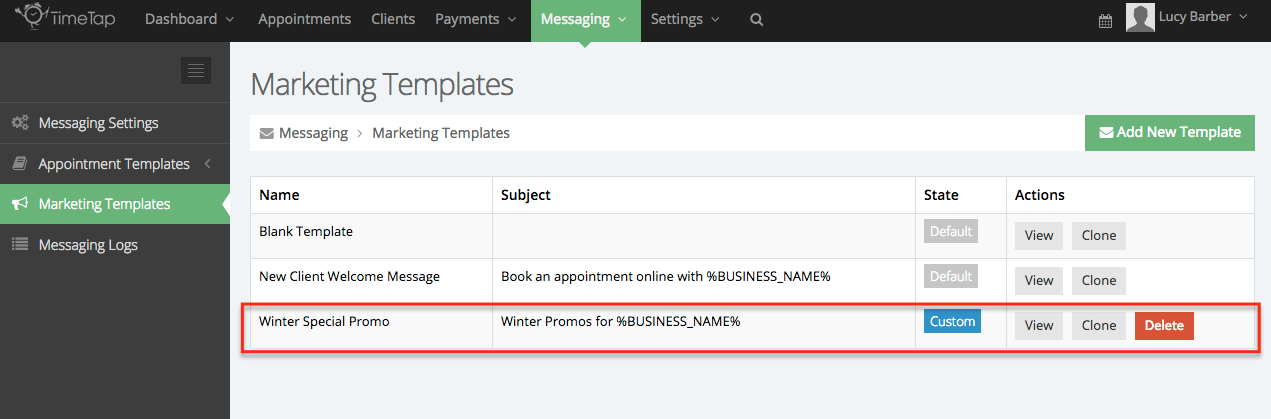
Now that I have my template created, I can see that template among my other templates in my Marketing Templates list:
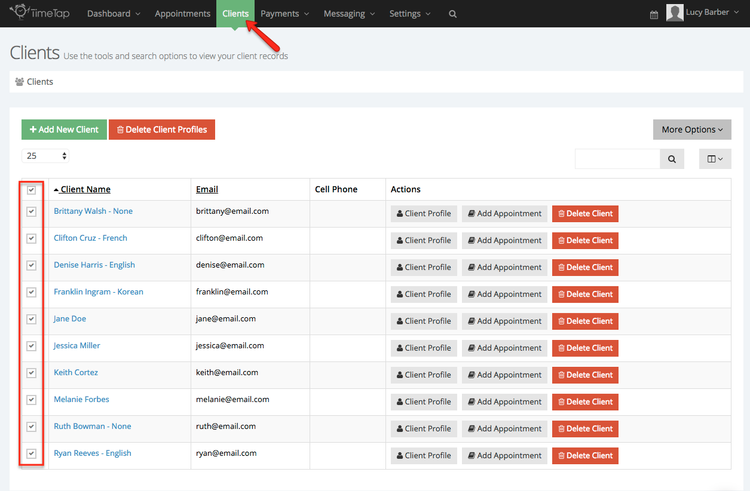
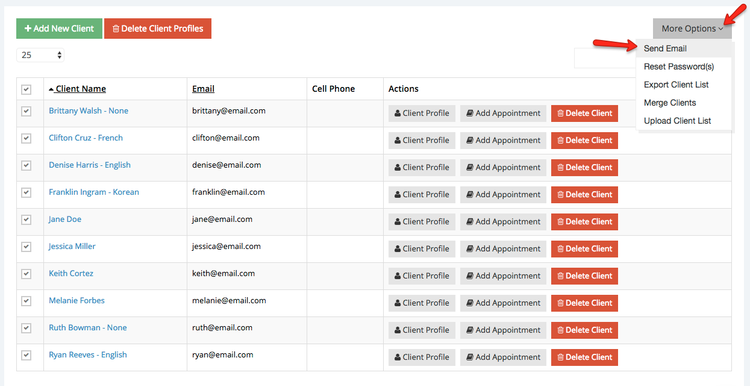
I can also select it as a template to send to my clients. To do this, I can go to Clients and select the clients I want to send the email to from my client list:
Then I can select More Options > Send Email:
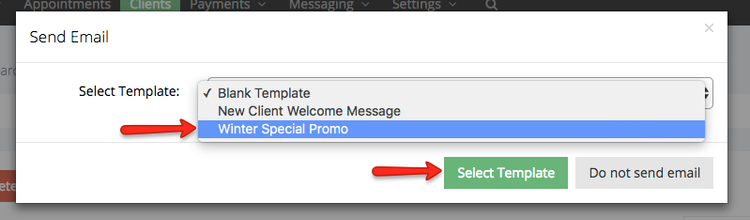
I can then select the "Winter Special Promo" template to send out to my clients I've selected:
Once I've selected that template, the template will appear and I can make any edits I'd like to before sending it out:
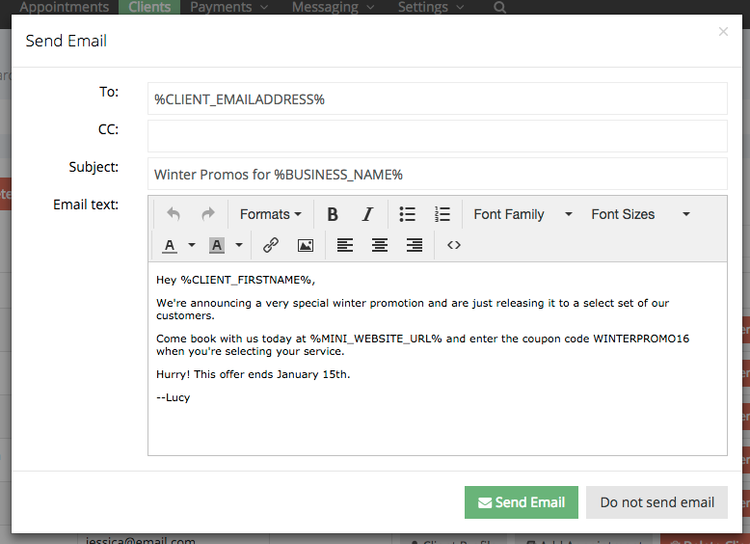
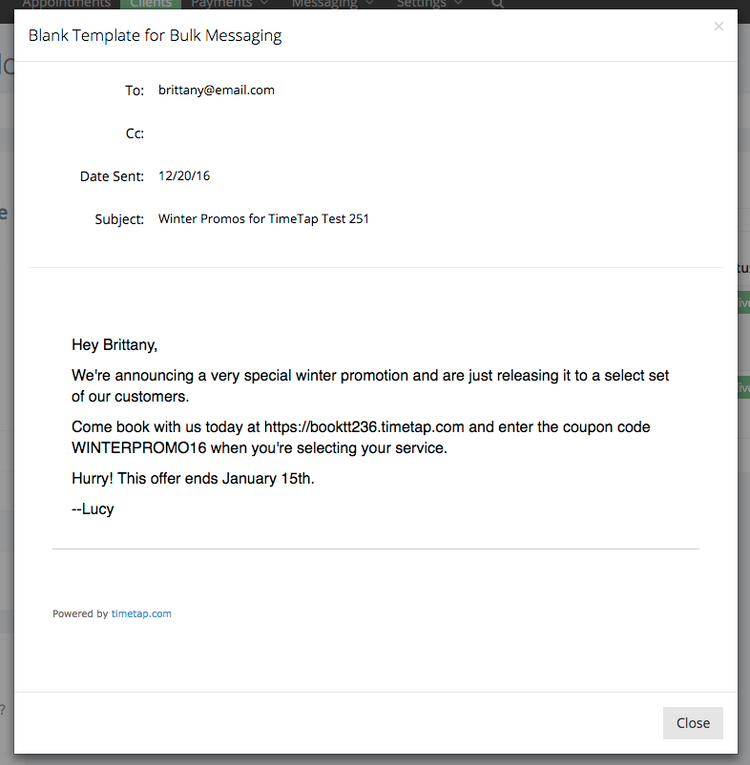
Please note: on the send email pop up, you will still see the tags showing there. Once you send the email out, we will merge these tags with their respective values. When your clients receive the email, they'll see it with the tags converted (as shown in the screenshot below):