Using Tags in Emails
- Lucy Barber (Deactivated)
When looking at any of your email templates, you'll inevitably notice text that is surrounded by % signs. These are known as "tags" and act dynamically to merge information about the appointment or the client to the email that is sent out.
There are several tags that all TimeTap accounts have in common that we've listed on a separate documentation page you can find here. On this documentation page we're going to explore:
Tags will make your email templates much more descriptive and powerful. If you have any questions after reading through this documentation, be sure to reach out to our support team.
As mentioned in the introduction to this documentation, tags work to merge dynamic information about an appointment or a client into the email that is sent out. There are several tags that are already on your email templates and available for you to use (see full list here). One of the most commonly used is the %APPT_DATE_TIME% which merges the date and time of the appointment to the email template. Let's take a deeper look at how this works.
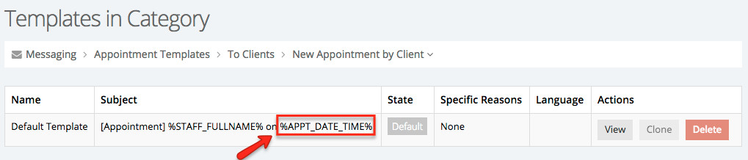
First, let's navigate to the template list for the New Appointment by Client email template by going to Messaging > Appointment Templates and clicking the "View" button next to that category:

In the template list view, we can see that even the subject line for the default New Appointment by Client email uses the tag %APPT_DATE_TIME%:
If we click the view button next to the template listed here to go into that template's profile, we'll see that the tag is also used in the body of the email:

Obviously everyone who books appointments with you is not going to have the same date and time for their appointment. Jane Doe's appointment with you may be for Monday, December 12th, 2016 at 9:00am whereas John Doe's appointment might be Tuesday, December 13th, 2016 at 1:00pm. With information that changes like this, you can't hard code in a date and time.
By using tags, TimeTap is able to generate the date and time on the fly for the appointment. The %APPT_DATE_TIME% tag will be filled in when the appointment is generated (after the client books) with the date and time that they booked for.
Now the %APPT_DATE_TIME% tag will always be filled in for appointment based emails, but there are instances where you may not have any information to merge with the email template. Take, for instance, the %LOCATION_ADDRESS% field in the template from the screenshot above. It's not required that you put in an address for your location, so what would happen if you had left that field blank and this template generated?
In this case, the field would simply not fill in and would display as a blank space on your email template. You'll see on the screenshot below that on this test account I'm using for this documentation, when the email template was created, the business name filled in but nothing underneath it in the location address field:
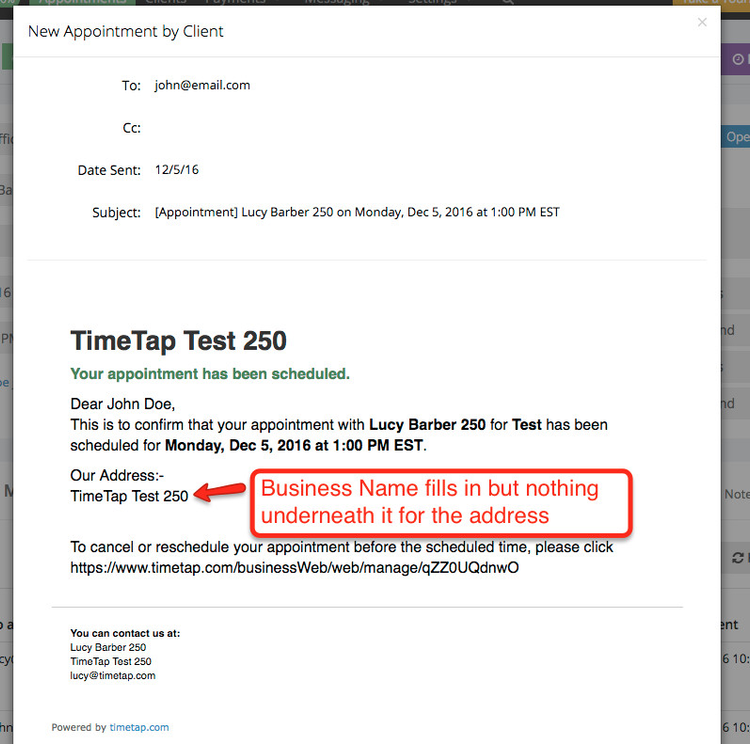
This is because on this test account, I don't have an address entered for the location, thus the tag just disappears from the email template when it's generated.
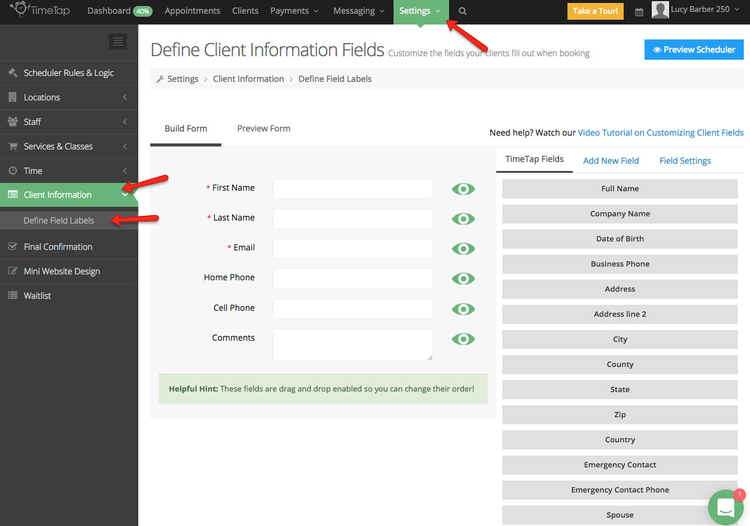
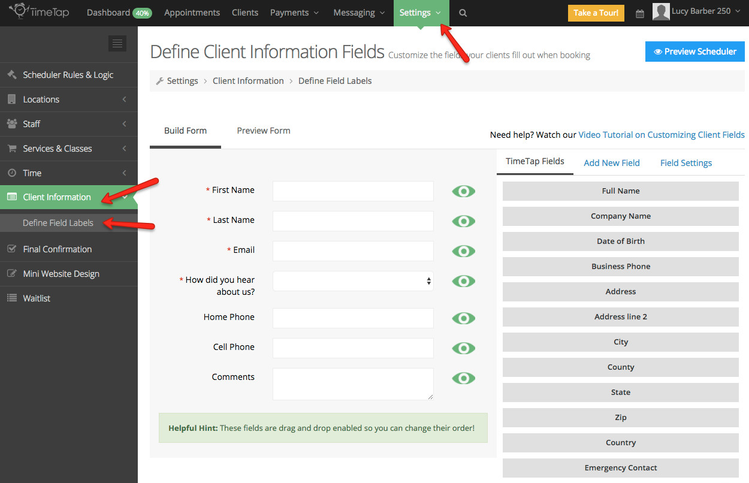
As mentioned in the introduction to this documentation page, there are several tags that are used across all TimeTap accounts (you can get a list of them here), but there are also tags that are going to be specific to your business. This is based on the booking form that you create for your clients to fill out under Settings > Client Information > Define Field Labels:
Please note: we've got full documentation on how to customize this page available here as well as a video guide of it available here.
You'll notice on this page that there are a number of fields that come with TimeTap. Take the "First Name" field for example. That is a pretty standard thing business's request from clients who are booking and thus TimeTap supplies it out of the box. If you click on the First Name field you'll see that the field's settings get toggled on:
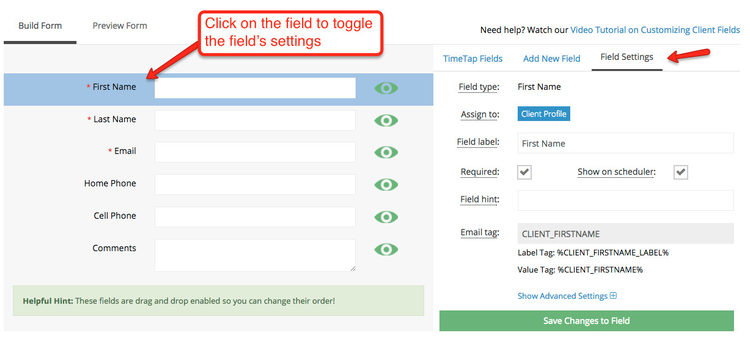
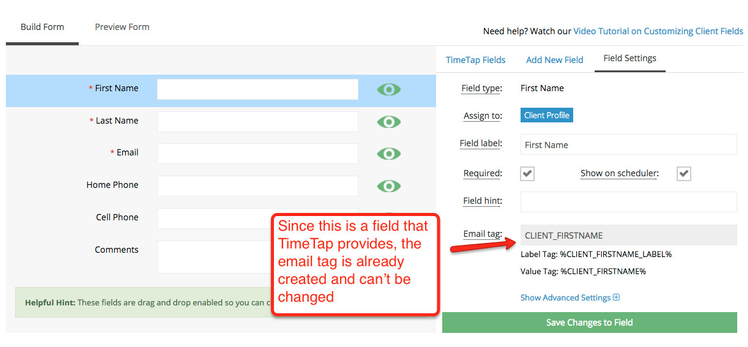
For any fields that TimeTap provides, you'll see that the email tag is already created and can't be edited:
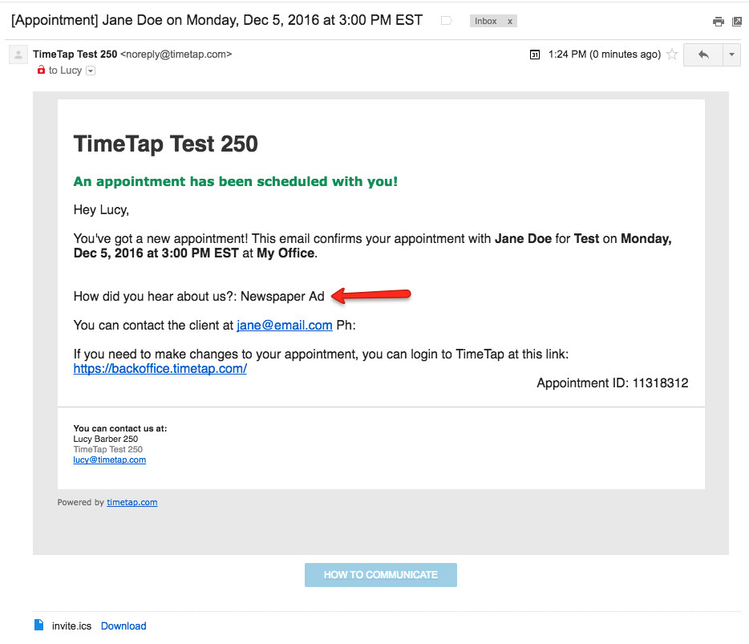
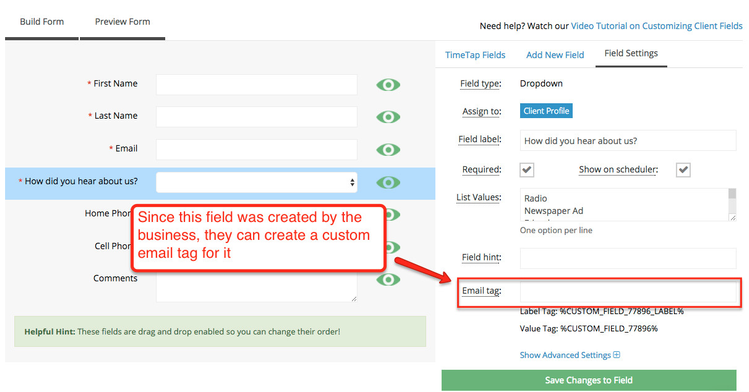
But let's say that you've added in a new field called "How did you hear about us" and filled it in with options for the client to choose from that are specific to your business's advertising channels. Since this field was created by your business, the email tag field won't be filled in by default. Instead you'll see a custom tag has been created:
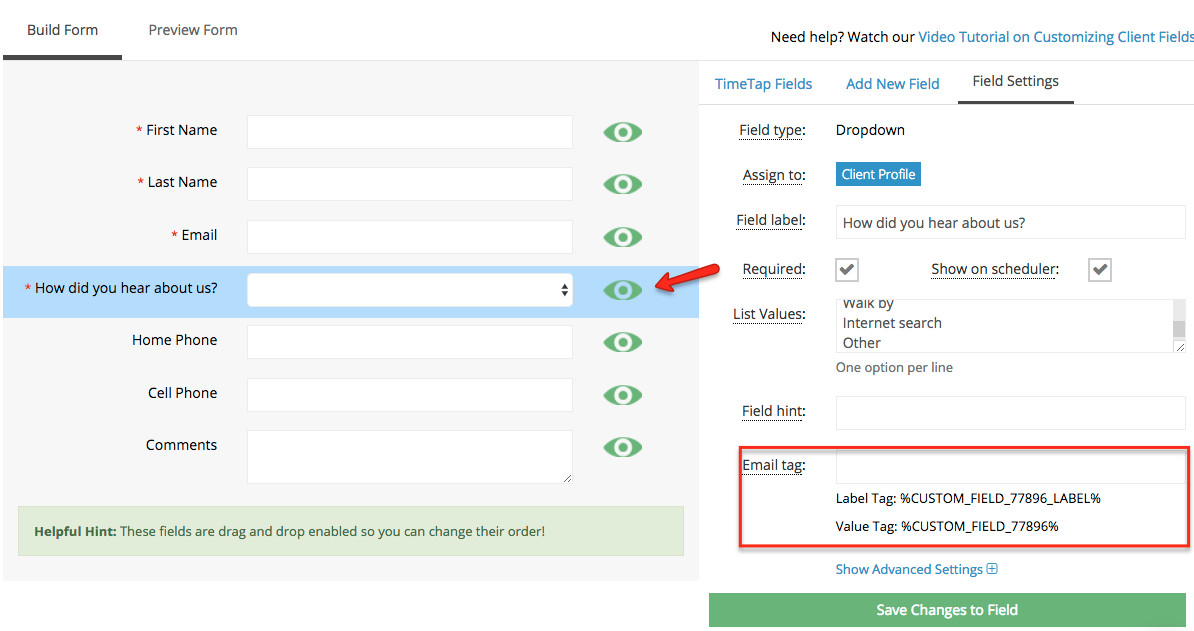
You can copy the "Value" tag and include it in one of your email templates to merge the option they enter to the email template when it's created. Let's say, for instance, that you add the value tag shown above %CUSTOM_FIELD_77896% to the new appointment email template sent to your staff member. Then, if client Jane Doe goes through to book and selects "Internet Search" from the dropdown of options, the email that the staff receives will merge the value the client selected to show "Internet Search".
You can also use the label tag %CUSTOM_FIELD_77896_LABEL% which will merge the field label to the template (in this case "How did you hear about us?".
You can use the "Email tag" field to create a friendlier email tag for yourself which is easier to remember. We go over how to do that here.
If you have custom fields that you've created on your client booking form and you want to include the value that's been inputted there in your email templates, it's a good idea to create an email tag for those fields.
To do this, go to Settings > Client Information > Define Field Labels:
If you click on one of the fields provided by TimeTap (like the "First Name" field), you'll notice that you can't update the "Email Tag" field:
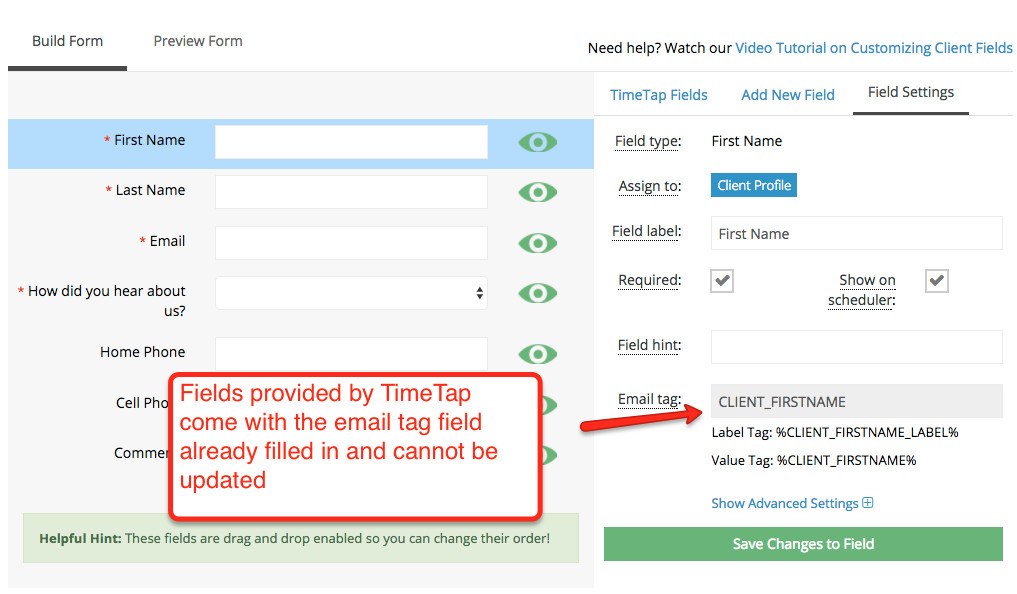
This is because the field is ubiquitous across all of our accounts and the same tag is used for that field for every business on TimeTap.
If, however, you click on a field that your business added specifically for your account (like the "How did you hear about us?" field shown here) you'll see that you can add a value to the email tag field:
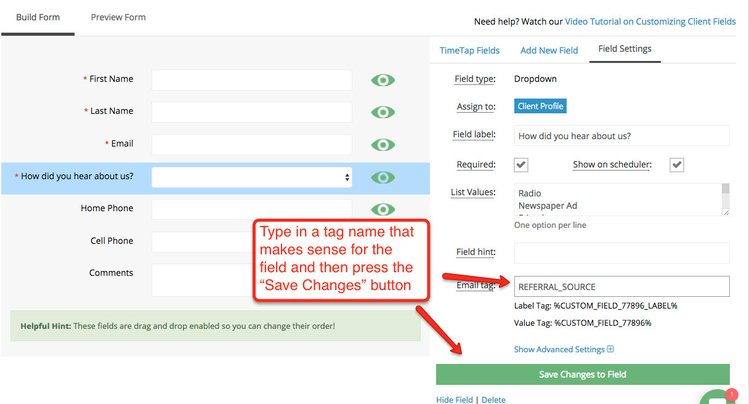
You'll notice that there is already a email tag applied for it, but the default email tag is just a random set of numbers and can be hard to remember as you're editing the email templates to apply tags to them. That's why I recommend creating an email tag for your field so it's easy to tell what they are when you're editing your email templates. To do this, simply type the value you want to be used for the tag into the email tag field and press save:
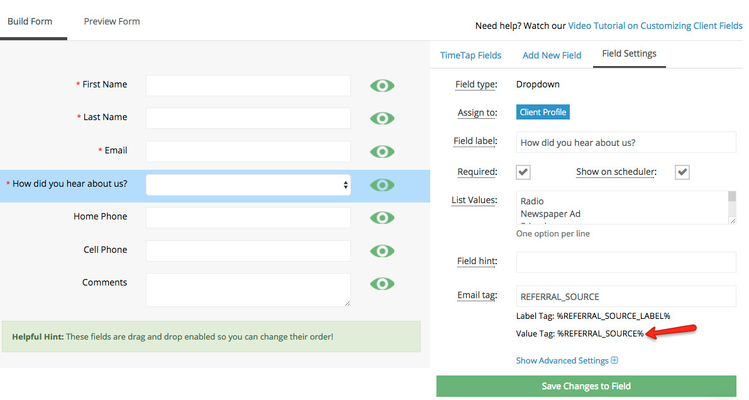
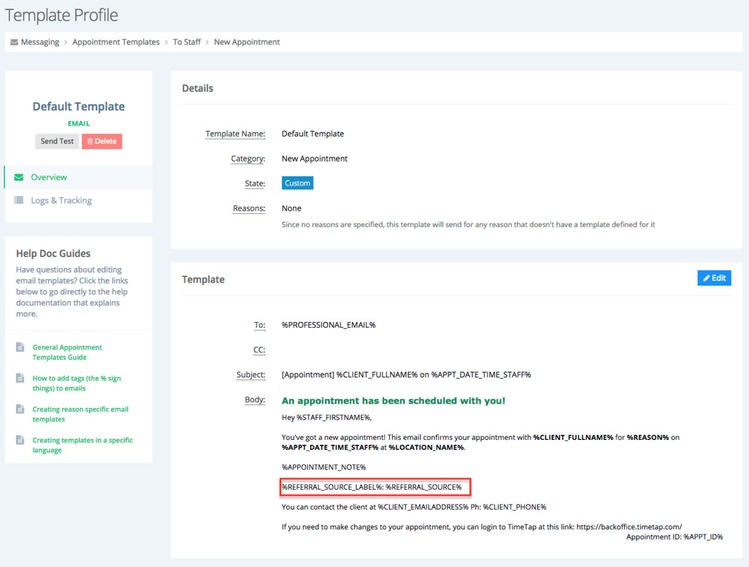
Once the field gets saved, you'll see the settings update and you'll notice the value tag is now %REFERRAL_SOURCE%:
I can take that tag and put it on my new appointment template sent to staff so that I know what referral source a client selected when I receive the appointment confirmation email:
Now, when a client books with me...
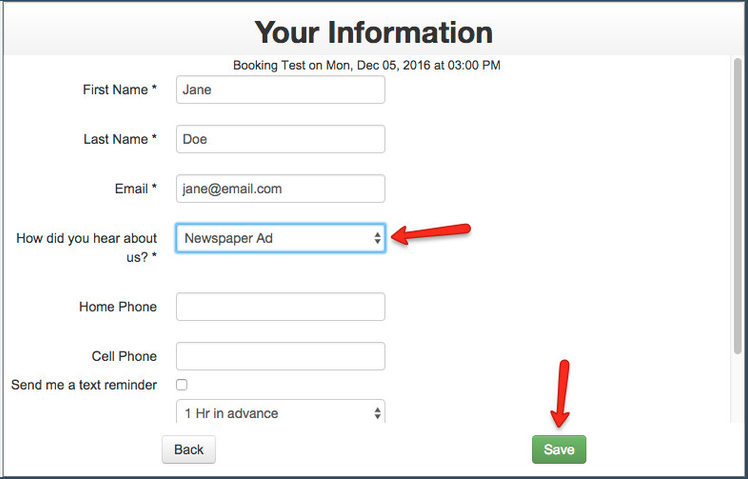
then the email I receive as the staff will have the value they selected in that dropdown filled in: