Service Availability from the Staff Profile are the dates and hours during which a staff member is available at a certain location to accept appointments for his/her services. In this documentation, we'll go through how you can set up service availability for yourself and each of your staff from the Calendar View using the Quick Add window. In this page we'll cover how to:
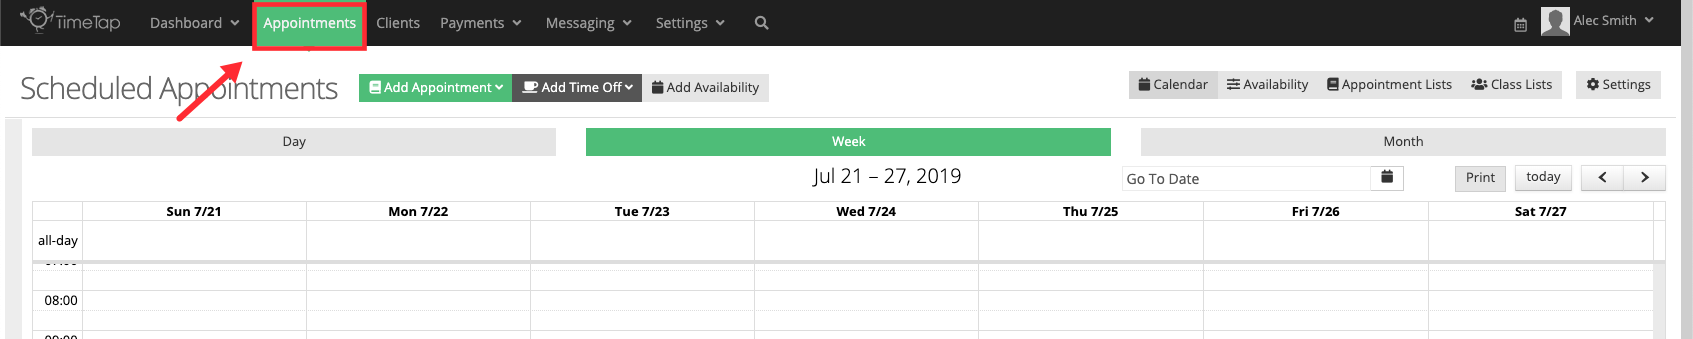
The Quick Add window in the calendar view can be used to schedule appointments, schedule class sessions, add time offs and to view/edit your availability. To add service availability for one day, begin by going to the calendar by clicking 'Appointment' in the navigation menu:

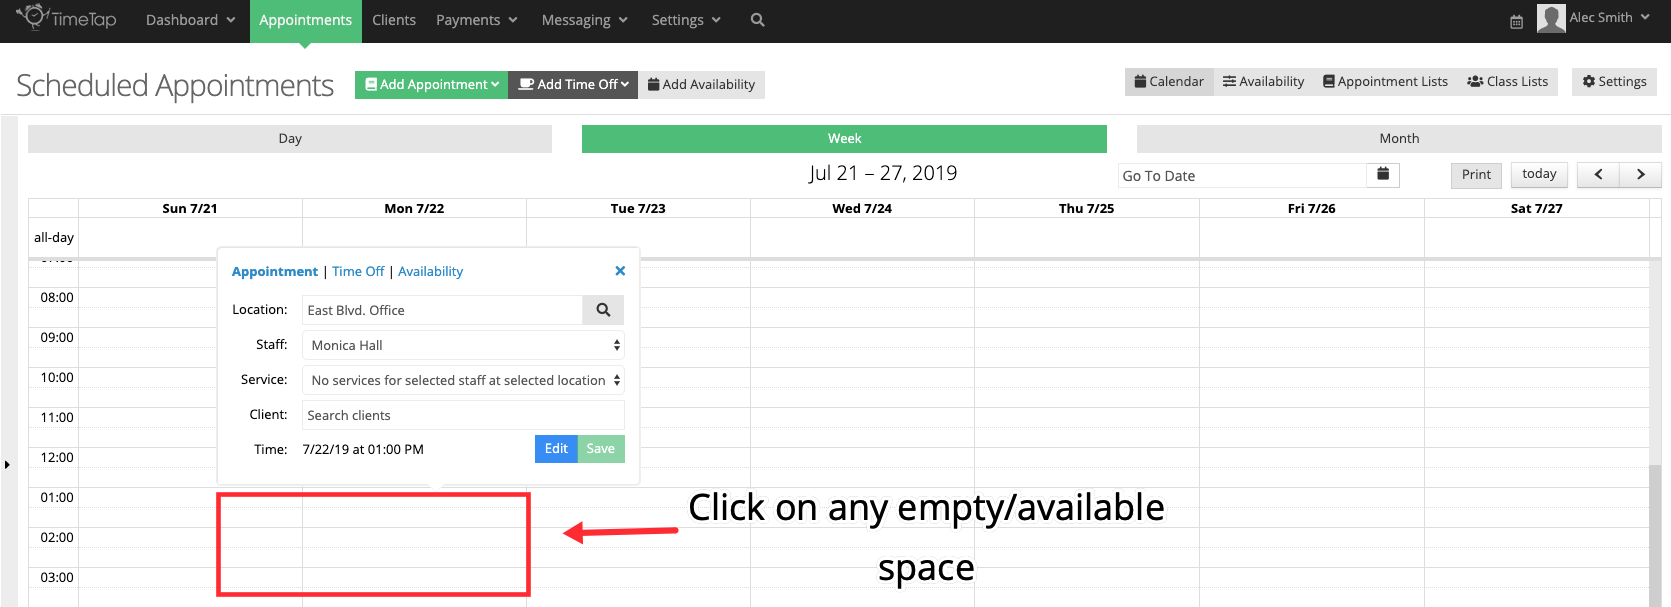
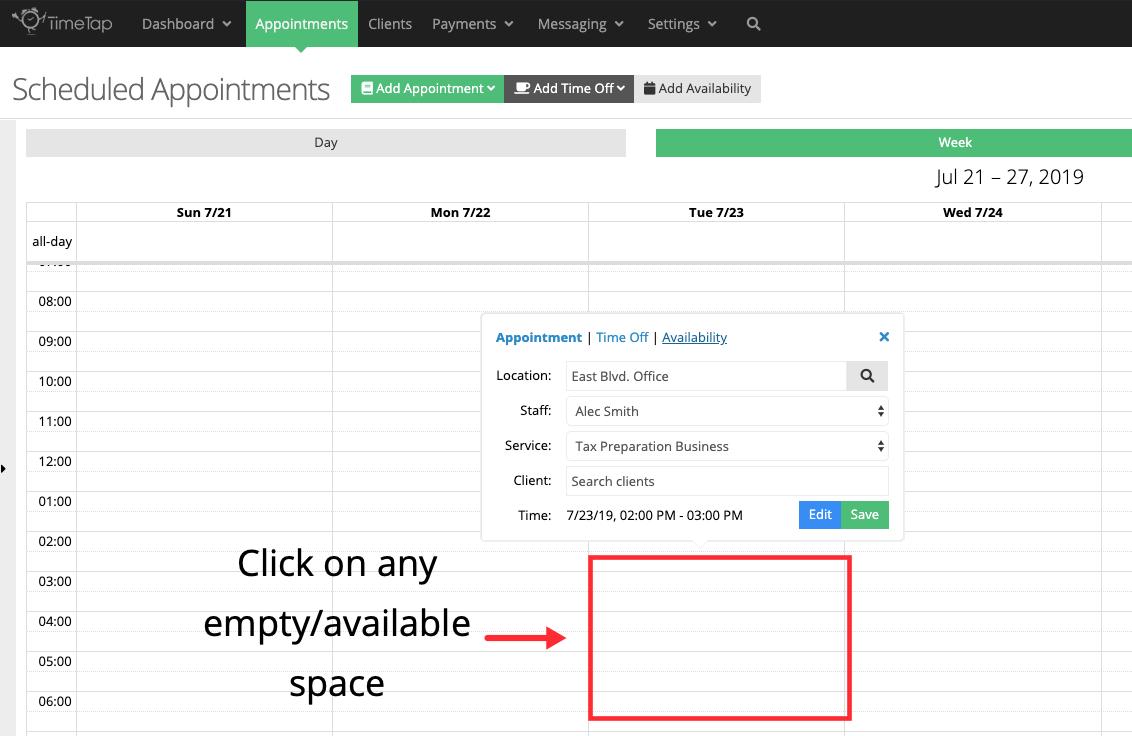
While in the calendar, click on any available space on the day when you want to add service availability to bring up the Quick Add window:
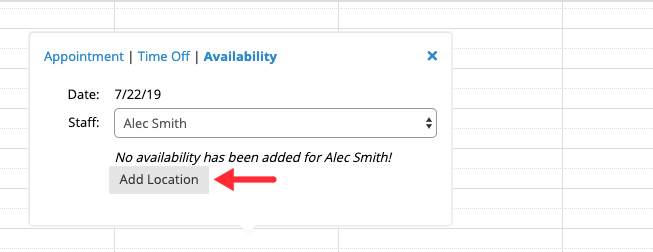
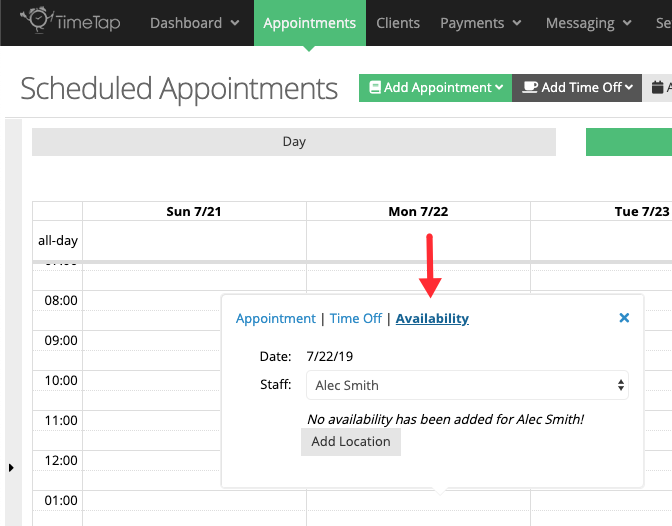
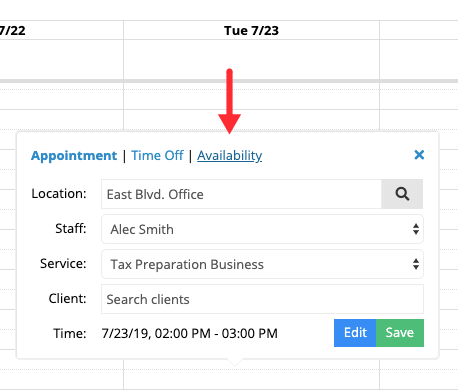
Click the 'Availability' option in the Quick Add window:

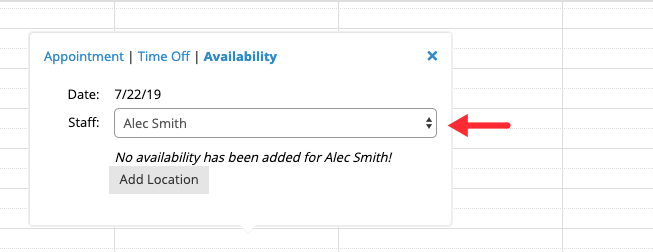
If you have multiple staff members in your account and you are the account owner, administrator or have access to view other staff, you'll have the option to select yourself or any of your colleagues in the 'Staff' dropdown:
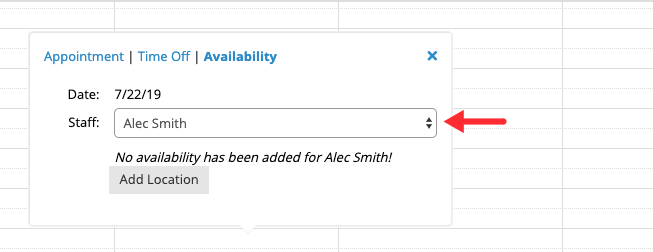
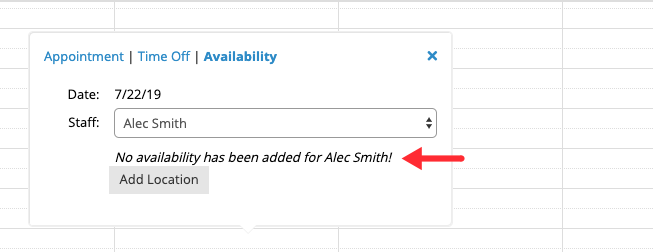
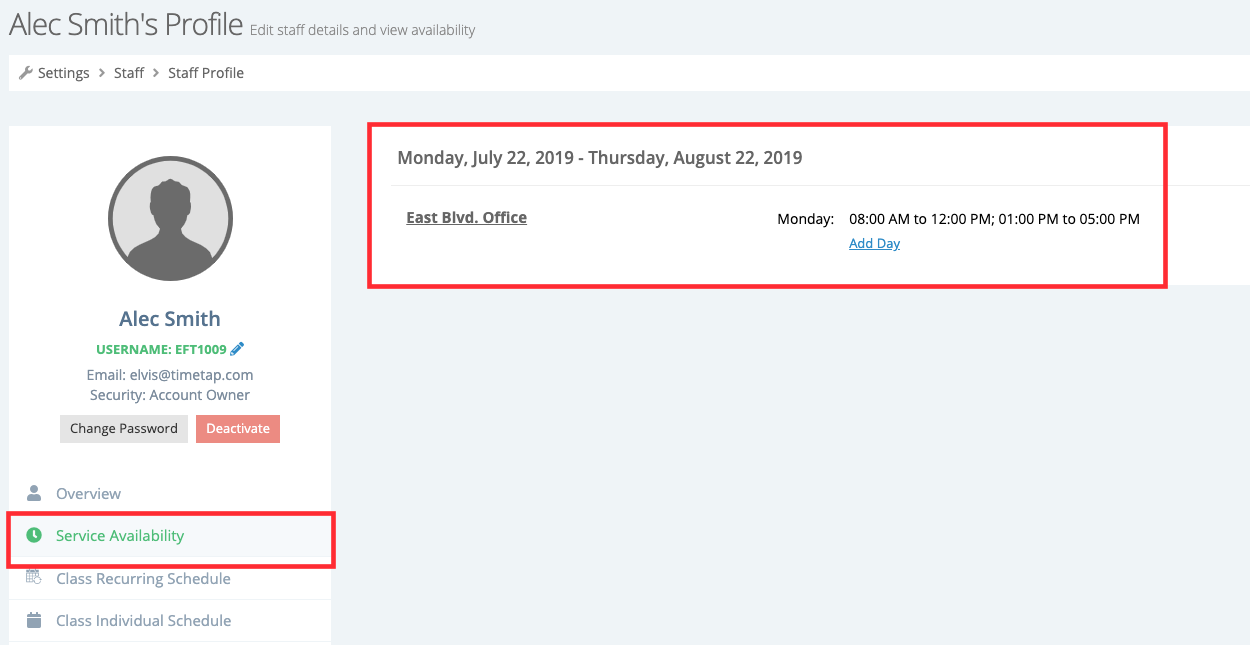
For this example, we'll assume that Alec Smith doesn't have any service availability, this is reflected in the text above the "Add Location" button:
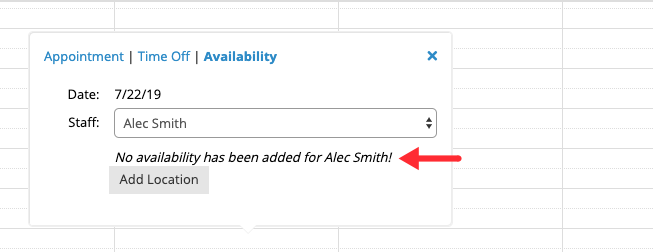
Click the 'Add Location' button to select the location where the staff will be available:
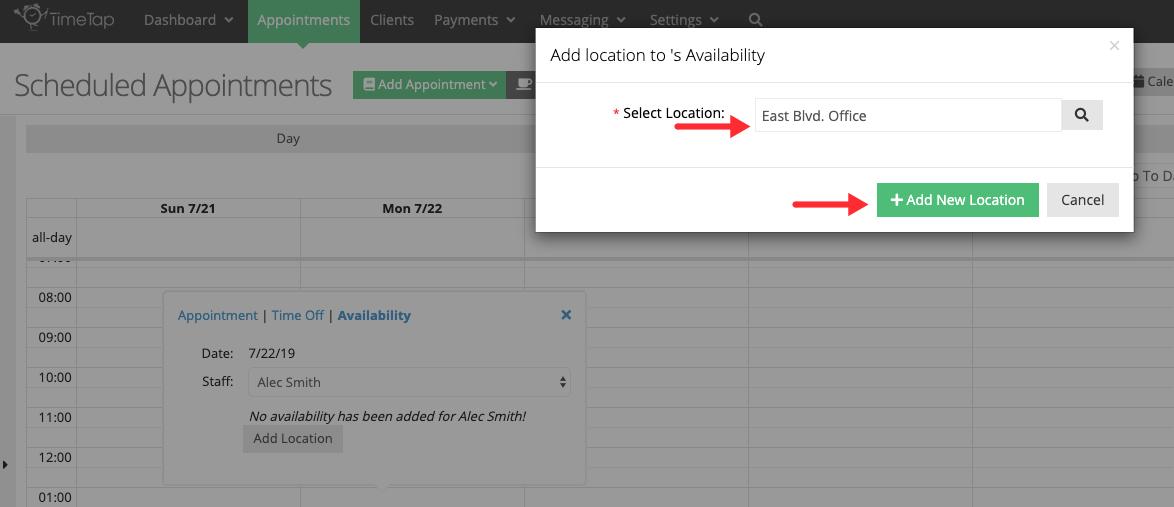
After you press the button, a new window will appear where you can search for the location where you or the staff selected will be available. You'll only be able to search and select only the location(s) that you have been granted permission to see. But, if you're an account owner or administrator you'll have access to search for any location. After you select your location click the 'Add New Location' button:

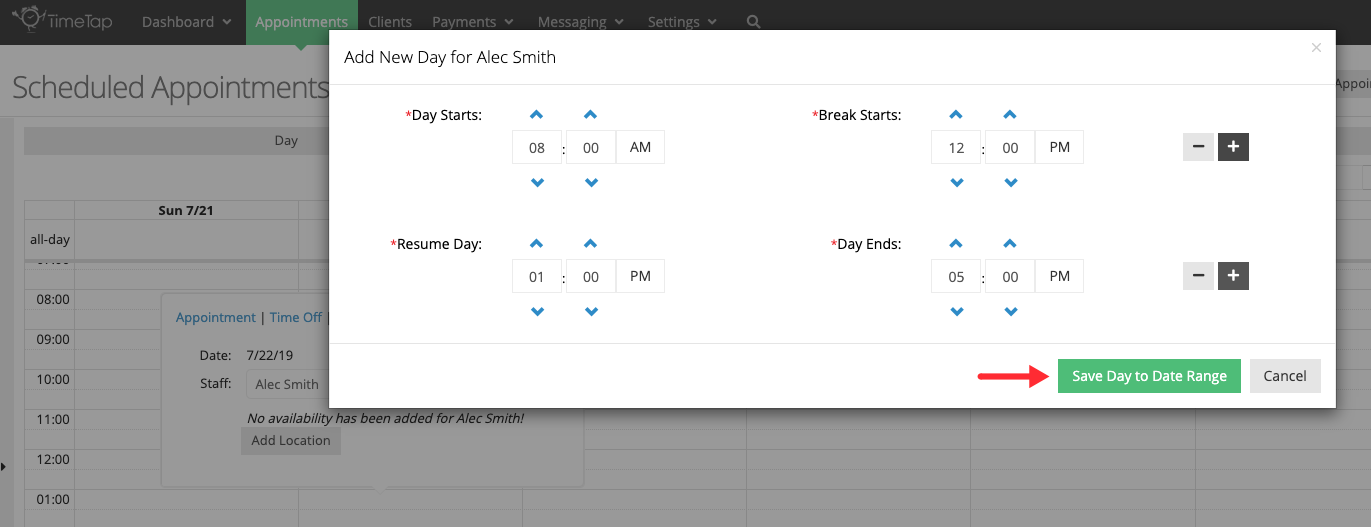
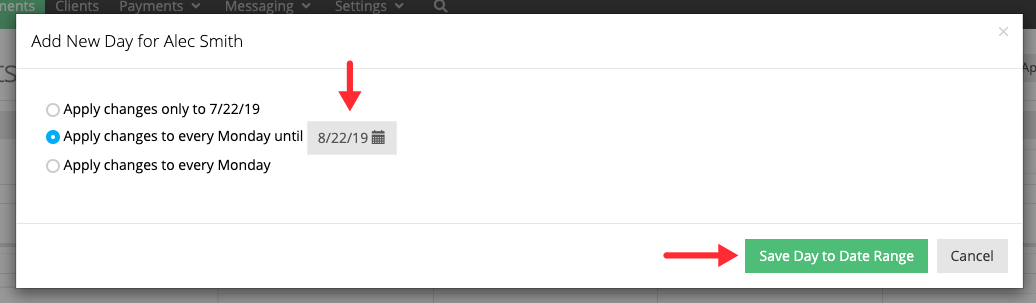
A new window will appear where you'll have the ability to set the hours you'll want to add. You can click the + and - to add or remove breaks. After you set your hours, click the 'Save Day to Date Range' button to add the service availability:
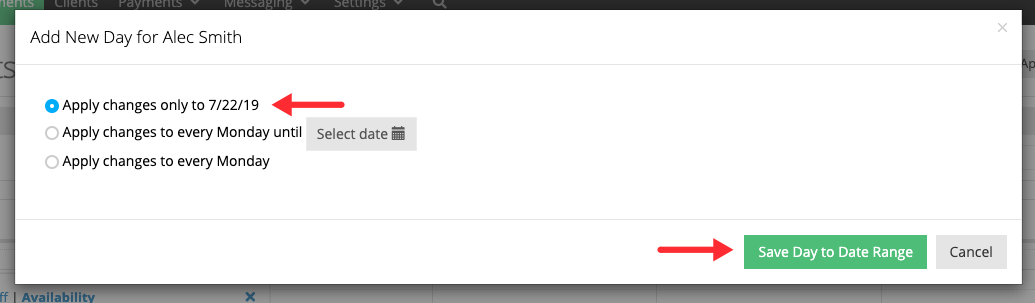
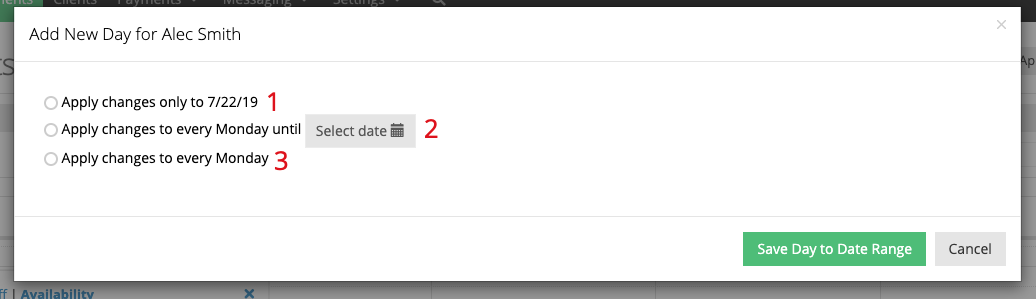
Finally, you'll have the option to select whether you want to apply this availability only on the date you selected (1), on the day of the week you selected for a date range (2), or on the day of the week you selected indefinitely (3):

For this example, we'll choose the option to only add service availability on day we selected, 7/22/19. After the selection is made, we'll click the 'Save Day to Date Range':
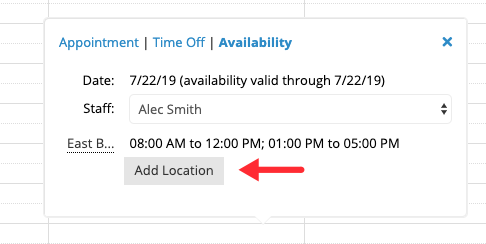
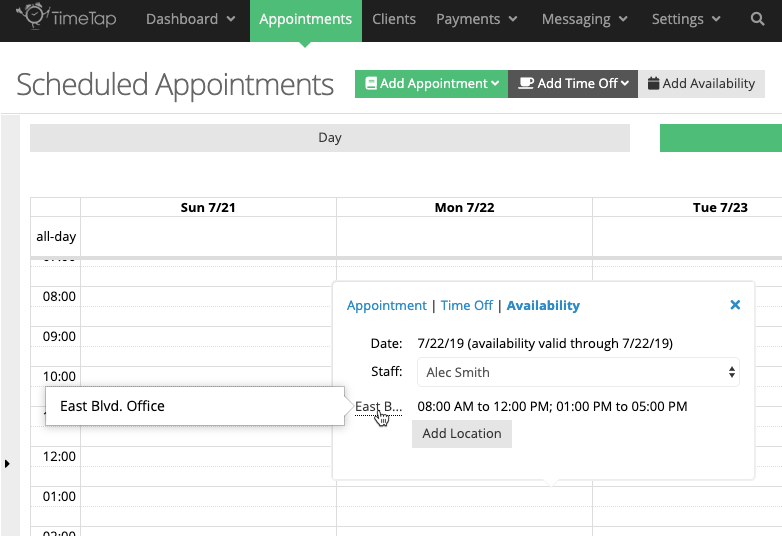
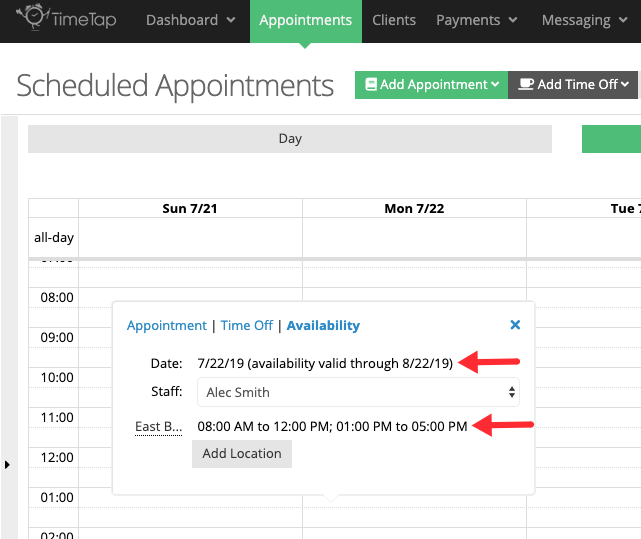
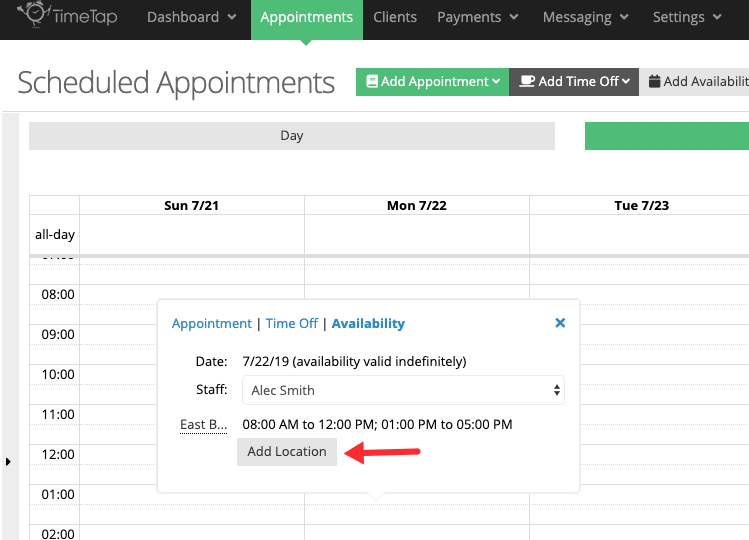
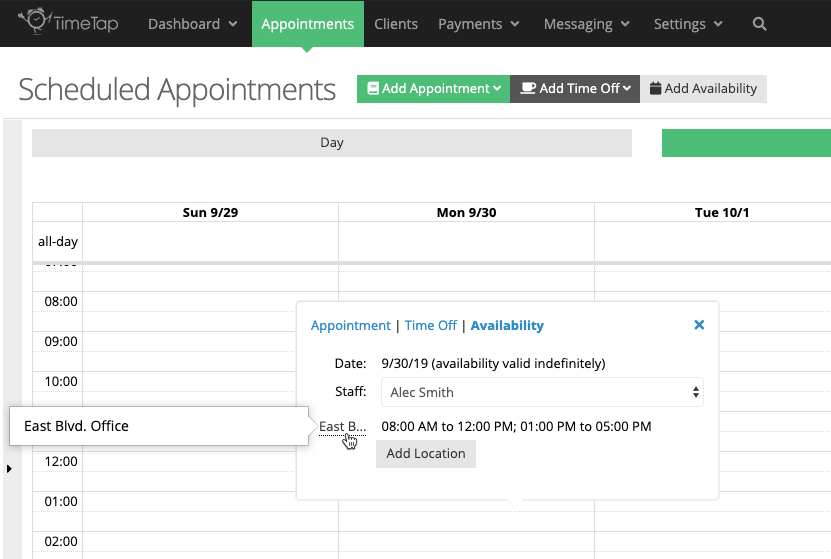
After the availability is added, the Quick Add window will update and will display the hours you selected:

If you want to add availability for the same staff at a different location, click the 'Add Location' button and repeat the previous steps:
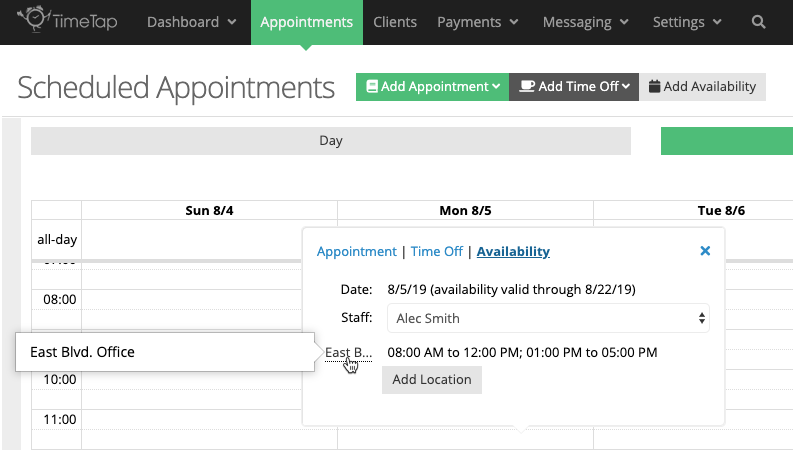
Due to space restrictions, the name of the location may not be displayed in full, but if you move your cursor over the location's name, it will appear fully:
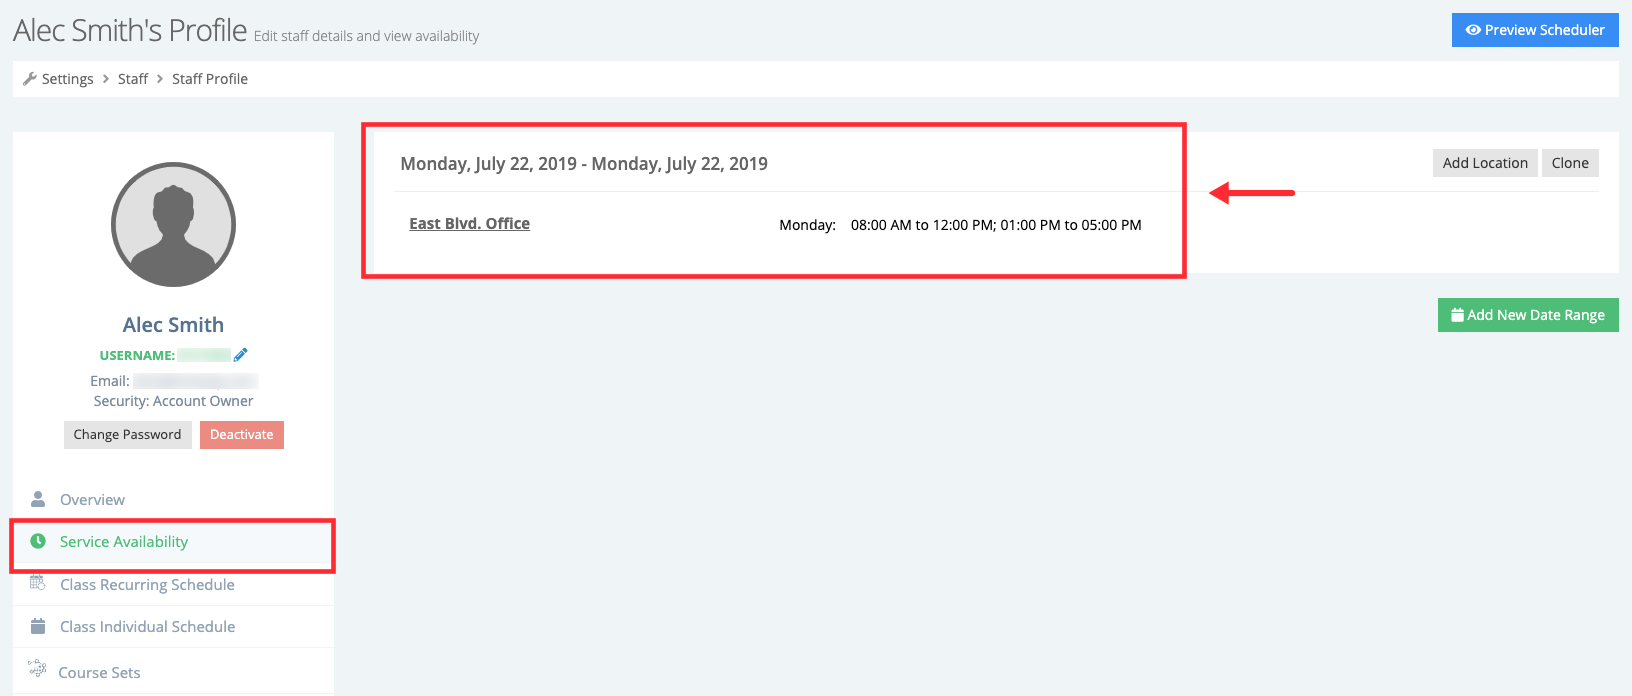
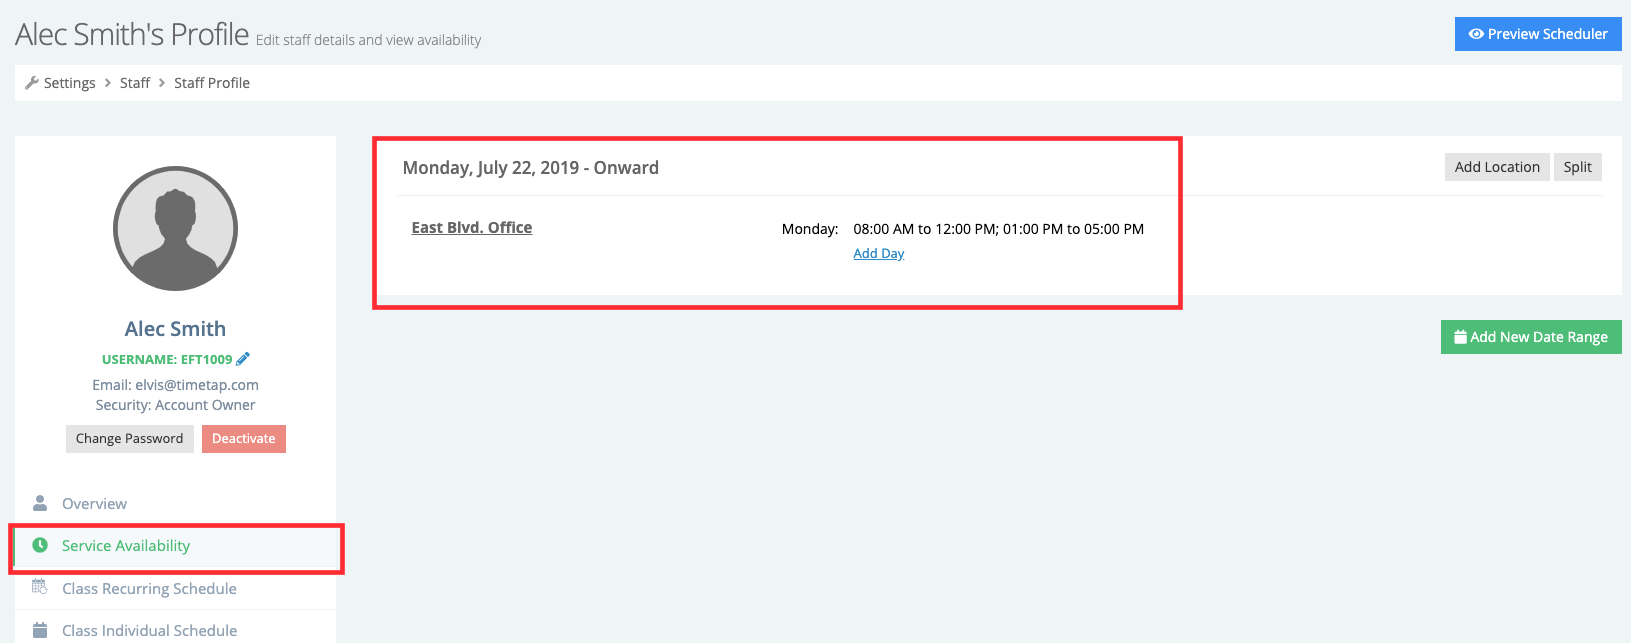
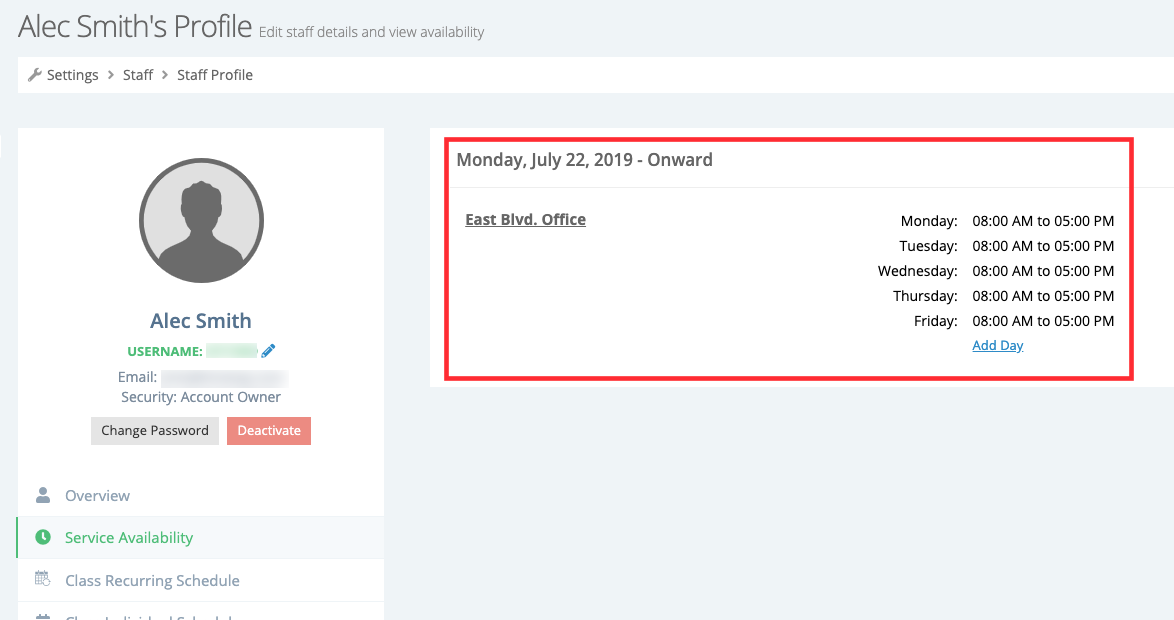
You can also go to your Service Availability tab within your profile to view the availability you just added:
To add service availability for a specific day within a date range, head over to the calendar view by clicking "Appointments" in the navigation menu:
While in the calendar view, click on any available space on the day when you want to add service availability to bring up the Quick Add window:

Click the 'Availability' option in the Quick Add window:
If you have multiple staff members in your account and you are the account owner, administrator or have access to view other staff, you'll have the option to select yourself or any of your colleagues in the 'Staff' dropdown:
For this example, we'll assume that Alec Smith doesn't have any service availability. This would be reflected in the text above the "Add Location" button:
Click the 'Add Location' button to select the location where the staff will be available:

After you press the button, a new window will appear where you can search for the location where you or the staff selected will be available. You'll only be able to search and select the location(s) that you have been granted permission to see. But, if you're an account owner or administrator you'll have access to search for any location. After you select your location, click the 'Add New Location' button:
A new window will appear where you'll have the ability to set the hours you'll want to add. You can click the + and - to add or remove breaks. After you set your hours, click the 'Save Day to Date Range' button to add the service availability:

Finally, you'll have the option to select whether you want to apply this availability only on the date you selected (1), on the day of the week you selected for a date range (2), or on the day of the week you selected indefinitely (3):
For this example, we'll choose the option to add service availability every Monday (day of the week selected in calendar) starting on 07/22/2019 (date selected in calendar view) until 08/26/2019. After the selection is made, we'll click the 'Save Day to Date Range':
After the availability is added, the Quick Add window will update and will display the hours you selected:
If you want to add availability for the same same staff at a different location, click the 'Add Location' button and repeat the previous steps:

I
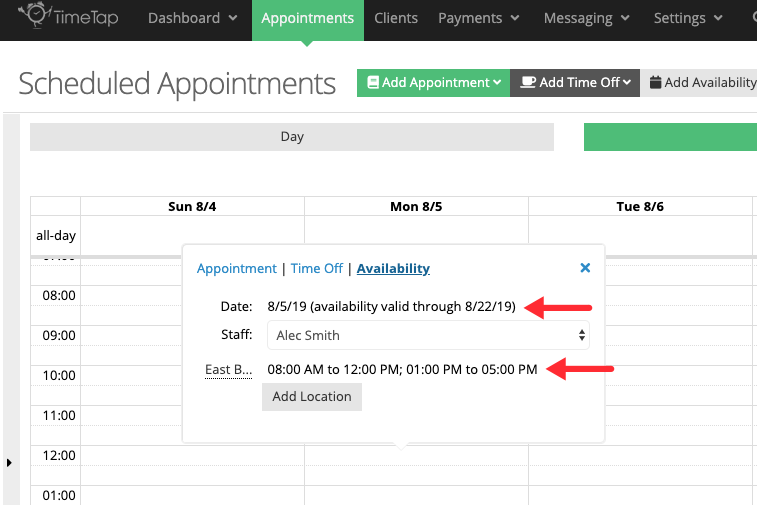
f you were to click on any available space on any Monday from 07/22/2019 and 08/22/2019, you'll be able to see the service availability you added:
Due to space restrictions, the name of the location may not be displayed in full, but if you move your cursor over the location's name, it will appear fully:
Additionally, you can go to your Service Availability tab within your profile to view the availability you just added:
To add service availability that repeats indefinitely on a specific day, head over to the calendar view by clicking "Appointments" in the navigation menu:
While in the calendar view, click on any available space on the day when you want to add service availability to bring up the Quick Add window:
Click the 'Availability' option in the Quick Add window:
If you have multiple staff members in your account and you are the account owner, administrator or have access to view other staff, you'll have the option to select yourself or any of your colleagues in the 'Staff' dropdown:
For this example, we'll assume that Alec Smith doesn't have any service availability. This would be reflected in the text above the 'Add Location' button:
Click the 'Add Location' button to select the location where the staff will be available:
After you press the button, a new window will appear where you can search for the location where you or the staff selected will be available. You'll only be able to search and select the location(s) that you have been granted permission to see. But, if you're an account owner or administrator you'll have access to search for any location. After you select your location, click the 'Add New Location' button:
A new window will appear where you'll have the ability to set the hours you'll want to add. You can click the + and - to add or remove breaks. After you set your hours, click the 'Save Day to Date Range' button to add the service availability:
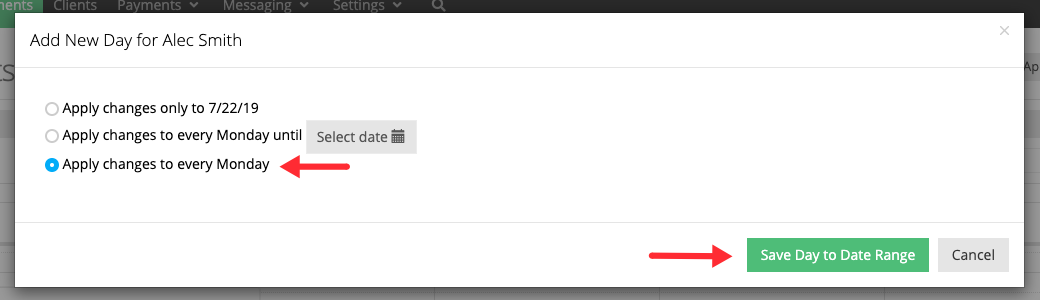
Finally, you'll have the option to select whether you want to apply this availability only on the date you selected (1), on the day of the week you selected for a date range (2), or on the day of the week you selected indefinitely (3):
For this example, we'll choose the option to add service availability every Monday (day of the week selected in calendar) starting on 07/22/2019 and continuing indefinitely. After the selection is made, we'll click the 'Save Day to Date Range':
After the availability is added, the Quick Add window will update and will display the hours you selected:

If you want to add availability for the same staff at a different location, click the 'Add Location' button and repeat the previous steps:
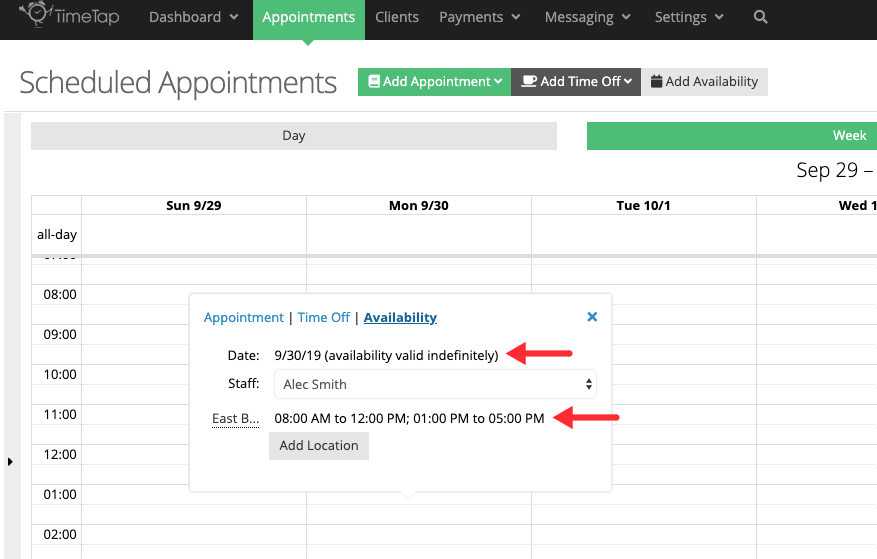
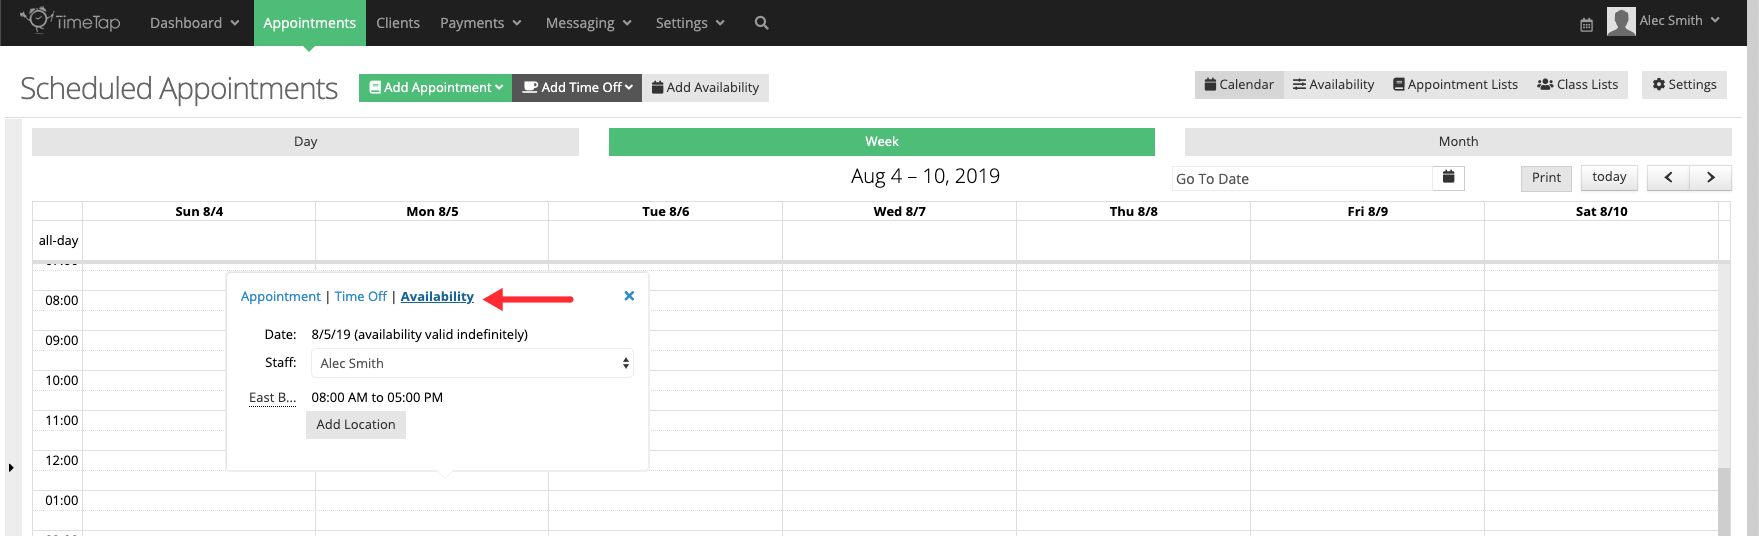
If you were to click on any available space on any Monday starting 07/22/2019 going forward, you'll be able to see the service availability you added reflected in the Quick Add window:
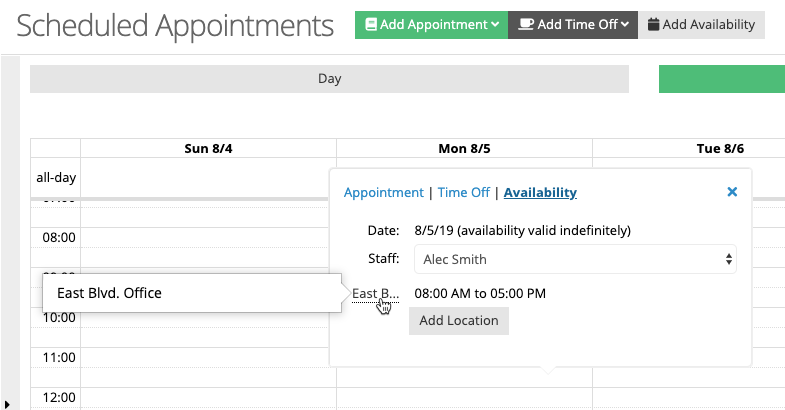
Due to space restrictions, the name of the location may not be displayed in full, but if you move your cursor over the location's name, it will appear fully:
Additionally, you can go to your Service Availability tab within your profile to view the availability you just added:
For this example we'll assume that our staff member Alec Smith offers appointments at the East Blvd Office and via Video Conference Line. To view his service availability on a specific day, head over to the calendar view by clicking 'Appointments' in the navigation menu:
While in the calendar view, click on any available space on the day when you want to view your or your staff's service availability:
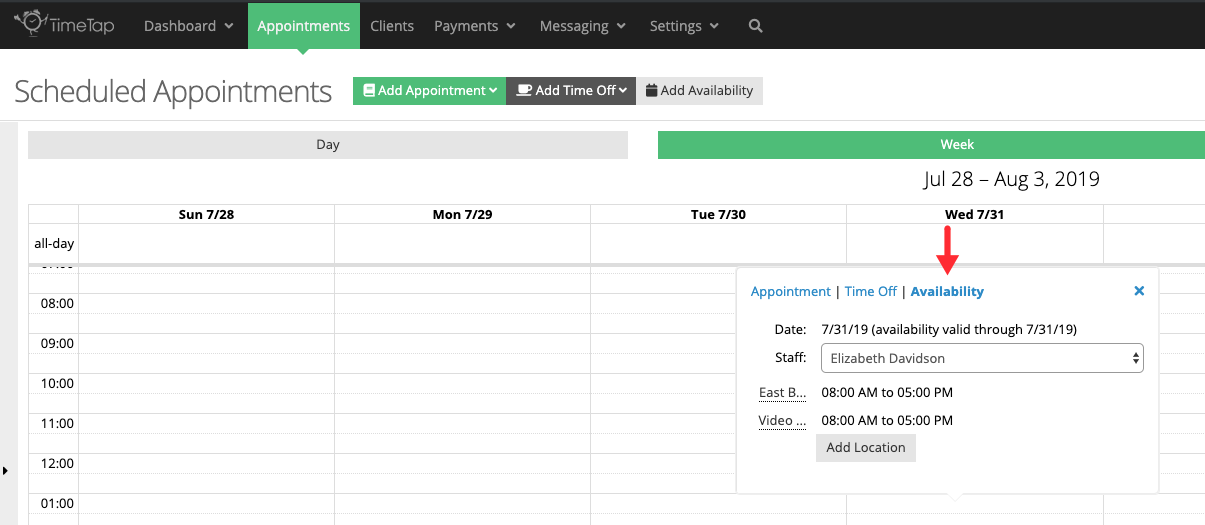
Click the 'Availability' option in the Quick Add window:
The 'Availability' tab is composed of 3 sections:
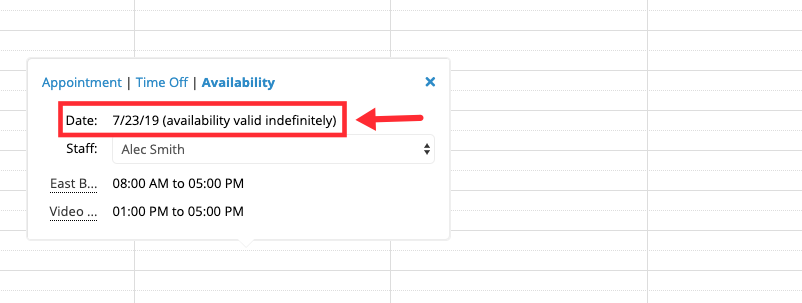
- Date: Shows when the availability is valid
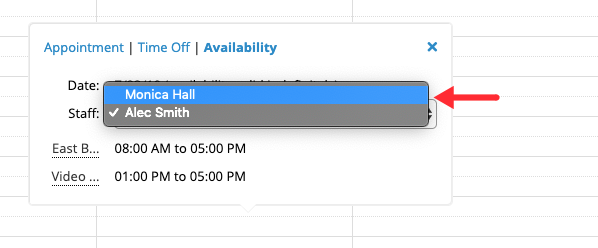
- Staff: Show which staff's availability you're seeing. You can select a different staff member by clicking the dropdown field
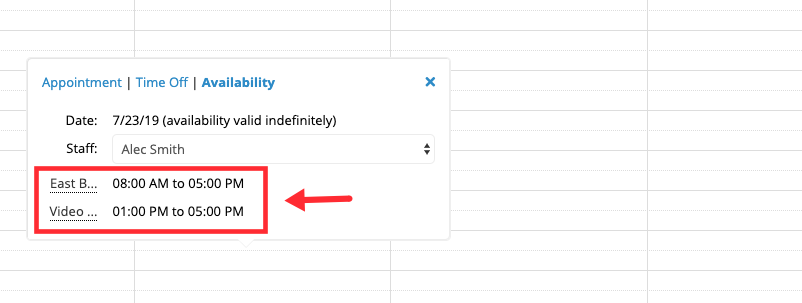
- Locations and hours: Shows at which locations and which times the staff is available
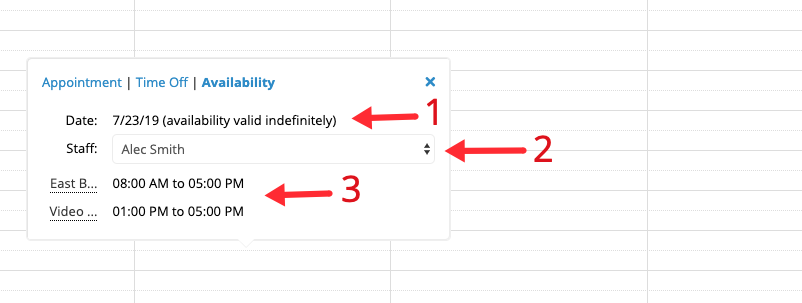
In this example I wanted to see Alec's availability on Tuesday, July 13th 2019. The availability tab tells us that Alec is available at the East Blvd Office from 8am to 5pm, and the the Video Conference Line from 1pm to 5pm (move your cursor over the locations' names to see them in full):
The Availability tab also tell us that Alec's availability is valid for the day we selected and continues indefinitely:
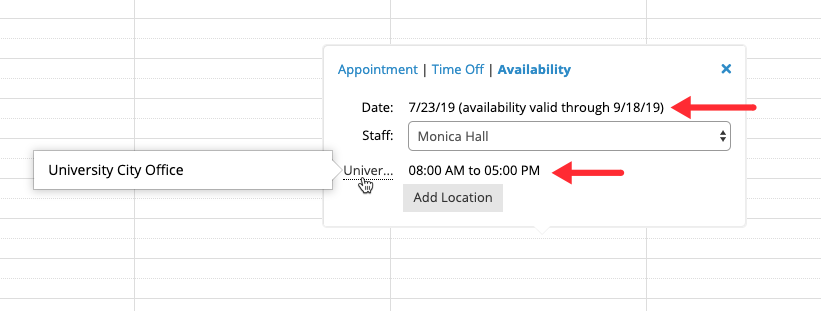
I now want to view Monica Hall's availability - from the Staff dropdown, I'll select her name:
On Tuesday, July 13th 2019 Monica is available at University City from 8am to 5pm and her availability is valid from the day we selected until September 18th 2019:
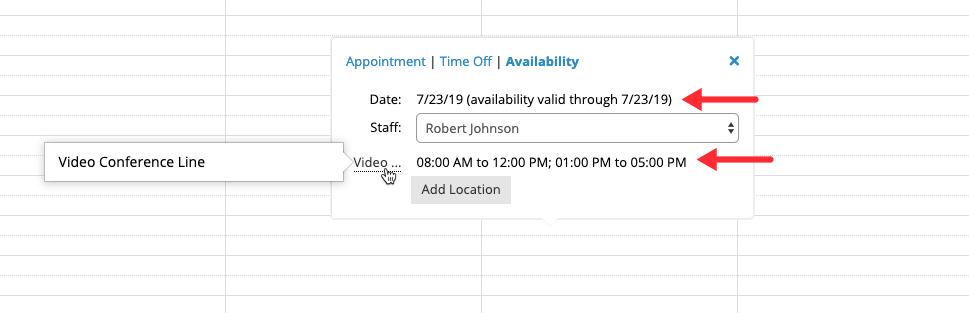
If we then select the staff Robert Johnson, we'll see that on Tuesday, July 13th 2019 he's available on the Video Conference Line from 8am to 5pm, and the availability is only valid on the day we selected:
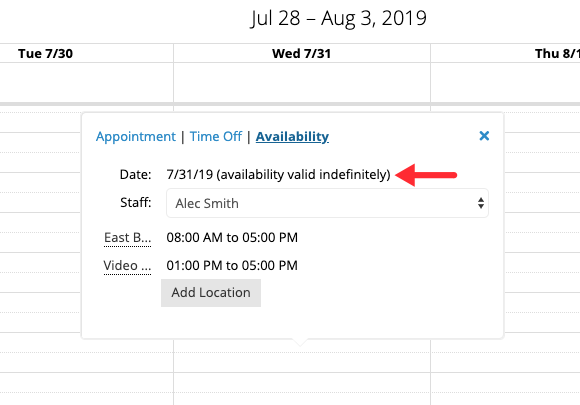
For the final example, we'll look at a staff member who is available at the East Blvd. Office every Monday through Friday, from 8am to 5pm indefinitely. This staff member is also available on the Video Conference Line, but only on Wednesday, July 31st 2019. We'll click on an available space on Wednesday, July 31st 2019, then, when the Quick Add window appears we'll select the 'Availability' tab:
The Locations and hours section shows the availability that the staff has at both location locations on this particular day:
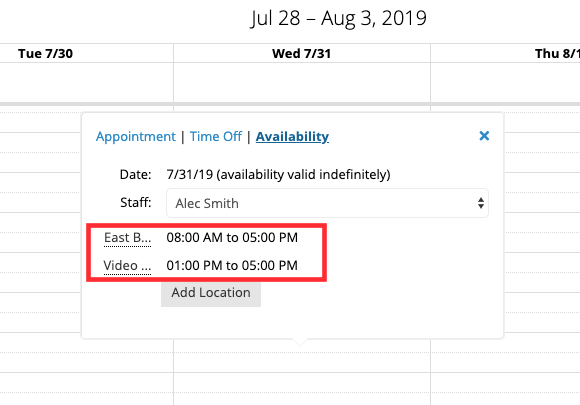
Due to space restrictions on the Date field, it will only show information for one date range. If you'd like to see this staff's availability in detail we recommend going to the staff's profile → Service Availability:
In this section we'll cover how to edit your service availability using the Quick Add window in the Calendar view. For the following example we'll assume that our staff Alec Smith is available at the East Blvd. Office from Monday through Friday starting at 8am to 5pm and his availability extends indefinitely:
On Monday, August 5th 2019 he will only be available from 12pm to 3pm - to change his availability, we'll begin by clicking on any available time slot on 08/09/2019 and when the Quick Add window appears, we'll click the 'Availability' tab:
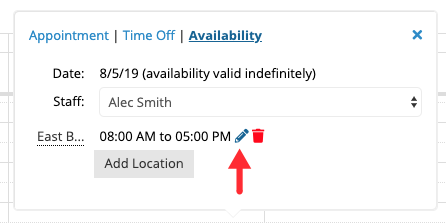
We'll move over cursor over the location's name to see it in full and confirm that he is in fact available at the East Blvd. Office:
Move your cursor over the hours and click the Edit icon ( ) to edit the service availability. Clicking the Delete button (
 ) will remove the service availability:
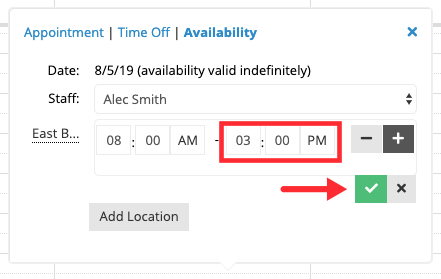
Clicking the edit button will put the service availability in edit mode. From here, you can enter the availability manually and/or use the plus ( + ) and minus ( - ) to add breaks. We'll change the availability end time and click the Save button. If you want to discard your change, click the Cancel button (x):
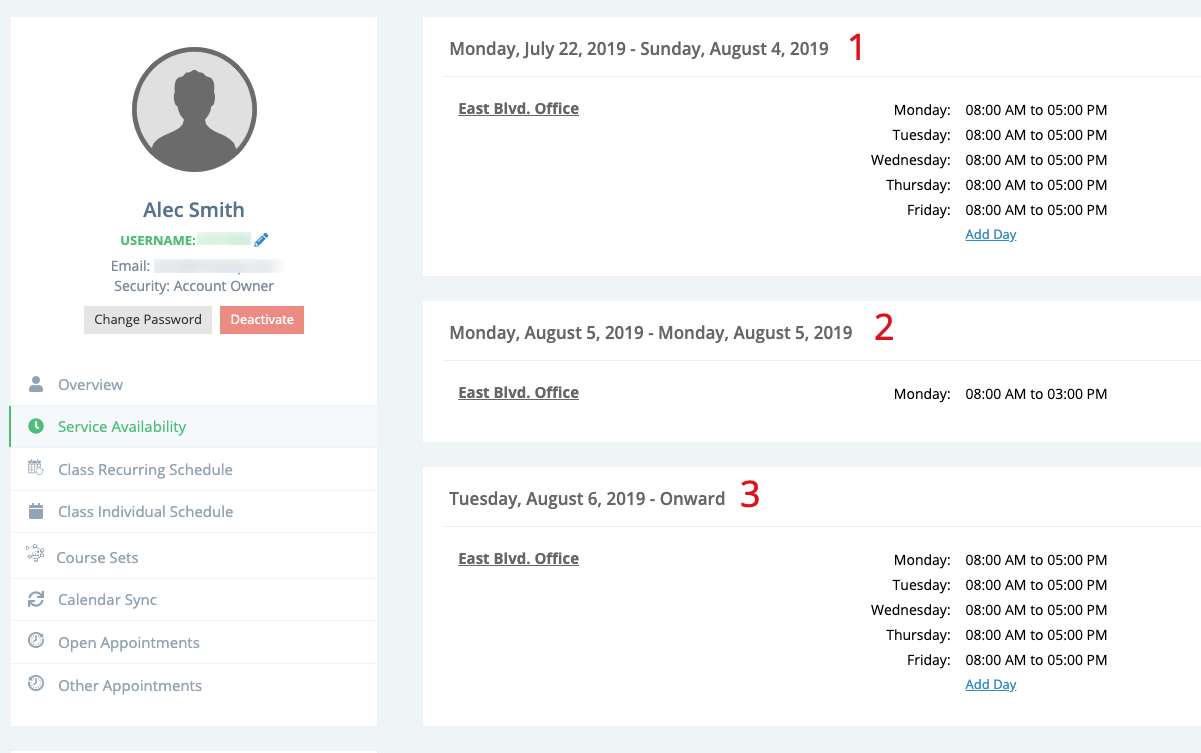
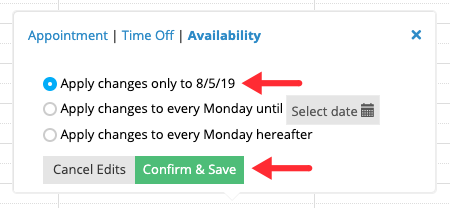
You'll then have the option to apply this change only to day you selected (1), to every day of the week you selected for a date range (2), or to every day of the week you selected indefinitely (3). For our example, we'll select to only apply these changes to Monday August 5th, 2019 and click the Confirm & Save button:
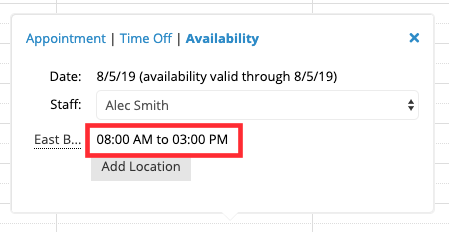
After the changes are Saved, the Availability window will update to reflect the changes we made:
This change will create 3 date ranges, One from Monday, July 22, 2019 (current day in example) through August 4th, 2019 (1), one for the day we selected (2), and one for August 6th going forward (3):