Now that you know how to add and edit a service, we'll cover classes. All the classes you crated in checkAppointments will appear in TimeTap, in this documentation we will cover how to add a new class and edit existing and new classes.
In this page we'll cover:
- How to add a class
- How to edit a class profile
If you wanted to add a new classes in checkAppointments, first you would have to go to the Setup tab > Class and choose to add a new class. After adding a class, you would then have to add a schedule for the class sessions.
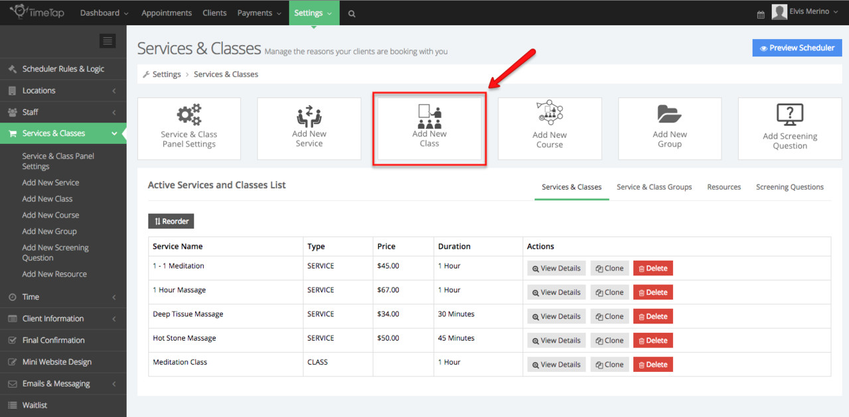
To add a service, navigate to your Services screen by going to Settings → Services and Classes and click the button to "Add New Class":
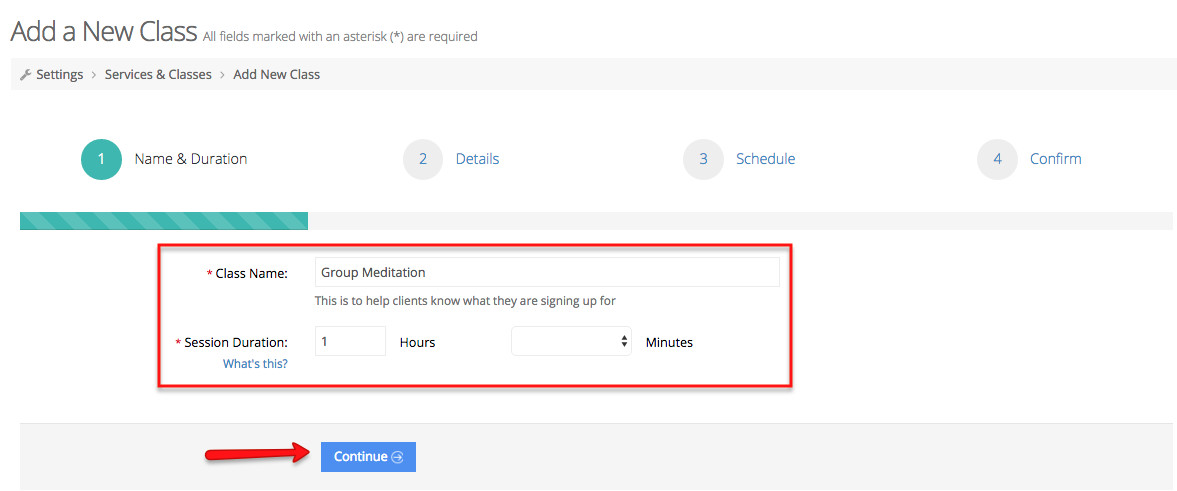
This will take you into the Add New Class flow. On the first page, enter in the name and the duration for the class. Once you've entered in those basic details, click "Continue" at the bottom:
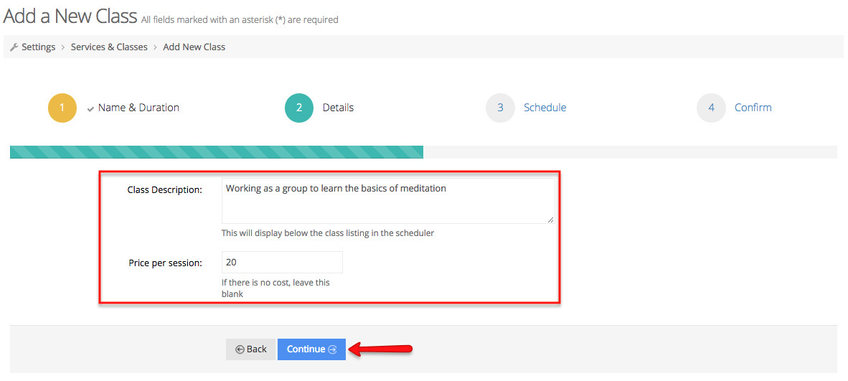
On step 2, you can enter in a description for the class which will display underneath the class name in the scheduler flow as well as a price for the class if you charge or invoice your clients for making an appointment. After you enter in those details you can hit the "Continue" button to move on to the confirmation page or the "Back" button if you need to make a change to the name or duration:
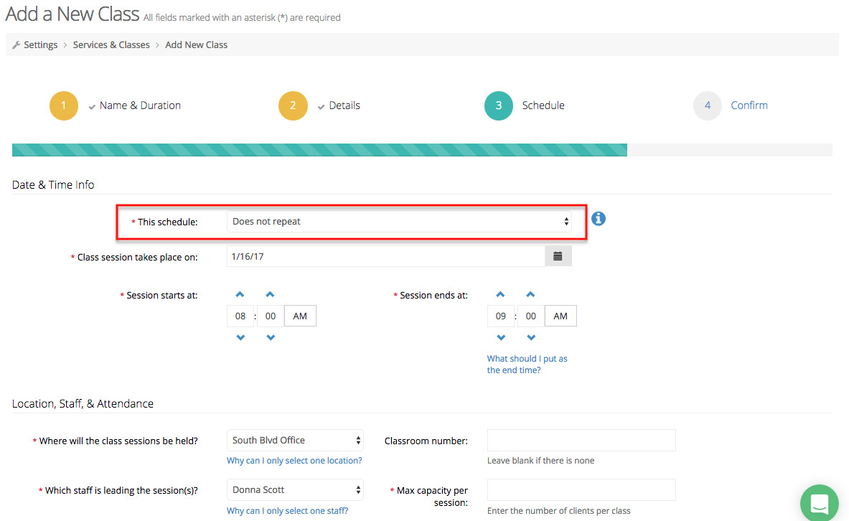
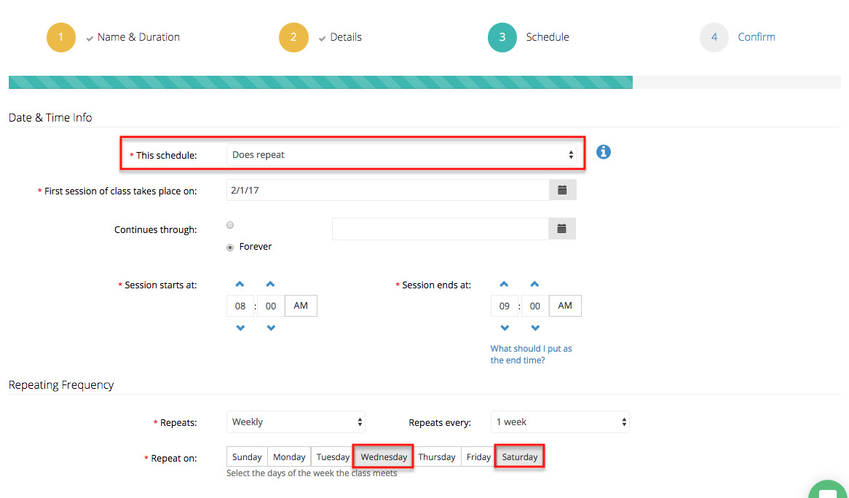
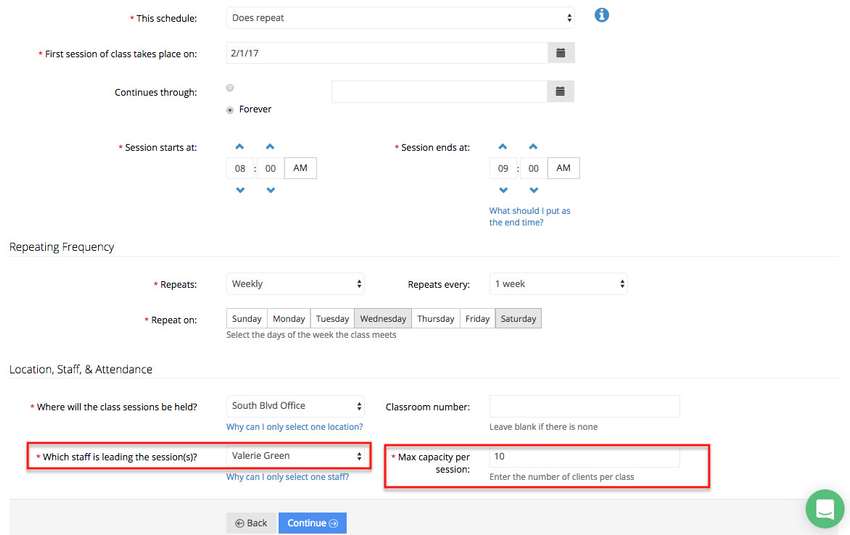
After clicking the "Continue" button under the Details page, you'll move through to the "Schedule" section of the "Add a New Class" flow where you will set up either a one time date for a class session or a repeating schedule of meeting dates for multiple class sessions. During the "Add a New Class" flow, you'll just be setting up one schedule for when the class will meet, but once the class is added to your account, you can add as many schedules as you'd like.
If the class is just meeting one time, then you would want to set the "This schedule:" drop down to "Does not repeat". In the screenshot below, you'll see that I have set up for this class to have one session that is scheduled for January 16th, 2017 from 8:00am - 9:00am:
