How do I ask clients to provide their credit card information, but not charge them, at the time of booking?
You can ask clients to provide their credit card information at the time of booking an appointment for a service, class, or course even if it doesn't have a price associated with it. For example, let's say you offer a class that is free of charge, and you want your clients to sign up for the class session but also would like to charge a fee to those clients who do not show up.
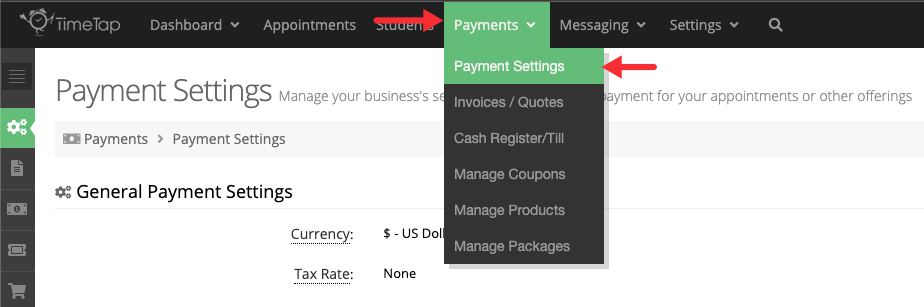
Begin by going to Payments → Payment Settings:
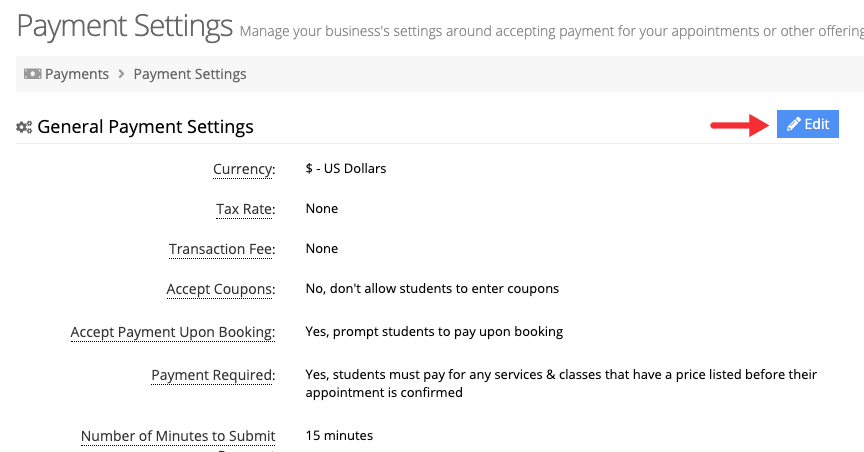
Click Edit in the General Payment Settings section:
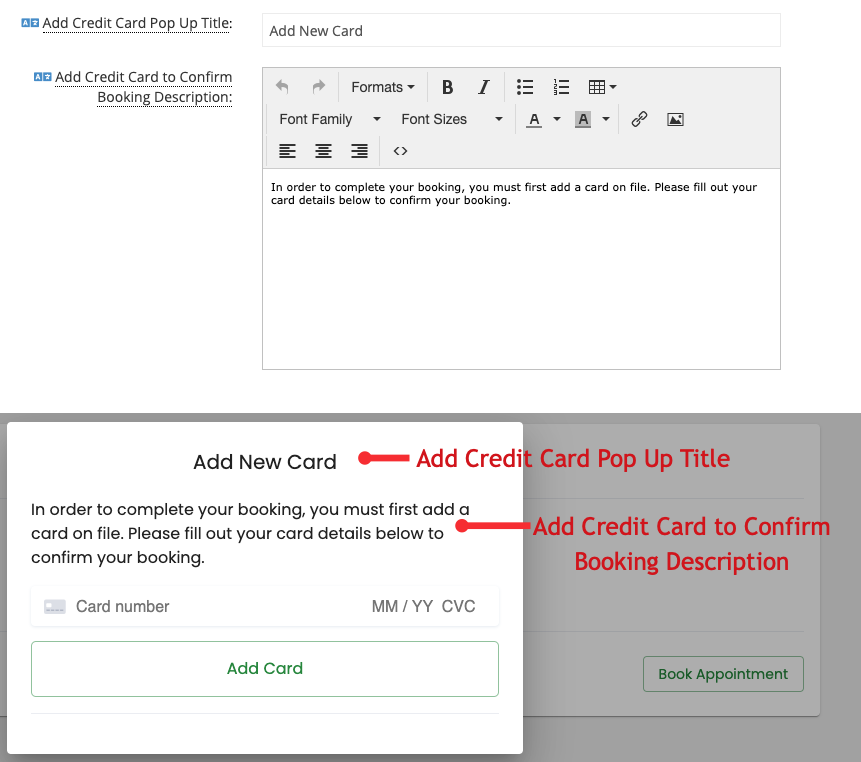
Scroll to the bottom portion of the Payment Settings page and locate the "Add Credit Card Pop Up Title" and "Add Credit Card to Confirm Booking Description" fields - these 2 fields allow you to change the text in the window where clients must enter their credit card information in order to schedule their appointment. After you make your changes to the "Add Credit Card Pop Up Title" and "Add Credit Card to Confirm Booking Description" fields, click Save:
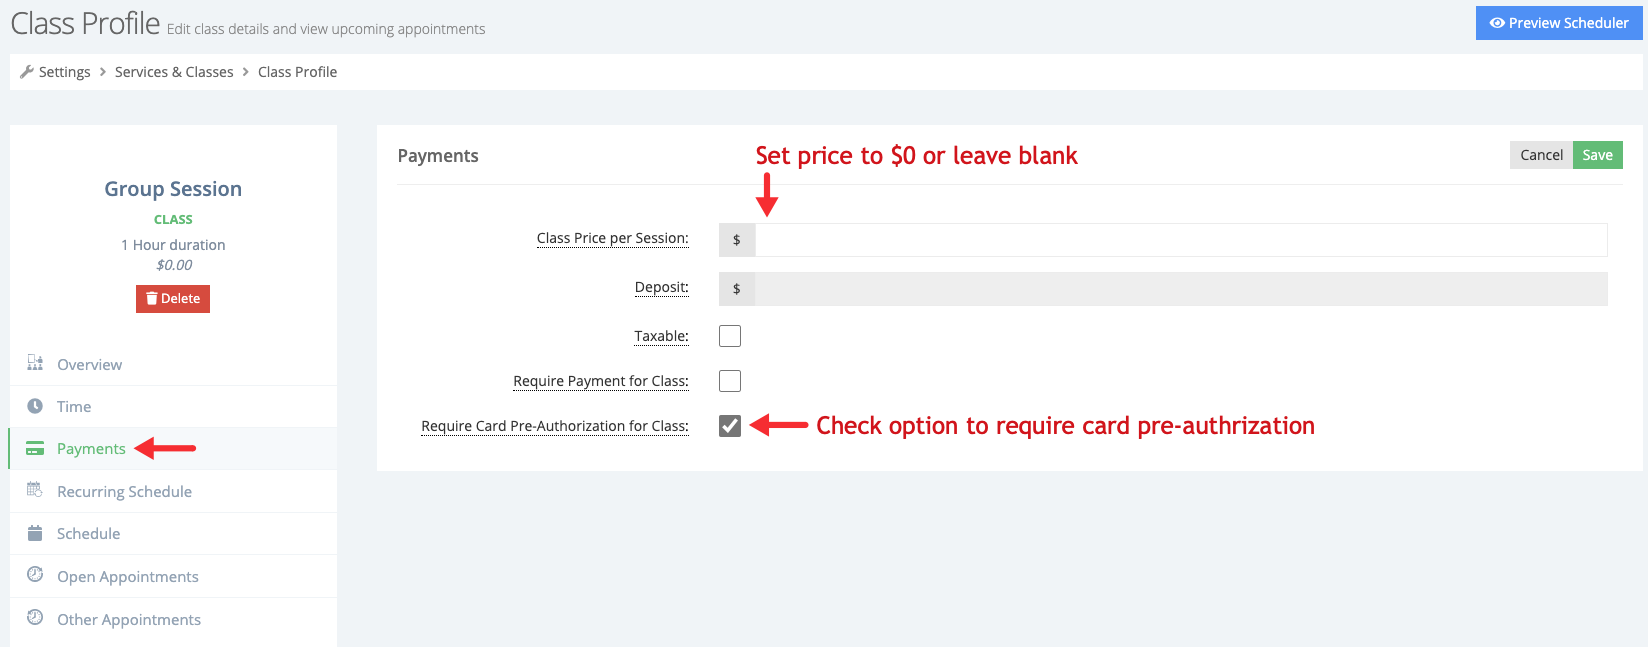
Next, go to the service, class, or course profile that you want to allow clients to book while getting prompted for their credit card information. While in the reason's profile, you'll need go to the Payments tab and set the price to $0 (or leave it blank), then check the box next to "Require Card Pre-Authorization for Service/Class/Course" and click Save:
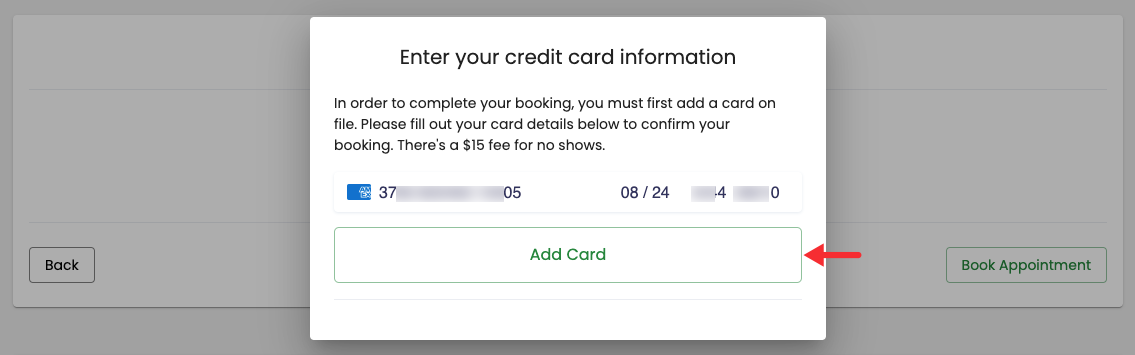
When your clients go to your mini-website and select the service/class/course they want to book, choose the appropriate time & date and enter their client information, and then click on the Save button to schedule their appointment, a new window will pop up. In this window they will be prompted to enter their credit card information, and then can click the Add Card button so that their appointment is scheduled and added to your calendar:
Let's assume that the client didn't cancel or reschedule their appointment and then didn't show up for it. You can charge a No Show fee by creating a new invoice and adding a line item to it, or by using our recommend method of locating the No Show appointment and creating an invoice that is tied to it. You'll need to locate the client's appointment and in the bottom portion of the Appointment Detail page click the Invoice tab, and then click the "Create Invoice" button:
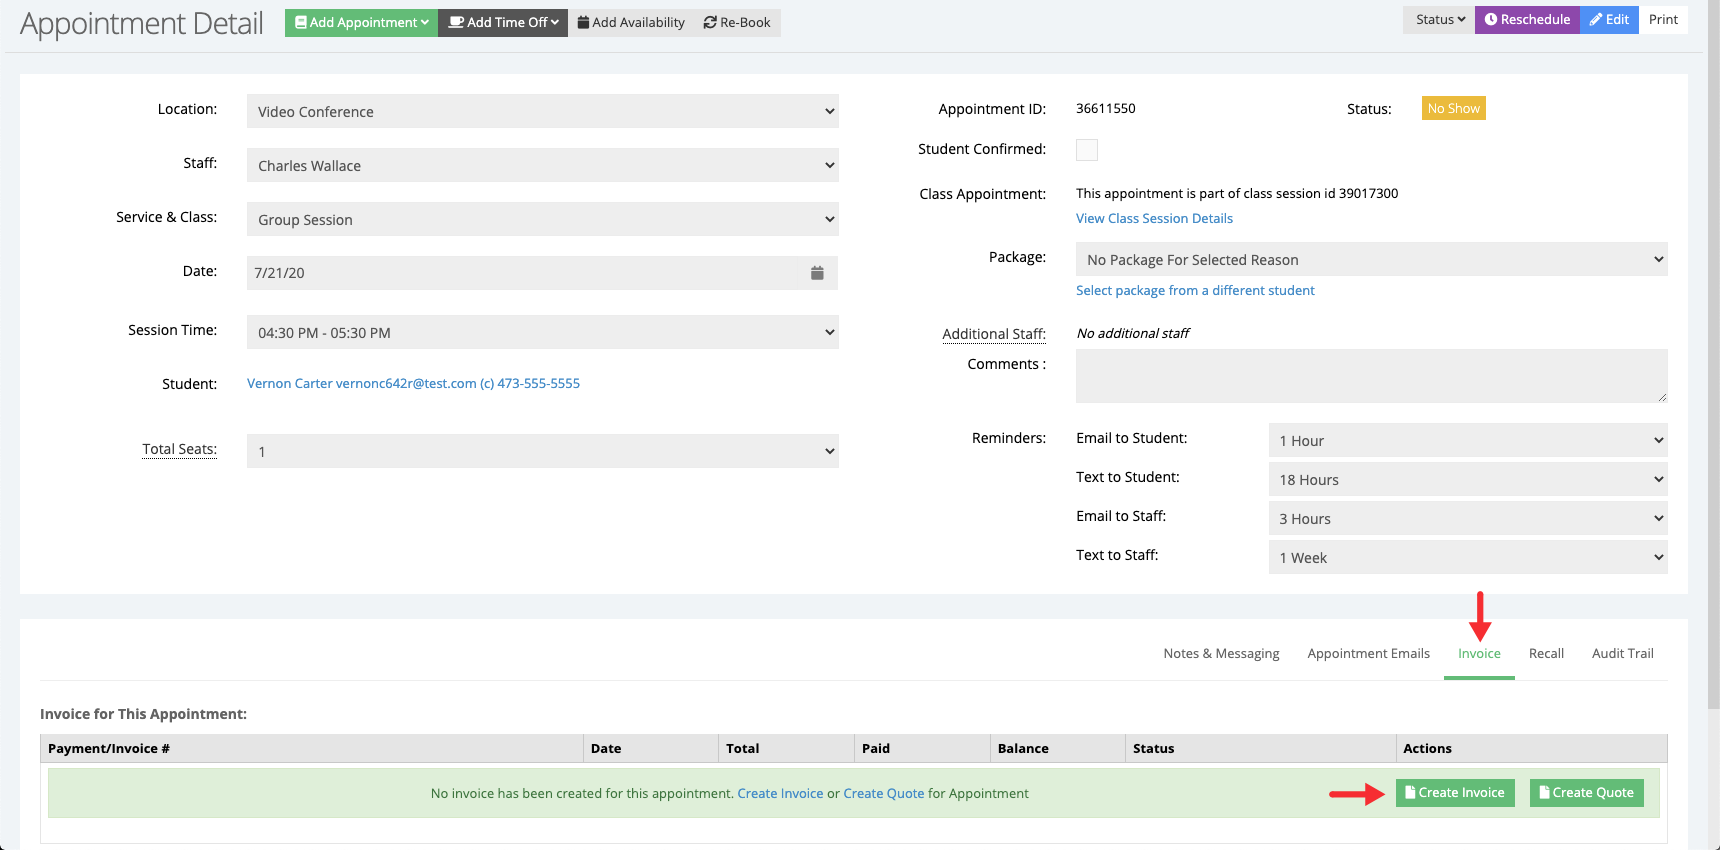
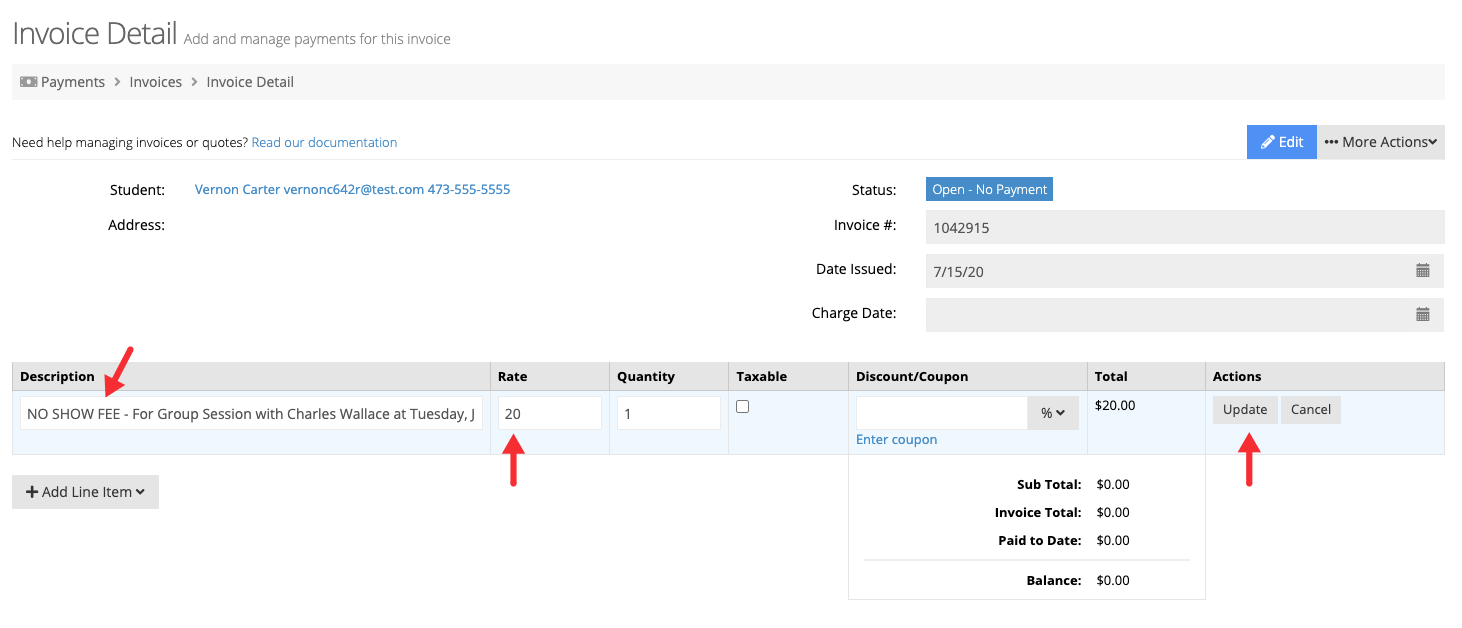
Clicking the "Create Invoice" button in the Appointment Detail page will create an invoice that will be tied to the appointment, which will make it easier to identify charges. After the button is pressed, you will be redirected to the Invoice Detail page where the appointment will appear in the line items section with a rate of $0. Click the Edit button in the Action column to change the line item description and rate:
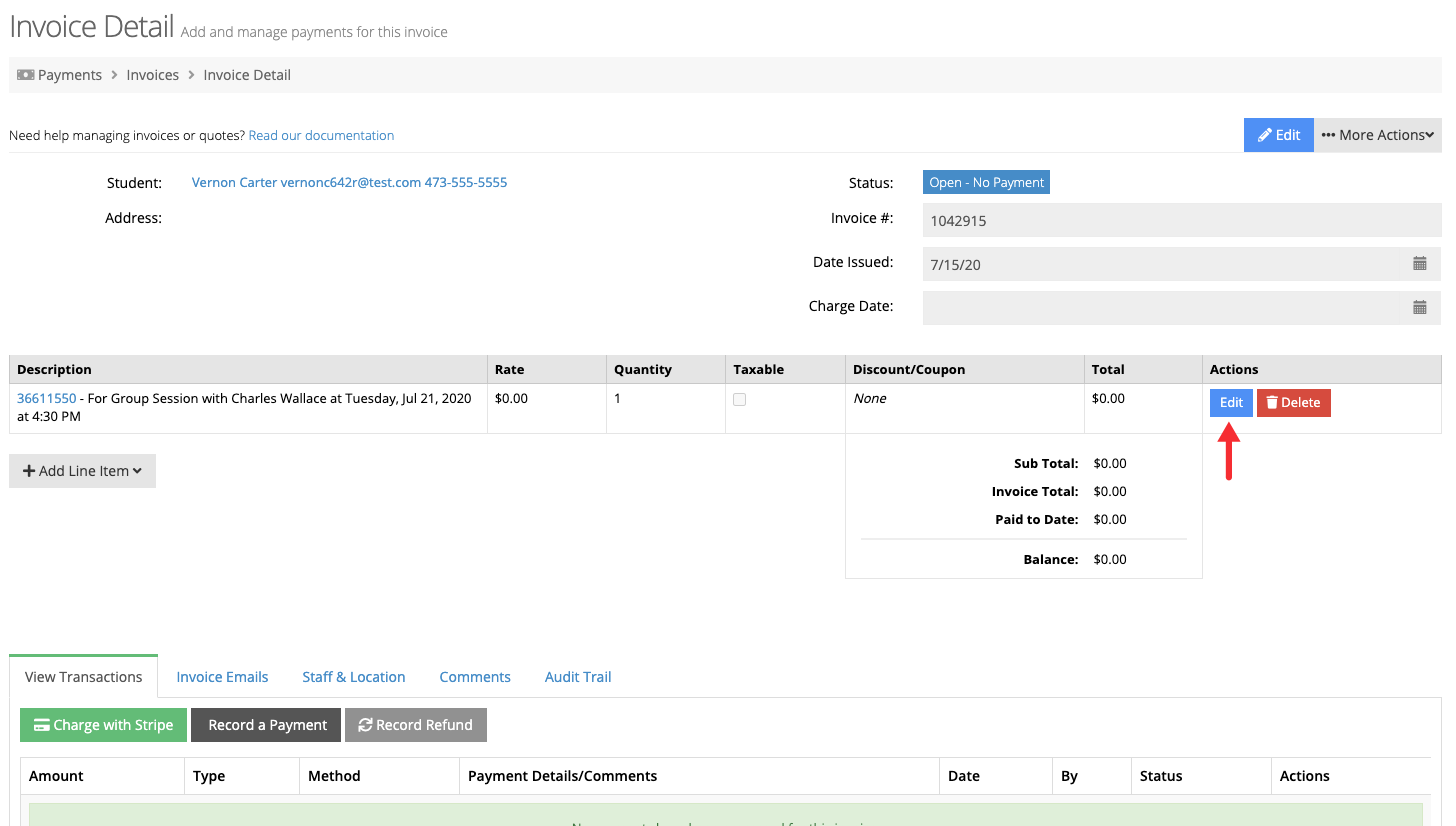
With the invoice in edit mode, adjust the description of the line item (if necessary), adjust the rate, and click Update:
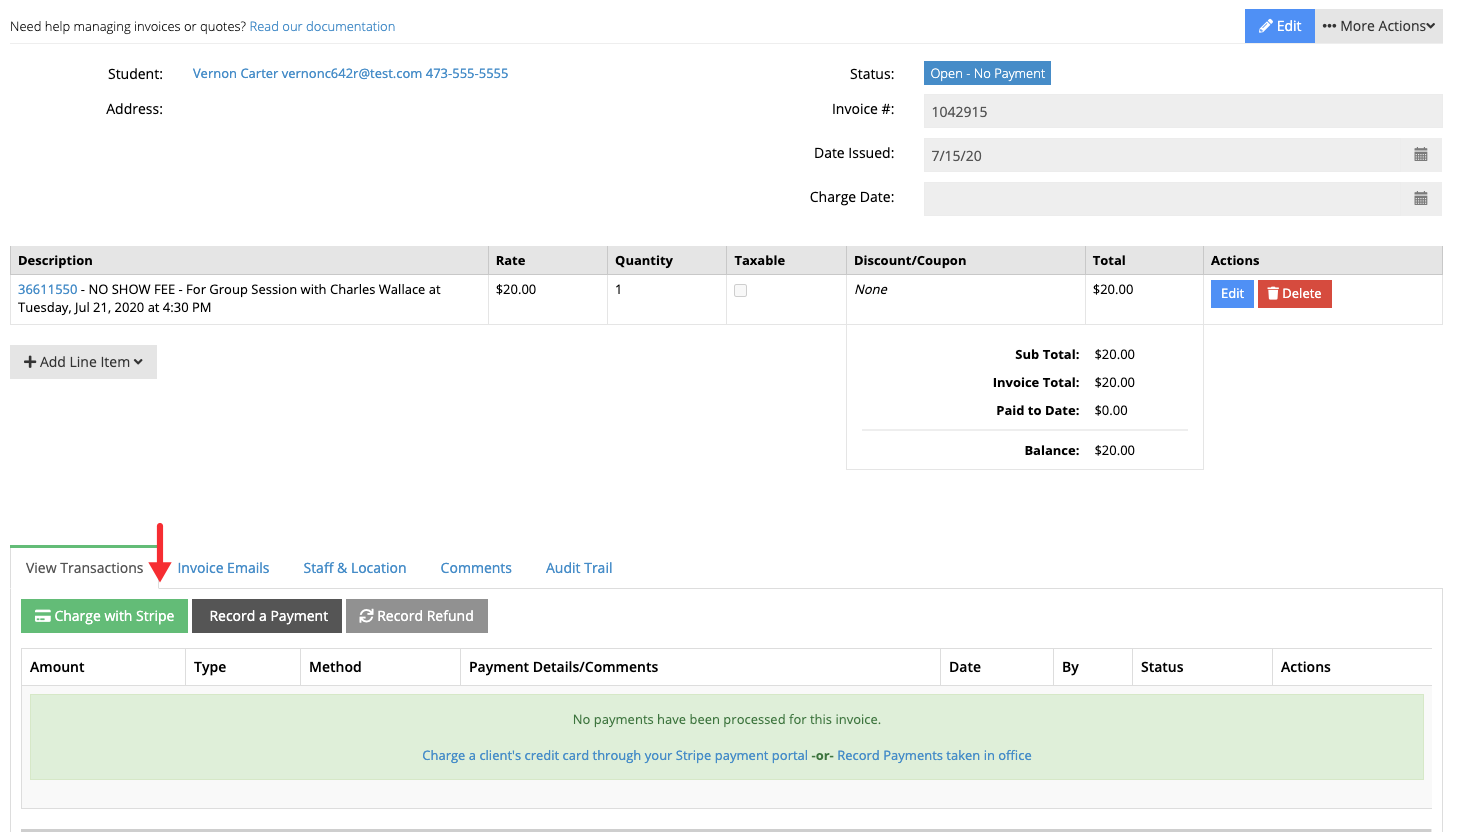
Next, click the "Charge with Stripe/Square" button:
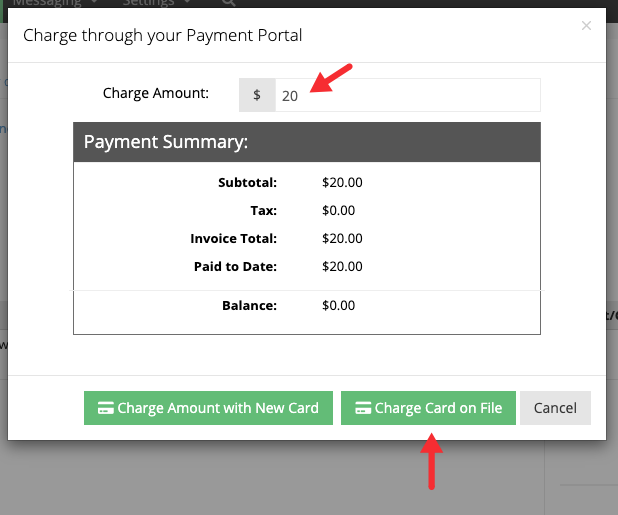
When the charge window appears, enter the amount you want to charge the client and click the "Charge Card on File" button to charge the card the client provided at the time of booking:
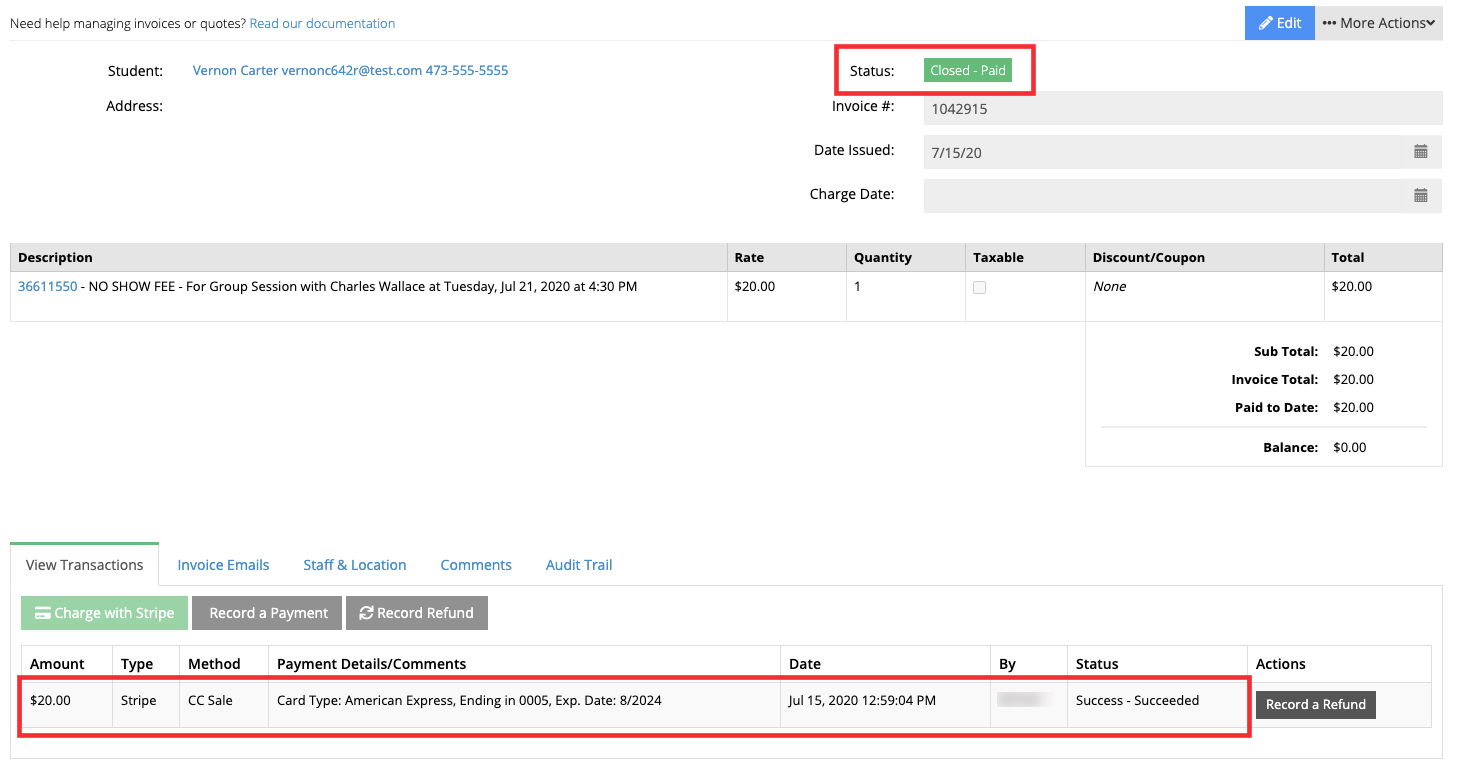
After the payment is processed, the payment will be listed in the View Transactions tab and the invoice's status will change to "Close - Paid":