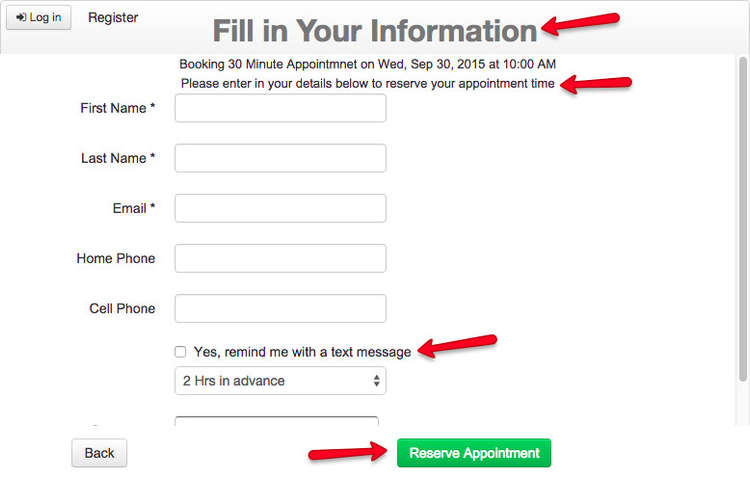
The second to last page of your client-facing scheduler is where your clients will enter in their contact information in order to reserve their appointment time. You can customize the text and what information you collect from clients on this step by editing your settings on the Client Info Settings section of the Client Information page.
On this specific documentation page, we'll go through how to edit the text and labels that appear on the client information page of your scheduler.
We go through how to change the booking form that clients actually have to fill out on our documentation on defining field labels.
To change the text and labels on the Client Information page of the scheduler, click the Edit button in the top right of the "Client Info Settings" portion of the Client Information screen of the TimeTap Back Office:

This will allow you to the Edit Client Info Settings:
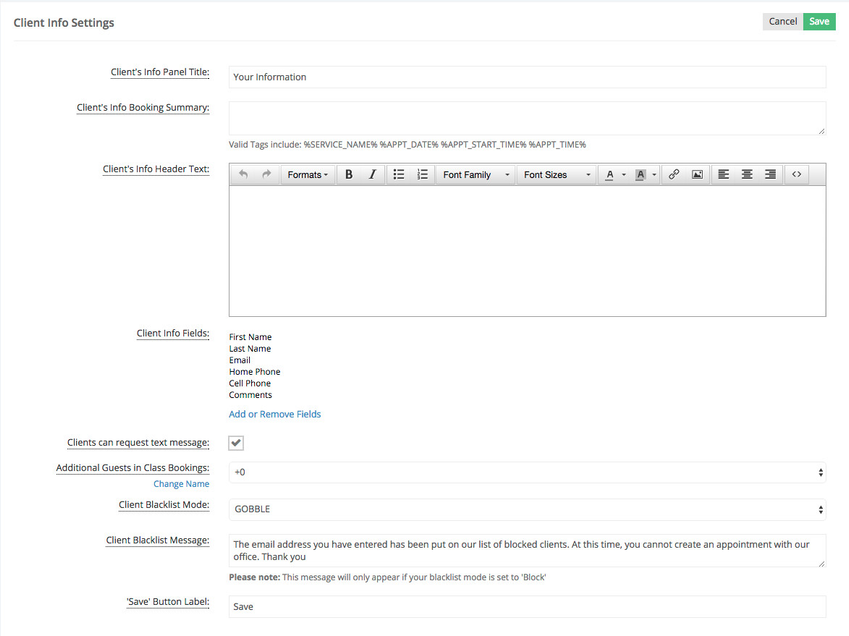
Fill in the changes you want to make and press Save Changes:
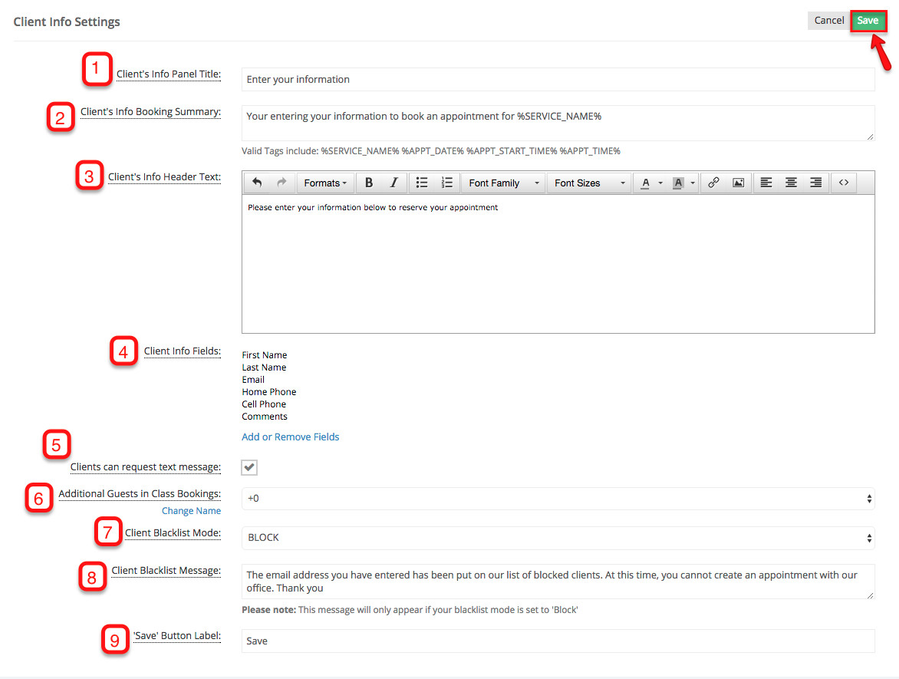
In this screen, you can make changed to the following:
- Client info Panel Title: This appears in the header bar on the second to last page of your scheduler. It is the page where clients put in their information
- Client info Booking Summary: You can override the default booking summary which tells clients the service/class they're booking and the start time here
- Client's Info Header Text: This text appears beneath the header bar on the last page of the scheduler. Clients will see this before being prompted to enter their contact information
- Client Info Fields: These are the fields that clients are prompted to fill out before confirming their booking. You can change and edit these fields under Settings > Client Information > Define Field Labels
- Clients can request text message: Checking this box will show the option for clients to request a text message reminder underneath the cell phone field while they're booking an appointment
- Additional Guest in Class Bookings: This makes it so when someone is booking a class session, they can add additional guests they are bringing with them that will count against the total capacity for the class session
- Client Blacklist Mode: This applies to all clients who have been set to a status of blacklisted from their client profile
- Client Blacklist Message: This is the message that will show to all clients who have been set to blacklisted status if your blacklist mode is set to 'BLOCK'
- 'Save' Button Label: The button that appears in the bottom right of the Client Information page and prompts your clients to confirm their booking
After pressing Save Changes, you can open up your scheduler and click through to the last page to see how those changes have taken effect: