Most businesses that use TimeTap have a lot of different types of appointments that clients could potentially book with them. With each of these different types of appointments may come different instructions that need to go with them. We can customize emails to send out based on the type of appointment booked.
We're going to use a doctor's office as the example business in this documentation. Let's pretend that this doctor's office has a "Check Up" appointment that doesn't require anything special before the appointment, but they also offer a "Full Body Scan" appointment that requires clients to fast for 12 hours before they come into the appointment. As you can imagine, the template that sends out when a client books a Scan should tell them that they need to fast, but they wouldn't want someone coming in for just a Check Up to have to fast if they don't have to.
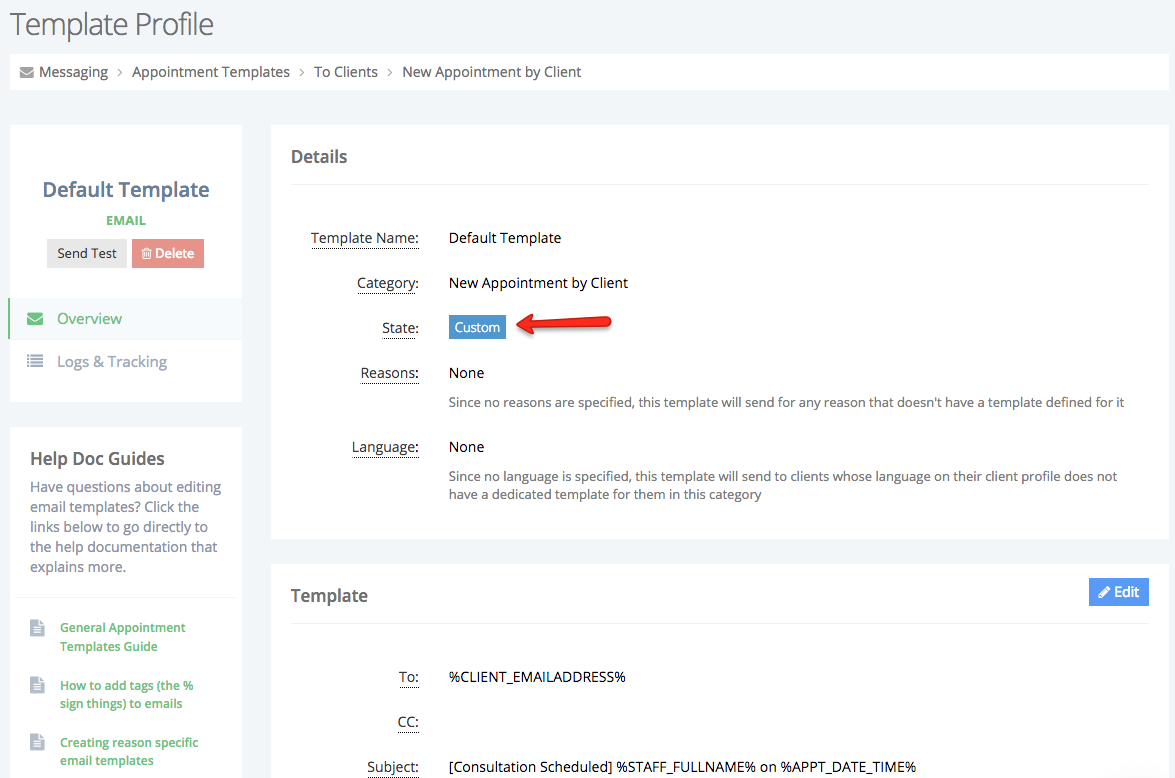
Step 1: In this example, we're going to customize the New Appointment by Client email template which is the email that sends out the the client after he/she books. We'll customize the initial template which will be used by default and create a new template to be sent out to our clients who book the "Scan" appointment. To start, I'll go to Messaging > Appointment Templates > To Clients. This will pull up the entire list of email categories that send out for appointments. The first step will be to click the "View" button next to the email category you want to edit:
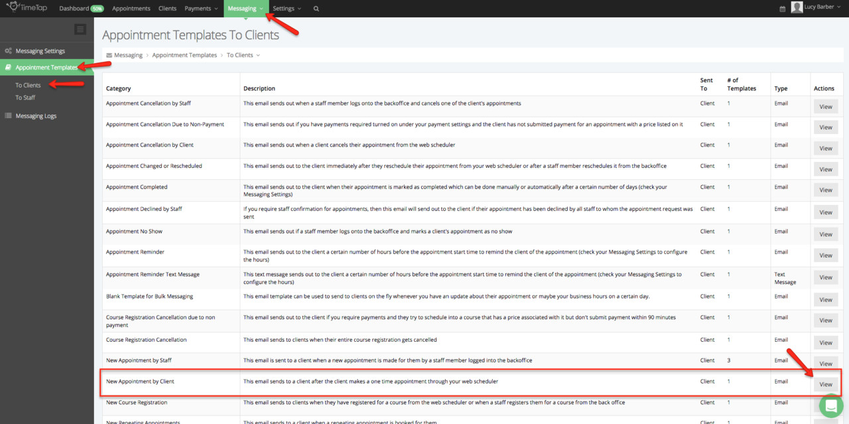
Step 2: This will take you to the list of templates in that category. Before you've made any adjustments to any templates in this category, you'll see that the "Default Template" listed there is in "Default" state. Your Default Template is the fall back template in case there's not been a customization made for a the appointment type that a client booked. For instance, if you happen to have a client that books a "Consultation" service but you've not created a template for "Consultaiton", they will receive the default template. So, before you can clone this template, you first have to edit it to move it out of it's default state. You'll see in the screenshot below that the clone button is disabled because the default template has not been customized:
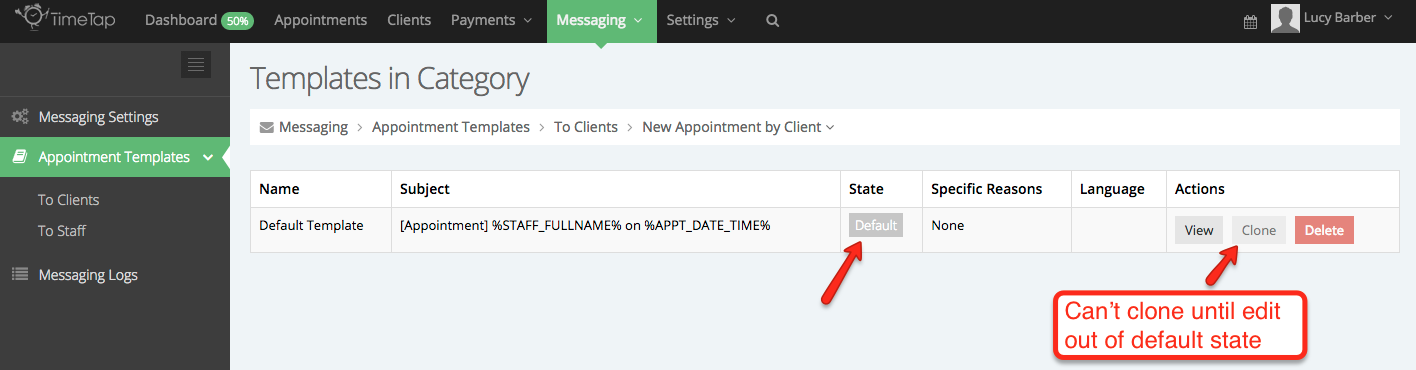
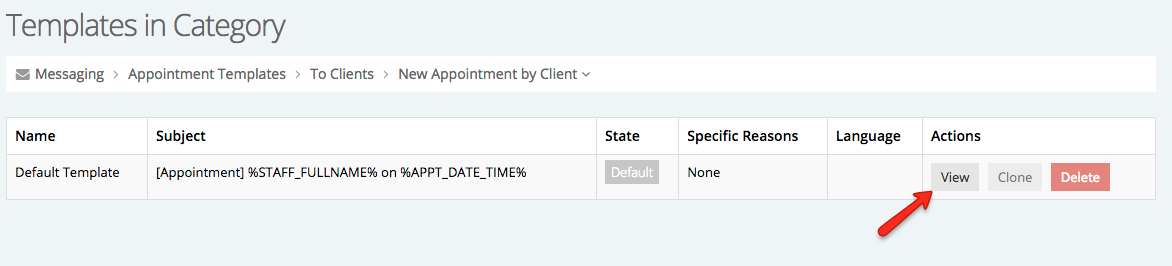
So first you'll need to click the "View" button to edit the default template in order to be able to clone it (please note: if your template is already in custom state, you can skip ahead to step 4):
Step 3: On that template's profile, click the "Edit" button next to the "Template" section:
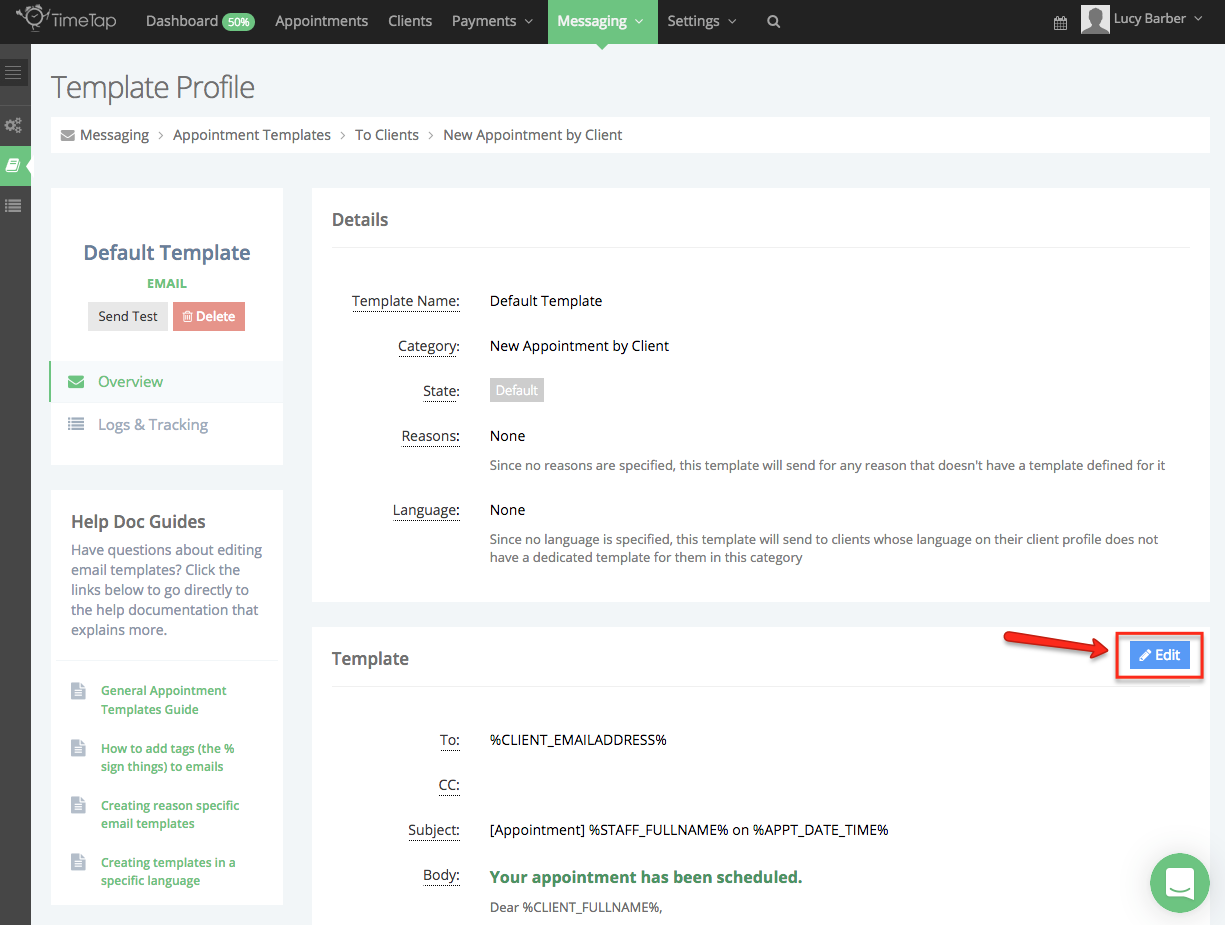
You can update your default template to have language more specific to your business and then press "Save":

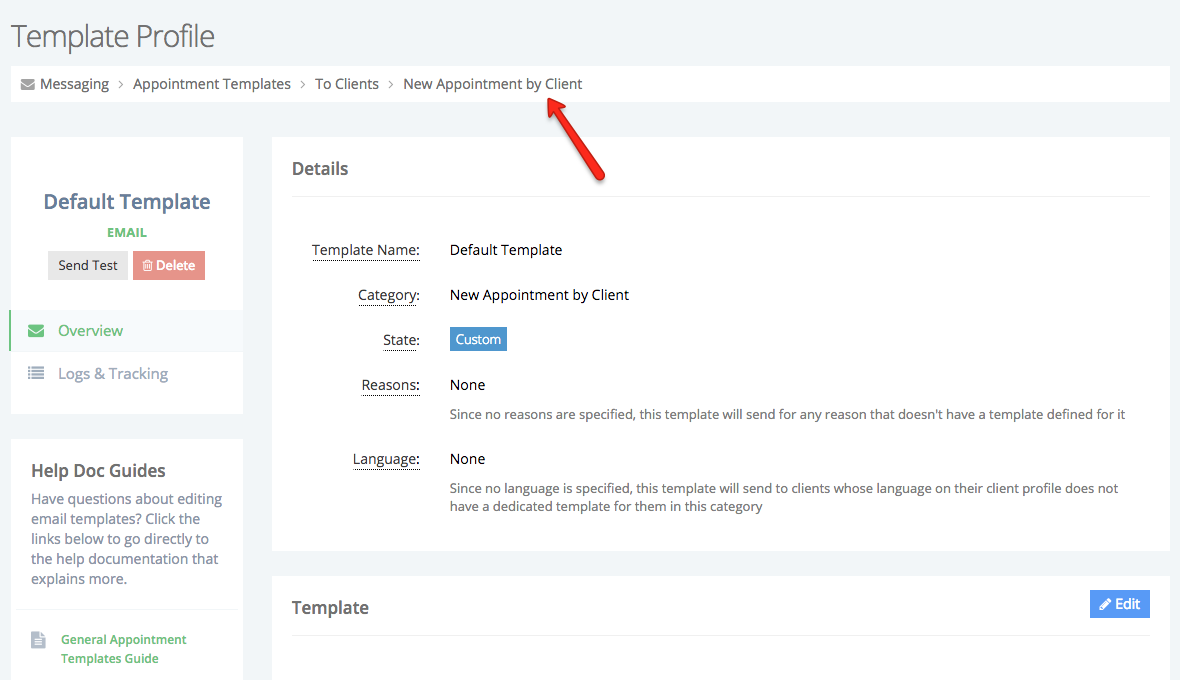
Once you save changes to your template you'll see that it is now in "Custom" state:
Since it is now in "Custom" state, we can back out of the template profile view to the list of templates in order to clone the custom template to apply it to the language we want to customize for. To back out to the template list level, just click the link from the breadcrumbs bar at the top:
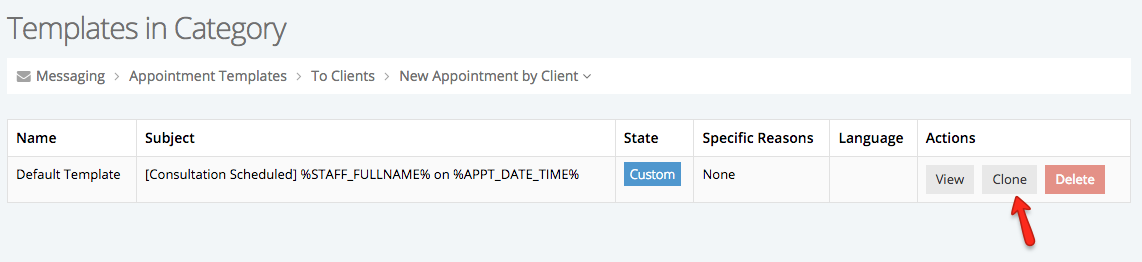
Step 4: Back on the list of templates in the New Appointment by Client category, the template will be in "Custom" state and you can now "Clone" the template:
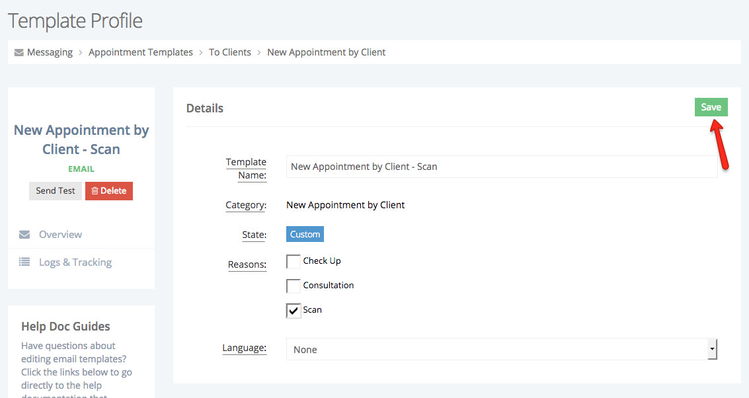
On cloning it, you can assign the new template to a specific service (in this case "Scan"):
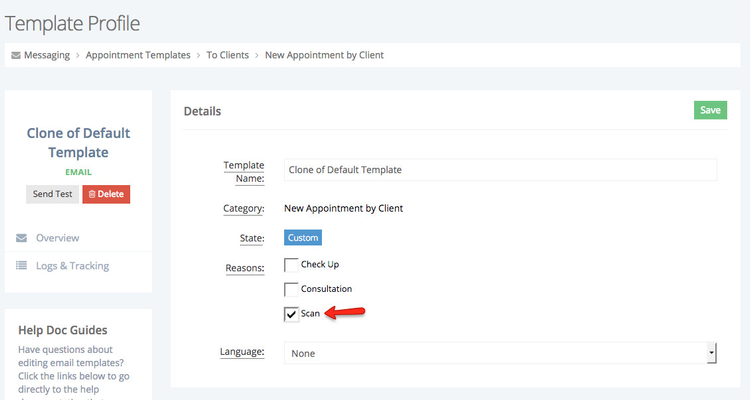
I'd also recommend naming the template so that it's easy to distinguish. In this case, I'm going to name it "New Appointment by Client - Scan" and "Save" the template:
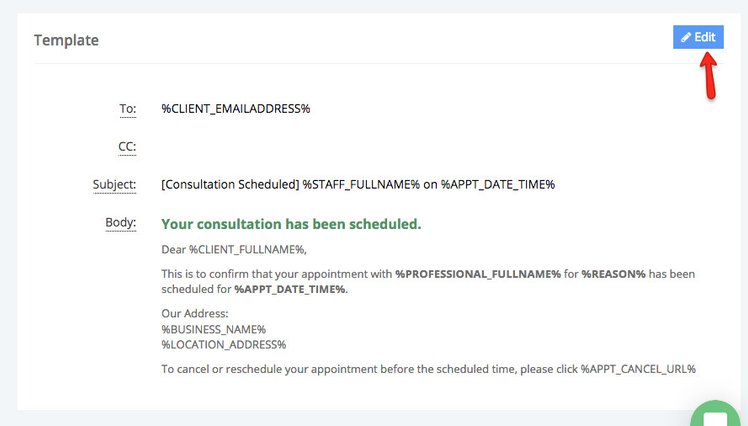
Step 5: Now that the "Details" customizations are in place, we can update the language in the template to Spanish. Scroll down on the Template Profile and click "Edit" next to the Template section:
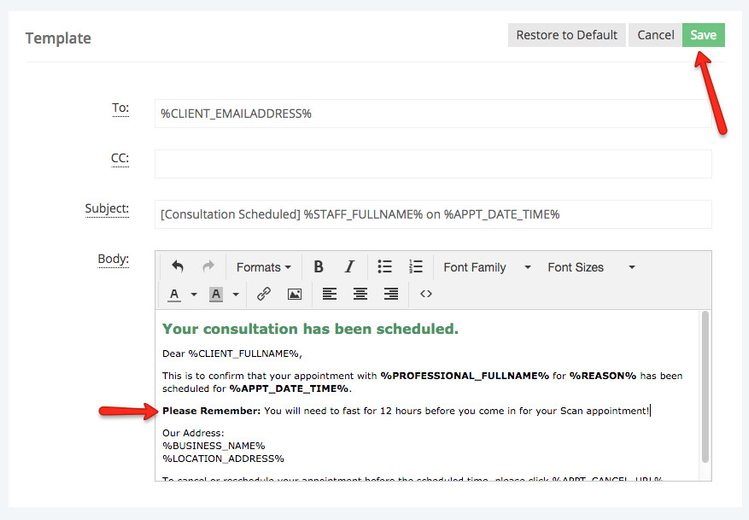
When it's in Edit mode, you can put in the instructions that you'd like to add for the "Scan" appointment and press "Save":
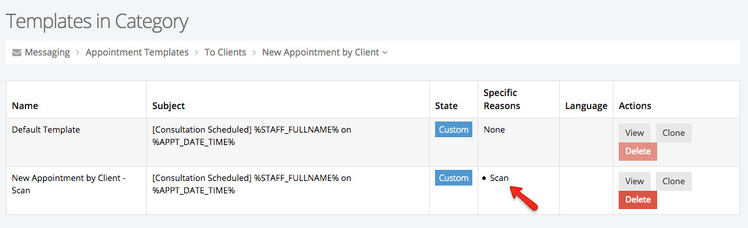
If we look back at the category template list now, we'll see we have two templates the default and then the one we've customized for "Scan":
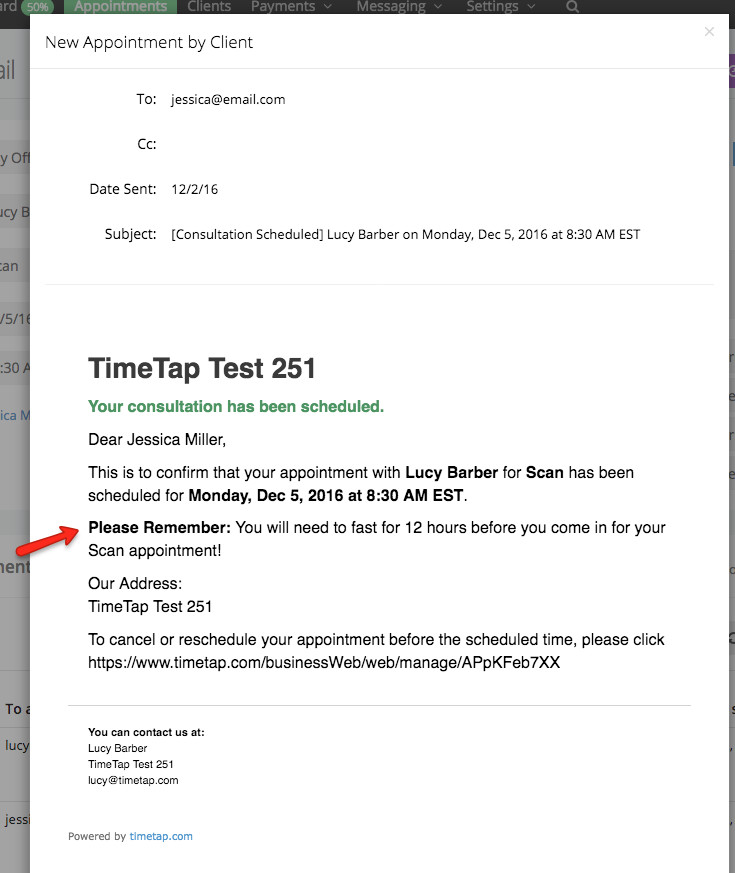
Step 6: Now, let's look at how this when clients book. I've got a client who's booking the "Scan" appointment...
...then the email that goes out to them will have the new template we made for the "Scan":
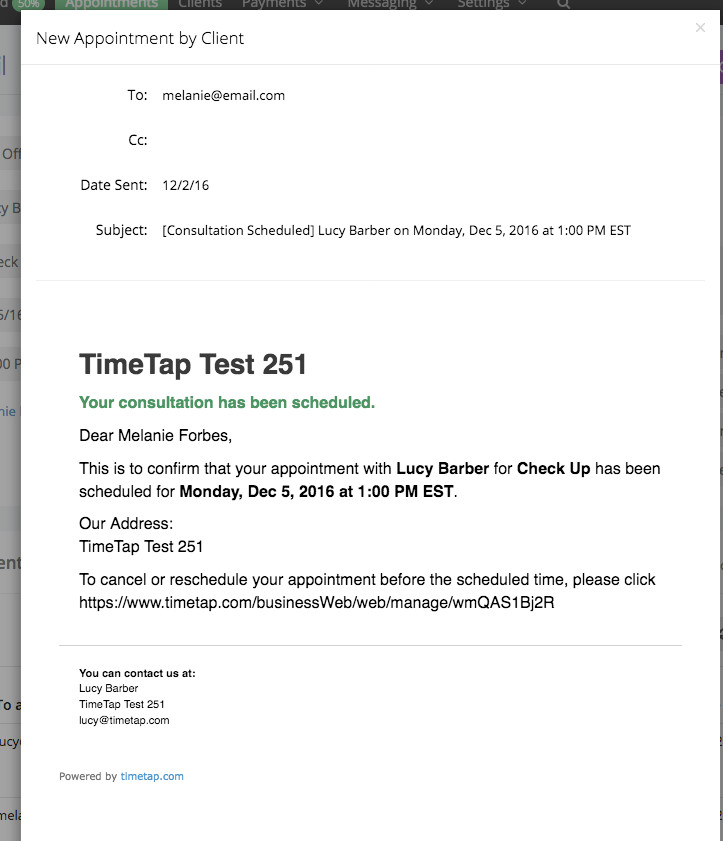
But if a client books an appointment for "Check Up"...

Then they're going to receive the default template (aka the fall back):
By creating templates in assign to specific reasons, then when clients book for those appointments you can send out really specific instructions based on what to expect for those appointments.