Appointment Templates
Under Messaging > Appointment Templates, you'll see that your appointment emails are divided into emails/SMS sent to your clients and emails/SMS sent to your staff. The appointment templates are notifications to both your clients and staff to inform them of a new appointment made, any changes that have happened to that appointment since it was created and an automated reminder is scheduled to send out based on your accounts preference.
These automated notifications are all based on actions taken with any given appointment for a service and/or class.
View and Edit Appointment Templates
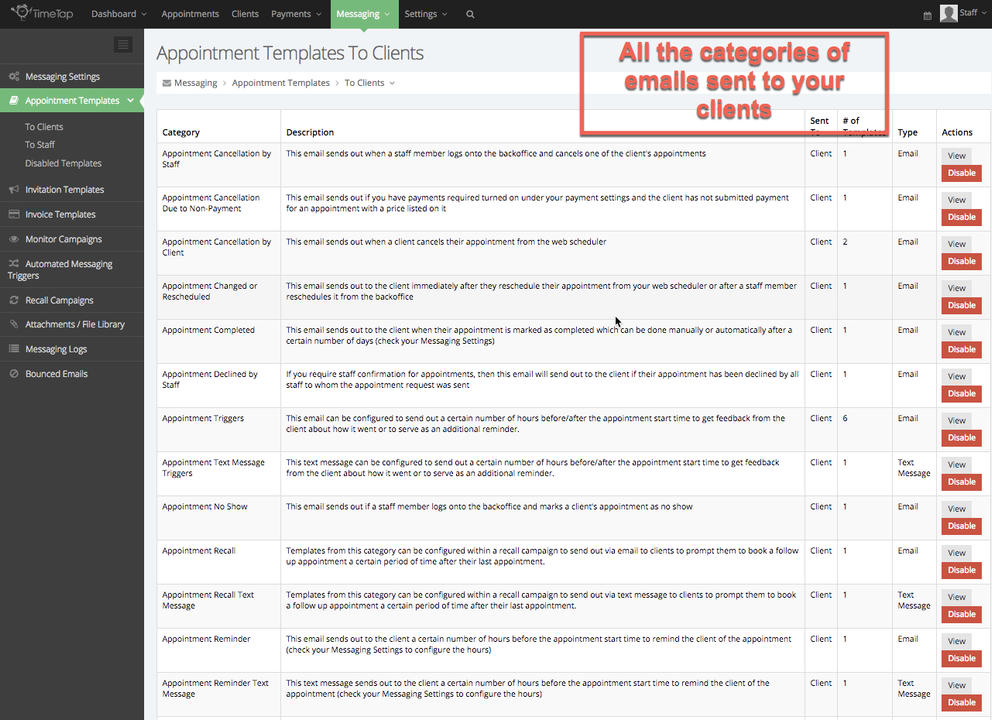
By looking at the Appointment Templates to Clients view (seen below), you'll see a table view of all the categories of emails that are sent out to your client to alert them of their appointment and any changes therein:
You'll notice moving left to right on this table that you first have the:
- Category name: This is the general type of email; some accounts won't use all categories of emails. Read the description to see if you think the category would be pertinent to you (i.e., the "Appointment Cancellation Due to Non-Payment" category really only applies to business's that require payments upon booking; if your business doesn't, then you may never need to use this category type)
- Description: This tells you about the template and when it is used. As mentioned in the category name blurb above, you may not use all template categories and that's fine. Your business just may not have use for it. If you read the description, it should give you a good idea of whether or not it is pertinent to your business. If it's not, no need to dig into it and customize the template.
- Sent To: This will be filled in with either client or staff depending on the view you're in
- # of Templates: This is where the power of TimeTap really shines, because you're able to add in multiple templates to your account and customize the messaging on a per service or per language basis. If you've done that, then you'll have more than one template in a given category. We've got loads more documentation on how to do this so I won't get too far ahead of myself here. All I'll mention for now is this column is essentially a tally of the number of templates you've created
- Type: We currently send notifications about appointments via email and text message. This column will tell you which type of notification the category is in
The same columns are detailed under either the Appointment Templates To Clients or the Appointment Templates To Staff views, but the categories that are in each may differ slightly.
If you want to see what email templates read as in any given category, click the "View" button to the right of the category's row:
This will show you all the templates that you have created for that category. In the view below, you'll see how this view looks on a brand new account for any given category:
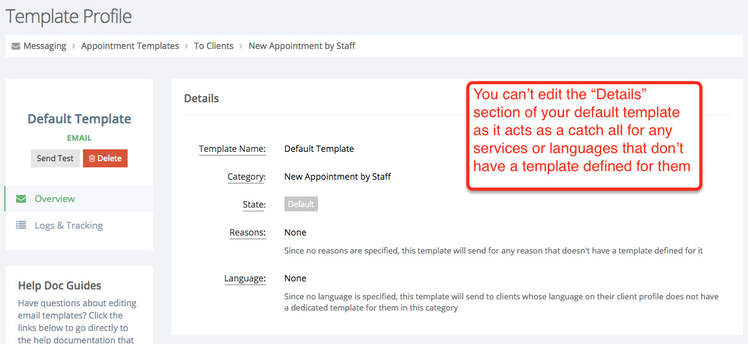
As you can see, the default template that's added to your account starts off in a "Default" state meaning it has the email body and subject line TimeTap wrote, which is not specific to your business. This default template acts as a fall back and will always be in your categories template list to act as a catch all. You can't clone the default template to start applying it to specific languages and/or reasons until you edit it. To do this, click the "View" button next to it to edit it:
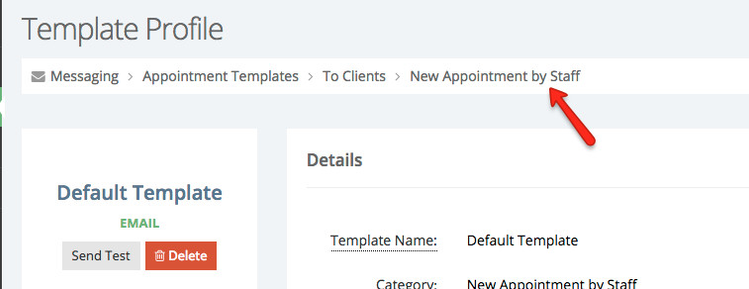
This will take you to that template's profile screen. The Default Template's name and details cannot be edited and applied to specific services or languages as it is a catch all template. This helps in the case that maybe you've defined a specific template for one of your services, but then you add in a new service that you've not defined a specific template for. By having the default template as a fall back, this template will send for your new service until you define a custom template for it:
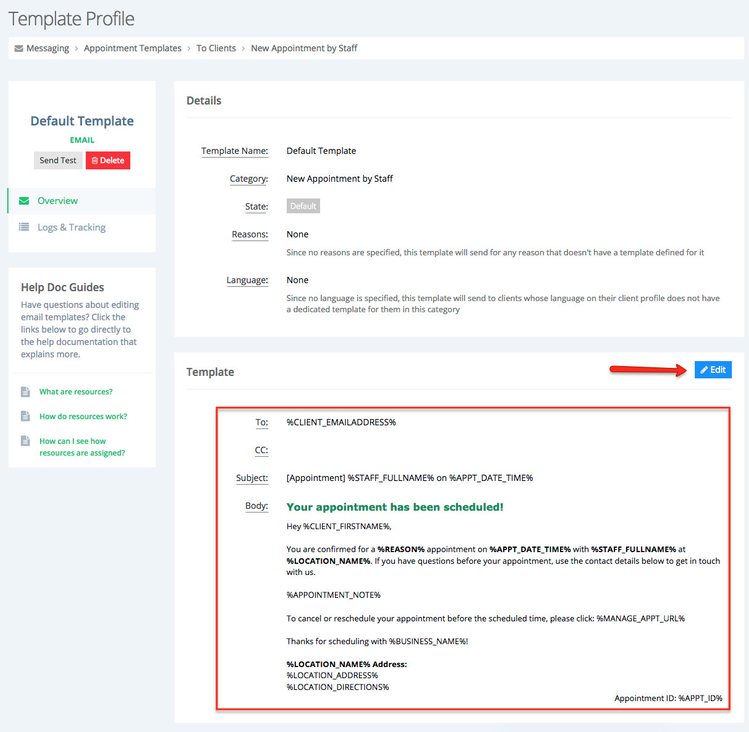
If you scroll down on your template profile page, you'll see where you can edit the meat of the template: the subject and body that is sent out:
Important: Before being able to clone a template in an appointment email category, you will always first want to edit the default template from it's default state. If you don't edit the template subject line or body, you won't be able to clone it to make a new template to apply to specific reasons and/or languages.
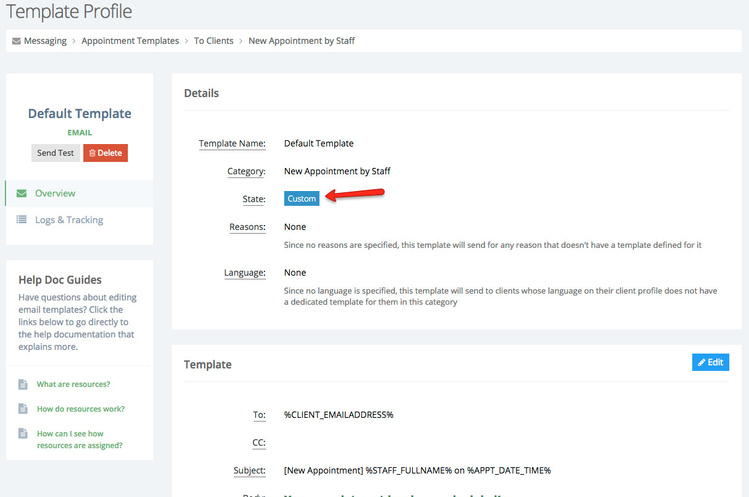
Once you edit and save the template, you'll notice that the state changes from "Default" to "Custom" (one the screenshot below, I edited the template and changed the subject slightly):
Since the default template in this category has been customized, I can click the category name from the breadcrumbs bar at the top:
To go back to the list of templates in the category and I'll see that I can now clone the default template:
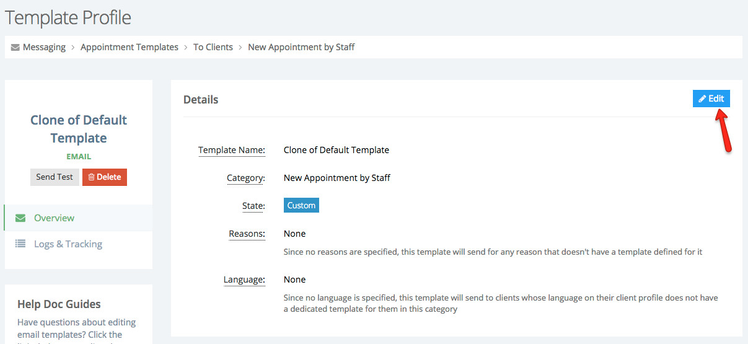
If I do that, then I can view and edit the new template to apply it to specific reasons and/or languages:
