| Anchor | ||||
|---|---|---|---|---|
|
In this documentation we'll cover how to:
- Add new fields from TimeTap's default fields (and what default fields are provided)
- Add new fields that you create yourself for your business
If you have any questions about adding fields after reading through this documentation, please feel free to reach out to our support team and we'd be happy to answer them for you.
There are several Client Fields that come with TimeTap including:
- First name
- Last name
- Cell phone
- Home phone
- Business phone
- Address (line 1, line 2, City, State, Zip, County, & Country)
- Company Name
- Date of Birth
- Username
- Sex/Gender
- Spouse
- Emergency Contact
- Emergency Contact Phone
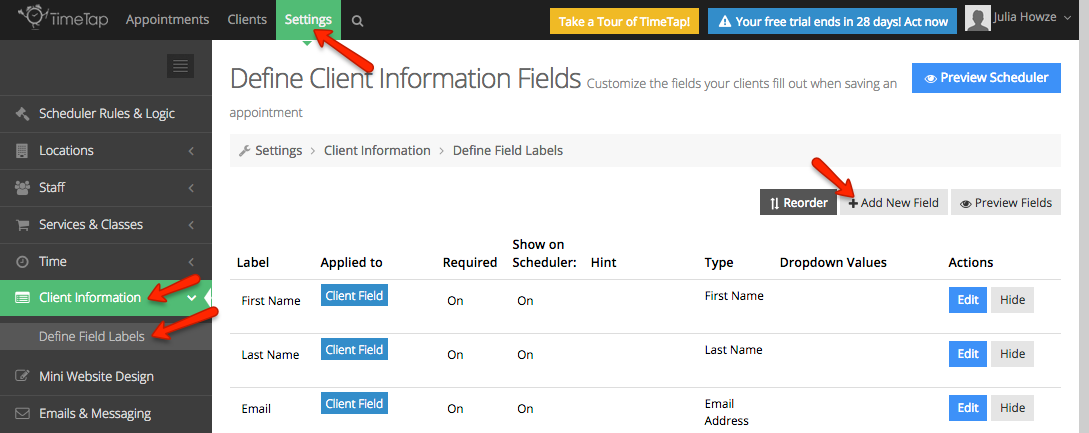
You can easily choose from and add these fields to your Define Field Labels section so that they are included on your client profiles. To do this, go to Settings → Client Information → Define Field Labels, and click the button to "Add New Field" near the top right of the screen:

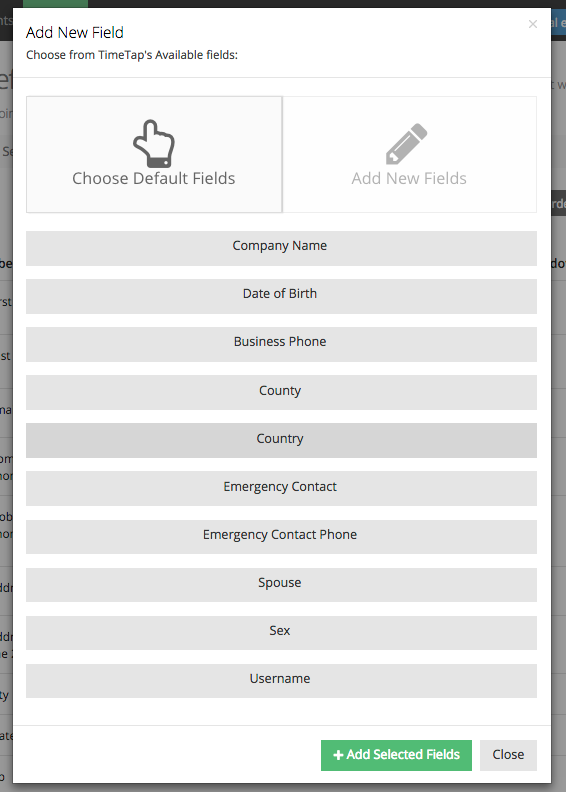
From the window that pulls up, you will see a list of all of the default fields that are not already on your client information form. You will also see any of your custom created fields that you may have hidden:
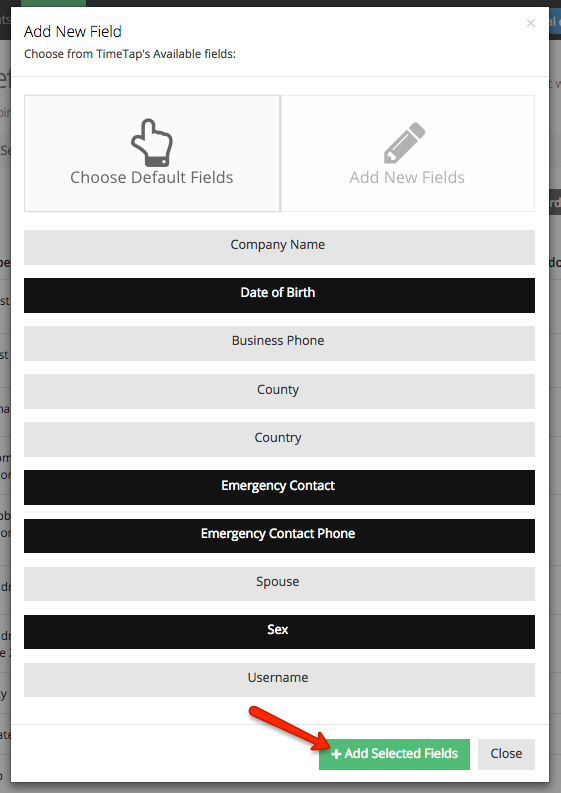
Select any of the fields that you want to add and press the button to "Add Selected Fields":
You'll then see the fields show up on your form.

You can also change the field labels and hints, make the fields required, and decide whether you want to clients to fill them out by toggling on the "Show on Scheduler" switch. Need to change where in the form the fields display? You can also reorder the fields so that they show up the way you want them to.
Have questions about adding a field from among the default fields? Reach out to our support team and we can help you get it all setup.
While TimeTap does have a lot of nice default fields that you can apply to clients, you can also create some custom fields that can be applied either to clients or to appointments.
On TimeTap Free accounts, you are limited to just 3 of these create your own fields. If you are a TimeTap Plus Professional user, you can add as many of these fields as you would like! (Not sure what TimeTap Plus Professional is all about? Learn more here).
To add one of these fields, go to Settings → Client Information → Define Field Labels, and click the button to "Add New Field" near the top right of the screen:
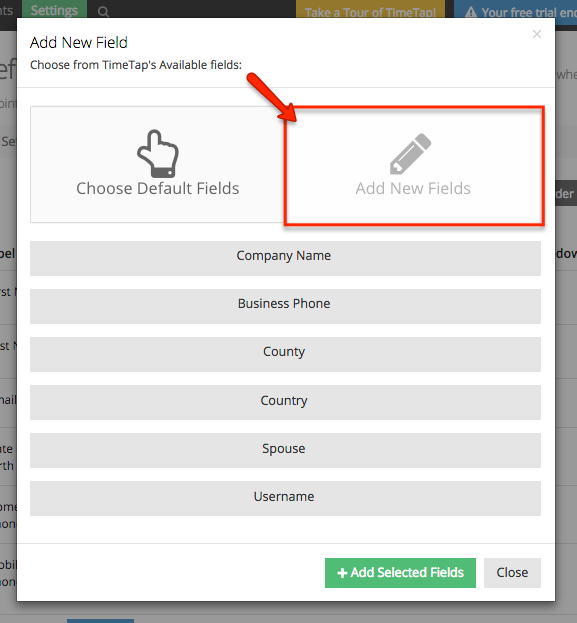
The first window that appears will give you a list of all the default TimeTap fields. Click the "Add New Fields" button to add a brand new field of your own:
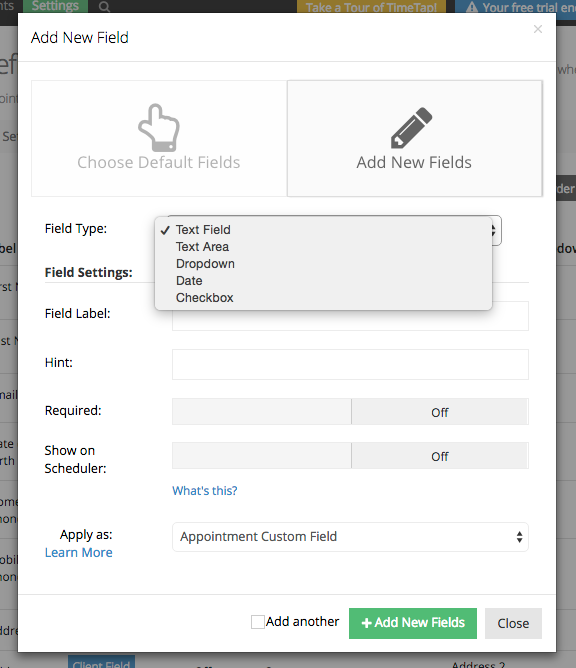
From the Add New Fields window, you'll first want to select which type of field you're adding. Please note: this is important to get right as you cannot change the field type once you've created it. You can add a:
- Text field: This is just a single line of text
- Text area: This is a large text box for clients or staff to input text
- Dropdown: This will give you a dropdown menu where you can define the values that a client or staff can select from
- Date picker: This will give you a calendar dropdown to pick a date from
- Checkbox: This is a yes/no checkbox that can either be selected or deselected
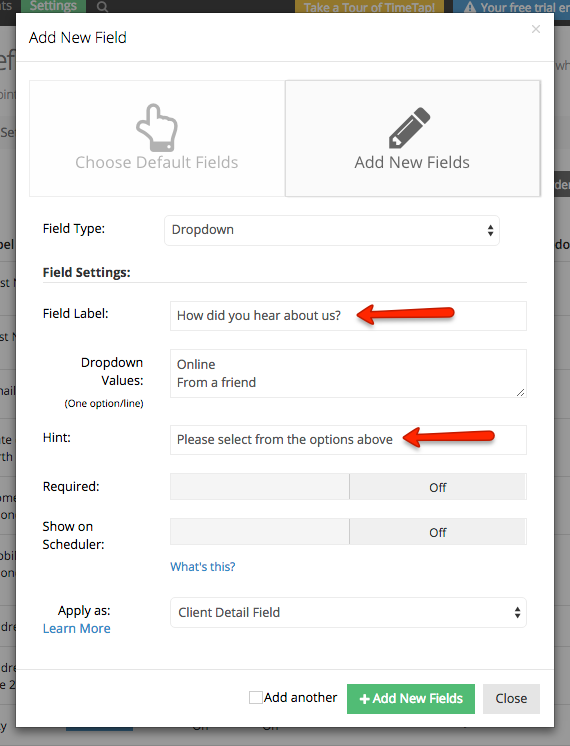
Once you've determined what type of field you want to add, you can then set the label for the field as well as the hint. The label will show up in front of the field to prompt clients or staff to put in the respective information whereas the hint shows up beneath the field to provide more context. If you've selected to add a dropdown field, you'll also have the option to put in your dropdown values (you can come back and add to these at a later time if you want to):
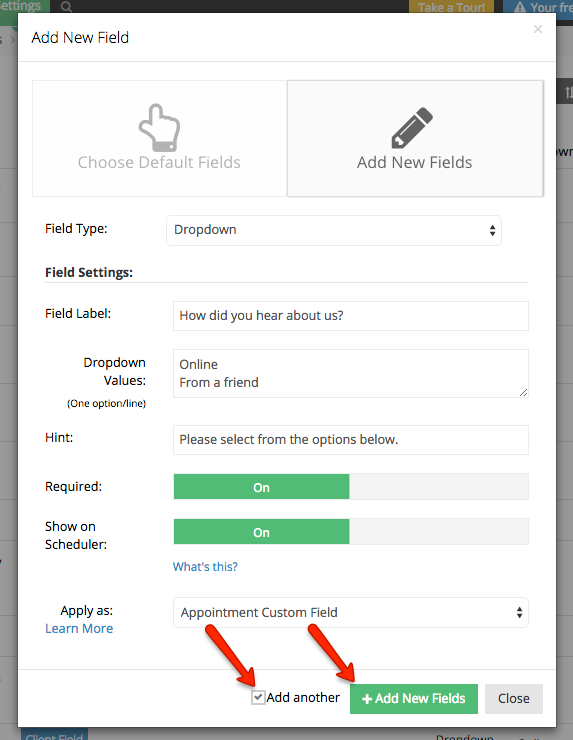
Next, you'll want to choose whether this field is required or not, whether it should show on the scheduler for the client to fill out or if you just want the staff to have access to it through TimeTap's back office, and whether you want to apply it as an appointment custom field or a client custom field.
Once you've decided all those things, you can go ahead and click "Add New Fields" to add the new field you've just created, or you can select the Add Another checkbox to both add the new field and keep the window open with the same options selected so you can create another field of the same type:
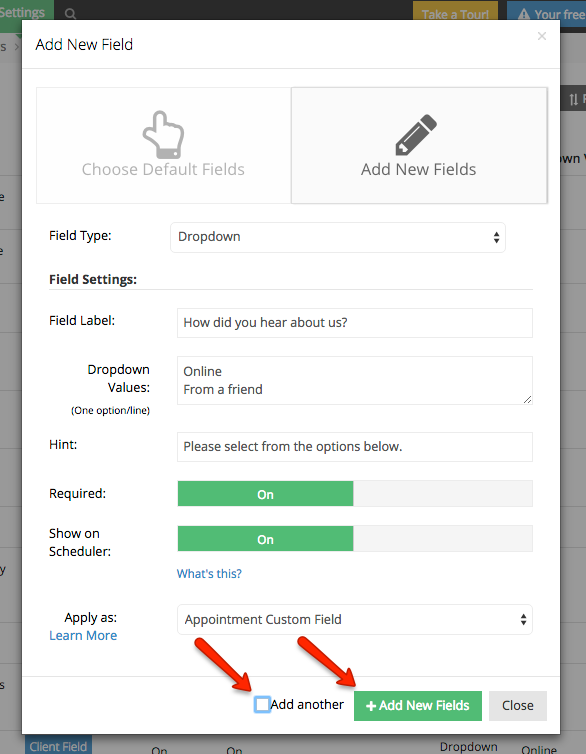
Here, you can either continue to add new fields by having the "Add Another" button checked (if you have a TimeTap Plus Professional account, which allows for unlimited custom fields), or if you don't want to add another field of the same type you can uncheck “Add Another” and just click the "Add New Fields" button.
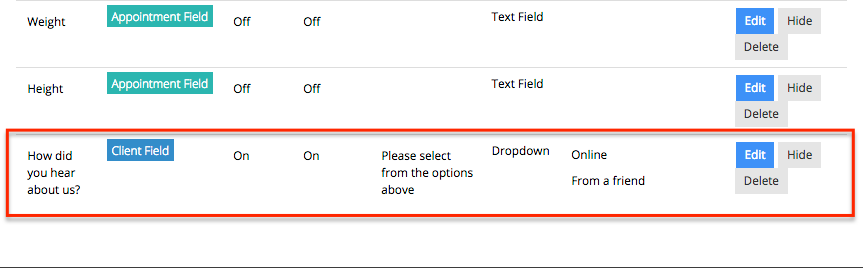
If you’ve chosen to add the field without checking the Add Another box, then by clicking the “Add New Fields” button you will add the field you just created to your Define Field Labels Screen. As you can see below, the new “How did you hear about us” field has been added to the other client information fields that I currently have.
You can always come back and change your label or hint for the field you've created, change whether the field is required or whether it shows on the scheduler, and hide the field from view. If you want to change the order that the field comes in the form, you can do that as well by using the Reorder link in the top right of the define field labels screen.
If you do hide one of the custom fields that you've created, you can always recover it by clicking the button to Add More Fields and choosing from among the default/existing fields you have on your account.
Have questions about creating your own fields? Reach out to our support team and we'd be happy to answer them for you!