You can export any list view into Excel format. The options for this differ slightly based on what kind of TimeTap plan you're on.
If you are on our free version of TimeTap, you will be able to export your appointment lists as is. If you are a TimeTap Plus account holder, you can select which staff you want to export appointments for and then export the appointments with additional fields other than the ones that display on the list view by default. In this documentation, we'll walk through how to export an appointment list from the perspective of a TimeTap Plus user.
To export To export a list of appointments, first go to Appointments → Lists and click on the List view that you want to export:
...
Then, you'll want to select which staff you'll want to see the appointments for. To select which staff you want to export with, click the option to "Change selected staff" so that other staff's appointments show up on the list view as well:
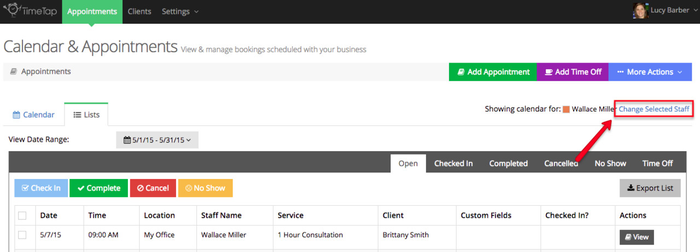
Please note: If you are on the TimeTap Free version of our software, your security status is just that of "User" you will not see the option to "Change Selected Staff" as TimeTap Free only allows for 1 staff on your accountUsers can only view their own appointment schedules. You will only see this option to include additional staff if you are on TimeTap Plus and have added other staff to your accounthave a security status of "Location Super User". Not sure what security status you are? Here's how to find out.
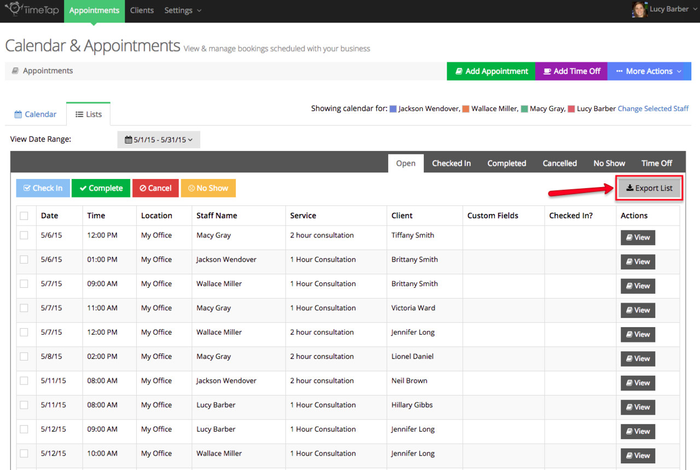
From the pop up window that appears, select any other staff whose appointments you want to display in the list view for export and press "Save Changes":
...
Once you've added the additional staff to display, you'll see any of their appointments appear in the List view as well. From here, all you have to do is click the "Export List" button in the top right of the list that you want to export for the given time range:
If you are on the TimeTap Plus version of our software, then from the From the Export List window that appears, you can select a number of additional fields to export along with the list your viewing on screen. After you've selected the fields you want to export on your list, click the green "Export List" button to initiate the export:
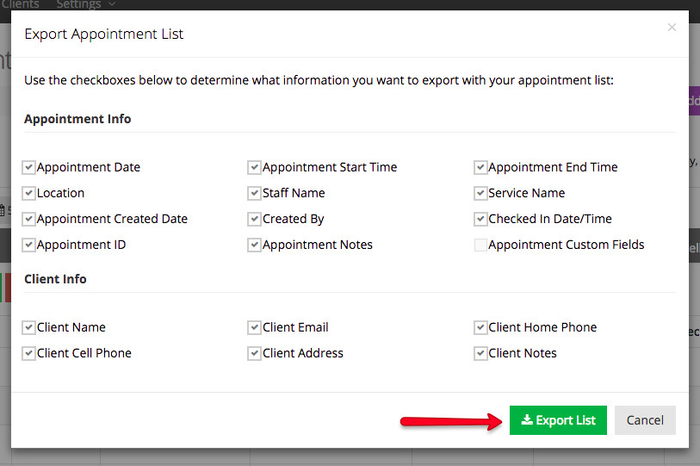 Please note: If you are just using the Free version of TimeTap, you will only be able to export the list as it stands in TimeTap. The fields will include Appointment Date, Appointment Start Time, Location, Staff Name, Service Name, Client Name, and any Appointment Custom Fields.
After you export the list, you can open it up in Excel and see all the information you exported in a nice table view (click image below to enlarge):
...