Navigating through Lists
- Lucy Barber (Deactivated)
There are times when a calendar view just won't cut it for getting you a good idea of what you've got on your schedule in a given time period. You don't want to see a week view or day view or even a month view. You want to see a time frame that's really specific.
Or perhaps you want to be able to re-categorize appointments in bulk. Instead of just clicking into an individual appointment from your calendar to mark it as completed or cancelled, you'd prefer to mass select a group of appointments and change their status all at once.
The lists view is a great way to accomplish seeing a custom time range of your appointments in a given status as well as changing the statuses of appointments in bulk.
In this documentation, we'll go through:
Where you'll find your Appointment Lists:
You'll see your list views under Appointments → Lists

Your account has 6 lists available to you:
- Open appointments
- Checked In appointments
- Completed appointments
- Cancelled appointments
- No Show appointments
- Time Off
Each of these lists will display any appointments with the respective status whose appointment date falls within the date range of the time being viewed. We will walk through each list below and discuss the types of appointments that are categorized underneath them.
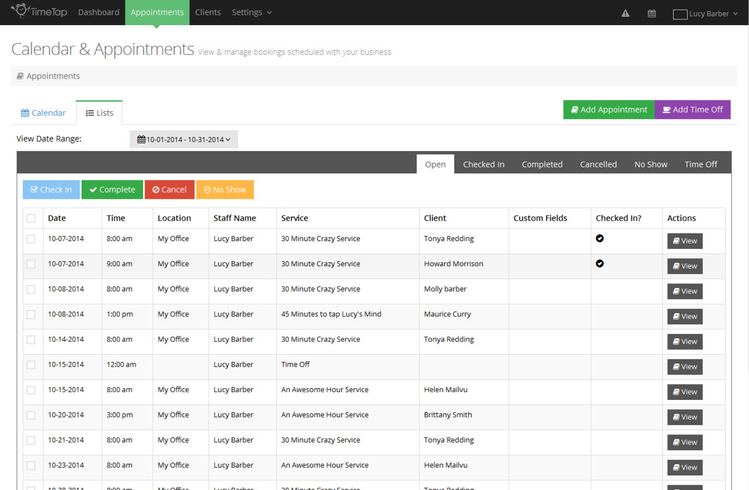
When an appointment is first created, it is placed in Open status. This typically means that the appointment has yet to happen and thus there's no need to mark it as Checked In or Completed yet. After the appointment date passes, if you don't mark the appointment as completed or no show, it will stay in open status.
The Open Appointments list shows your Open appointments and Checked In appointments. From the Open Appointments list, you can move appointments to any other status: Checked In, Completed, Cancelled, or No Show.
Here's what the Open Appointments list view will look like:
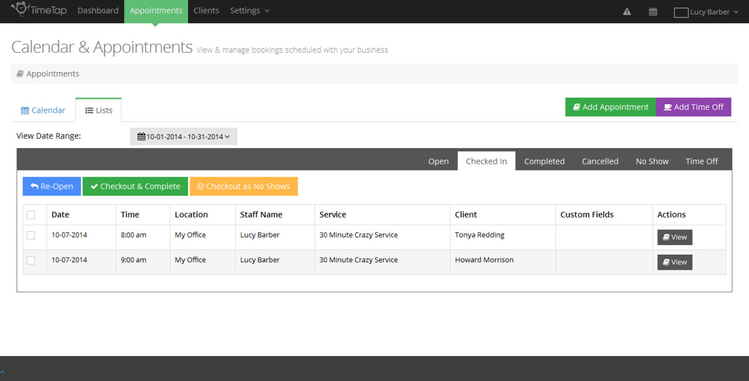
Once a client comes in for his or her appointment, you can mark the appointment as Checked In and apply a Checked In time stamp to the appointment. All the appointments that you have currently Checked In can be viewed next to one another in the Checked In list.
From the Checked In list view, you can check the appointment out as completed or you can check it out as a no show. You can also re-open the appointment to move it out of the Checked In list.
Here's what the Checked In Appointments list view will look like:
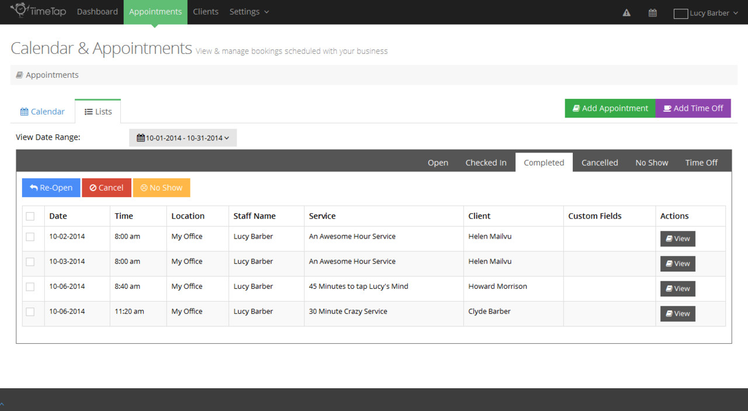
After you have successfully fulfilled an appointment with a client, you can mark that appointment as completed. A nice follow up thank you email will send out to the client and the appointment will be re-categorized by its new status under your Completed Appointments list.
From the Completed appointments list view, you can re-open, cancel, or mark appointments as no show in bulk to change the appointment(s)' status and filter them under a different list.
Here's what the Completed Appointments list view looks like:
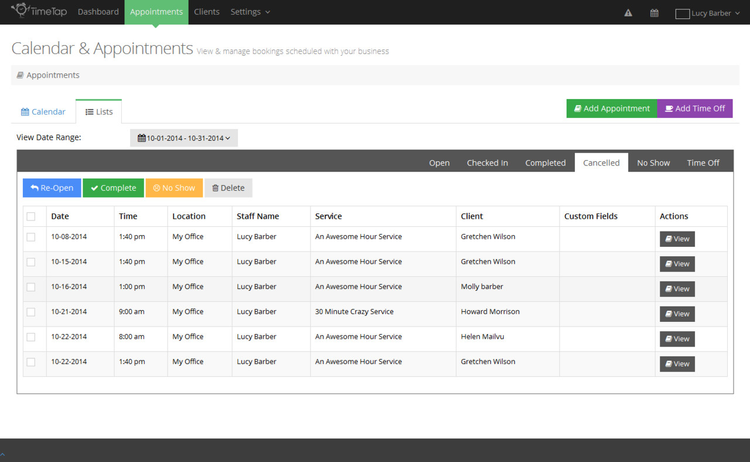
Whether you cancel an appointment set with a client or a client cancels the appointment for him/herself, you'll find all of your cancelled appointments in your Cancelled List.
You will not see your cancelled appointments on your Calendar view since they have been cancelled and thus are not on your schedule any more. Moving them off you calendar shows that those timeslots are now open for booking by another client.
From the Cancelled list, you can re-categorize appointments as Completed or No Show or you can re-open cancelled appointments. The Cancelled List is also the only place to delete appointments from.
Here's what the Cancelled Appointments list view looks like:
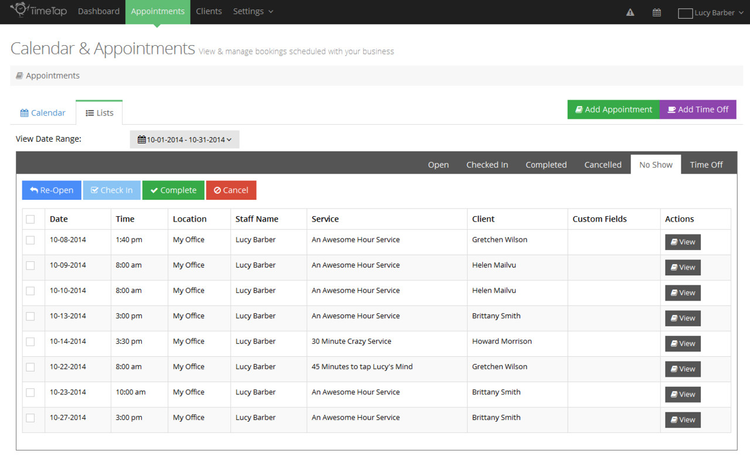
Clients that don't make it to their appointment time can be listed as No Shows. All of these appointments display under the No Show appointment list.
Unlike Cancelled appointments, No Show appointments are not removed from your calendar to open up availability for other bookings.
You can Check In appointments from the No Show view (in case you preemptively marked them as No Show before they arrived), can change their status to Completed, can move them to Cancelled which would clear them from your calendar view, or you can re-open the appointment.
Here's what the No Show Appointments list view looks like:
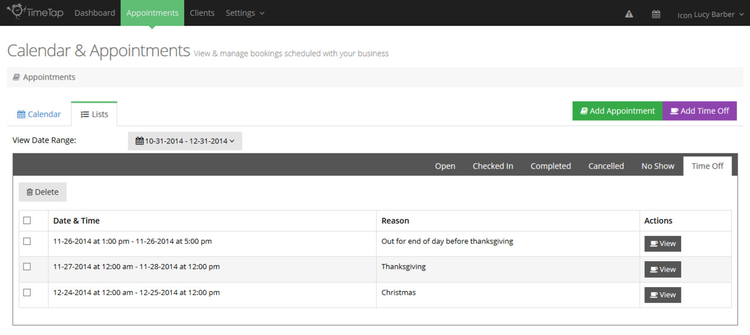
If you've added any time off periods to your schedule (maybe for a vacation or maybe just for a 2 hour doctor's appointment), you can see and manage your Time Off entries from the Time Off list.
These entries also display on your calendar view as they are blocking off your availability for scheduling. You can Edit and Delete time offs, but they do not exist in different statuses like the appointments described above.
Here's what the Time Off List view looks like:
The appointments that display on the appointment lists described in the section above are filtered not only by status but also by the Date Range selector shown at the top of each list view:
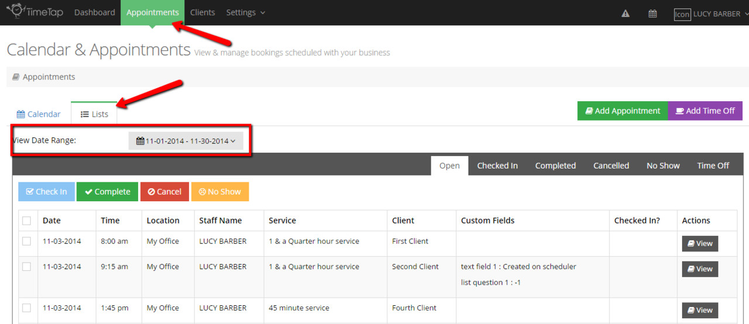
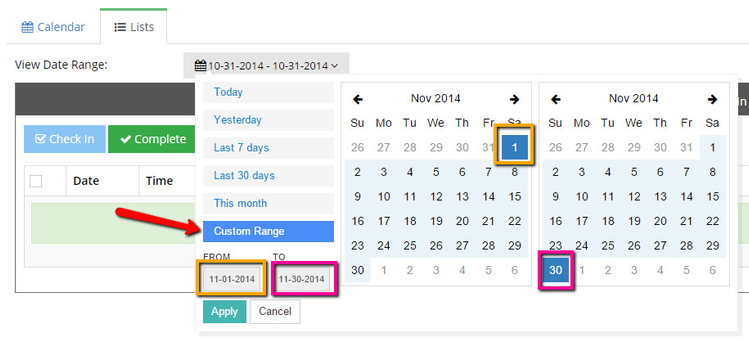
This filters the list you are viewing to appointments that are set for dates that fall within the range selected. There are a number of preset options you can choose to view such as Today, Yesterday, Last 7 days, Last 30 days, and This Month:
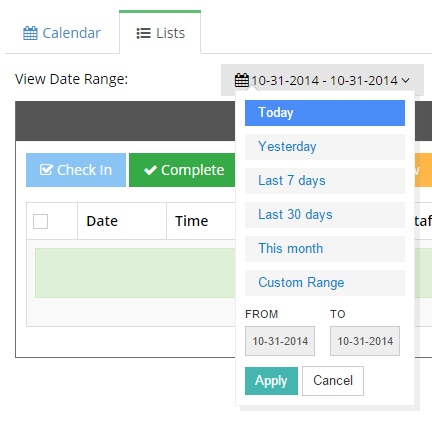
You can also select a custom range to display by selecting the "Custom Range" option and entering the starting point of the range on the left side calendar and the end point of the range on the right side calendar:
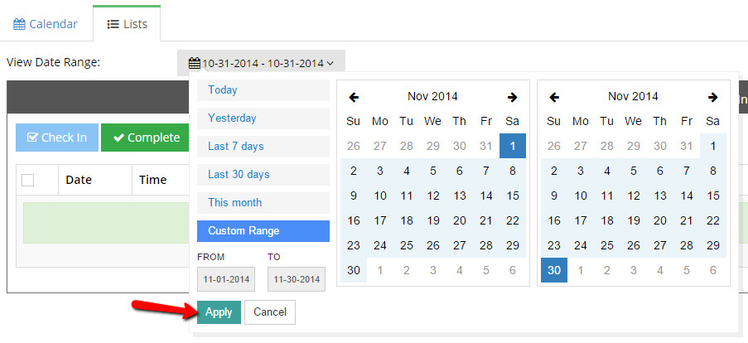
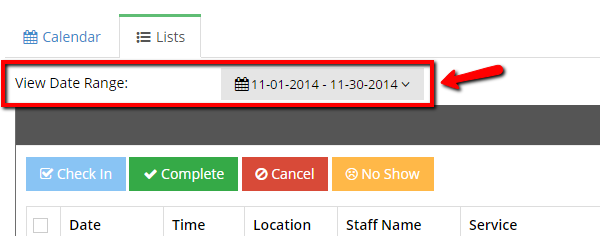
After selecting the 2 dates to define your range, hit "Apply" and your list will re-filter to display only appointments that fall between those 2 dates:
On each of the list views mentioned in the first section of this documentation, you'll see a series of buttons that allow you to change the status of the appointments in that list. On the Open Appointments list, the buttons are Check In, Complete, Cancel, & No Show:
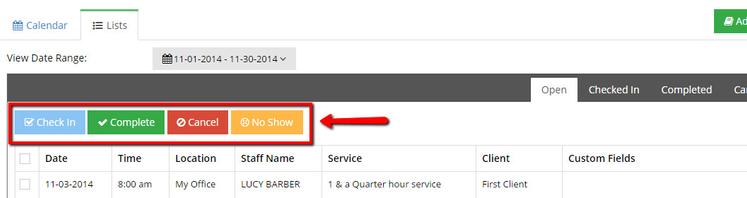
These buttons can be used to move appointments from the current list into other list views. All you have to do is select the check boxes next to the appointment(s) that you want to re-categorize and then hit the button to move them to that list:
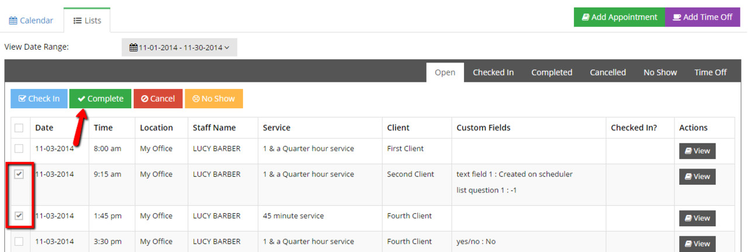
You'll get a pop up window to confirm that you want to make these changes to the appointments selected. After clicking Confirm from the pop up window, the screen will refresh and you'll see your selected appointments in the new list view.
Did we miss anything in our discussion about navigating through your list views? If so, please let us know by email us at support@timetap.com