Each location that you add to your account has its own profile with details around its address, contact information, directions, appointments assigned to it, and its availability. When you click into a location profile from Settings → Locations, you'll see three tabs: the Overview tab, the Service Availability tab, and the Class Schedule tab.
Underneath the "Overview" tab, you'll be able to update contact and direction details for your location as well as see upcoming and past appointments made with any staff assigned to that location. Under the "Service Availability" tab, you'll see the availability for all staff who have been assigned hours at that location. Under the "Class Schedule" tab, you'll see the schedule for all classes that are set for that location.
In this documentation, we'll cover everything found under the Overview tab including:
- The different components of your Location Profile
- How to Edit your Location Profile
- Viewing your Upcoming & Past Appointments at a Location
We cover how to use and customize your staff's availability at a location under a separate documentation page that goes in depth about adding, changing, and removing your availability.
Nothing matters about your location profile if you can't find it. So to start off this part of the discussion, I want to go ahead and point out where you'll find any of your Location's profiles.
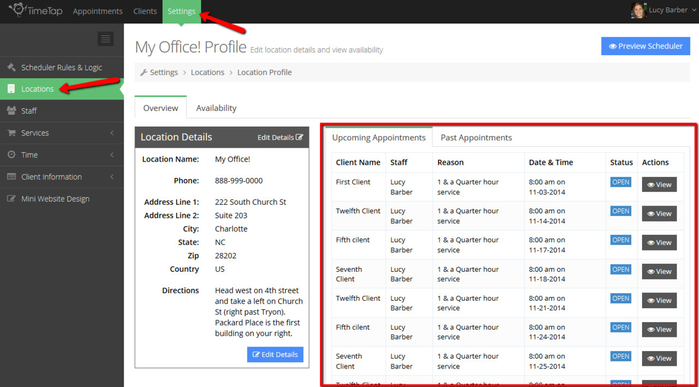
You can access a location profile by going to Settings → Locations. Here you'll be able to click in to edit Location Details and view upcoming and past appointments:
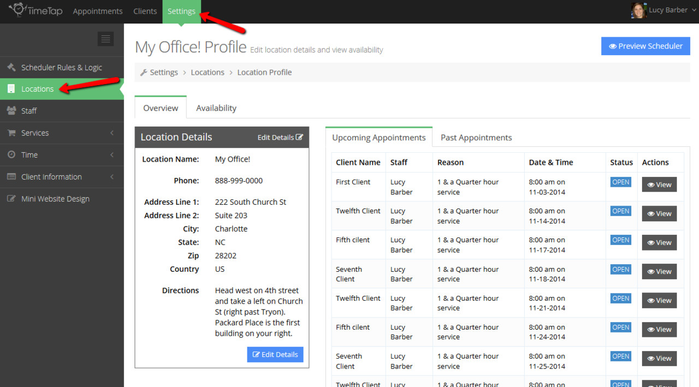
You Location Profile will open up to the "Overview" tab where you'll see your location name, phone number, address, and directions. To the right of those details, you'll see your Upcoming and Past appointments tables.
The other tab on your Location Profile is your Availability tab. As mentioned above, we discuss how to configure and manage your location availability in the next piece of documentation. For now, we'll just say that if you want a quick view of a Location's availability for all staff, visit the Availability tab in the Location Profile.
As mentioned on every other documentation page in the Settings menu, there is a quick link to your mini website to test out any changes you make by clicking the blue "Preview Scheduler" button in the top right. This way after tweaking your location details or customizing your location availability, you can quickly click through your scheduler to make sure that everything looks alright.
If you open up your location profile under Settings → Locations, you'll see all the different details about your location that you can edit in the "Location Details" box on the left hand side of the "Overview" tab:
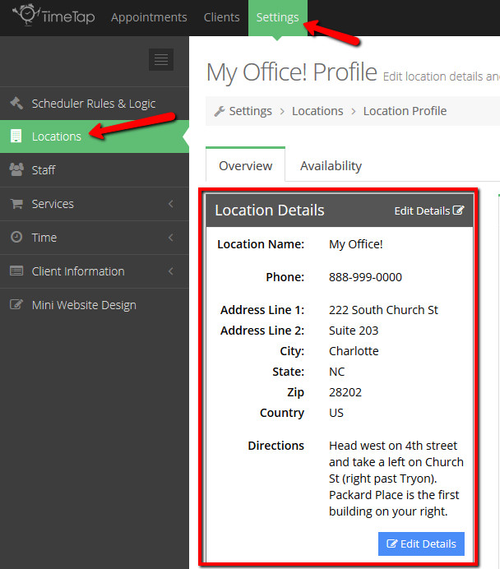
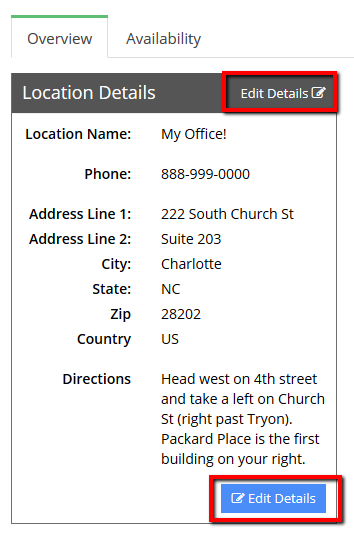
These details include: location name, phone number, address, and directions. To edit any of these items, click the "Edit Details" link or "Edit Details" button:
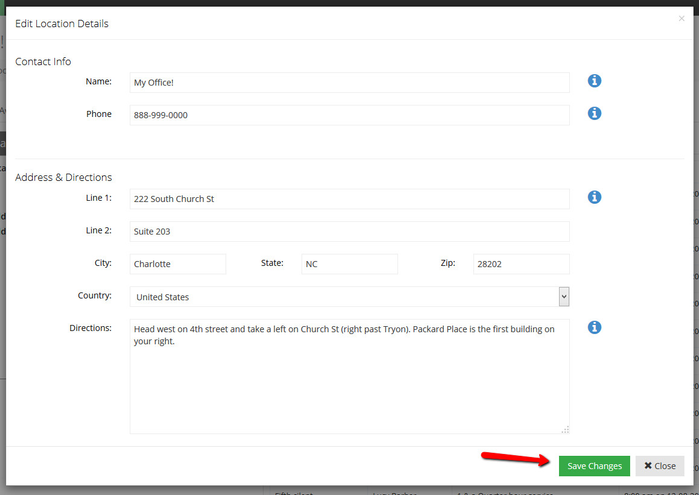
This will bring up the Edit Location Details window where you can make changes to the different aspects of your location. After you have finished making these changes, just click "Save Changes" and your location details will update:
If you choose to include Directions on your location profile, these directions will show up in the New Appointment Emails as well as the Appointment Edited/Rescheduled Email that clients receive. They show up underneath the location address toward the bottom of the email message. You can also embed them on the Appointment Saved Success Message using the tag %LOCATION_DIRECTIONS%.
On the right hand side of the Location Profile Overview tab, you'll see your Upcoming & Past Appointments table:
The appointments that will display in your Upcoming Appointments tab are all those listed in either Open or Checked In status. All the appointments that display in the Past Appointments tab have been marked either Completed, No Show, or Cancelled.