| Anchor | ||||
|---|---|---|---|---|
|
- Send forms to clients from the client profile
- Send forms to client clients when adding an appointment
- View form requests and submissions in the form's profile
- View form requests and submissions in the client's profile
- appointments
- Send forms to clients when viewing their appointments
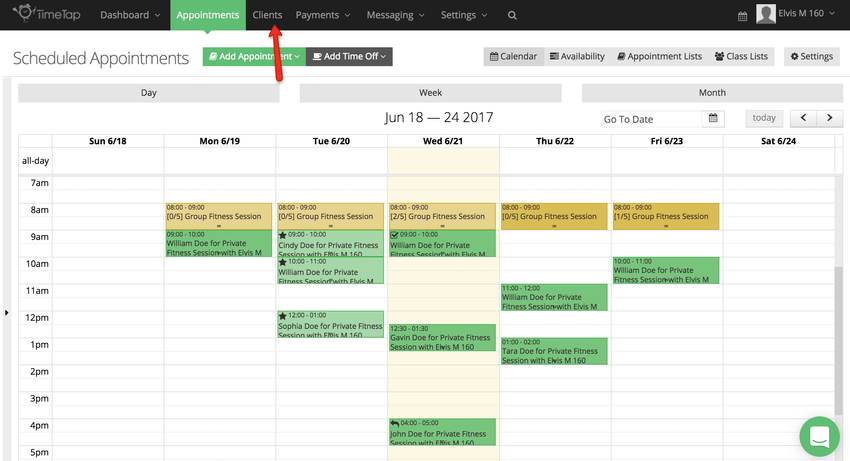
if you've created forms and would like to send them to a specific client, begin by going to your list of clients:
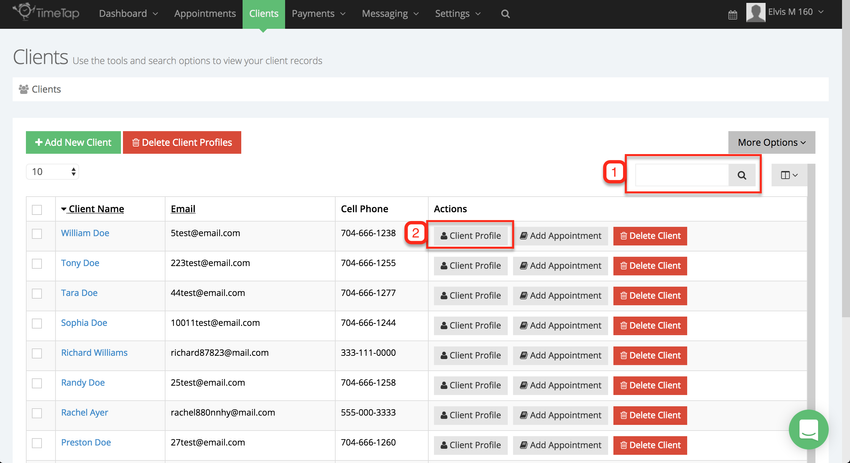
Once in the list of client you can search for a specific client (1) or click View Profile (2) next to any of your clients:
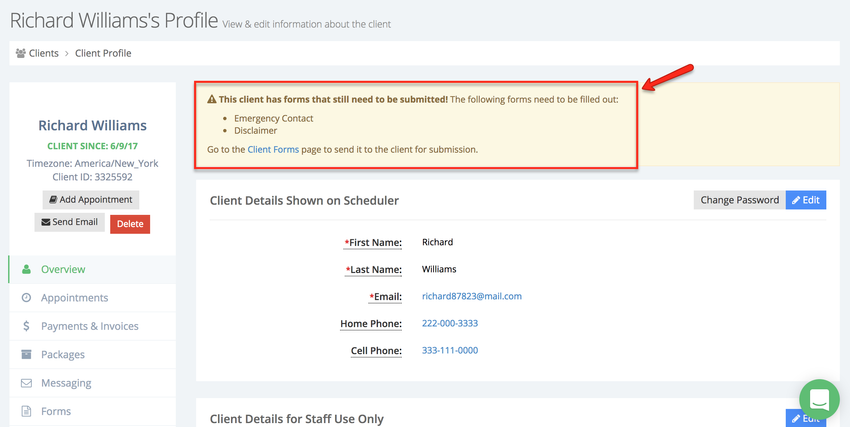
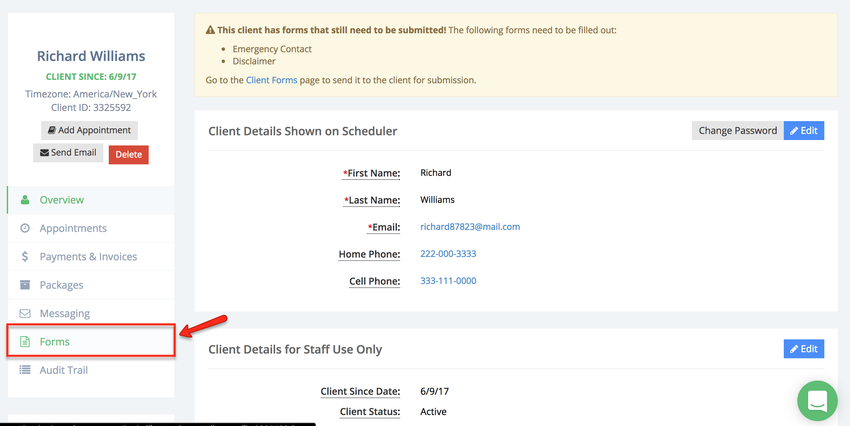
Once in the client's profile you will notice a message above to the client's details, this message box will list all required forms that still need to be submitted by the client:
To view and send your forms to the client click the Forms tab:
| Anchor | ||||
|---|---|---|---|---|
|

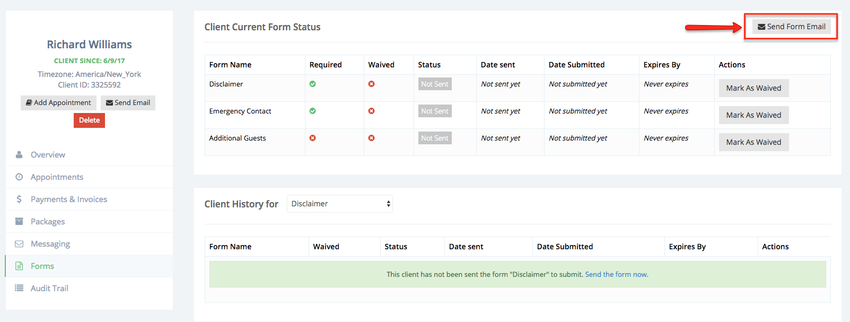
- Form Name: This is the name you assigned to the form. This can be changed in the form's profile.
- Required: This column tells you whether the forms is required or optional. A green check mark in this column means that the form is required, the white x mark inside the red circle means that the form is not required.
- Waived: This column tells you whether the form has been waived or not. A green check mar in this column means that the form has been waived, the white x mark inside the red circle mean that the forma has not been waived.
- Status: This is where you can tell is the form has been sent to the client (Sent), received (Received, or not yet sent (Not Sent).
- Date Sent: This is the date when the form was sent to the client
- Date Submitted: This is the date when the form was completed and submitted by the client.
- Expires By: This is the date when the form expires.
- Actions: This is where you have the option to waive a form for the client by clicking the "Mark As Waived" button.
- Send Form Email: Click this button to be able to select a form and send it to the client.
Within the Client Current Form Status section, we will send the Disclaimer form to client Richard Williams. Click the Send Form Email button:
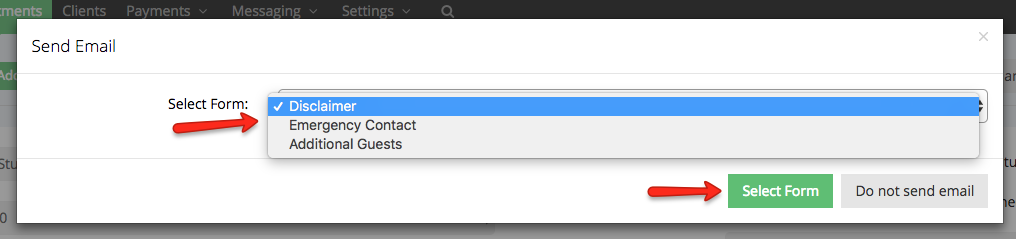
A new window will appear where you can select which form to email to the client, in this example I will select the form Disclaimer and click Select Form:

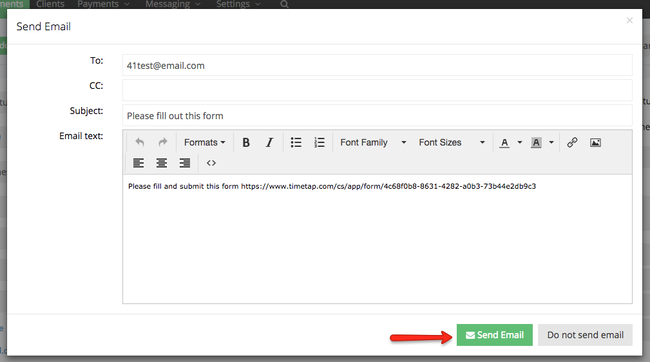
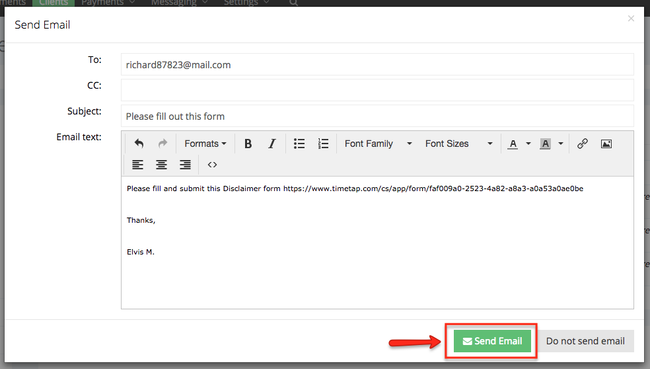
After you've selected the form and click the Send Form button, a new window will open. Here you will see a preview of the email you're sending to the client, this your opportunity to make changes to the email or add a note, click Send Email to send the email to the client:
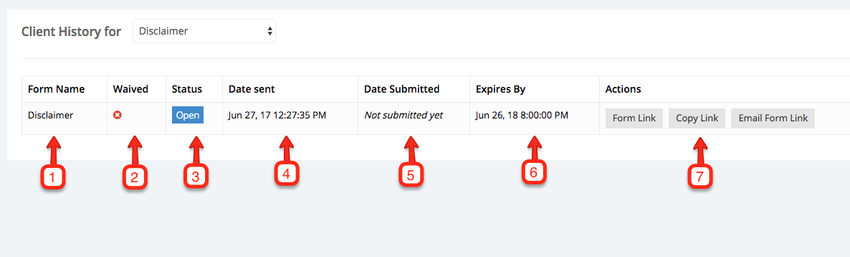
After the form has been sent, scroll down to the "Client History for" section an select the form that was sent to the client. The options in the dropdown :
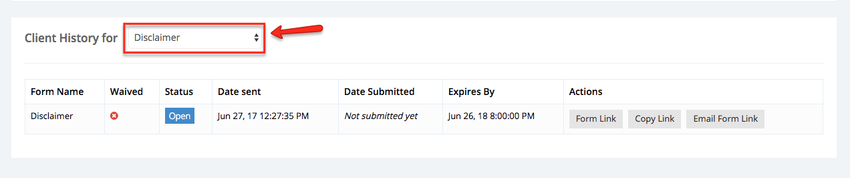
The information about this for the client will appear below:
- Form Name:This is the name you assigned to the form. This can be changed in the form's profile
- Waived:This column tells you whether the form has been waived or not. A green check mar in this column means that the form has been waived, the white x mark inside the red circle mean that the forma has not been waived.
- Status:This is where you can tell is the form is Open (not expired) or Expired
- Date Sent:This is the date when the form was sent to the client
- Date Submitted:This is the date when the form was completed and submitted by the client.
- Expires By:This is the date when the form expires.
- Actions:This is where you can be taken to the form's dedicated link (Form Link), copy the form's link (Copy Link), or Email the form's link to the client (Email Form Link)
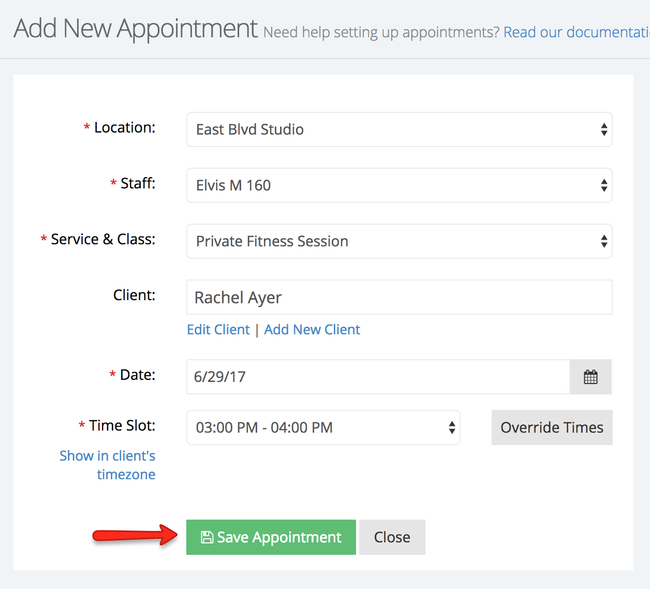
You can also email forms to clients when adding appointments for them. In the example below, I've chosen to add a new appointment for client Rachel Ayer, I will click the Save Appointment button to have the option to email the form to her:
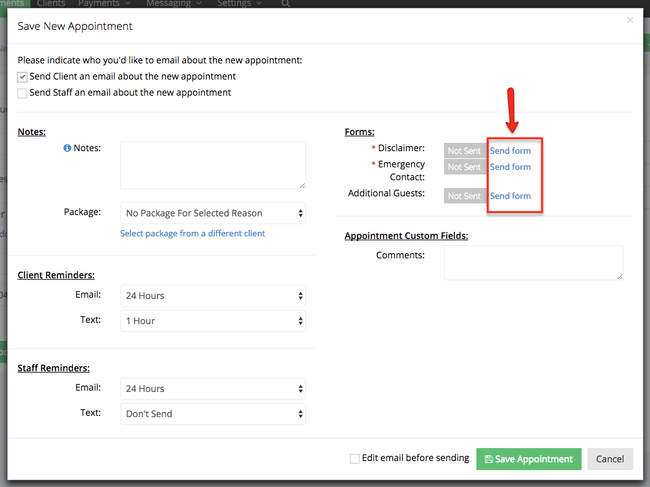
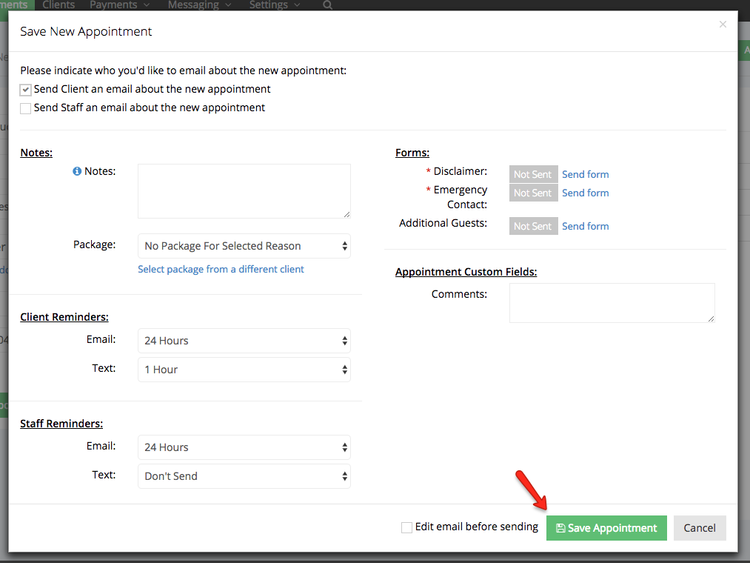
Once the Save Appointment button has been clicked the Save New Appointment window will appear, within this window you will see a list of all your forms, click any of the Send Form links next to your forms to select the form you want to send to the client:
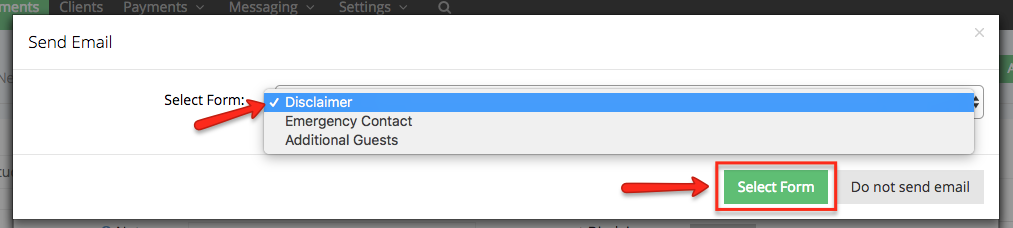
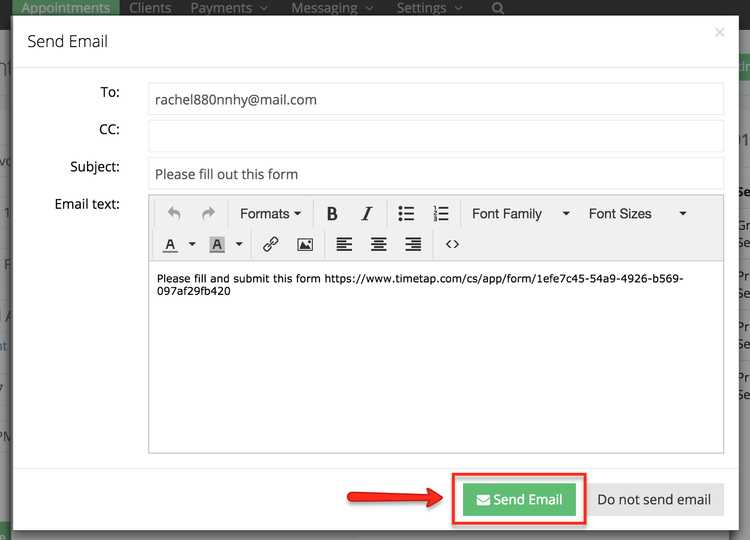
The Send Email window will appear where you can select the form you want to send, once the selection has been made click the Select Form button:
After you've selected the form and clicked the Select Form button, a new window will open. In this new window you will see a preview of the email you're sending to the client, this your opportunity to make changes to the email or add a note, click Send Email to send the email to the client:
After the email has been you will be brought back to the Save New Appointment screen where you can continue saving the appointment:
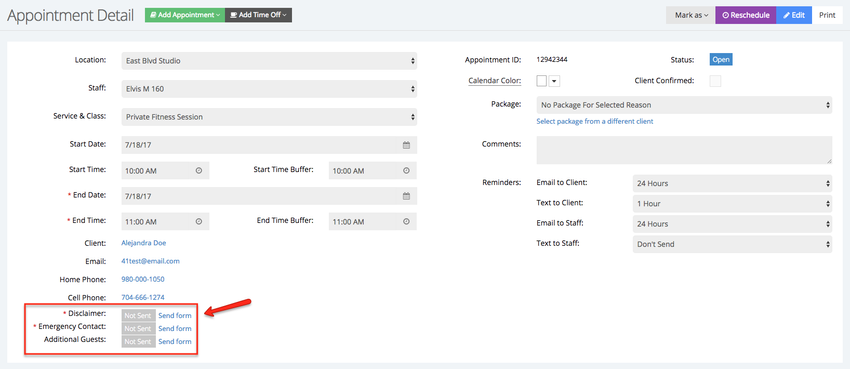
One more option to send the a form to the client to fill out is from the client's appointment details screen. Begin by going to the Appointment Details screen, under the client information you will see a list of all your forms (required and not required):
You can then click any of the Send form links next to any of the forms:
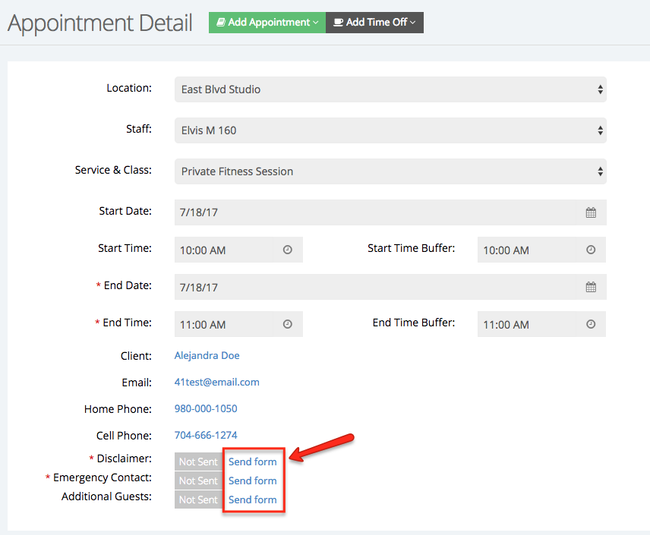
A new window will appear where you can select the form you want to email to the client, once you've made a selection click Send Form:
After you've selected the form and clicked the Select Form button, a new window will open. In this new window you will see a preview of the email you're sending to the client, this your opportunity to make changes to the email or add a note, click Send Email to send the email to the client: