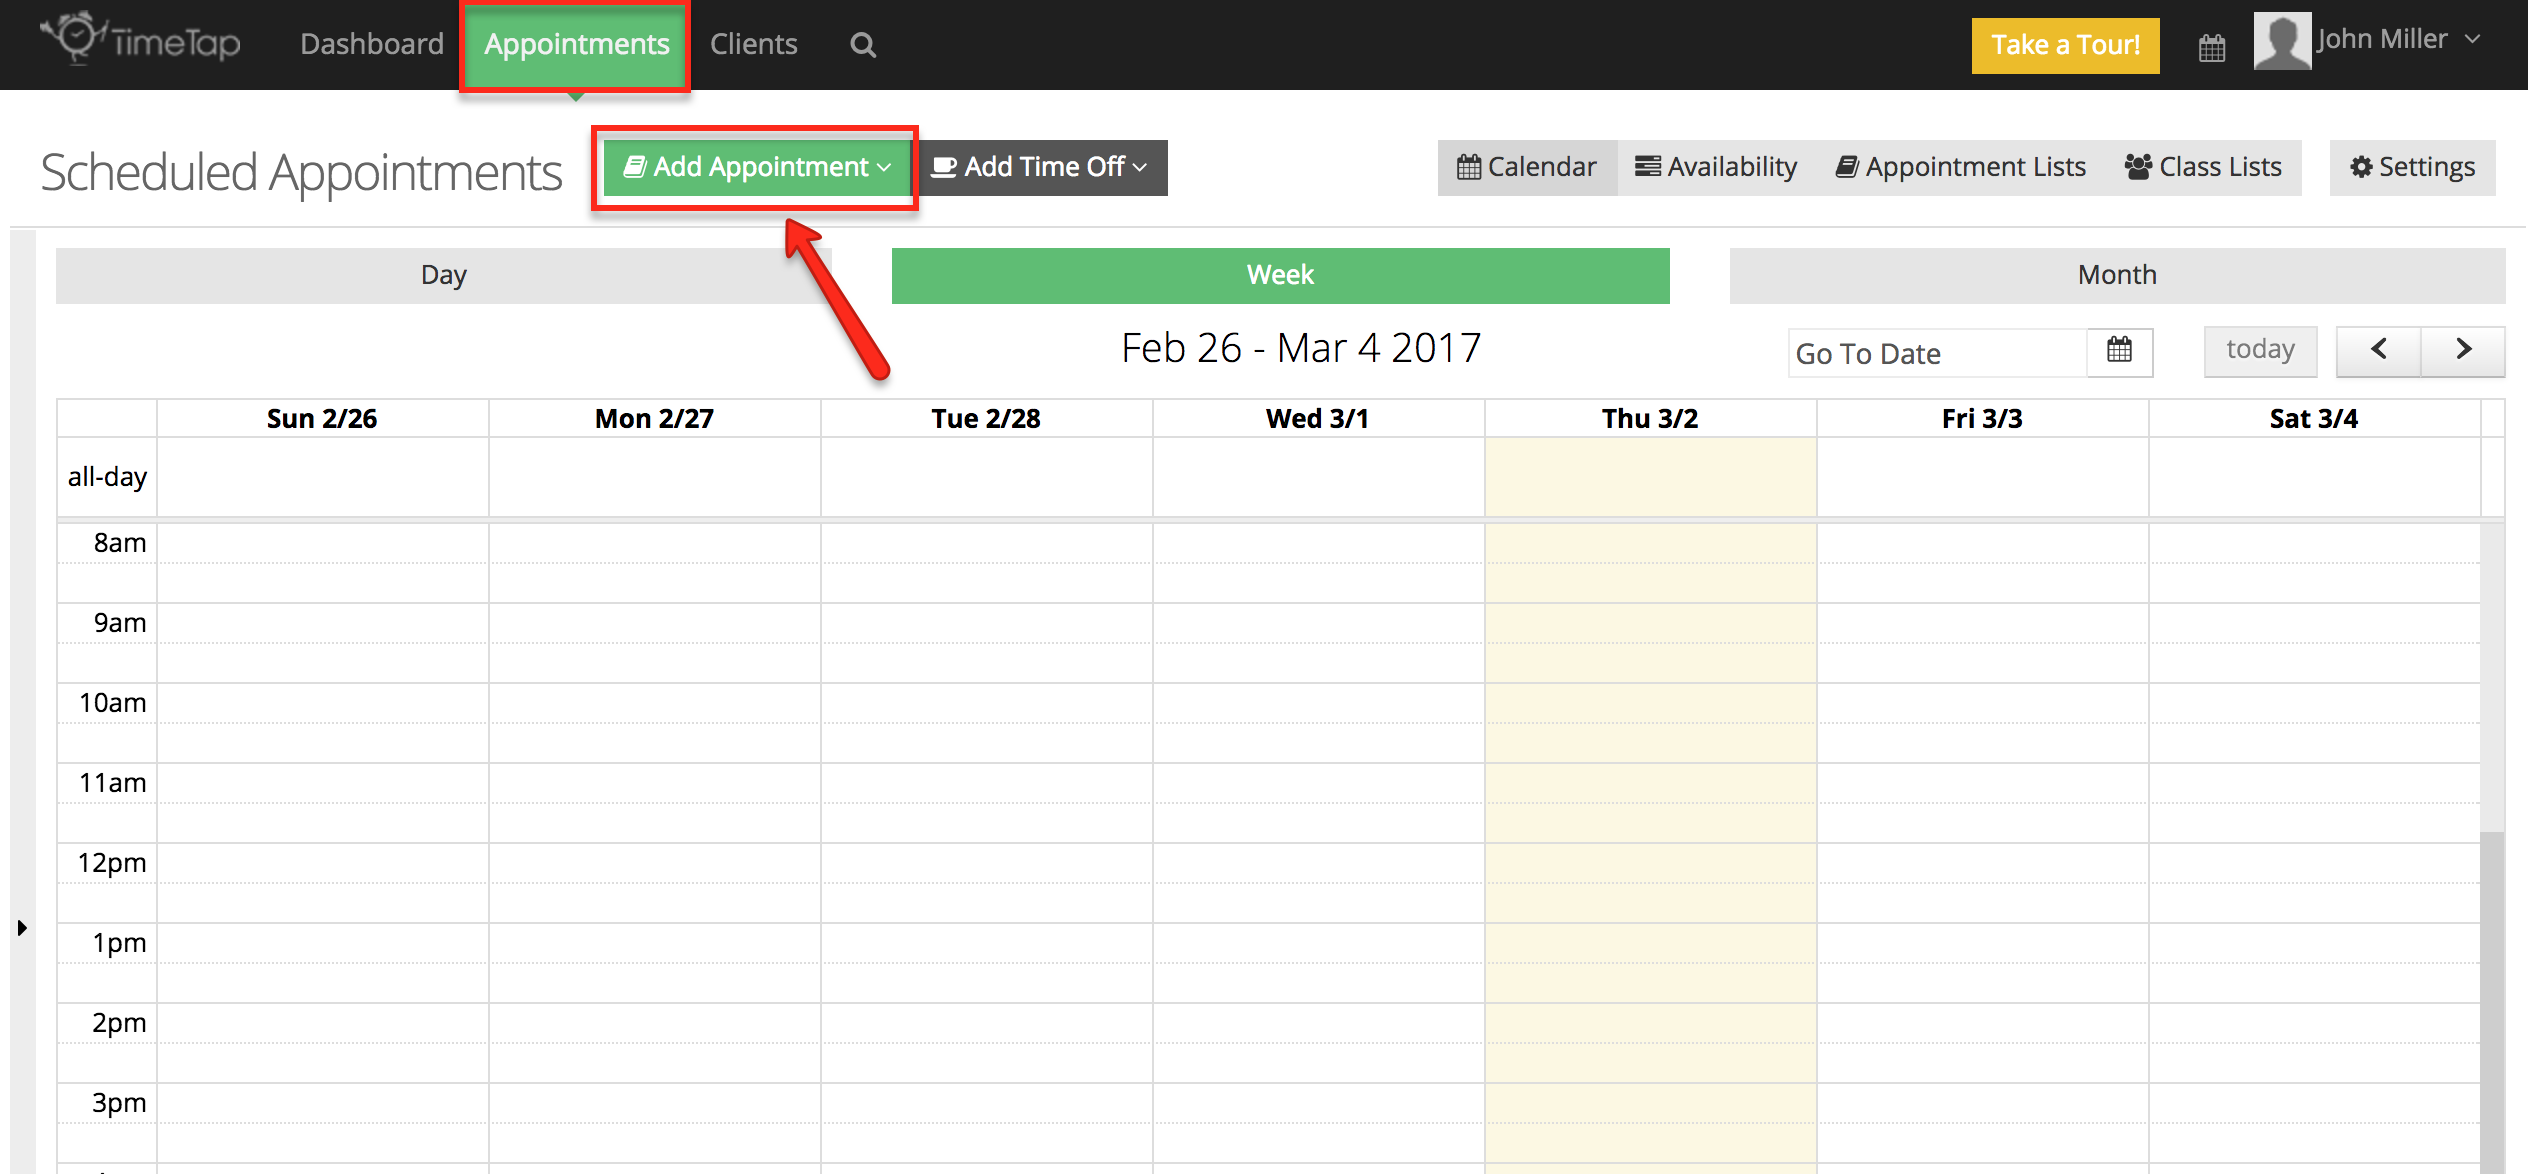
One way to get to You can always add a new appointment by pressing the "Add New Appointment" screen is to use the "Add Appointment" button found at the top right of the calendar underneath the main "Appointments" menu:

dropdown button from your Appointments page:
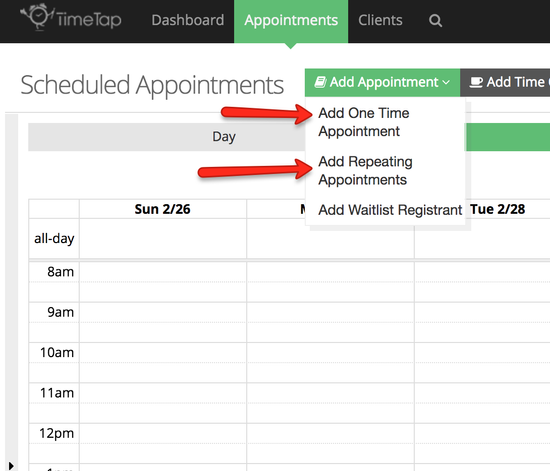
After clicking the green "Add Appointment" button, you'll be directed see you have the option to add either a One Time Appointment or a Repeating Appointment:
You can also get to the "Add New One Time Appointment" screen where you can set up either a One Time Appointment or a Recurring Appointment. By default, the selected date and time for the appointment will be the current date and time, although you can override this in finding the time for the appointment you're adding. This is different than when adding an appointment by clicking on a blank spot on the calendar (described below) as that will select the date and time that you clicked on in the Add New Appointment screen.

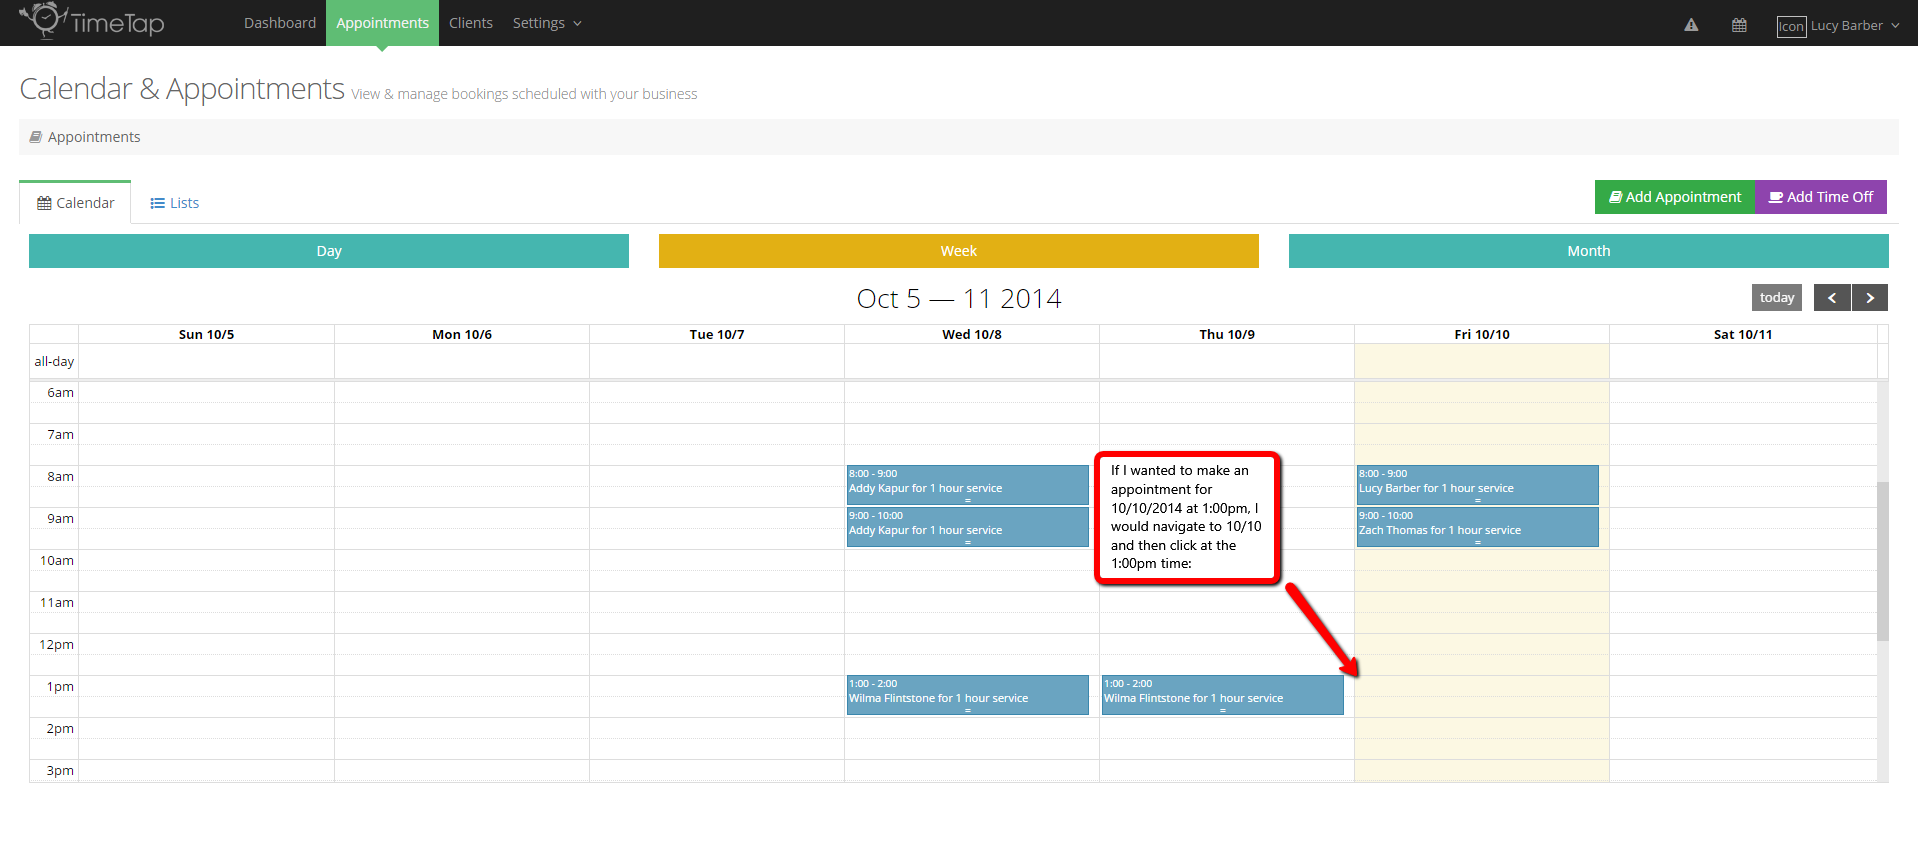
You can also get to the "Add New by scrolling through your calendar and clicking on a blank spot. To do this navigate to the main "Appointments" menu and make sure you have the "Calendar" tab open:
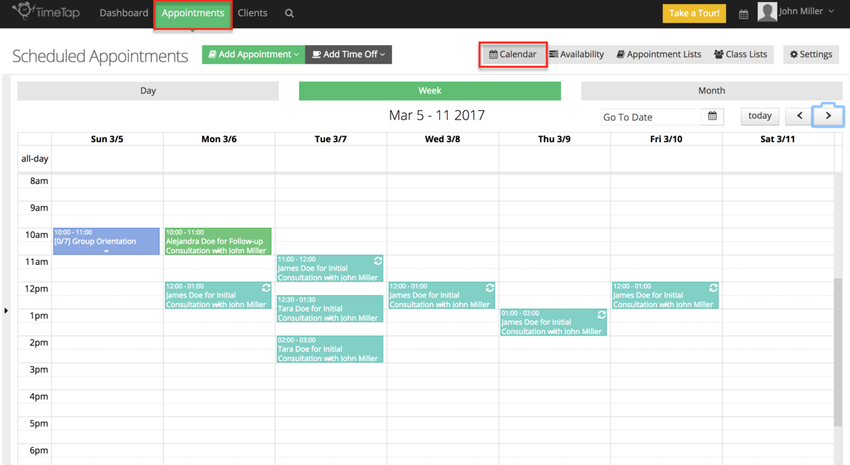
Find the date and time that you want to add an appointment for and click on it:
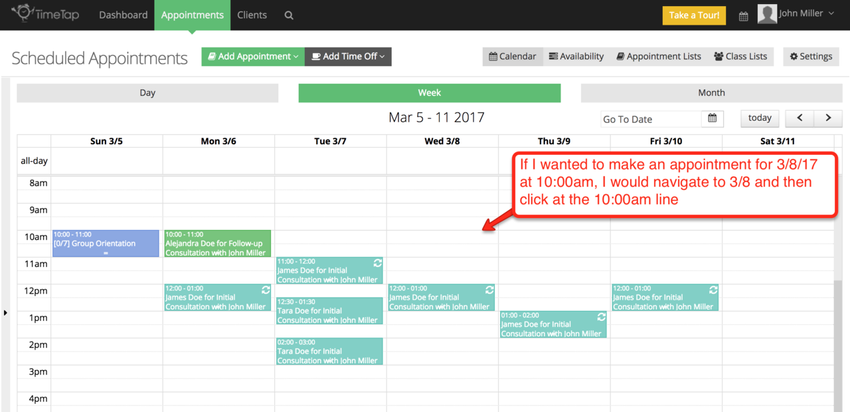
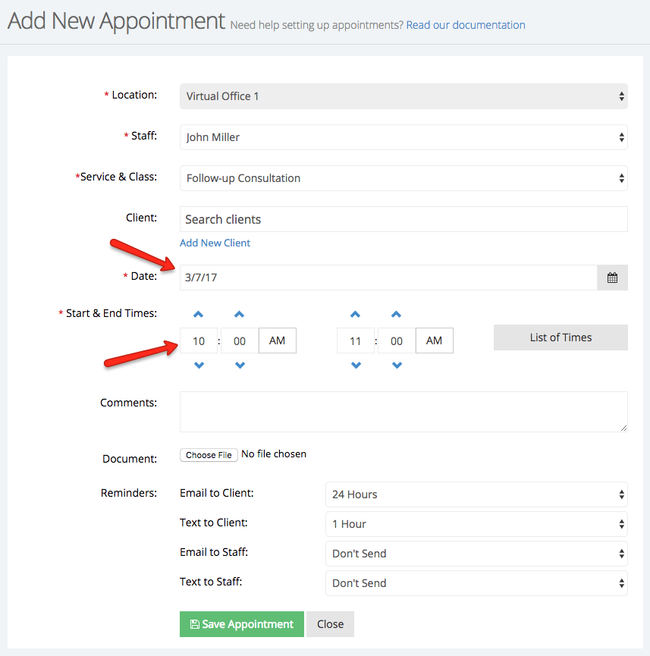
You'll see that when you enter into the Add New Appointment screen that the date and time are pre-filled with your selection from clicking on the calendar:
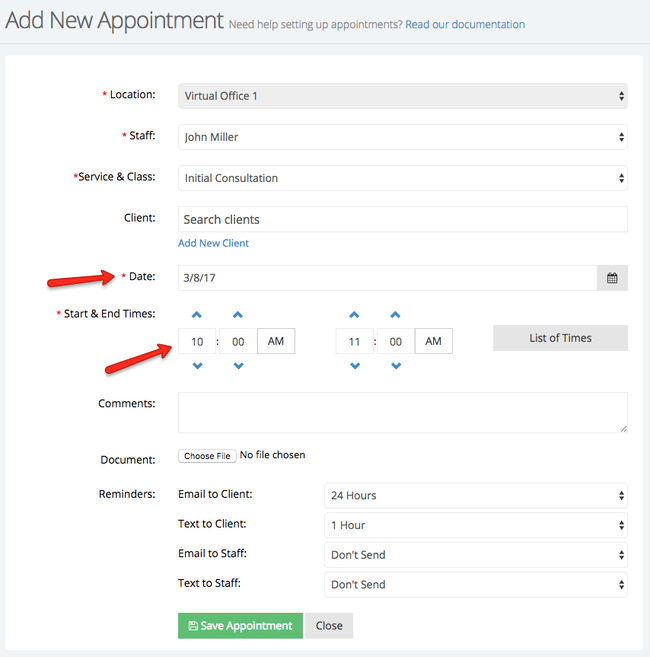
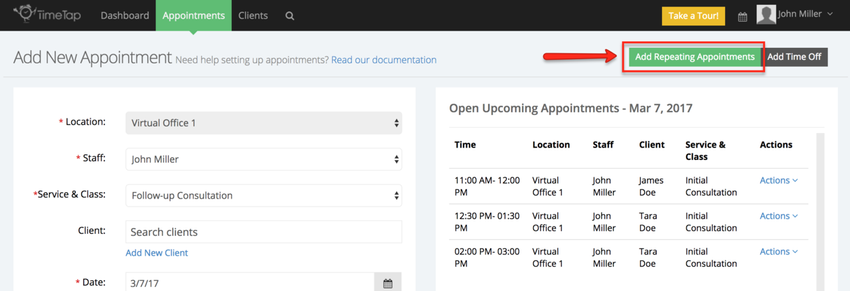
Once again, double clicking on the calendar is just going to get you to the Add One Time Appointment screen. If once in the screen to add one appointment you change your mind and now want to add repeating appointments click the "Add Repeating Appointments" button on the right side of the screen:

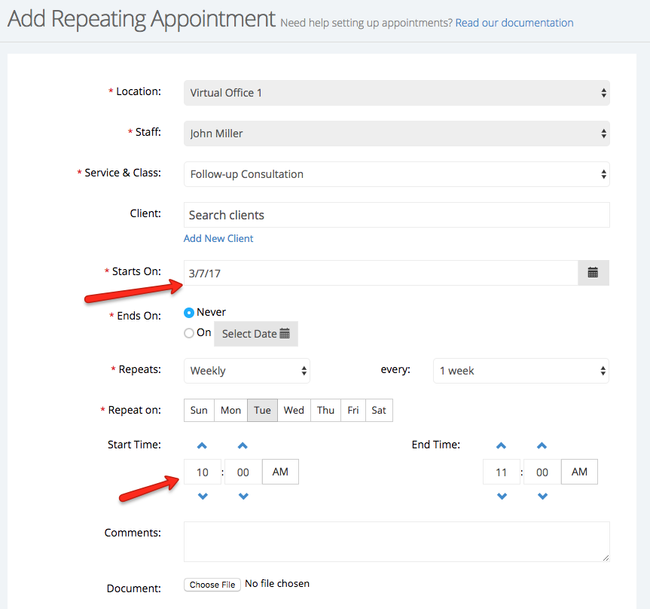
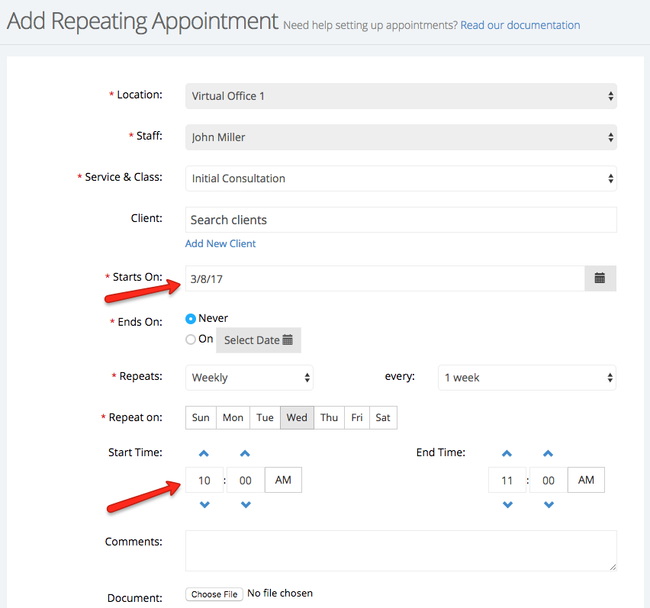
You'll see that when you enter into the Add Repeating Appointment screen that the date and time are pre-filled with your selection from the previous screen:
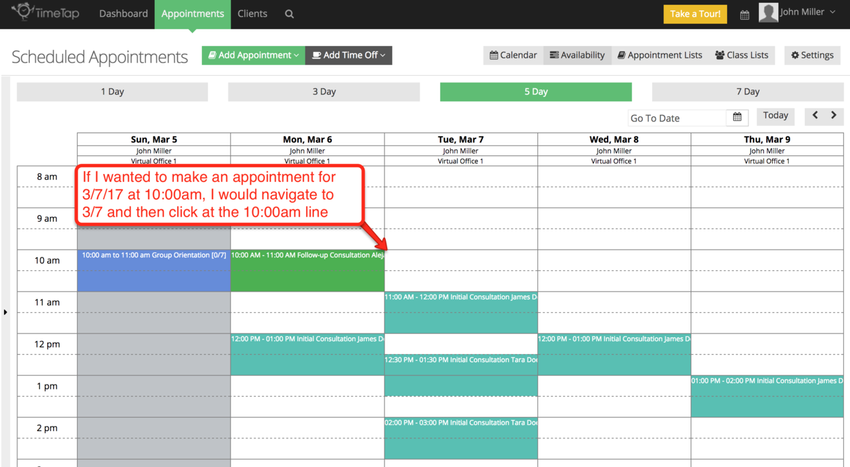
Just like in the Calendar view you can get to the "Add One Time Appointment" screen by scrolling through your calendar availability view and clicking on a blank spot. To do this navigate to the main "Appointments" menu and make sure you have the "CalendarAvailability" tab open:

Find the date and time that you want to add an appointment for and click on it:
. The white areas indicate your availability as entered in your Services Availability inside your profile, the greyed out area indicate the days where you do not have availability but you can still select those times and dates to add an appointment:
You'll see that when you enter into the Add New Appointment screen that the date and time are pre-filled with your selection from clicking on the calendar:

After you've entered into the Add New Appointment screen, you are all set to start adding One Time or Recurring appointments.
Once again, double clicking on the calendar is just going to get you to the Add One Time Appointment screen. If once in the screen to add one appointment you change your mind and now want to add repeating appointments click the "Add Repeating Appointments" button on the right side of the screen:
You'll see that when you enter into the Add Repeating Appointment screen that the date and time are pre-filled with your selection from the previous screen: