First we will focus in the Confirmation Panel Setting, to find where you can edit this message, go to Settings →Final Confirmation:

Click the blue "Edit" button in the top right of this section:

This will enable to edit the Confirmation Panel Settings:

You will then be able to change:
- Confirmation Panel Title
- Confirmation Panel Text
- Whether or not you want to display the "Book Again" button
- If you do want to display the button, what you want the button text to read as
- If you would rather have your “Book Again” button direct clients to a different web page instead of back through the scheduler, paste the URL of the target web page. If you would like the scheduler to automatically redirect clients to this URL, prefix the URL you entered with "redirect:" with no spaces.

With the confirmation panel text, you can include tags which summarize what the client just booked. You can learn more about using these tags on our Success Message Tags documentation page.
Once you've finished making the changes you want to make, click Save:

Click on the blue "Preview Scheduler" button in the top right of the Client Information page to open up your Mini Website and see how these changes take affect if you click through the client facing scheduler to book a test appointment with yourself:

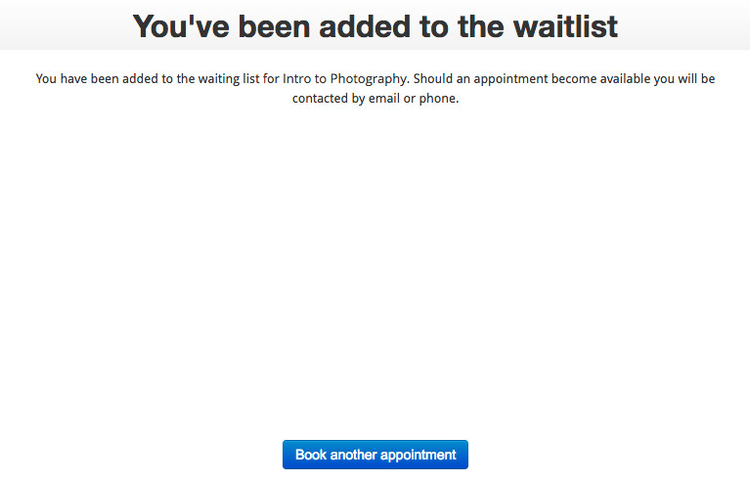
If you have a business account, you can use the wait list feature to let clients sign up for the waitlist for a class session or service once all seats in the class session are taken or the service is booked.
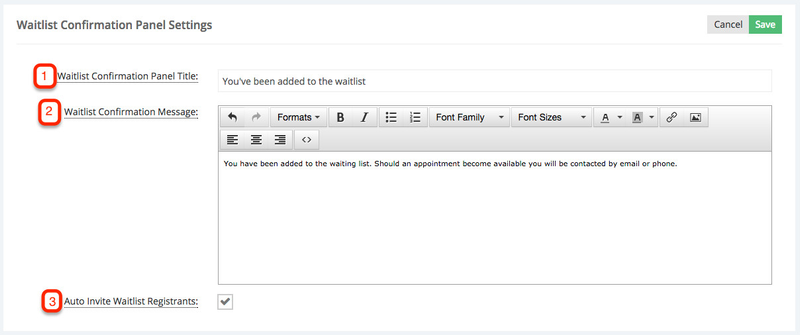
To make changes to the message displaying when a client has beed added to the waitlist, click the edit button next to Waitlist Confirmation Panel Settings:

You will then be able to change:
- Wailist Confirmation Panel Title,
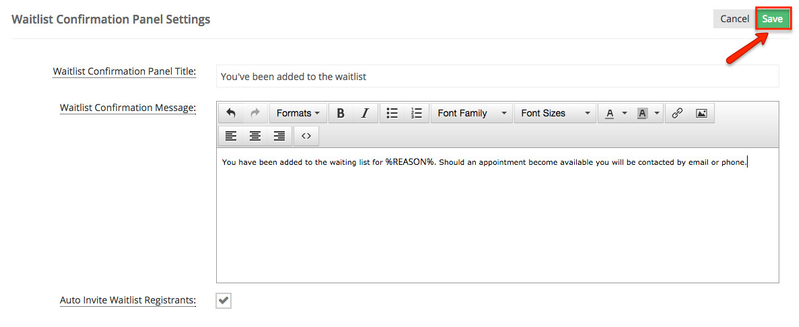
- Waitlist Confirmation Message
- Whether or not you want to invite Registrants via email to book an appointment or sign up for a class when a client cancels an appointment or session.
Once you've finished making the changes you want to make, click Save:
Click on the blue "Preview Scheduler" button in the top right of the Client Information page to open up your Mini Website and see how these changes take affect if you click through the client facing scheduler to book a test appointment with yourself: