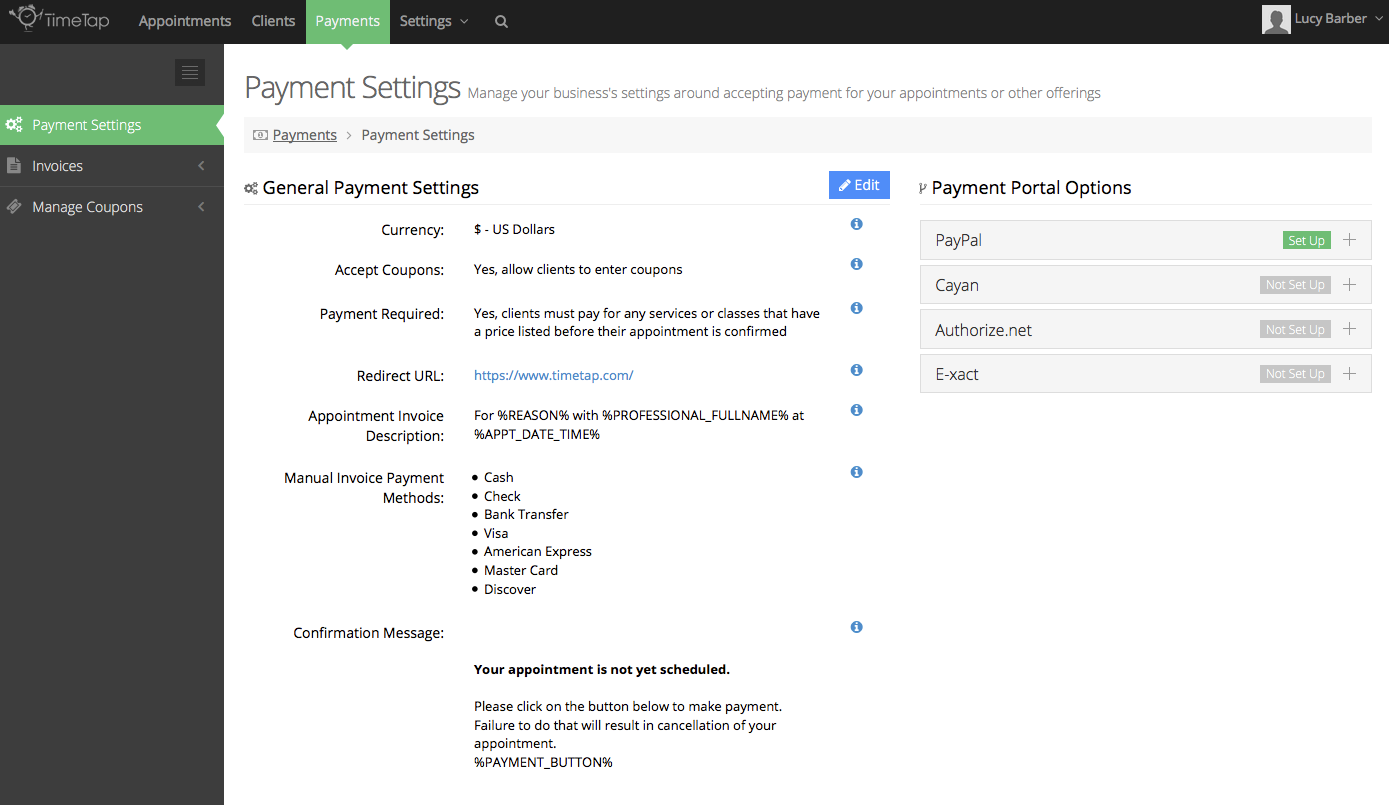
The Payments Settings page is where you'll configure the options around how your business wants to accept payments and manage invoices. This is also where you'll be able to set up any payment portal you might want to use for your business.
From the screenshot on the right, you'll see that there are several settings for accepting payments. Each of those settings are described in a section on this documentation page. Please click the link below to learn more about the setting you're interested in:
- Currency
- Accept Coupons
- Payment Required
- Redirect URL
- Appointment Invoice Description
- Manual Invoice Payment Methods
- Confirmation Message
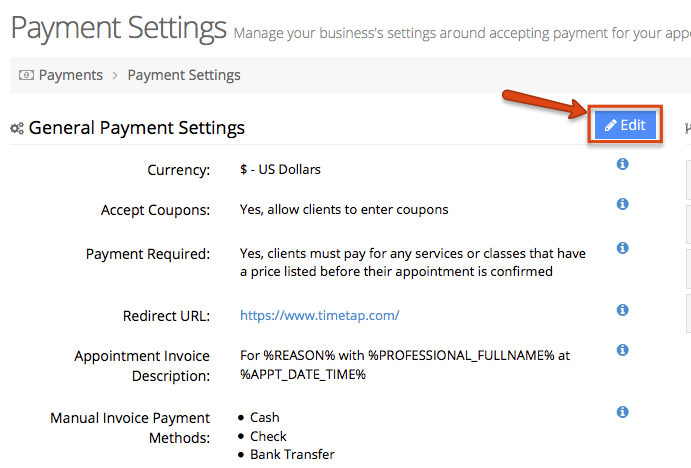
To edit any of these settings simply use the blue "Edit" button at the top of the page to toggle the screen into Edit mode.
You'll see on the right hand side of the Payment Settings page that there are a number of Payment Portals that you can set up on your account. Click on the links below to go to our documentation page where we describe how to set up each of those payment portals.
- PayPal
- Cayan
- Authorize.net
- E-xact
If you still have questions after reading through our documentation on Payment Settings, please feel free to reach out to our support team to ask them!
The first option under your General Payment Settings is the currency that your business bills in. To change this from the default value of US Dollars, click the blue Edit button in the top right of your payment settings view:
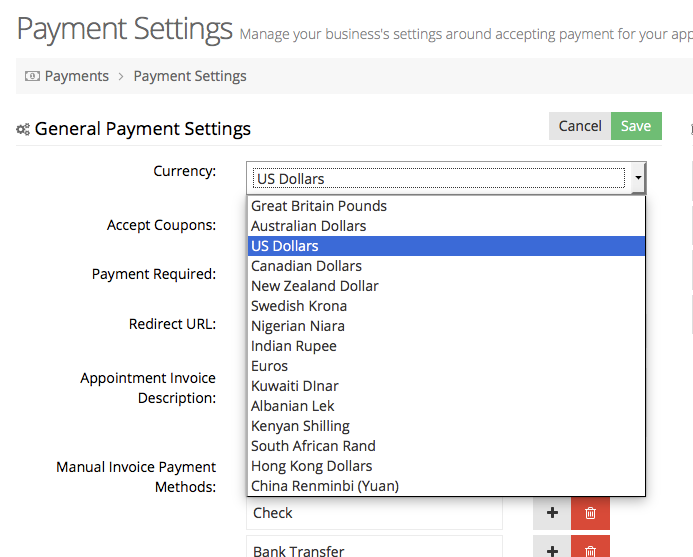
Next, use the dropdown to select the currency that best supports your business. If you don't see the currency your business bills in, please email us at support@timetap.com and we would be happy to add it for you:
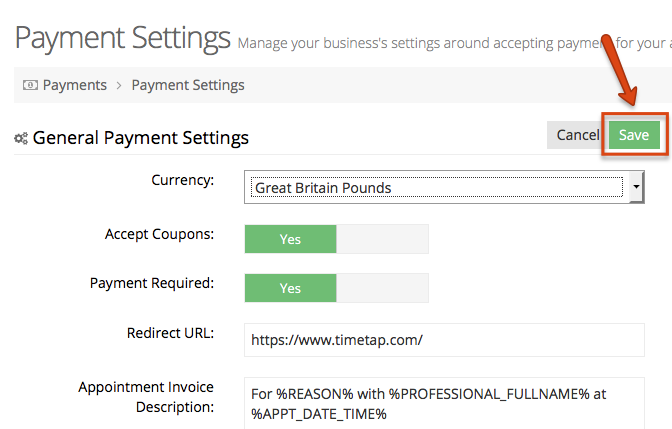
Once you've select the new value, click "Save" at the top of the screen:
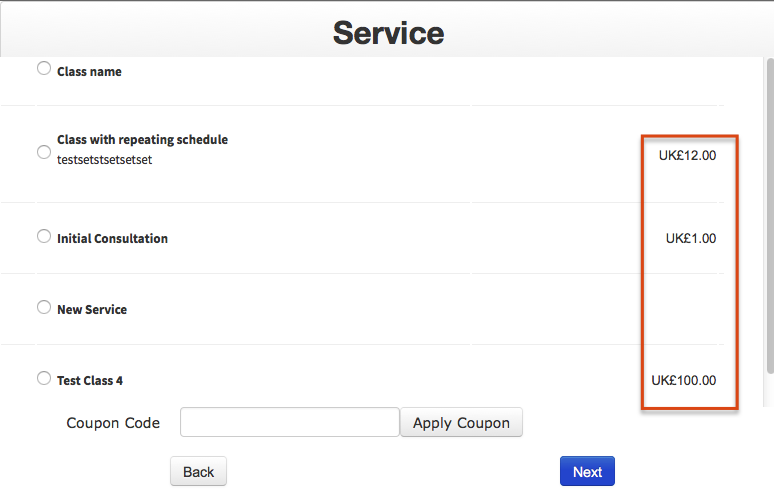
Now, if you go to your client facing scheduler, you'll see the prices listed for any of your services or classes that have a price on them will be in the new currency:
Also, once the appointment gets passed to your payment processing provider (like PayPal or Authorize.net) the price that is shown will also be in your business's currency rate.
Whether you have loyal clients you want to reward or are running a promotional deal on your services, allowing clients to enter coupon codes can be hugely beneficial for your business.
While you'll need to add your different coupons under Payments → Manage Coupons, you can turn on the ability for clients to enter in their own coupons under the payment settings menu. This means that as clients are choosing what service or class they want to book on your scheduler, they'll see the option to enter a coupon code and redeem whatever discount you applied to that coupon.
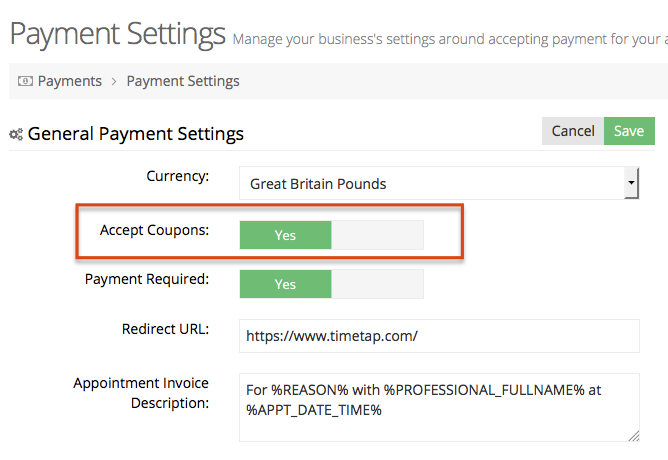
To change whether or not your accept coupons, click on the blue Edit button at the top of your general payment settings list:
You'll then be able to toggle on or off accepting coupons. If you select the Yes option you'll provide the field on the scheduling flow for clients to enter their own coupon code. If you select No the clients will not see this field (although you'll still be able to add coupons using TimeTap's back office when you're viewing an invoice).
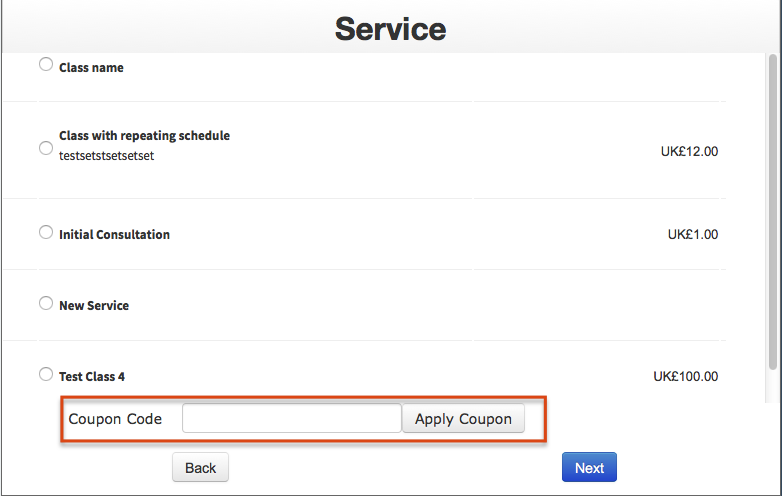
Once you've set it properly for your business, click the "Save" button in the top right of the view. If you set accept coupons to "Yes" then you'll now see the apply coupon field show on your scheduler flow:
Still have questions about what it means for your business to accept coupons upon scheduling? Feel free to contact our support team and we'd be happy to help!
Making payment required means that whenever a client books an appointment for a service or class that has a price or deposit amount associated with it, they will be prompted to pay that price or deposit amount before their appointment gets confirmed.
You can only make payment required if you have one of our payment processing providers set up. If you don't have a way to accept payments, then having payments required doesn't make a ton of sense!
This setting goes hand in hand with the Confirmation Message that shows a little further down the page. If you have payments marked as required, then you'd want the confirmation message to read something along the lines of "You appointment is not yet confirmed. Please submit payment". If you don't have payment marked as required (i.e. it's optional) then you'd want your confirmation message to read something along the lines of "Your appointment is confirmed! If you'd like to pay for the appointment now, please use the payment button below". We go into much greater detail on what messages make sense in the linked section of our documentation, but hopefully that gives you an idea of how Payment Required and the confirmation message go hand in hand.
If you have payment set to required, then a client has 90 minutes to submit payment before their appointment gets cancelled due to non payment. During that time we put their appointment in a holding cell so no one else can book that date and time out from underneath them. The appointment is stored as a "Pending" appointment and you'll find it under your Appointments → Appointment Lists → Pending tab view. You can override the automatic cancellation from that view by choose the button on the pending appointment's detail view to open the appointment without payment.
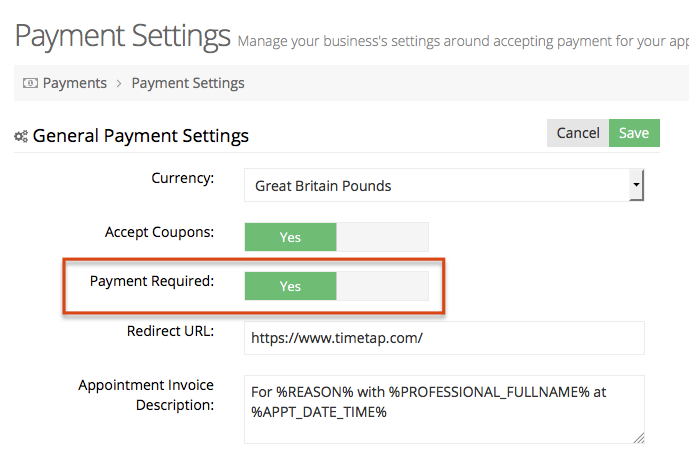
Now, to turn Payment Required on or off, click the "Edit" button at the top of your Payments → Payment Settings → General Payment Settings view:
Use the toggle switch to set whether "Yes, you want to make payments required upon booking" or "No, just provide the option to pay but don't make it mandatory":
As mentioned above, depending on what you have set for your payment required flag, you'll want to change your confirmation message at the bottom of this view to match the behavior you want from your clients. This confirmation message will only display when clients book a service or class that you have a price listed for and you have at least one payment portal set up on your account.
Once you've set the Payment Required flag to what you'd like it to be, click the "Save" button at the top to commit your changes.
The Confirmation Message that is on your Payments → Payment Settings → General Payment Settings view is the message that will display to clients if they have booked an appointment for a service or class that has a price or deposit amount associated with it and you, as a business, have a payment portal set up. If you do not have a payment portal set up or if the client books for a service or class that does not have a price or deposit amount listed, then they will see the appointment saved success message that is shown under Settings → Client Information → Confirmation Panel Settings.
The wording of this message should differ based on how you have Payment Required set. If you set Payment Required to "No" then your confirmation message should read something like the following:
Your appointment has been scheduled!
Staff: %STAFF_FULLNAME%
Reason: %REASON%
Time: %APPT_DATE_TIME%
If you would like to pay for your appointment now, please use the payment button below
%PAYMENT_BUTTON%
If you set Payment Required to Yes, then you'll want your confirmation message to clearly relay that payment at this time is required in order for their appointment to be confirmed. Should you set Payment Required to Yes, then your confirmation message should read something like this:
Your appointment is not yet confirmed.
We are holding your %REASON% appointment with %STAFF_FULLNAME% for:
%APPT_DATE_TIME%
In order to complete your reservation, you need to submit payment for this appointment now. Use the payment button below to submit payment in the amount of $%APPT_AMOUNT% to confirm your appointment
%PAYMENT_BUTTON%
No matter if you set Payment Required to Yes or Payment Required to No, you'll always want to make sure that you have the tag %PAYMENT_BUTTON% on your message somewhere if you want the button for client to click and pay for the appointment to show up at all. This is the only Tag that is different than what you can use in the appointment success message. For a full list of tags available to you for this confirmation message, please visit our Success Message Tags documentation.
To change your Confirmation Message when a service or class has a price and you have a payment portal set up, go to your Payments → Payment Settings → General Payment Settings and click the blue "Edit" button in the top right:
At the bottom of your General Payment Settings, you'll see the text editor for your confirmation message. Type in the message that you want your clients to see when they are booking an appointment for a service or a class with a price on it. Feel free to copy the messages that are written above if you'd like. Be sure to include the %PAYMENT_BUTTON% tag!
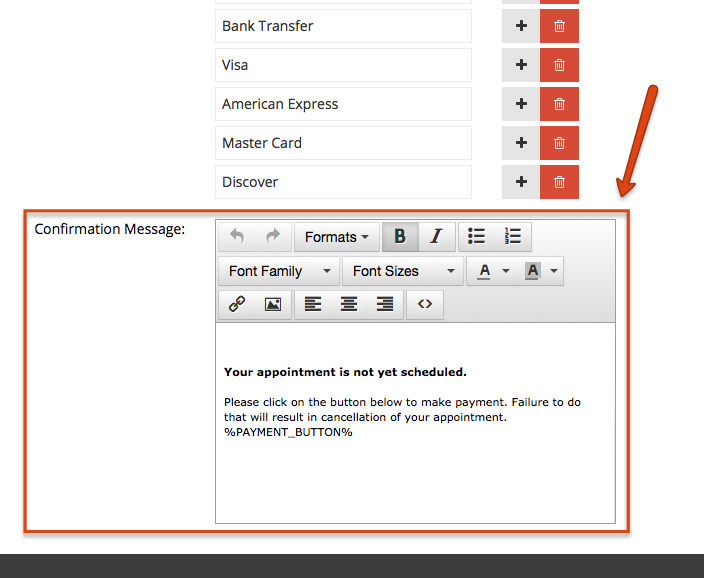
Once you're done typing in your new confirmation message, click the "Save" button at the top of the screen to commit your changes.
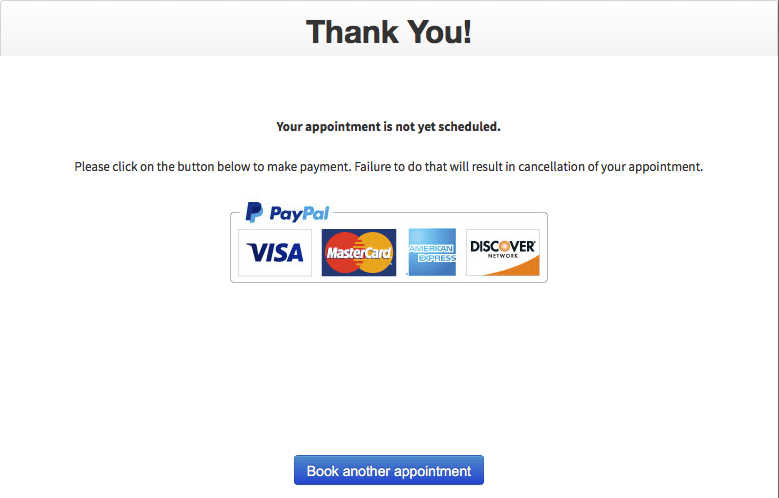
If you've set up a payment portal, you'll now see that the confirmation message that shows on the last page of the scheduling flow when you book an appointment for a service or class with a price or deposit amount listed is the confirmation message you saved here:
If you have any questions about editing the confirmation message, please feel free to get in contact with our support team!