TimeTap integrates with Square, the payment processing provider that made the iPhone card reader famous. TimeTap's integration is not directly with the iPhone card reader but rather through Square's online virtual terminal.
In this documentation we'll go through:
If you have any questions on how Square payments work after reading through this documentation, please reach out to our support team to let us know.
Once you have your Square Payment Portal setup and have configured your Payment Settings the way you'd like for them to be for your business, you are ready to start taking payments upon booking.
You'll want to make sure that the services, classes and/or courses that clients can book with you have a price listed for them. You can check this out under Settings > Services & Classes:
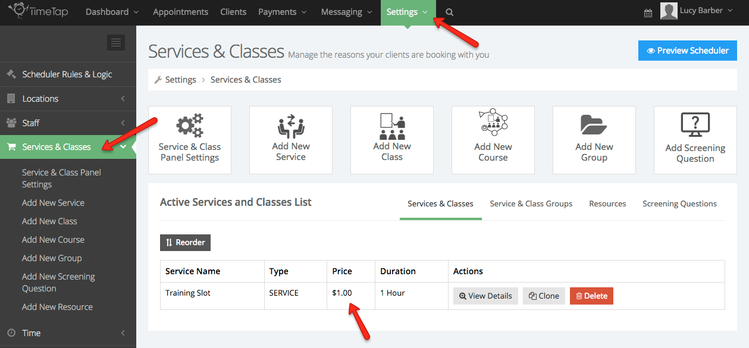
To add or change the prices for your appointment reasons, just click the "View Details" button next to the service, class, or course in this list and then click on that reason's "Payments" section. From there you can configure the reason's price and/or deposit amount. Learn more about that here.
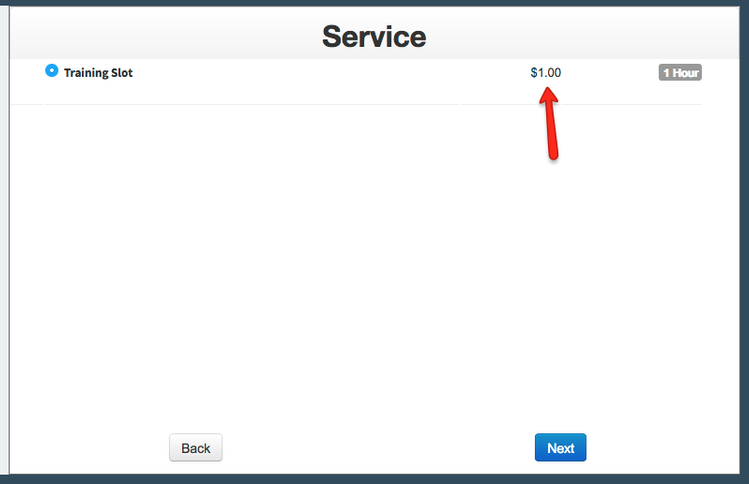
Now that the setup steps are out of the way, when your client goes to book with you on your scheduler, they will see the price of the reason they are booking when they are selecting their appointment type:
They'll then select their date and time, and enter their information. On the confirmation page, they'll see they confirmation title and confirmation message that you've configured in your Payment Settings:
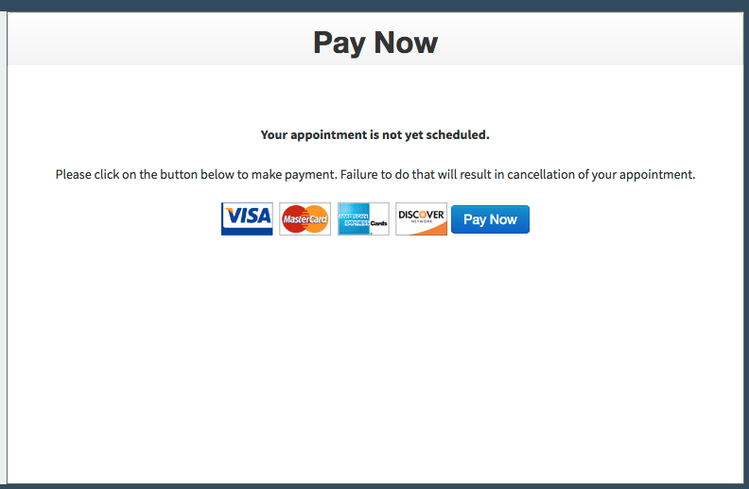
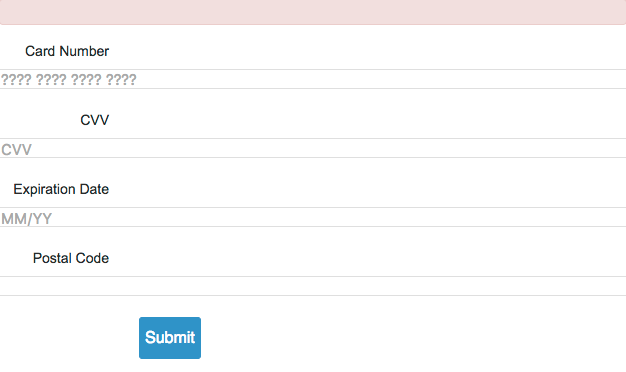
If the client clicks "Pay Now" they'll be connected to your Square account's payment gateway where they can enter in the card information and click submit to submit their payment for the appointment:
Once they've submitted their payment, you'll see the invoice attached to their appointment in TimeTap:
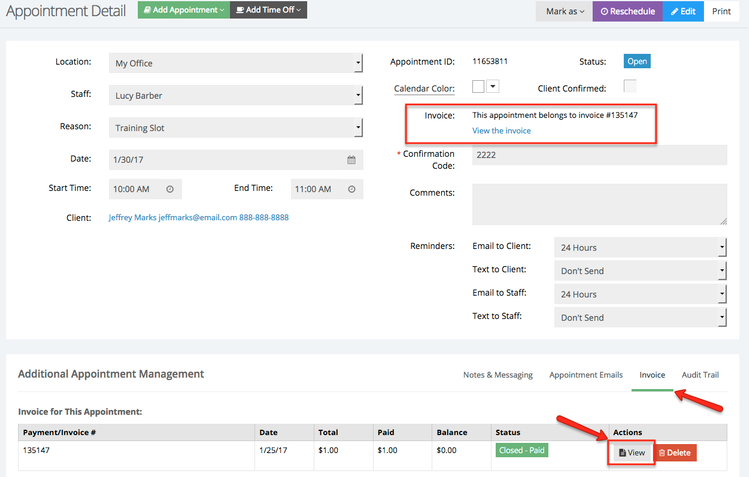
If you view that invoice, you'll see the payment confirmation at the bottom of that invoice detail page:
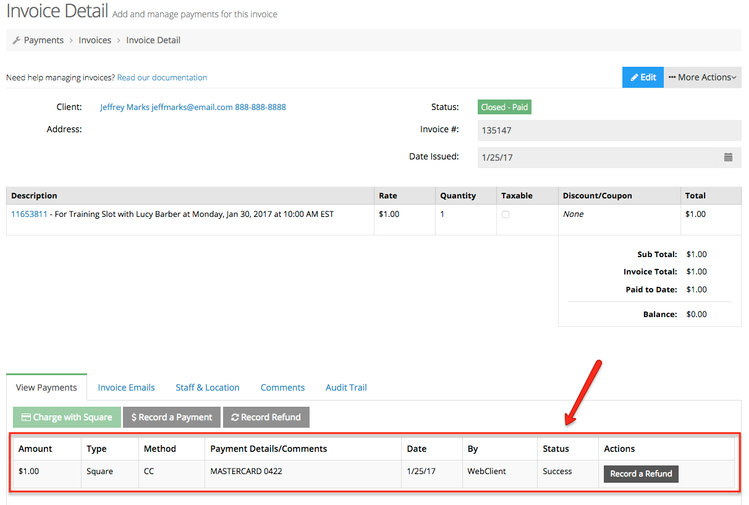
If the full price of the invoice has been paid the invoice will be in Closed status. If you end up refunding this in Square, you can always record that refund in TimeTap by clicking the "Record a Refund" button next to the payment in TimeTap's Invoice Detail screen.
If you no longer want Square to be connected to your TimeTap account, you'll need to deactivate the integration and disconnect Square from TimeTap. You'll need to do this in TimeTap under Payments > Payment Settings as well as within your Square account.
In TimeTap, go to Payments > Payment Settings and expand the Square portal on the right:

Underneath the Square portal, click the red "Disconnect" button:
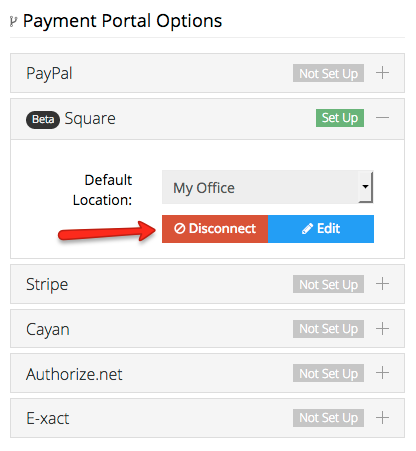
That will remove all the Square credentials from your TimeTap account.
Now, login to your Square account and remove TimeTap's access under your Square Apps screen. We've written documentation on how to do this below, but Square's interface may change so we recommend looking at their documentation on removing apps as well (currently found here (albeit that link could change too)).
As of 1/25/2017, here are the steps you would take:
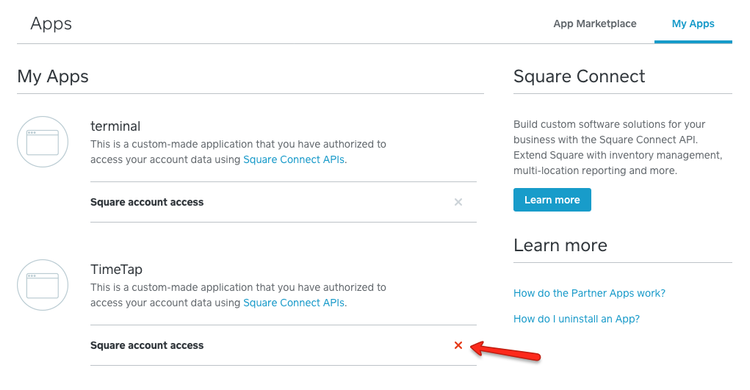
Login to Square and go to Apps > My Apps:
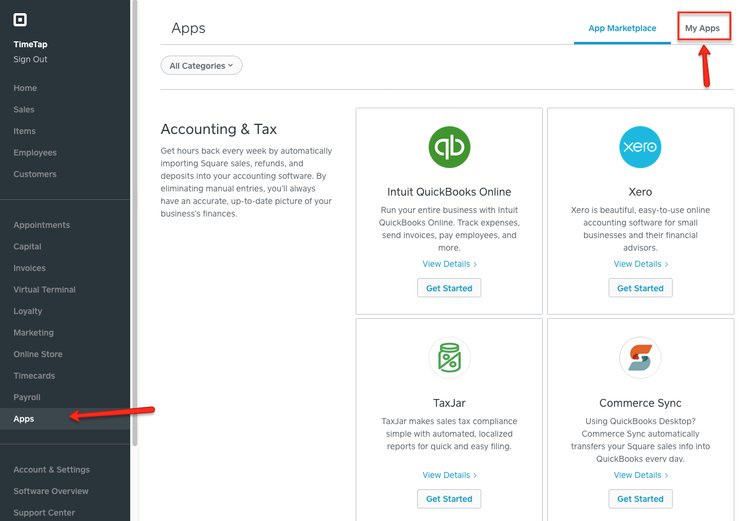
Under My Apps, find TimeTap and click the red "x" to the right of "Square Account Access":
You should be all disconnected at this point.