| Anchor | ||||
|---|---|---|---|---|
|
The Quick Setup Guide is composed of multiple areas which will help you:
- Setup Staff to accept appointments
- Setup Locations where you offer appointments
- Add your different appointment types
- Book test appointments
- Customize the web address for your scheduling page
- Customize the look & feel of your scheduling page
- Add clients to your account
- Setup payment portal on your account
- Schedule your onboarding call with TimeTap Coach
The Setup Guide is the first screen you will see right after you've completed/skip the setup wizard. As you move around TimeTap you can always go back to the setup guide by clicking Dashboard > Quick Setup Guide:
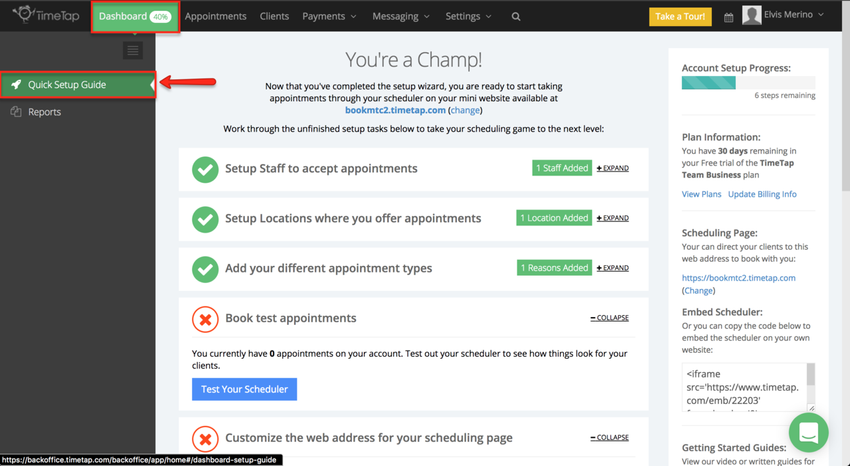
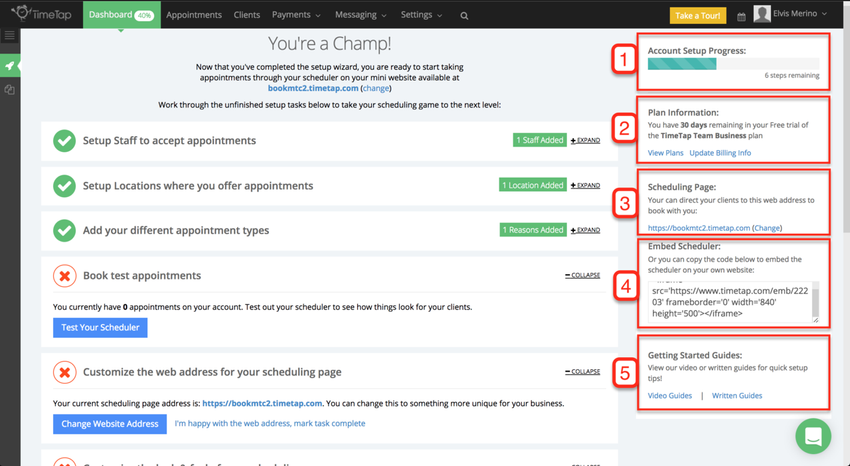
First we'll cover the sections on the left side of the screen:
- Account Setup Progress: This progress bar tells you how many more you have left to complete the basic setup guide. You're able to take appointments right after your complete the setup wizard, but if you would like to customize TimeTap to fit the needs of your business we recommend you take time to go through each step of the setup guide
- Plan Information: This sections tells you how many days you have left in your free 30 day trail and the TimeTap plan you've selected
- Scheduling Page: This the URL where your client can book appointments with you using the mini-website. You can update this URL to match your business' branding.
- Embed Scheduler: This code can be use to embed your business' scheduler in your website and allow your client to book appointments without having to leave your site
- Getting Started Guide: Here you will find a link to our video guide on how to get started using TimeTap and if you prefer you can click the link go to our written getting started guide
If you're in a Team Professional or Team Business Plan you can add multiple staff member to be available to take appointments. Within the Quick Setup Guide you will see a section called "Setup Staff to accept appointments", at a quick glance you will be able to see how many staff members you've added to your account. To see the option to a new staff member click the Expand link to the right of this section:

With the section expanded you will be able to see the names of the staff you already added as well as the name of the location(s) where they are able to accept appointments. To add a new staff member click the "Add More Staff" button:

You will then be taken to the Add New Staff flow, which we have covered in a different page:

After you've added a new staff you will be prompted to add his/her service availability, but just in case you forgot or decided to this later, you can either go to the staff's profile > Service Availability, or from the Quick Setup Guide, expand the "Setup Staff to accept appointments" section and click the link "Why don't you add some?" next to the staff's name who doesn't have any:

After you click the link you will be redirected to the Add Staff Availability flow:

Lastly, if you need to make changes to a staff's profile you can go to their profile, Settings > Staff > View Details, or you can click the link "Edit Profile" next to their name under the "Setup Staff to accept appointments":

After clicking this link you will be redirected to this staff's profile where you can make the necessary changes:
