Skip to end of metadata
Go to start of metadata

You are viewing an old version of this page. View the current version.

Compare with Current View Page History

« Previous Version 3 Next »

Appointments will be added to your schedule either by you, the Staff person, while logged into TimeTap's Back Office or by your client who is using your scheduler.

You can add appointments underneath the main "Appointments" menu. Once appointments are added you can find them on your calendar or navigate to your lists and find them by status.

On this documentation page, we'll cover the two ways you can add appointments using TimeTap's Back Office

These two ways are applicable only to the staff person who is logging into the Back Office. Clients are able to schedule their own appointments by visiting your scheduler that's on your mini website and/or embedded on your own website.


Adding Appointments with the Add Appointment button:

You can always add a new appointment by pressing the "Add Appointment" dropdown button from your Appointments page:


After clicking the green "Add Appointment" button, you'll see you have the option to add either a One Time Appointment or a Repeating Appointment


Adding Appointments by clicking on the Calendar:

You can also get to the "Add One Time Appointment" screen by scrolling through your calendar and clicking on a blank spot. To do this navigate to the main "Appointments" menu and make sure you have the "Calendar" tab open:


Find the date and time that you want to add an appointment for and click on it:


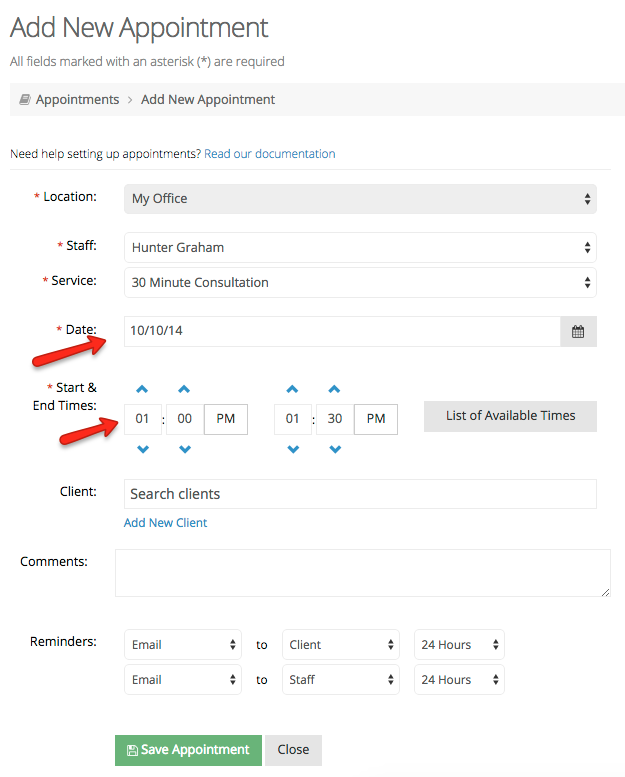
You'll see that when you enter into the Add New Appointment screen that the date and time are pre-filled with your selection from clicking on the calendar:

Once again, double clicking on the calendar is just going to get you to the Add One Time Appointment screen. You would need to press the "Add New Appointment " button at the top of the Appointments page to get to the Add Repeating Appointment screen.

  • No labels