Changing Appointment Time/Date and sending Participant an email
Everything in life is subject to change, and in order to keep up with that, so are your TimeTap Appointments. This documentation will familiarize you with the changes you can make to the Appointments you create in TimeTap. You will also see how easy it is to notify the Participants involved in those meetings of the changes. There are a few methods for editing an appointment; this documentation will cover editing an Appointment by using the Drag and Drop method and editing from the Appointment Detail.
Drag and Drop
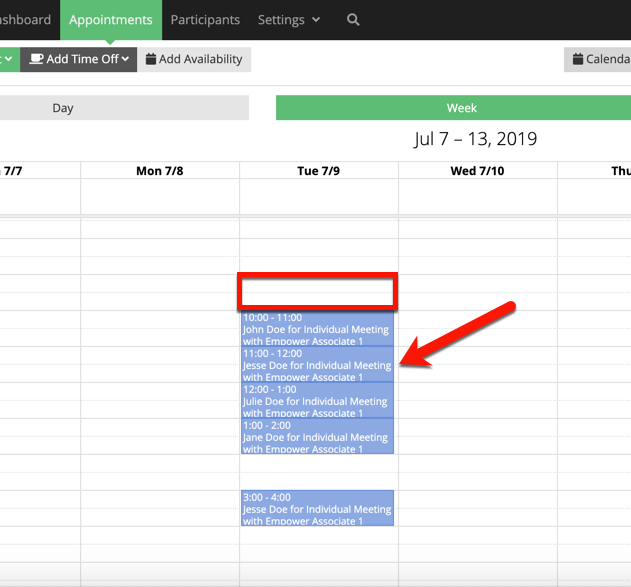
You can edit an Appointment time and date right from your Calendar view of your Appointments tab. This is the quickest (and most visual) way to edit the time and date of an appointment. Click anywhere on the Appointment, and while holding down your mouse, drag it to the new time slot that you want the Appointment to be in.
For example, the Empower Associate has an Appointment with Jesse Doe at 9am on Tuesday 7/9, and it needs to be moved later the same day. There is a blank space on the calendar at 11am, so we'll move it there.
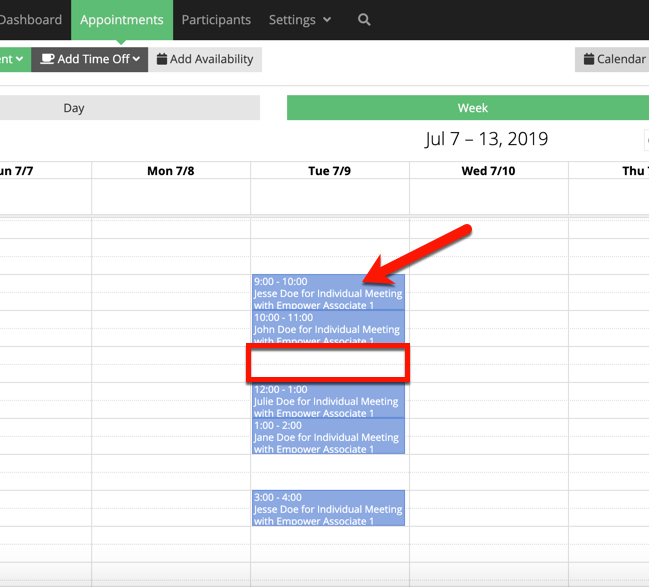
Click anywhere on the Appointment, and while holding down your mouse, drag the Appointment to the new time slot that you want the Appointment to be in. You'll notice that the time shown on the Appointment block will update as you drag it around your calendar.
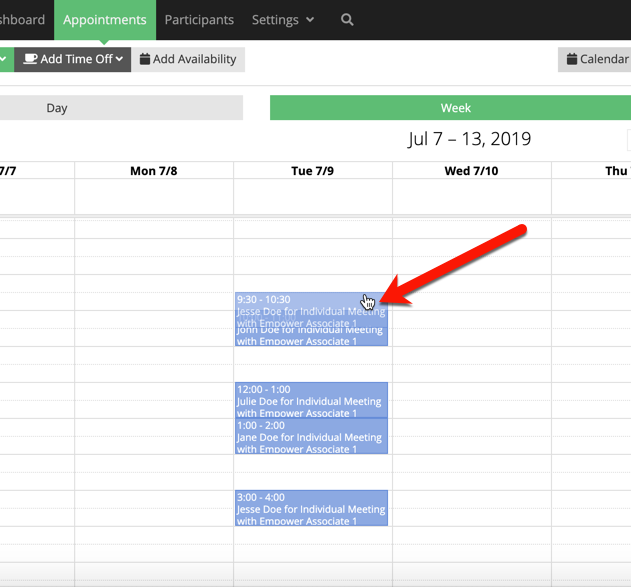
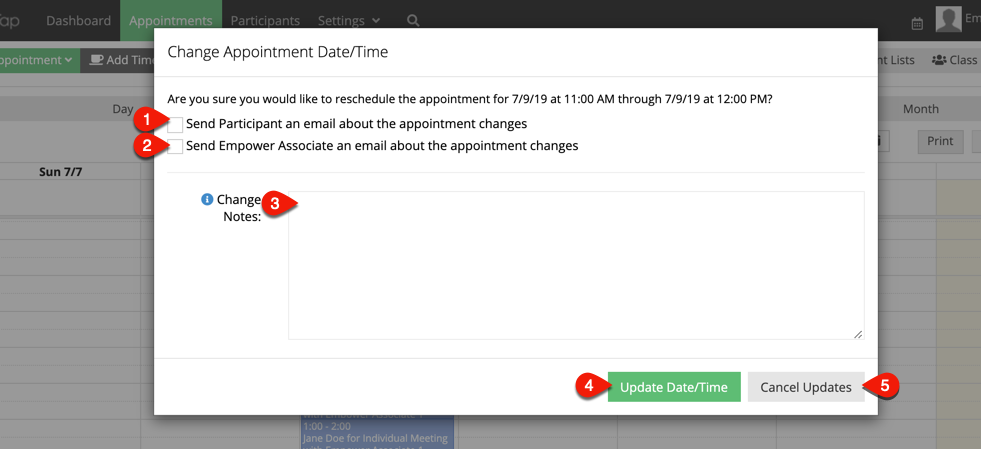
When you have placed the Appointment in the space on your calendar that you want to change it to, release your mouse. A dialogue box will appear asking if you're sure you want to make this change, and it will confirm the date and time to which you have moved the Appointment. This dialogue box also offers some more helpful options:
- Selecting this box indicates that you want to send the Participant of this Appointment an email regarding the change.
- Selecting this box allows you to send yourself (or the Empower Associate whose Appointment you're editing) an email update regarding the change.
- If you would like to add a note regarding the change, you can type that note here and this text will be inserted into the email send about the Appointment change.
- After choosing the email options you want, click Update Date/Time in order to save the changes.
- If you meant to move the Appointment to a different time (or you didn't mean to drag it at all), clicking Cancel Updates will avoid a change being recorded.
Once you have confirmed the update, you will see the blank space where the Appointment was and the Appointment now filling its new time slot on your calendar in TimeTap, as well as on any synced calendars.
Editing from the Appointment Detail
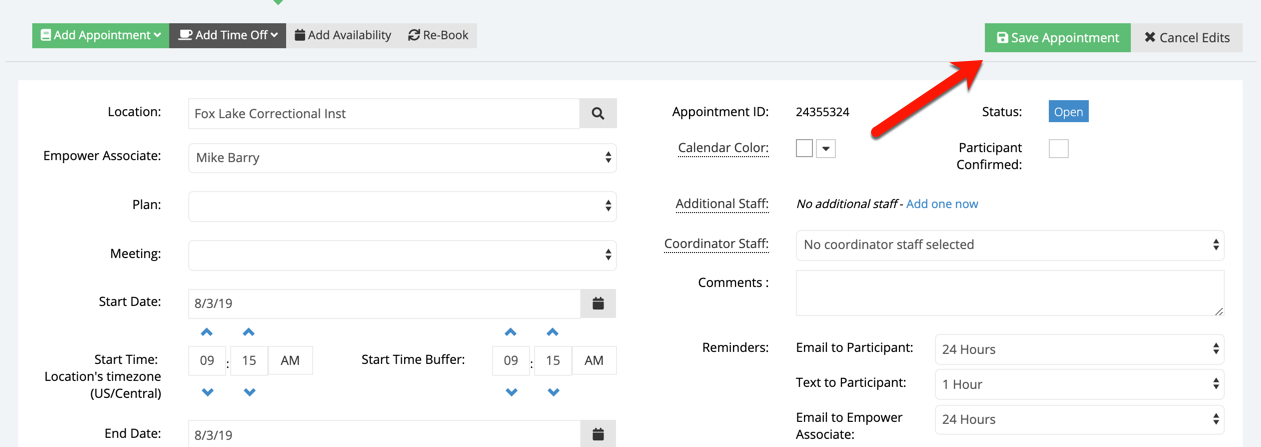
If you navigate to an Appointment Detail screen, you'll notice along the top there is a blue "Edit" button.
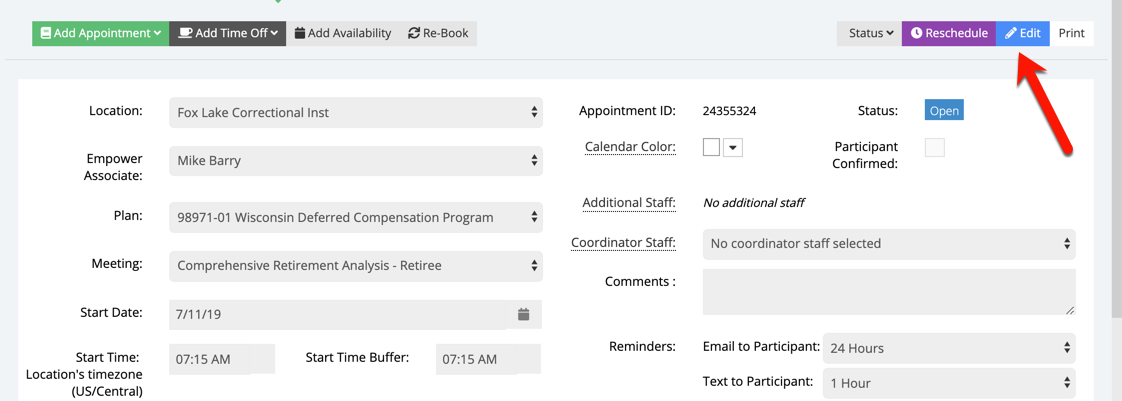
By clicking Edit, you'll turn the disabled fields into editable fields that you can change. These editable fields include:
- Location
- Empower Associate
- Plan
- Meeting
- Start Date
- Start Time
- End Date
- End Time
- Coordinator Staff
- Comments
- Reminders
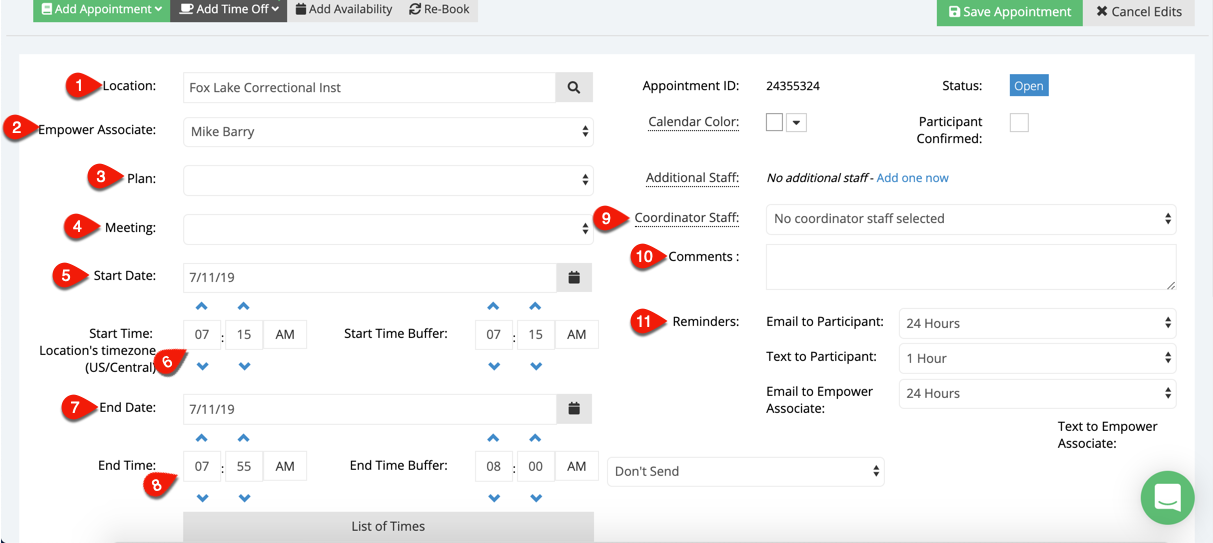
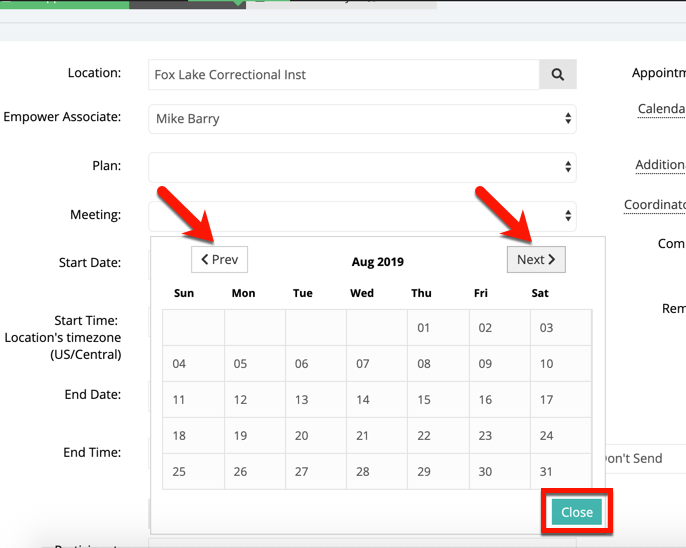
You can make changes to the appointment start date by clicking the calendar icon to the right of the field and choosing a new date from the calendar that appears. You can switch month views by using the "Prev" and "Next" buttons. Clicking the date you want to move the Appointment to will exit you from the pop-up calendar. If you decide not to change the date, simply click Close.
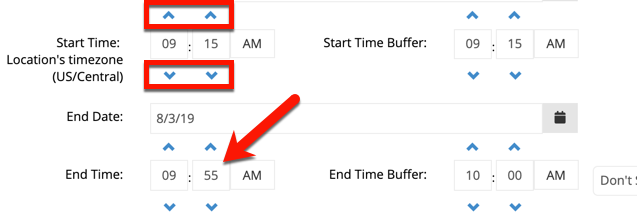
Make changes to the time of the Appointment by using the arrow buttons above and below the time, or simply typing the new time into the text field. You will notice that the end time of the Appointment will automatically update based on the duration of the meeting type for which the Appointment is set. However, you can also edit this to be longer or shorter if needed.
Once you have made all the edits that you need, click Save Appointment.
Upon clicking Save Appointment, you'll be prompted to confirm that you want to make these changes. The dialogue box that appears also offers some helpful options:
- Selecting this box indicates that you want to send the Participant of this Appointment an email regarding the change.
- Selecting this box allows you to send yourself (or the Empower Associate whose Appointment you're editing) an email update regarding the change.
- If you would like to add a note regarding the change, you can type that note here and this text will be inserted into the email send about the Appointment change.
- After choosing the email options you want, click Save Changes in order to save the changes.
- If you need to make another change, clicking Cancel will avoid a change being recorded yet.
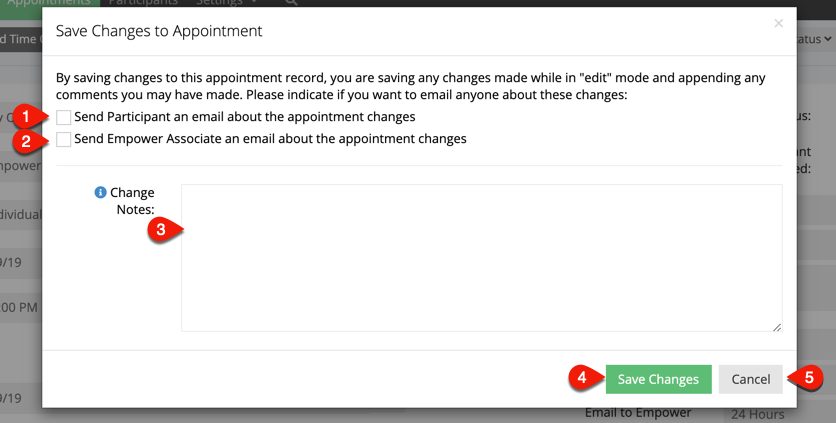
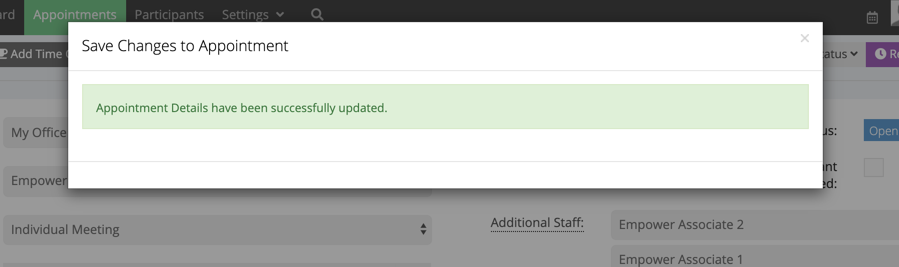
If you have opted to save, you will receive confirmation that these changes have been saved to your Appointment.