Gadgets
- Elvis Merino (Unlicensed)
- Joel Kearney
- Meaghan O'Reilly (Unlicensed)
Gadgets monitor different aspects of your business's daily or weekly traffic at a location or popularity of services over a given time period. You can choose to build your gadgets based on Location or Staff. From there you will define which locations, staff and services/classes to show in your gadgets's agenda.
This feature is great for running a quick report on your company and gives you the option to pick how many days within the week ahead you want to view at once.
In this section we will cover the following:
How To Add A Gadget
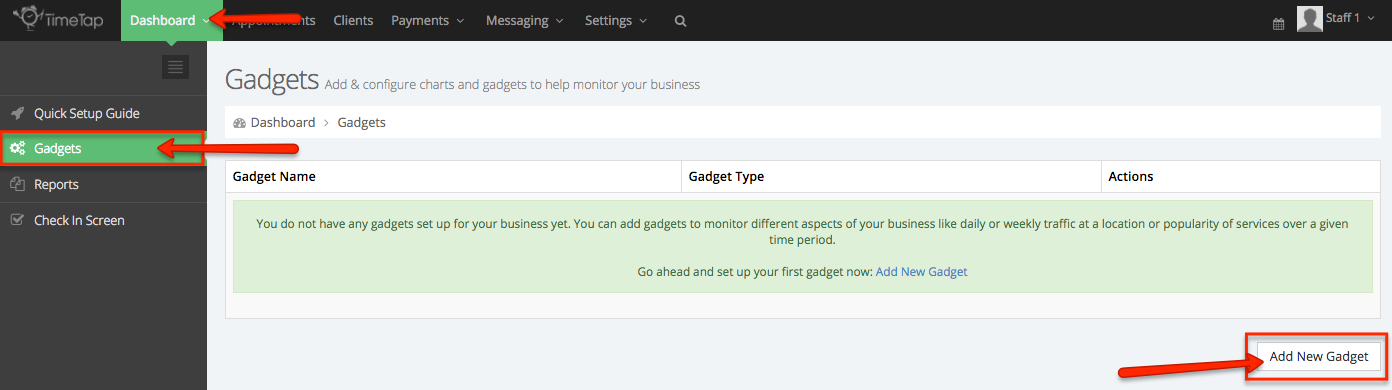
As an example lets say that you are interested in seeing a weekly snapshot of what is happening with all of your locations, staff and services. To add a new gadget to your account you will go to the Dashboard, click on Gadgets and click Add New Gadget.
How To Build a Gadget
Once you click Add New Gadget it is now time to define the information you are looking to pull to your agenda:
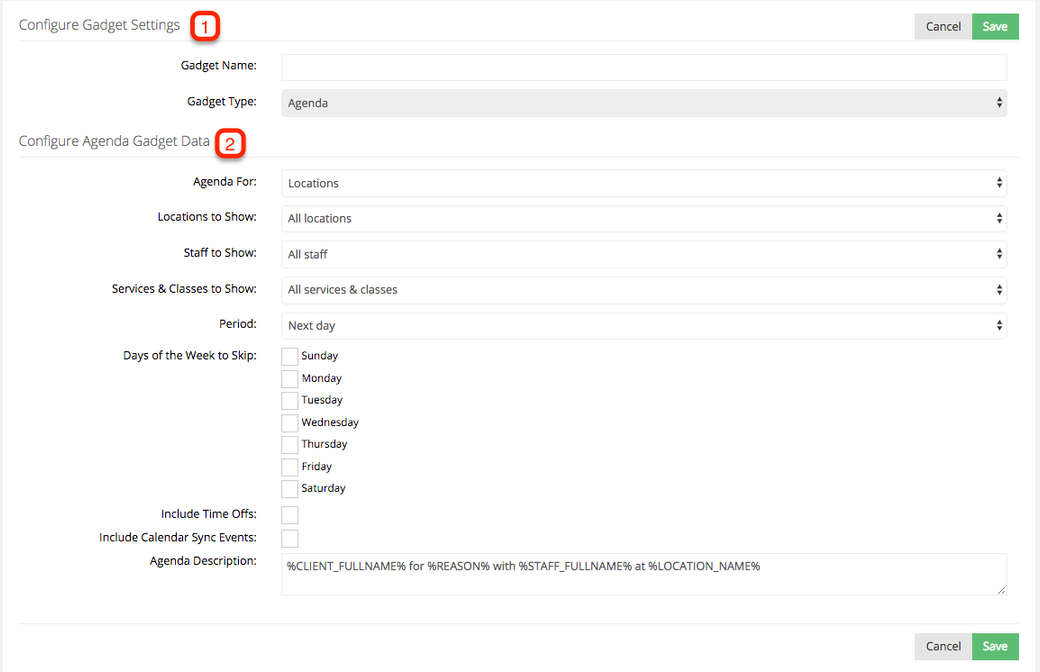
- Configure Gadget Settings:
- Gadget Name - Internal use only. This will be the identifier for you and your staff on what information this gadget is giving. For example if you wanted to see how many appointments you have for a specific service each week you can name it "Weekly Appointments - Service Name"
- Gadget Type - the gadget type will automatically set to Agenda as that is the only view the gadget currently gives.
- Configure Agenda Gadget Data:
- Agenda For - Are you basing this agenda off of locations or Staff
- Locations to show - Select the location(s) you would like to include on your agenda
- Staff to show - Select the staff(s) you would like to include on your agenda
- Services and Classes to show - select the services and classes you would like to include on your agenda
- Period - Select the period of time you want to show in agenda (next day, next 2 days, next 3 days, next 4 days, next 5 days, etc)
- Days of the Week to Skip - in this section you will check the box next to any days you do not want to include in your agenda. If your appointments on Wednesdays don't apply to this agenda you can opt out on pulling that data.
- Include TimeF Offs - This would come in handy if you are looking to see where you staff will be for the week. Check this box to show your staff members time offs within the day(s)/week agenda
- Include Calendar Sync Events - Since a lot of accounts sync external calendars to their TimeTap accounts by checking the include calendar sync box you are also pulling those events for your staff, location and service to the agenda you are creating. This will give you a bigger picture of what is coming in the week ahead.
- Agenda Description - In this section you can use Tags to pull specific information into your Gadget's agenda. In the screenshot above you will see the infomration that we are pulling is the clients full name, the service/class they are signed up for, the staff members assigned to that appointment and the name of the location. We use these same tags in our Appointment Templates, to see other tags you are able to add to the Agenda's Description Click Here.
In our example for our Weekly Appointments Gadget we will name it "Weekly Appointments - IA" (Initial Appointment) and select the agenda for Staff, we want to show all locations and staff but we are only looking to see information regarding our service called "Initial Appointment" (IA). Since we are looking to see our weekly breakdown for where and when our staff is offering the service Initial Appointments we will select the next 7 days for the period of time and we will not skip any days. We will also include calendar sync'd events in case we have any appointments on our google calendar. Once we are done defining our agenda we will click save.

How to View a Gadget's Agenda
Now that we have saved our Agenda it is now saved under Dashboard > Gadgets. Under actions we will click view to run the gadget and edit to make any changes to the items defined in the agenda. If you want to remove the gadget from your account you will click the delete call to action button.

In our example we are looking to see the weekly appointments based on staff which will only including the servie Initial Appointment. When we click view we will see that information depicted over the next 7 days.
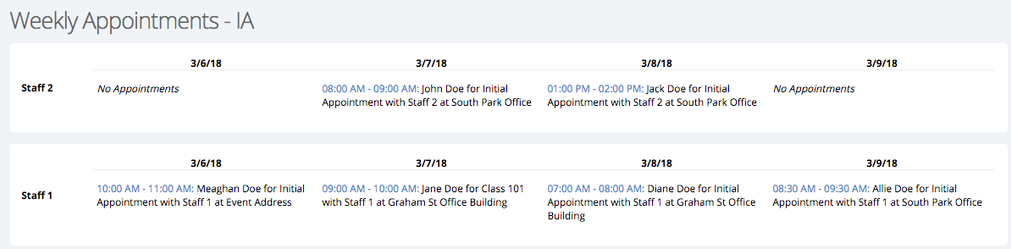
When we run the report you will see each staff member listed with the appointments broken down by date:
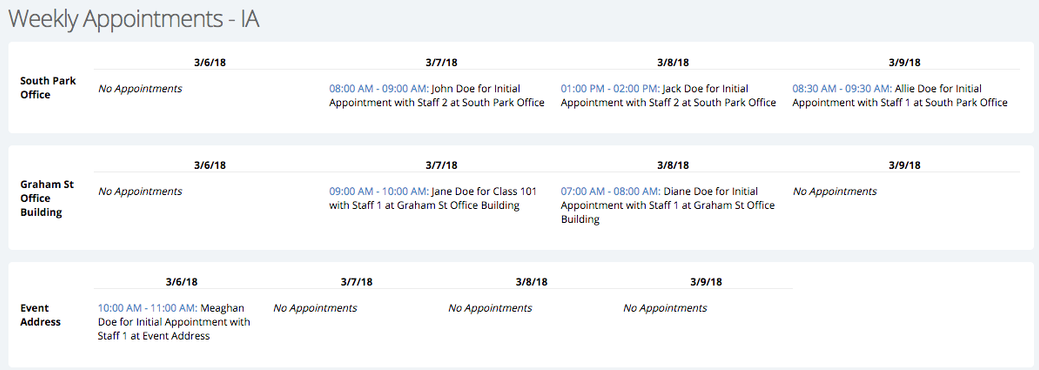
Had we chosen to base this gadget's agenda off of the location instead of staff, the information would be broken down per location: