Editing Client Profiles
Once a client is added to your account, you have the ability to change just about everything on their client profile. This includes their name, email address, phone numbers, company, gender, date of birth, address, timezone, and password to login to your scheduler
On this documentation page, we will go through how to:
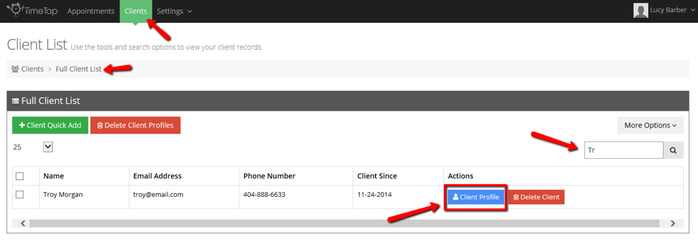
You can find any client's profile by going to the Full Client List and searching by their name or email address. Once you have found the client, click on the blue "Client Profile" button to go into the individual client's profile, where you can edit the options mentioned above.
If you know the client you want to edit the client details for, find him in your full client list and click the blue "Client Profile" button:
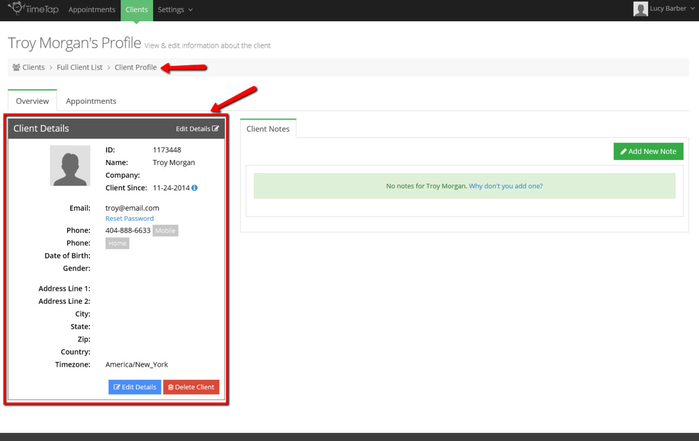
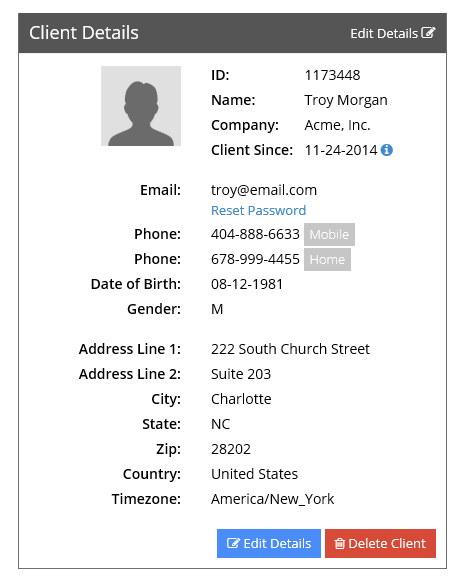
From here you'll enter into the Client Profile where you can see all the details you have put in for the client:
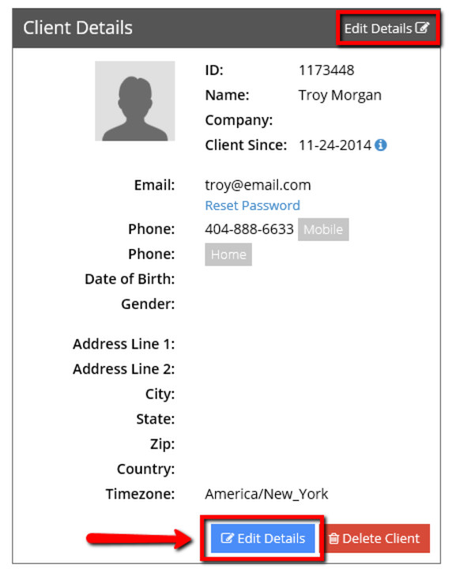
To change or customize any of these details, click on the "Edit Details" link in the top right or blue button at the bottom:
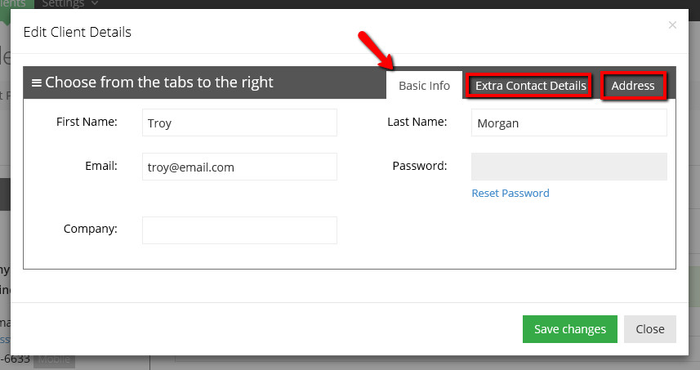
This will bring up the "Edit Client Details" window where you can navigate between three tabs to customize the different parts of the clients info. The first tab is the "Basic Info" tab where you can make changes to the client's name, email address, company, or reset the password:
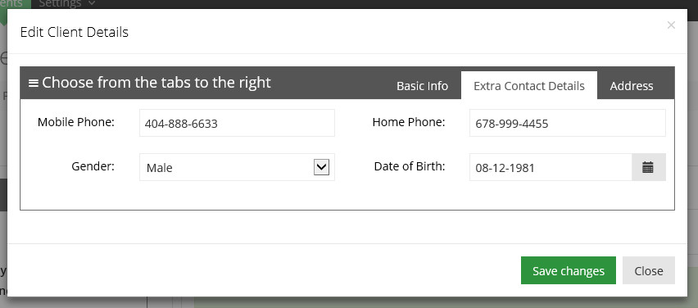
Underneath the Extra Contact Details tab, you can update the mobile phone number, home phone number, gender, and date of birth:
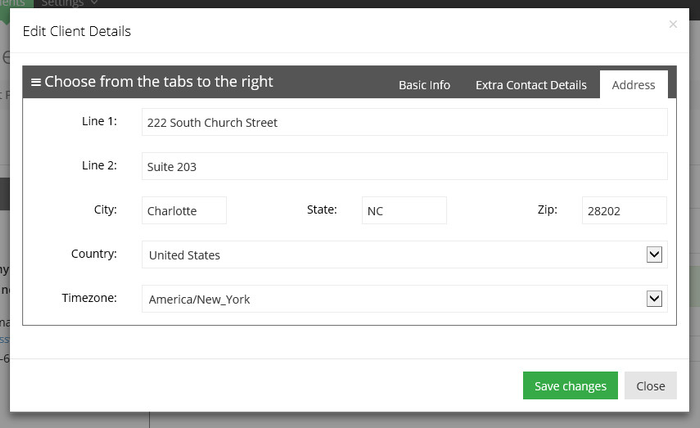
Finally, on the Address tab, you can update the listed address for the client as well as their timezone:
Once you have finished editing the client's details in the "Edit Client Details" window, click the "Save Changes" button at the bottom of the window to commit the changes and return to the Client Profile. You'll see that the Client Details have updated with the new information you entered:
Please note: When clients schedule themselves for an appointment, their client profile is created, but the only details that will be filled in are the ones that you asked for them to fill in on the Client Information screen of your scheduling process. If you want to change the information that is filled in by clients when they schedule themselves, simply refine what information you are asking for them to input.
If a client has registered for your scheduler, then he/she already has a password to login to your scheduler to view their appointment history and schedule new appointments.. There may be some clients, however, that are having a hard time logging in (maybe they have the caps lock on or maybe they can't remember their password and don't have access to their email to reset it themselves) and so you offer to reset their password for them.
You can reset a client's password either on their client profile or through the full client list. In this documentation we will cover how to reset the password through the client profile. Click here to read how to reset the client's password through the client list.
The first step in resetting the client's password is to find the client on your client list and click the blue "Client Profile" button next to their name:
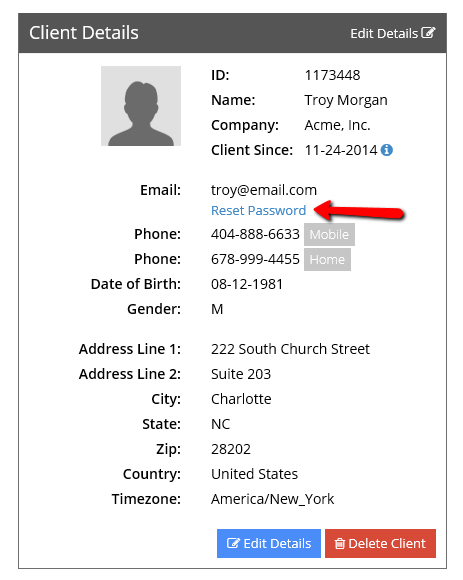
This will take you to the Client Profile screen where you will see in the "Client Details" section a link to "Reset Password":
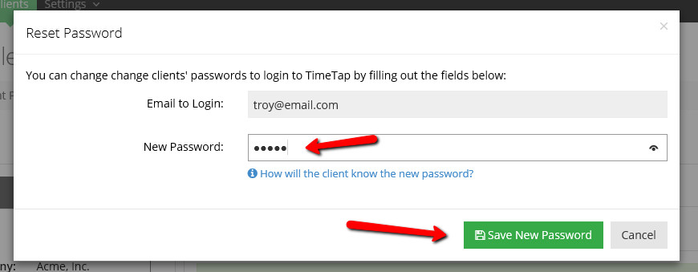
Click on the "Reset Password" link to bring up the Reset Password window. Enter in the new password for the client and click save:
Please note: For your security, TimeTap encrypts all users' and clients' passwords. Therefore we do not have a way to send your client their password. If you reset the password for your client, you are responsible for communicating that change with them.
Any notes that you add to a client's profile are for internal purposes only. They are not shared with your clients. They can only be viewed by you and your staff on the client's profile.
To add or edit notes on a client's profile, first go to Clients → Full Client List to search for the client and click into their client profile:
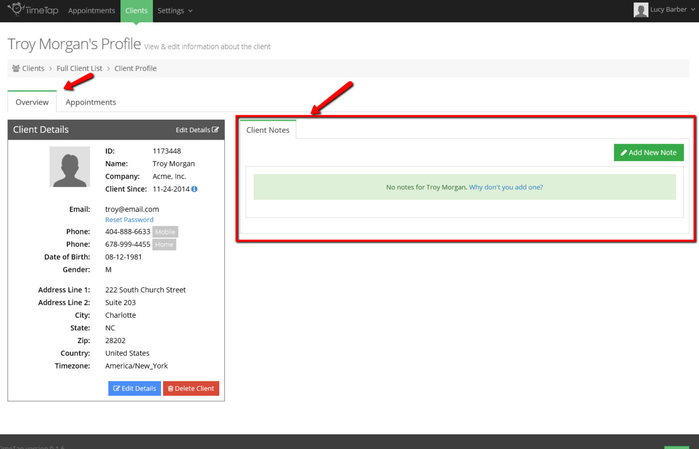
When you are on their client profile screen, you will see on the Notes section on the right hand side of the "Overview" tab:
To add a new note, click the "Add New Note" button:
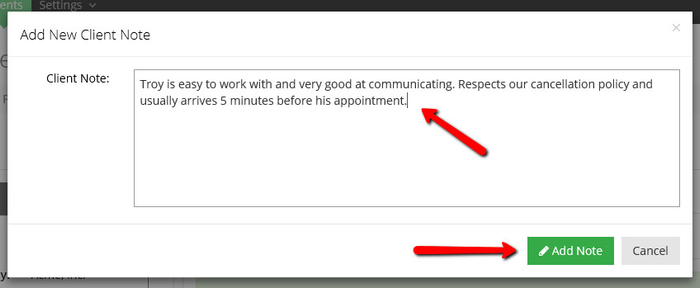
This will bring up the "Add New Client Note" window where you can type out whatever internal note you want to add to the client's profile and then click "Add Note":
Once the note is added to the client's profile, you will see it display on the client's profile and be able to either Edit it to include more information or delete it if you want to remove the note from the profile all together:
Now that you've added the note, you can navigate away from the client's profile if you'd like. Each time you come back to the client's profile, the note will be saved there and you can edit it or discard it as you please.
