If you're an in home or traveling service provider, you'll need to set up your TimeTap scheduler so that you make sure to account for the following three points:
Point #1: Capturing the address upon booking
When you are an in-home service provider, it’s best practice to go ahead and get the address for the appointment at the same time that the client is booking. Waiting until later could mean not that you don’t get it in time to stay on schedule with your appointments for the day. Or, worse yet, it could mean that you can’t get in touch with the client and can’t confirm their appointment at all. So, this point is critical and below we’ll go through how to make sure this is turned on in your TimeTap account.
Point #2: Immediately confirming that you got their address
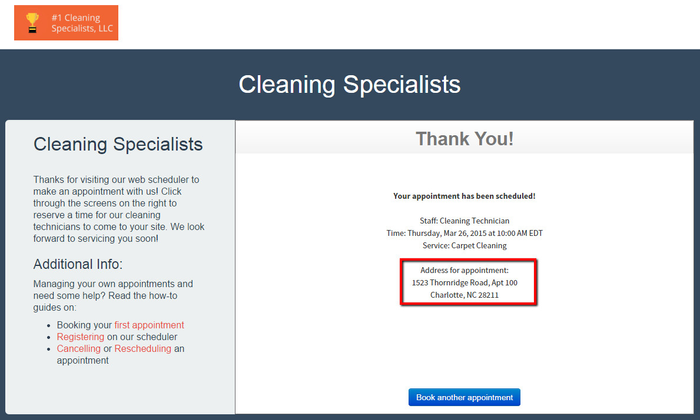
When clients are booking themselves, it gives them peace of mind to feel reassured that you have their correct information. A great opportunity to reassure them is on the final confirmation screen that clients see after setting their appointments. By default this screen in TimeTap just prints the location’s address, but since this is going to be the client’s address, we will have to do some swapping to some of the default settings. It gives clients a lot of comfort that their appointment was scheduled correctly if, after putting in their address & saving the appointment, the confirmation message reads, “We look forward to meeting you at the following address” and displays their address back to them.
Point #3: Including their address on email messages:
...
So, where and how do you make these changes within your TimeTap account? I’ve set up a demo account of a mock cleaning company that goes to people’s homes and/or offices to clean. We’ll dive into the nitty gritty next and go through just how you’ll make in-home bookings a piece of cake:
...
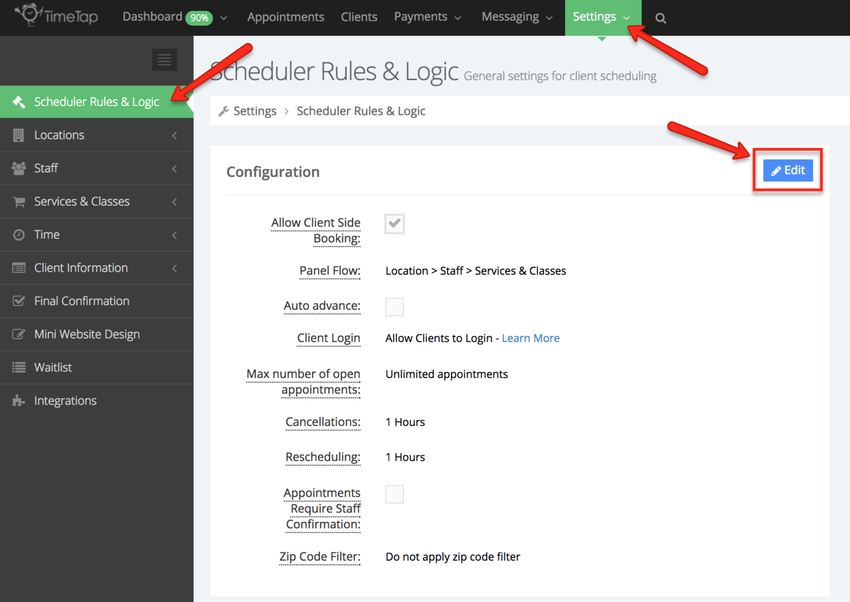
Before we begin with step 1, you might want to remove the option to select a location from the scheduling flow in your scheduler, this will avoid confusion and will make the booking process faster for your clients. Head over to the Setting → Scheduler Rules & Logic, and click Edit next to Configuration:
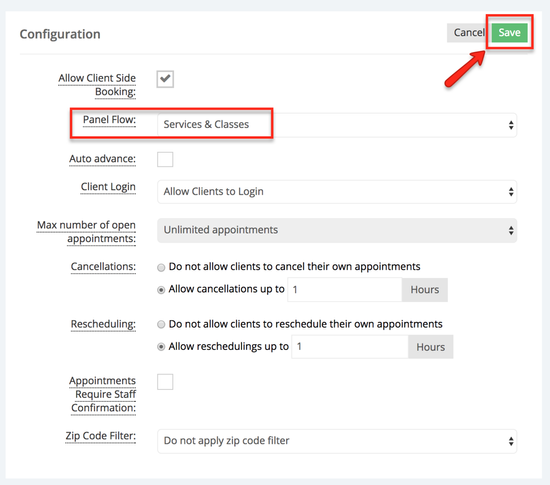
From the Panel Flow dropdown select any of the flows that do not have location in them, in the example below I only want my clients to see the services I offer so I will select Services & Classes and click Save:
...
Step 1: Making sure that client address is turned on and is mandatoryAnchor Step1ClientLoc Step1ClientLoc
...
Now, when clients of my demo cleaning company fill in their name and email address to confirm their cleaning appointment, they’ll also be prompted to fill in their address. This address will get stored on their client profile so if they login next time, they won’t have to fill in their address again.
Step 2: Put your client’s address in your confirmation message Anchor Step2ClientLoc Step2ClientLoc
...
Test out your booking process now and you’ll see that the success message prints out the address that the client puts in on the Your Info page:
Step 3: Change Add your location’s address to include tags for your client’s addressclient's address in the appointment confirmation emailAnchor Step3ClientLoc Step3ClientLoc
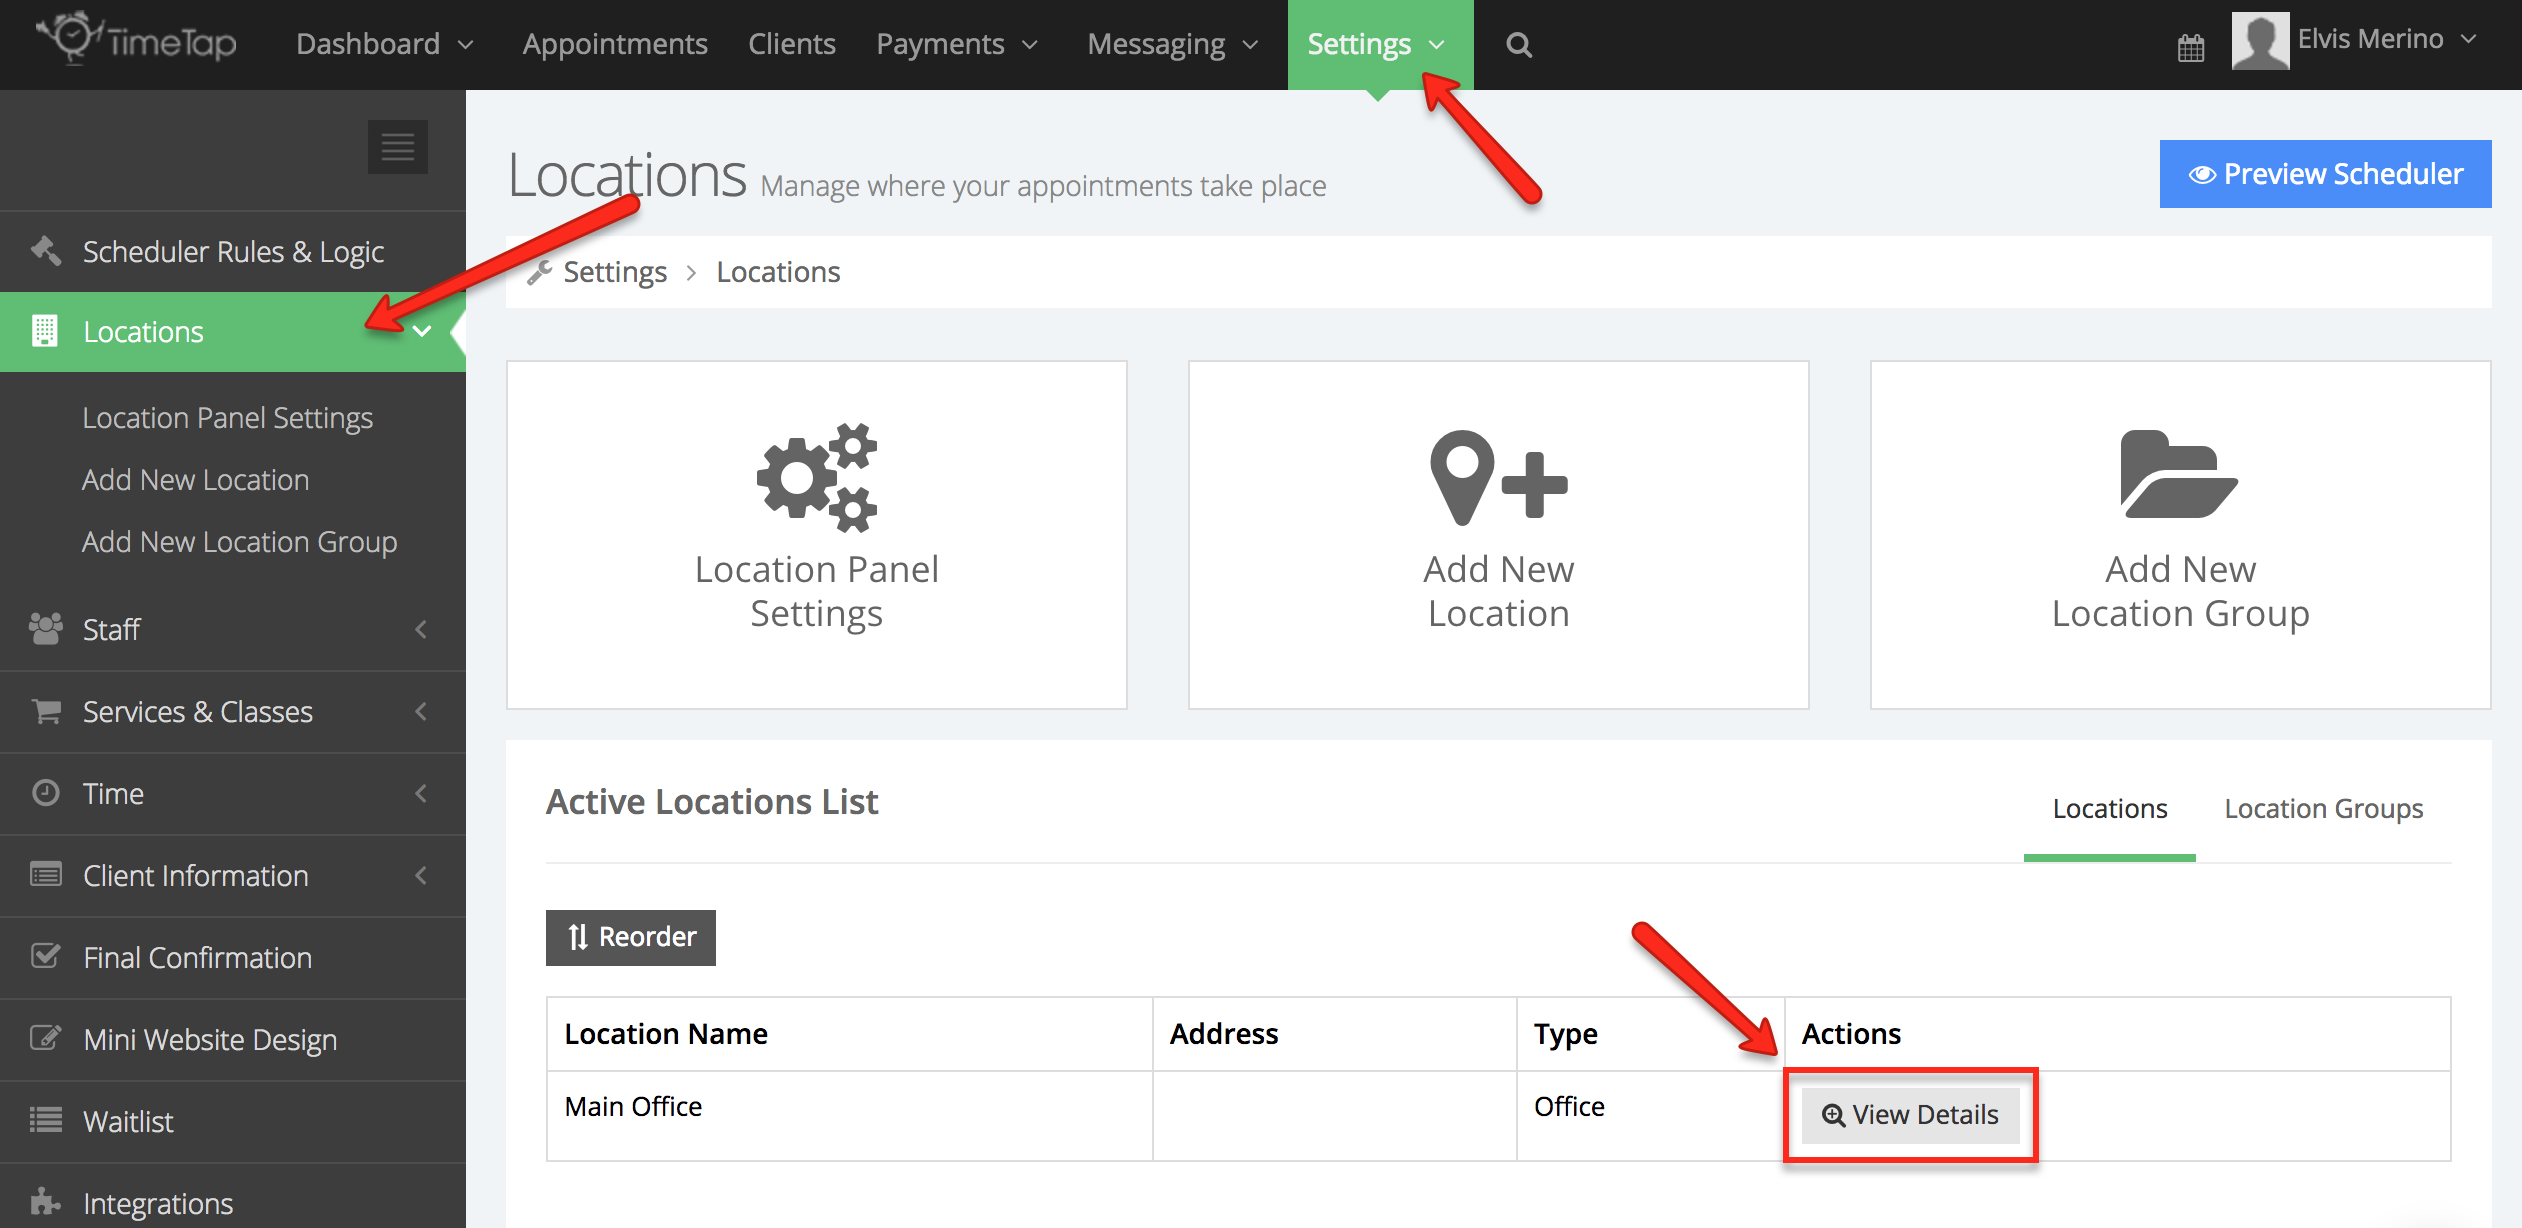
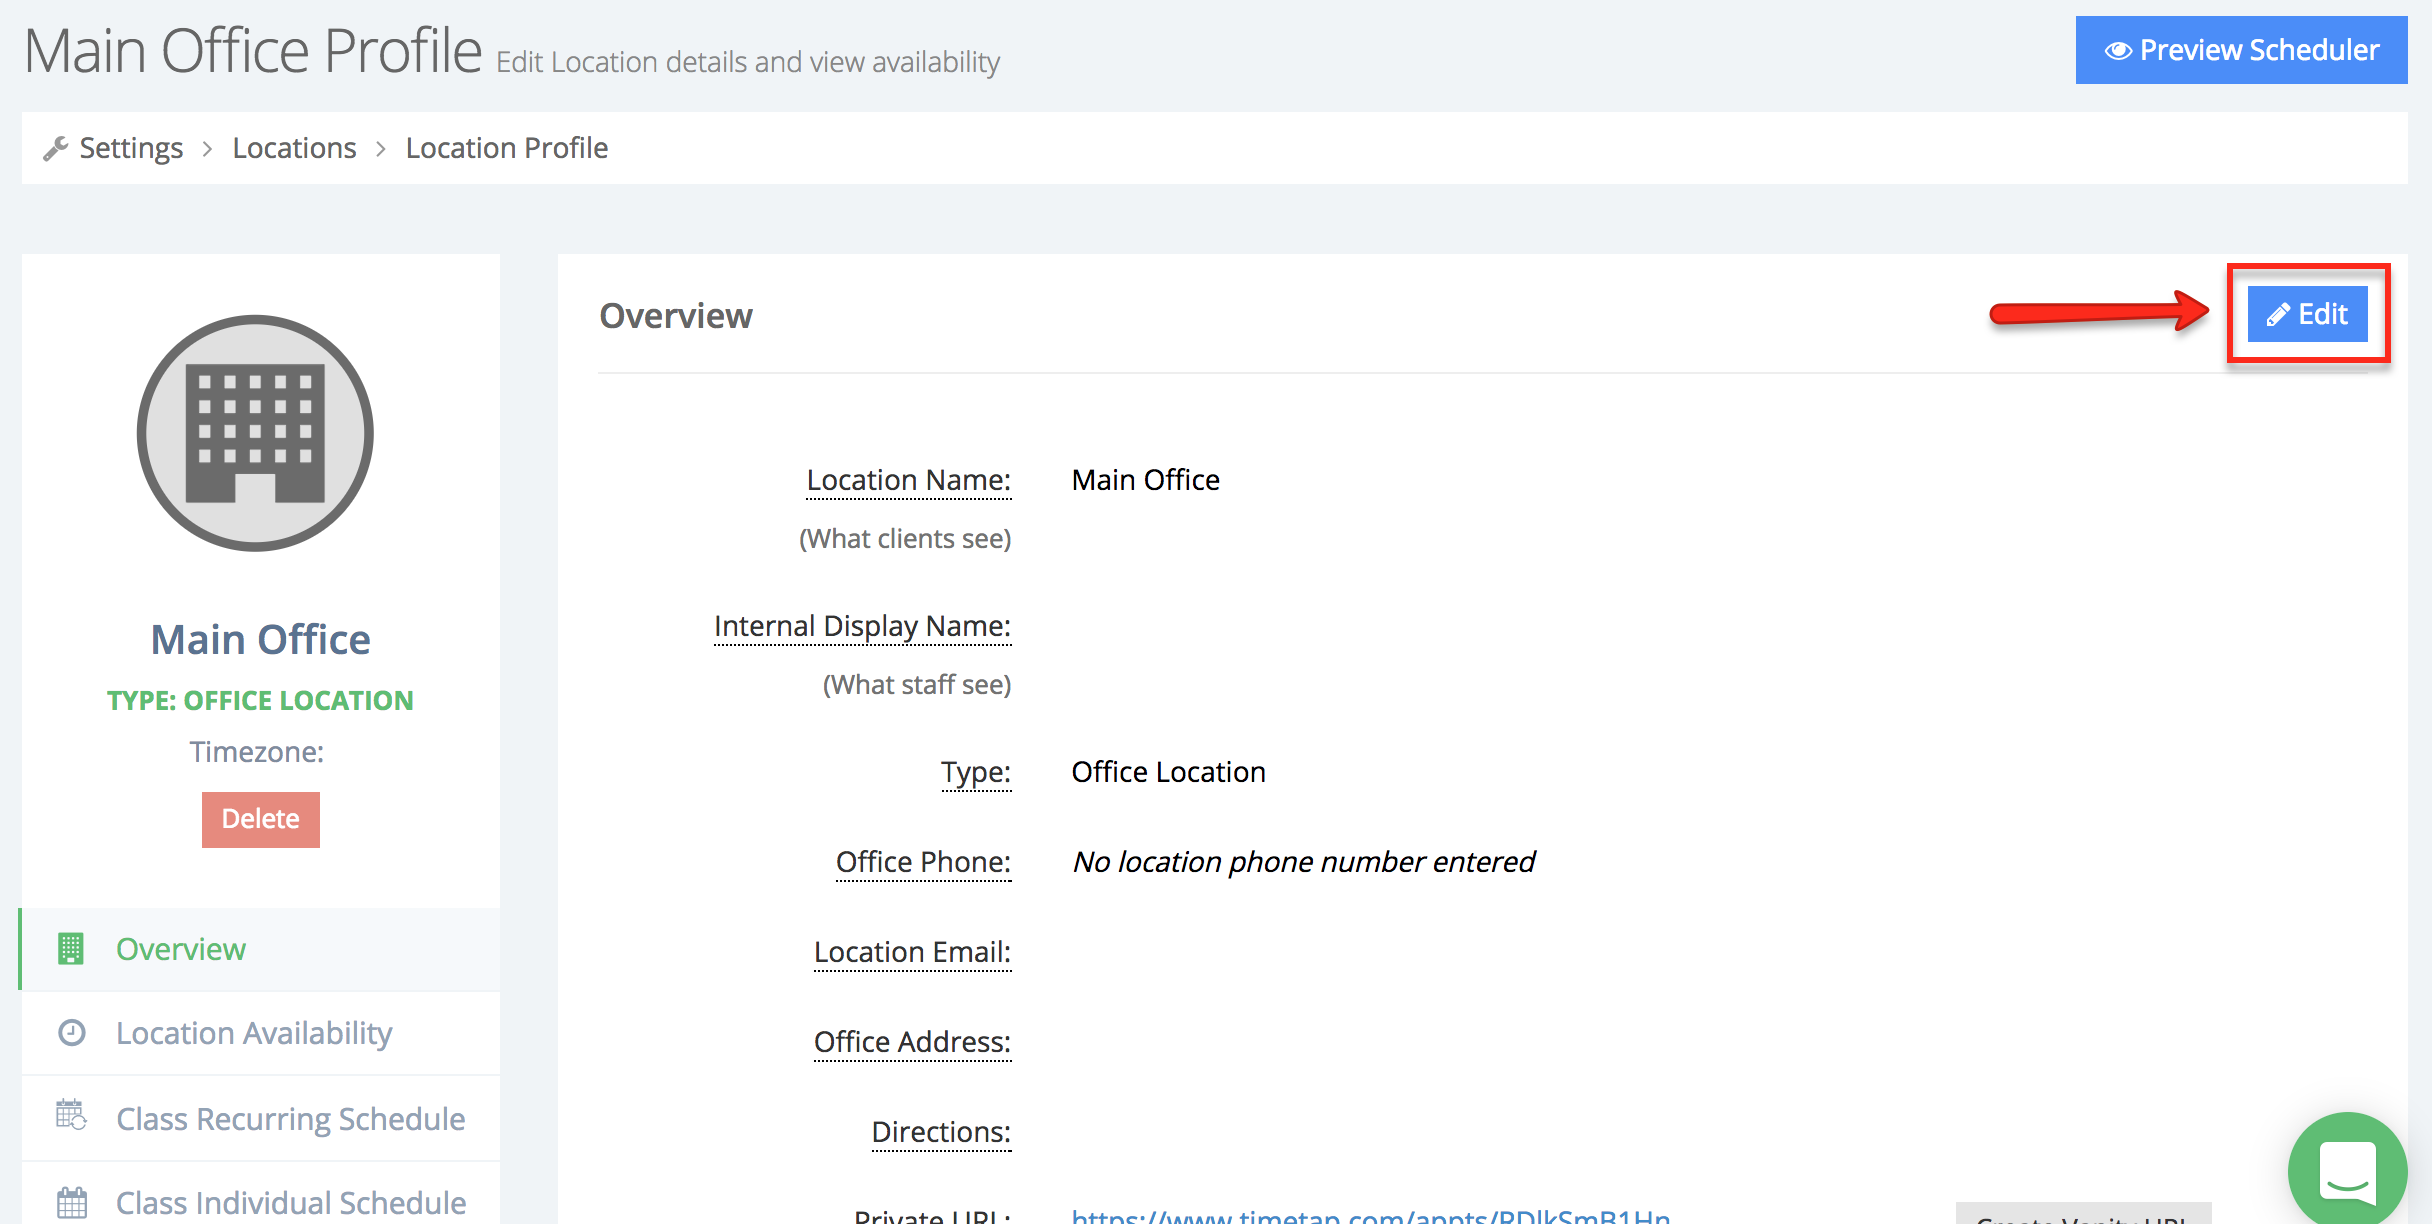
The last step is to go into your location’s profile and change the location name and address so New Appointment email templates and add your client's address information so that when clients get the email confirmation, the address that prints out for the appointment is the address the put in they have reassurance that you will be coming to their address. To do this, go to your Settings menu on your TimeTap account and click Locations. Once you are in the location profile, click on the “View Details” button to the left of the location:
Once in the Location's profile click Edit right side of the screen to make changes:
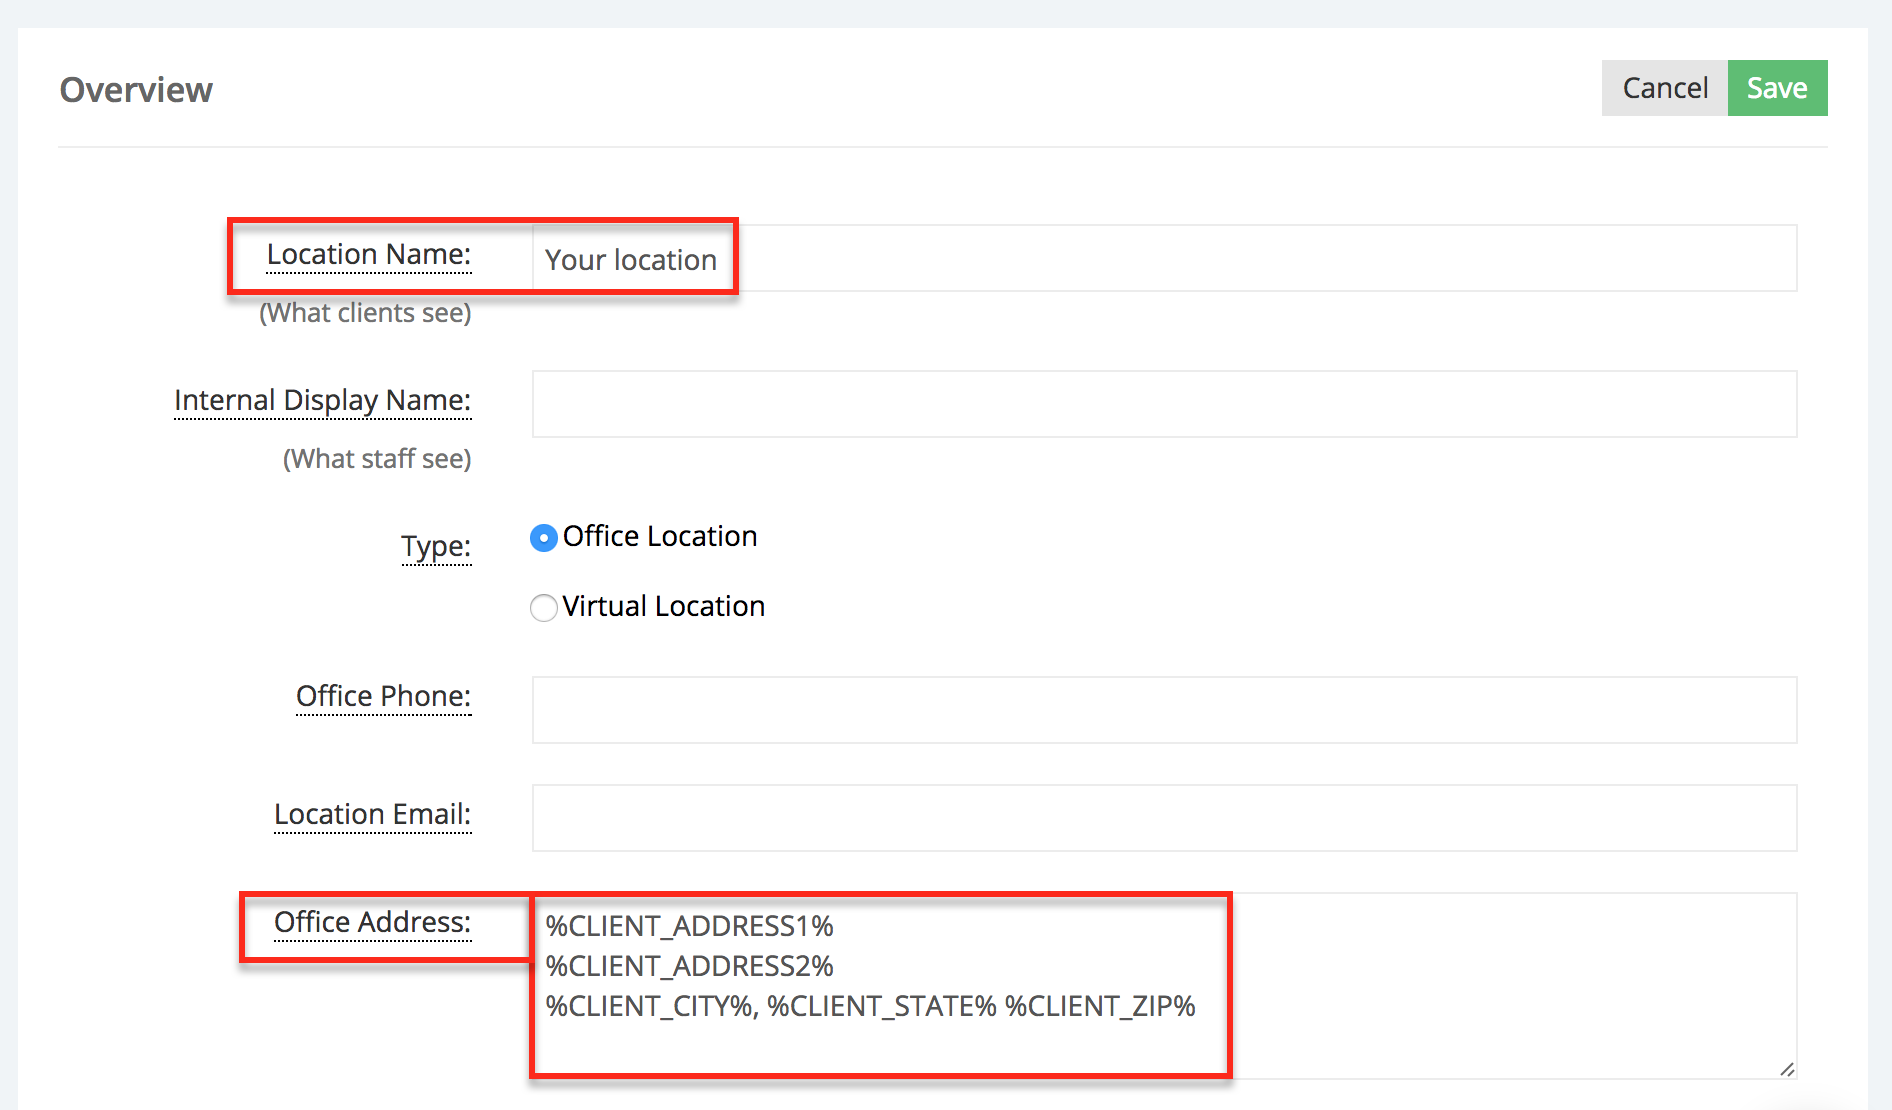
It’s best to go ahead and name it “Your location” or something similar. In the address fields, go ahead and embed the same tags that we listed above so that the address that gets printed on the email is the client’s address, not the business’s.
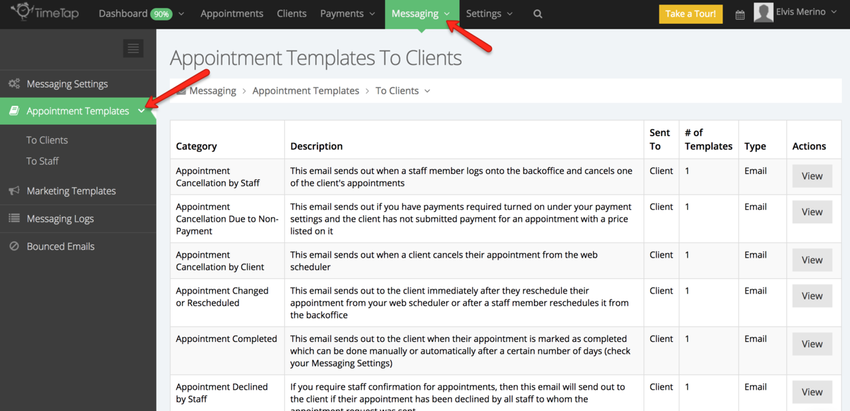
Messaging → Appointment Templates:
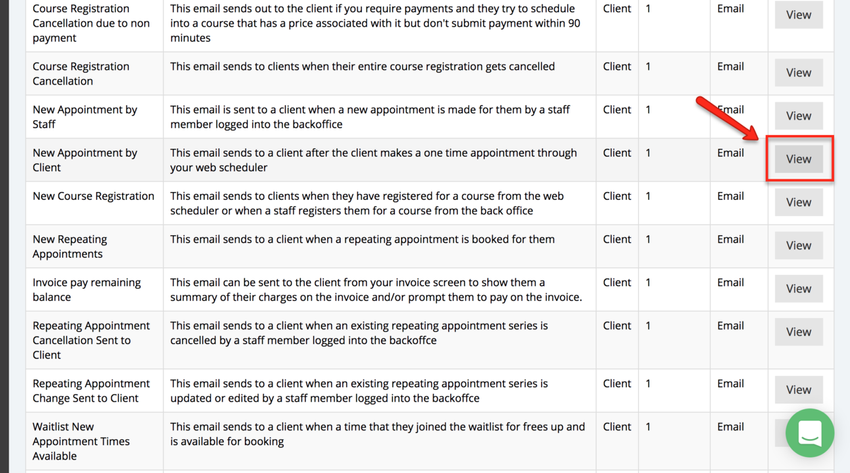
Next, locate the template "New Appointment by Client" and click View, this is the email that is sent to the clients when they book an appointment:
Note: We recommend that you also apply the following steps to the template "New Appointment by Staff", this is the email that is sent to the client when an appointment is added by the staff.
After you click view you will be taken to the Templates in Category screen, click View under the Actions column:
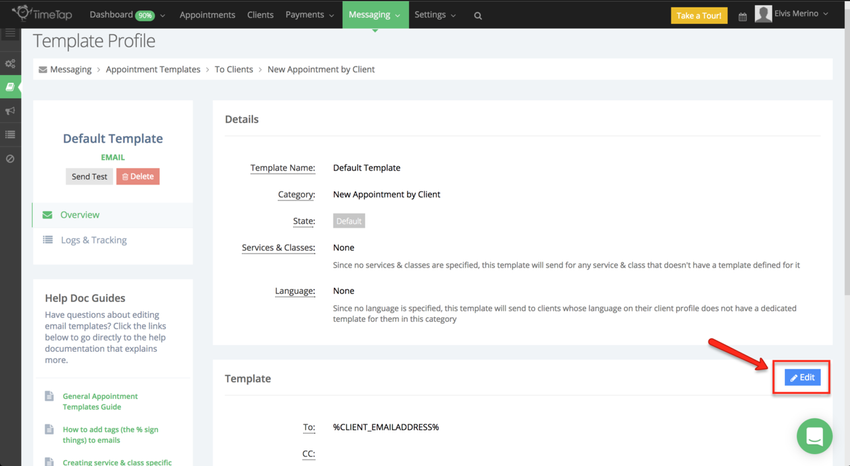
Once in the Template Profile click Edit to the right of the template section to being changing this template:
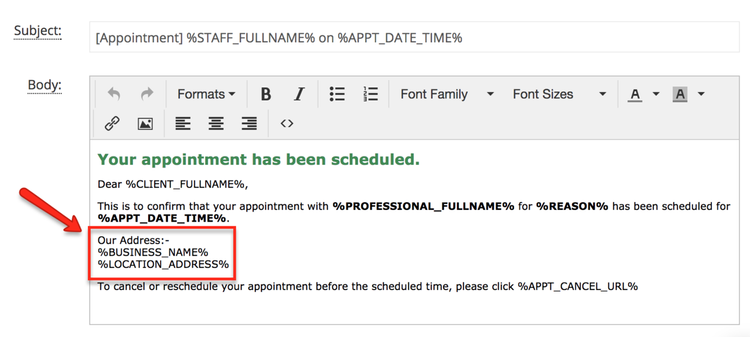
With the template in Edit mode, remove the section Our Address:
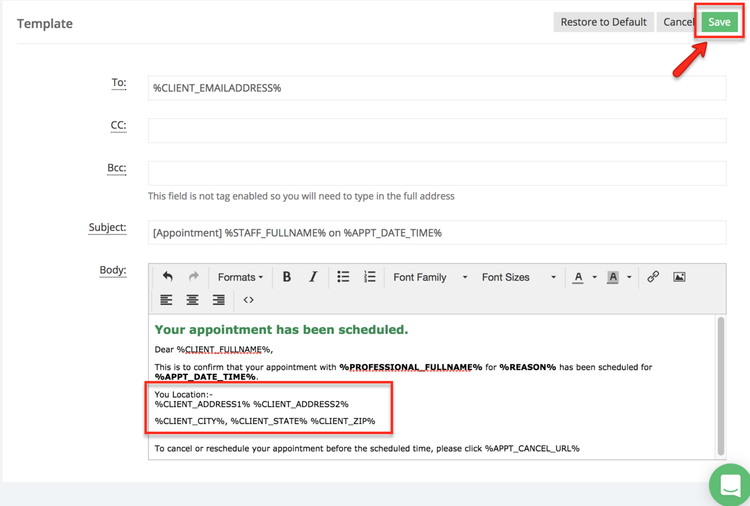
Then replace this section with the client address tags we used in step 2 and click Save, notice that I removed "Our Address" and substituted it with "Your Location":
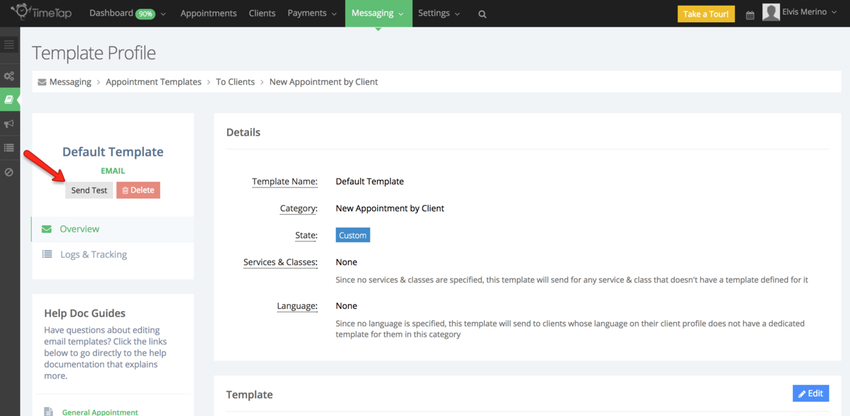
You can then test this email to make sure it look the way you want it by clicking the Sent Test button:
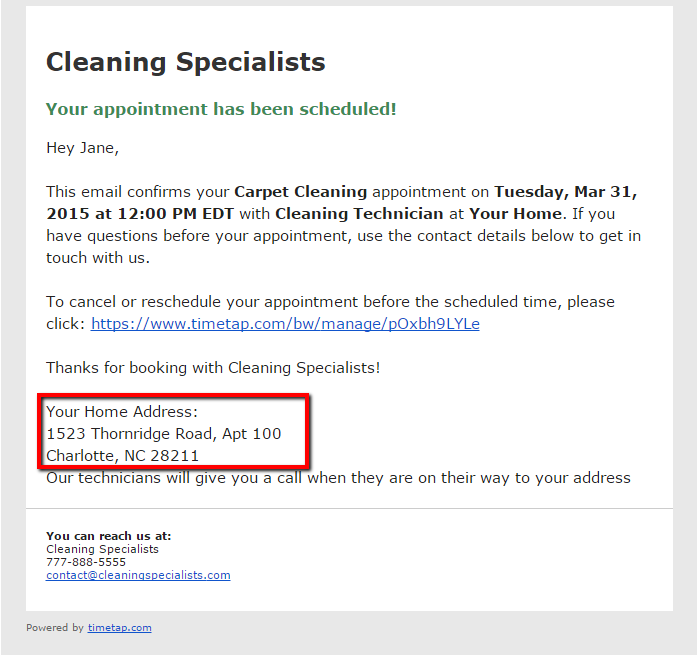
Now when your confirmation emails go out to clients, they will have the client's address on them:
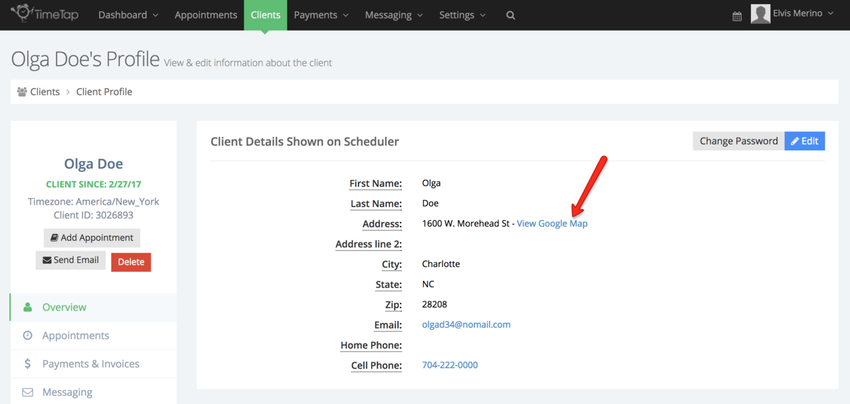
Once the appointment has been booked you can go to the client's profile to view their location and click "View Google Map" to see the address that was entered in Google Maps and even get direction to it:
If you think we've missed anything here, please feel free to contact our support team and we'll get back to you as soon as we can with an answer.
