By accessing your Class Schedule from the Staff Profile page, you have access to similar options as you would by accessing the Class Profile page through the Services & Classes sidebar tab. The primary difference between accessing your Class Schedule from the Staff Profile page versus the Class Profile page is that instead of selecting the "Staff" drop-down menu under the "Location, Staff, & Enrollment" section when trying to add a repeating schedule or single session, you will select the "Class" drop-down menu to select the class for that particular staff member's profile. We will explain this further with several options that are available through accessing your Class Schedule from the Staff Profile page.
Under the “Class Schedule” tab of your Staff Profile page, there are a number of things that you can do. In this documentation you will learn how to do the following from the Staff Profile page:
- Navigate to the Class Schedule page from the Staff Profile page
- Add a Repeating Class Schedule
- Edit an Existing Repeating Class Schedule
- Add an Individual Class Session
- Edit an Existing Individual Class Session
- Cancel an Individual Class Session or Repeating Class Schedule
If you have any questions or concerns after reading through this documentation, please feel free to reach out to our support team. We would be happy to assist you with whatever you are trying to accomplish with the Class Schedule feature found under the Staff Profile page.
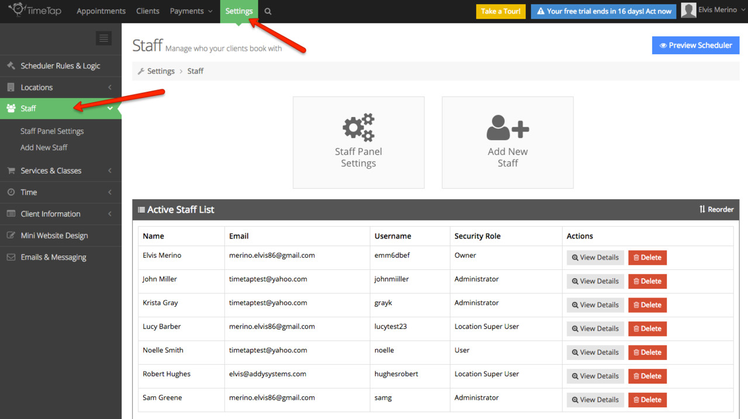
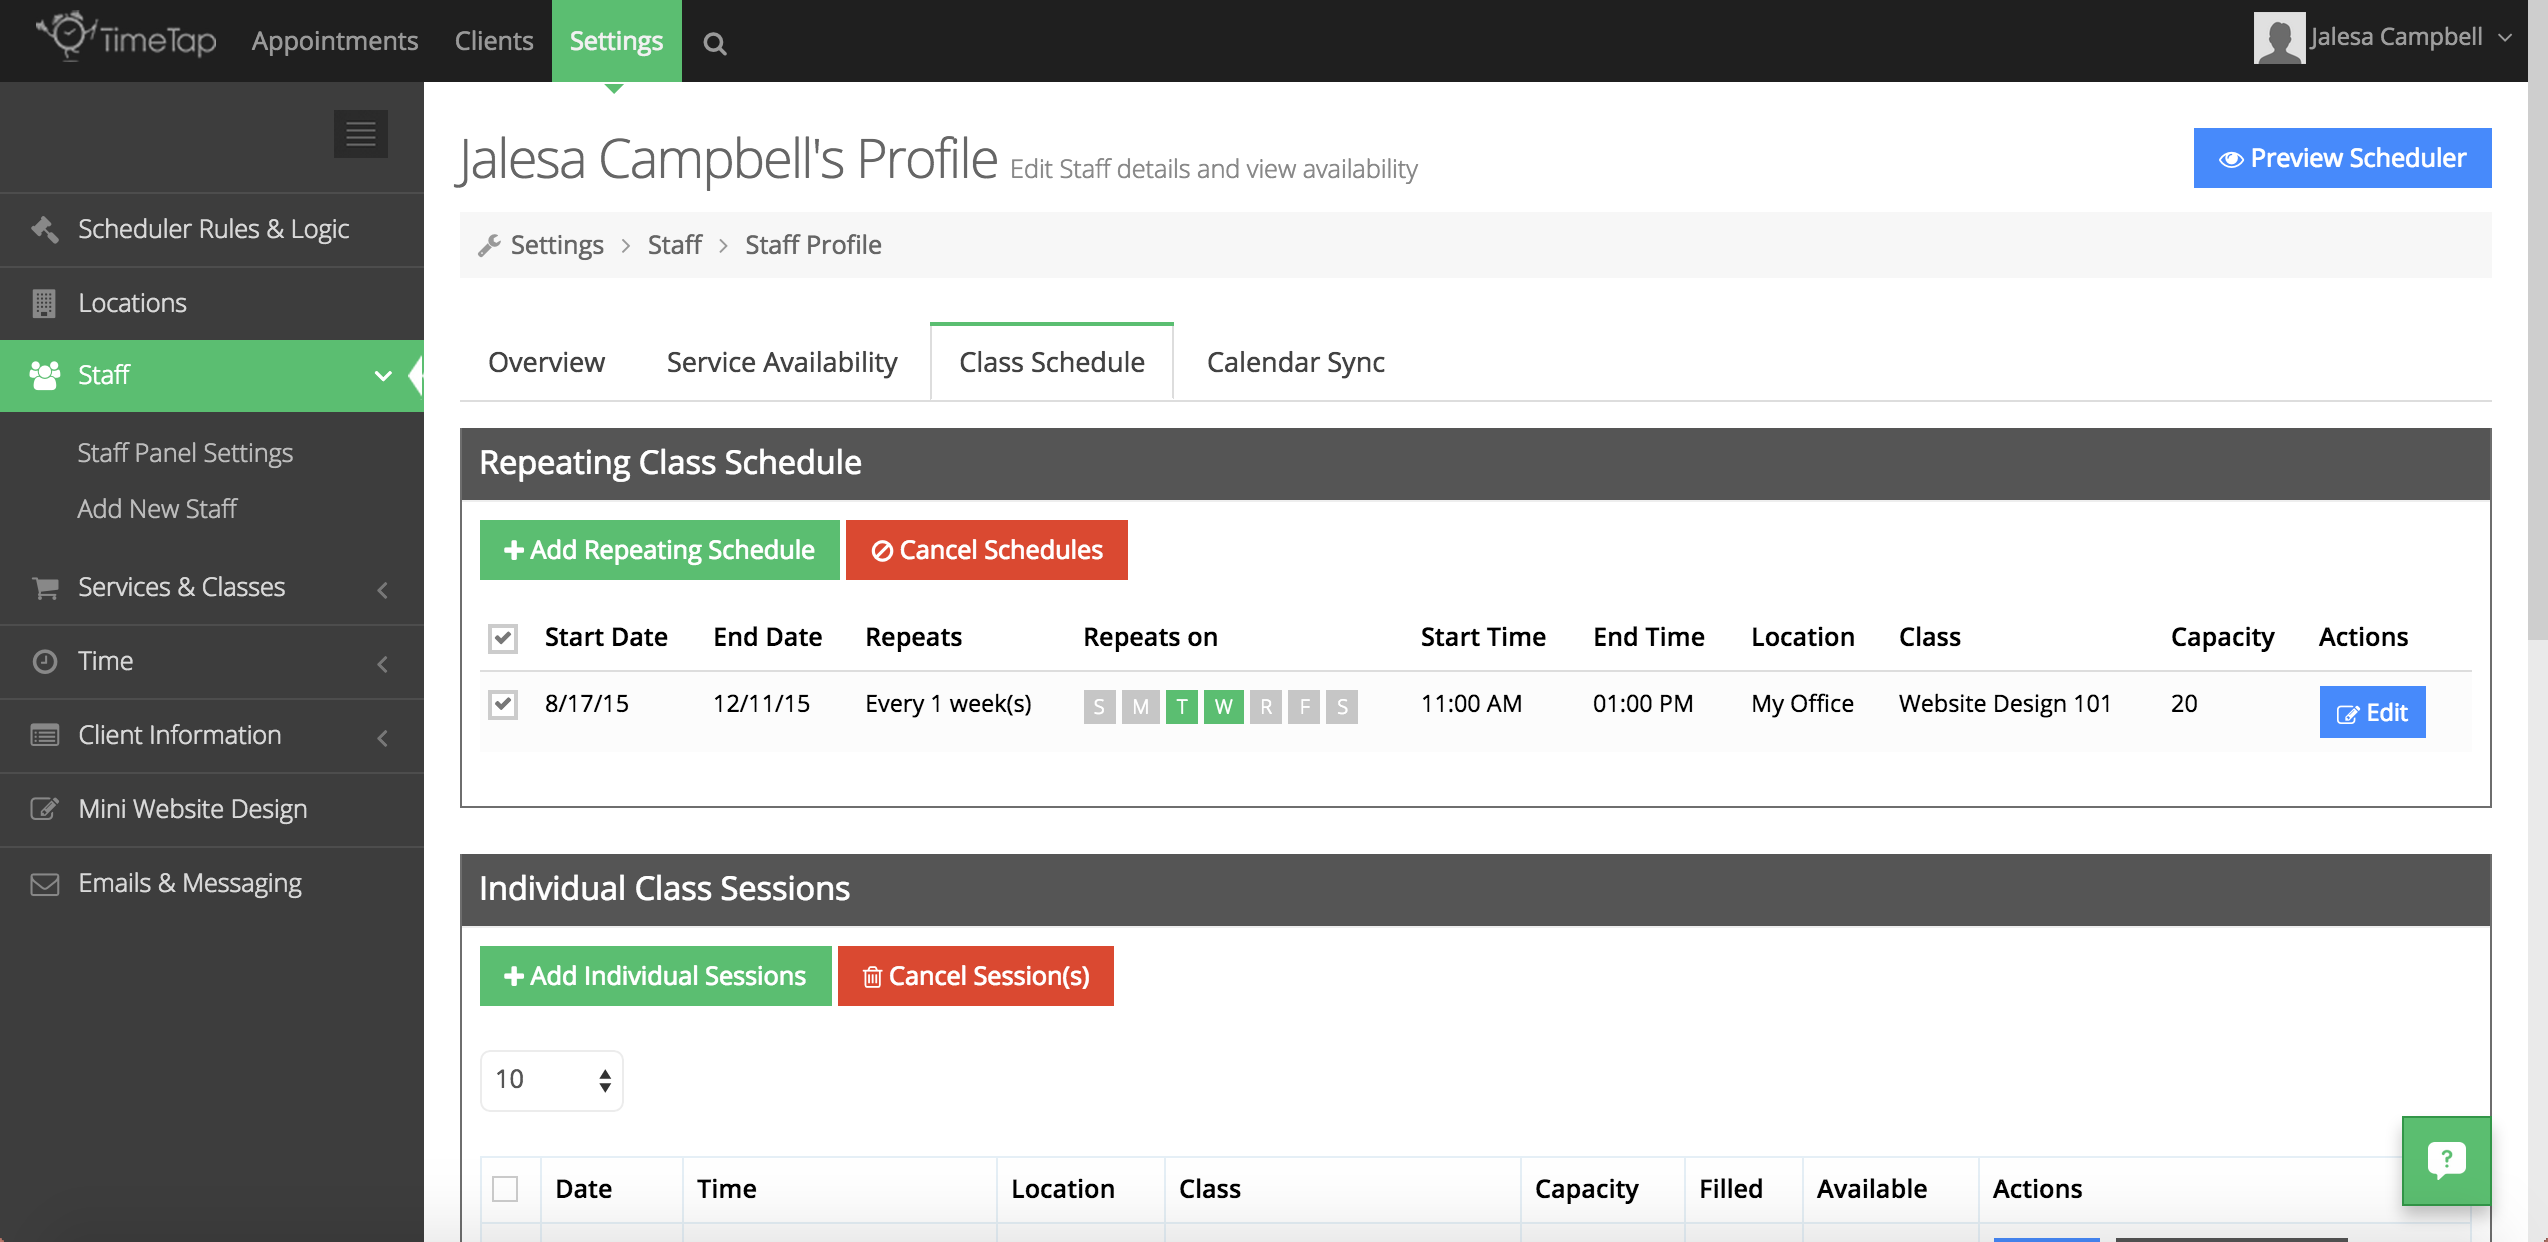
To view your Class Schedule from the Staff Profile Page, first navigate to your Settings → Staff screen:
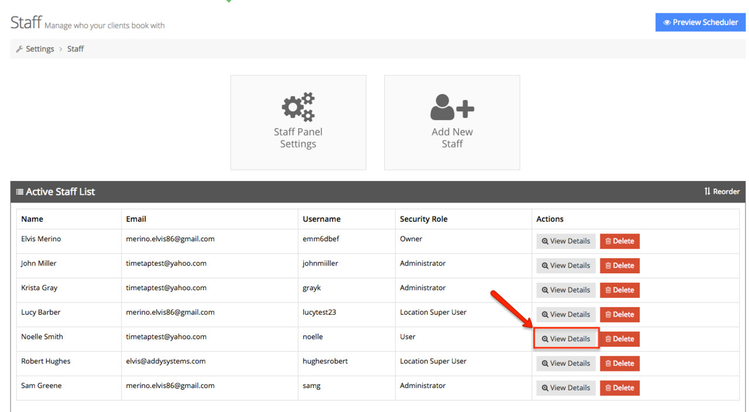
Once on the Staff page, click on "View Details" near the bottom of the page next to the staff member’s details you would like to view.
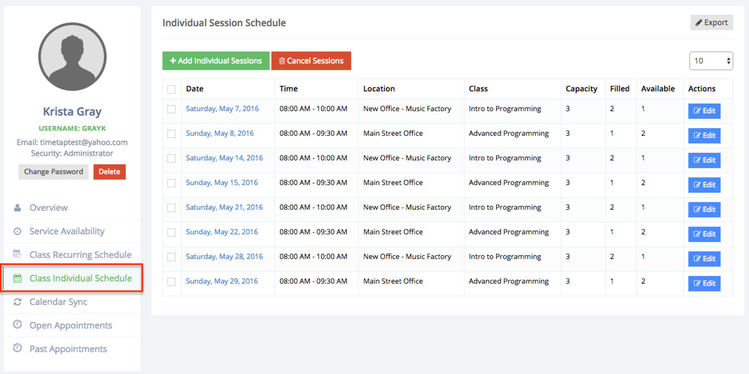
This will take you to the staff member’s page, that you have chosen, and from here click on the "Class Individual Schedule" tab which will take you to your class schedule.
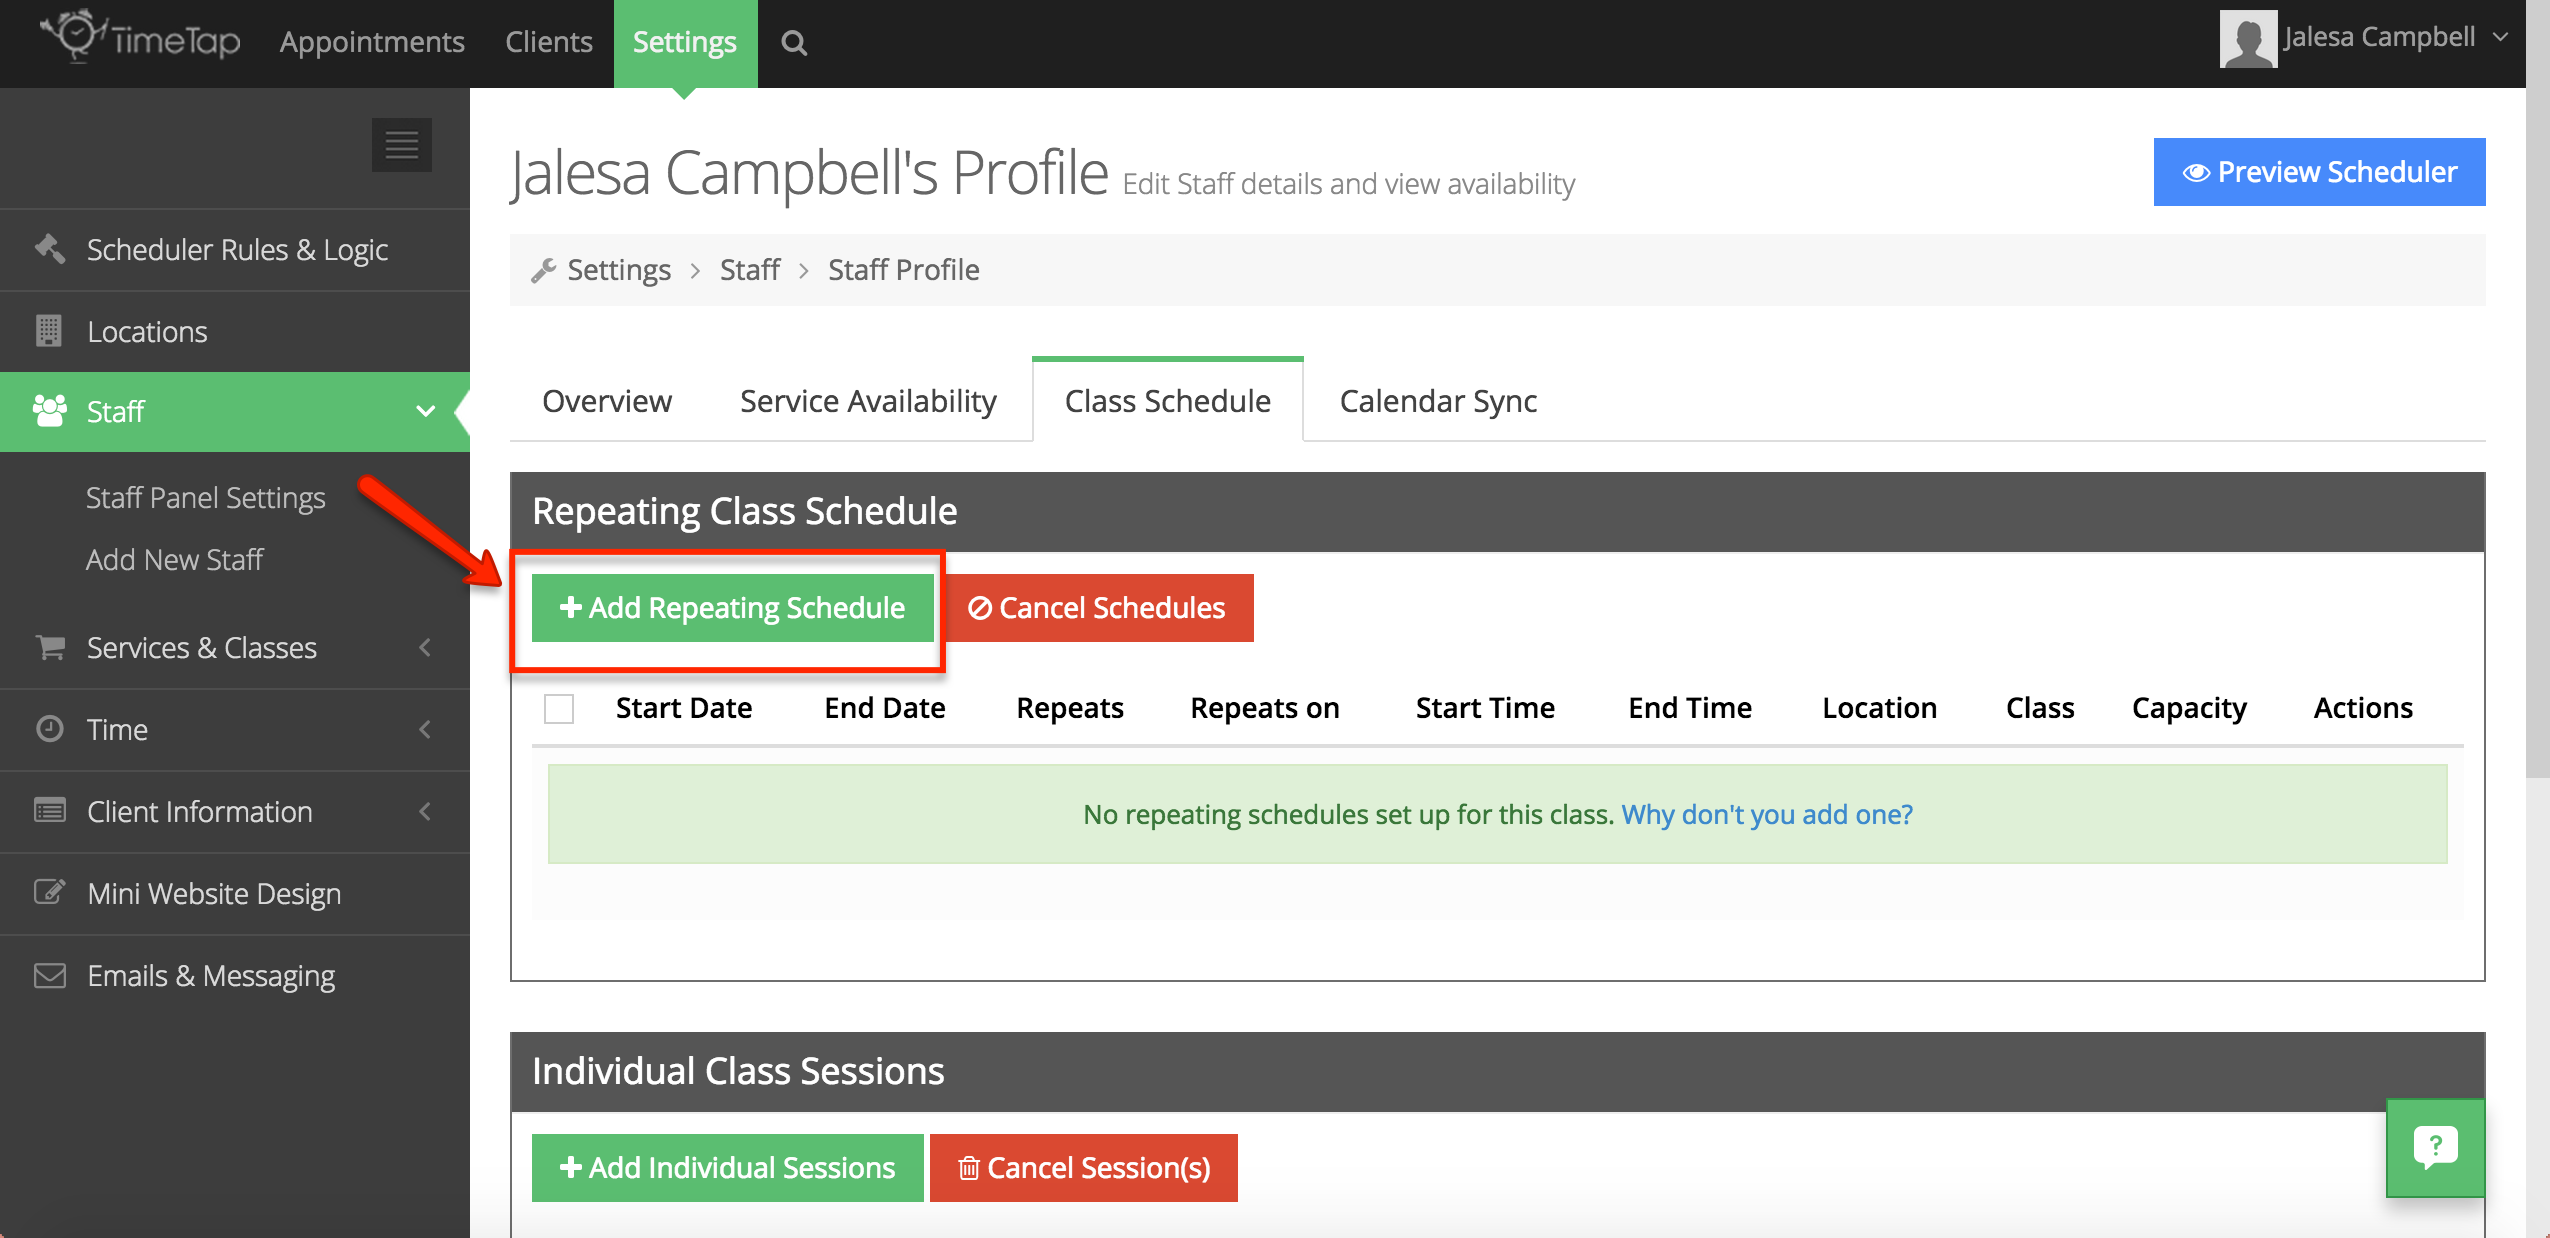
Next, you will learn how to add a repeating schedule from your Staff Profile page to your Class Schedule.
If you would like to learn how to add a repeating schedule, please follow the hyperlinked text as we currently have documentation on this procedure. The main difference that this documentation will address is how to choose the staff member and class for a particular location.
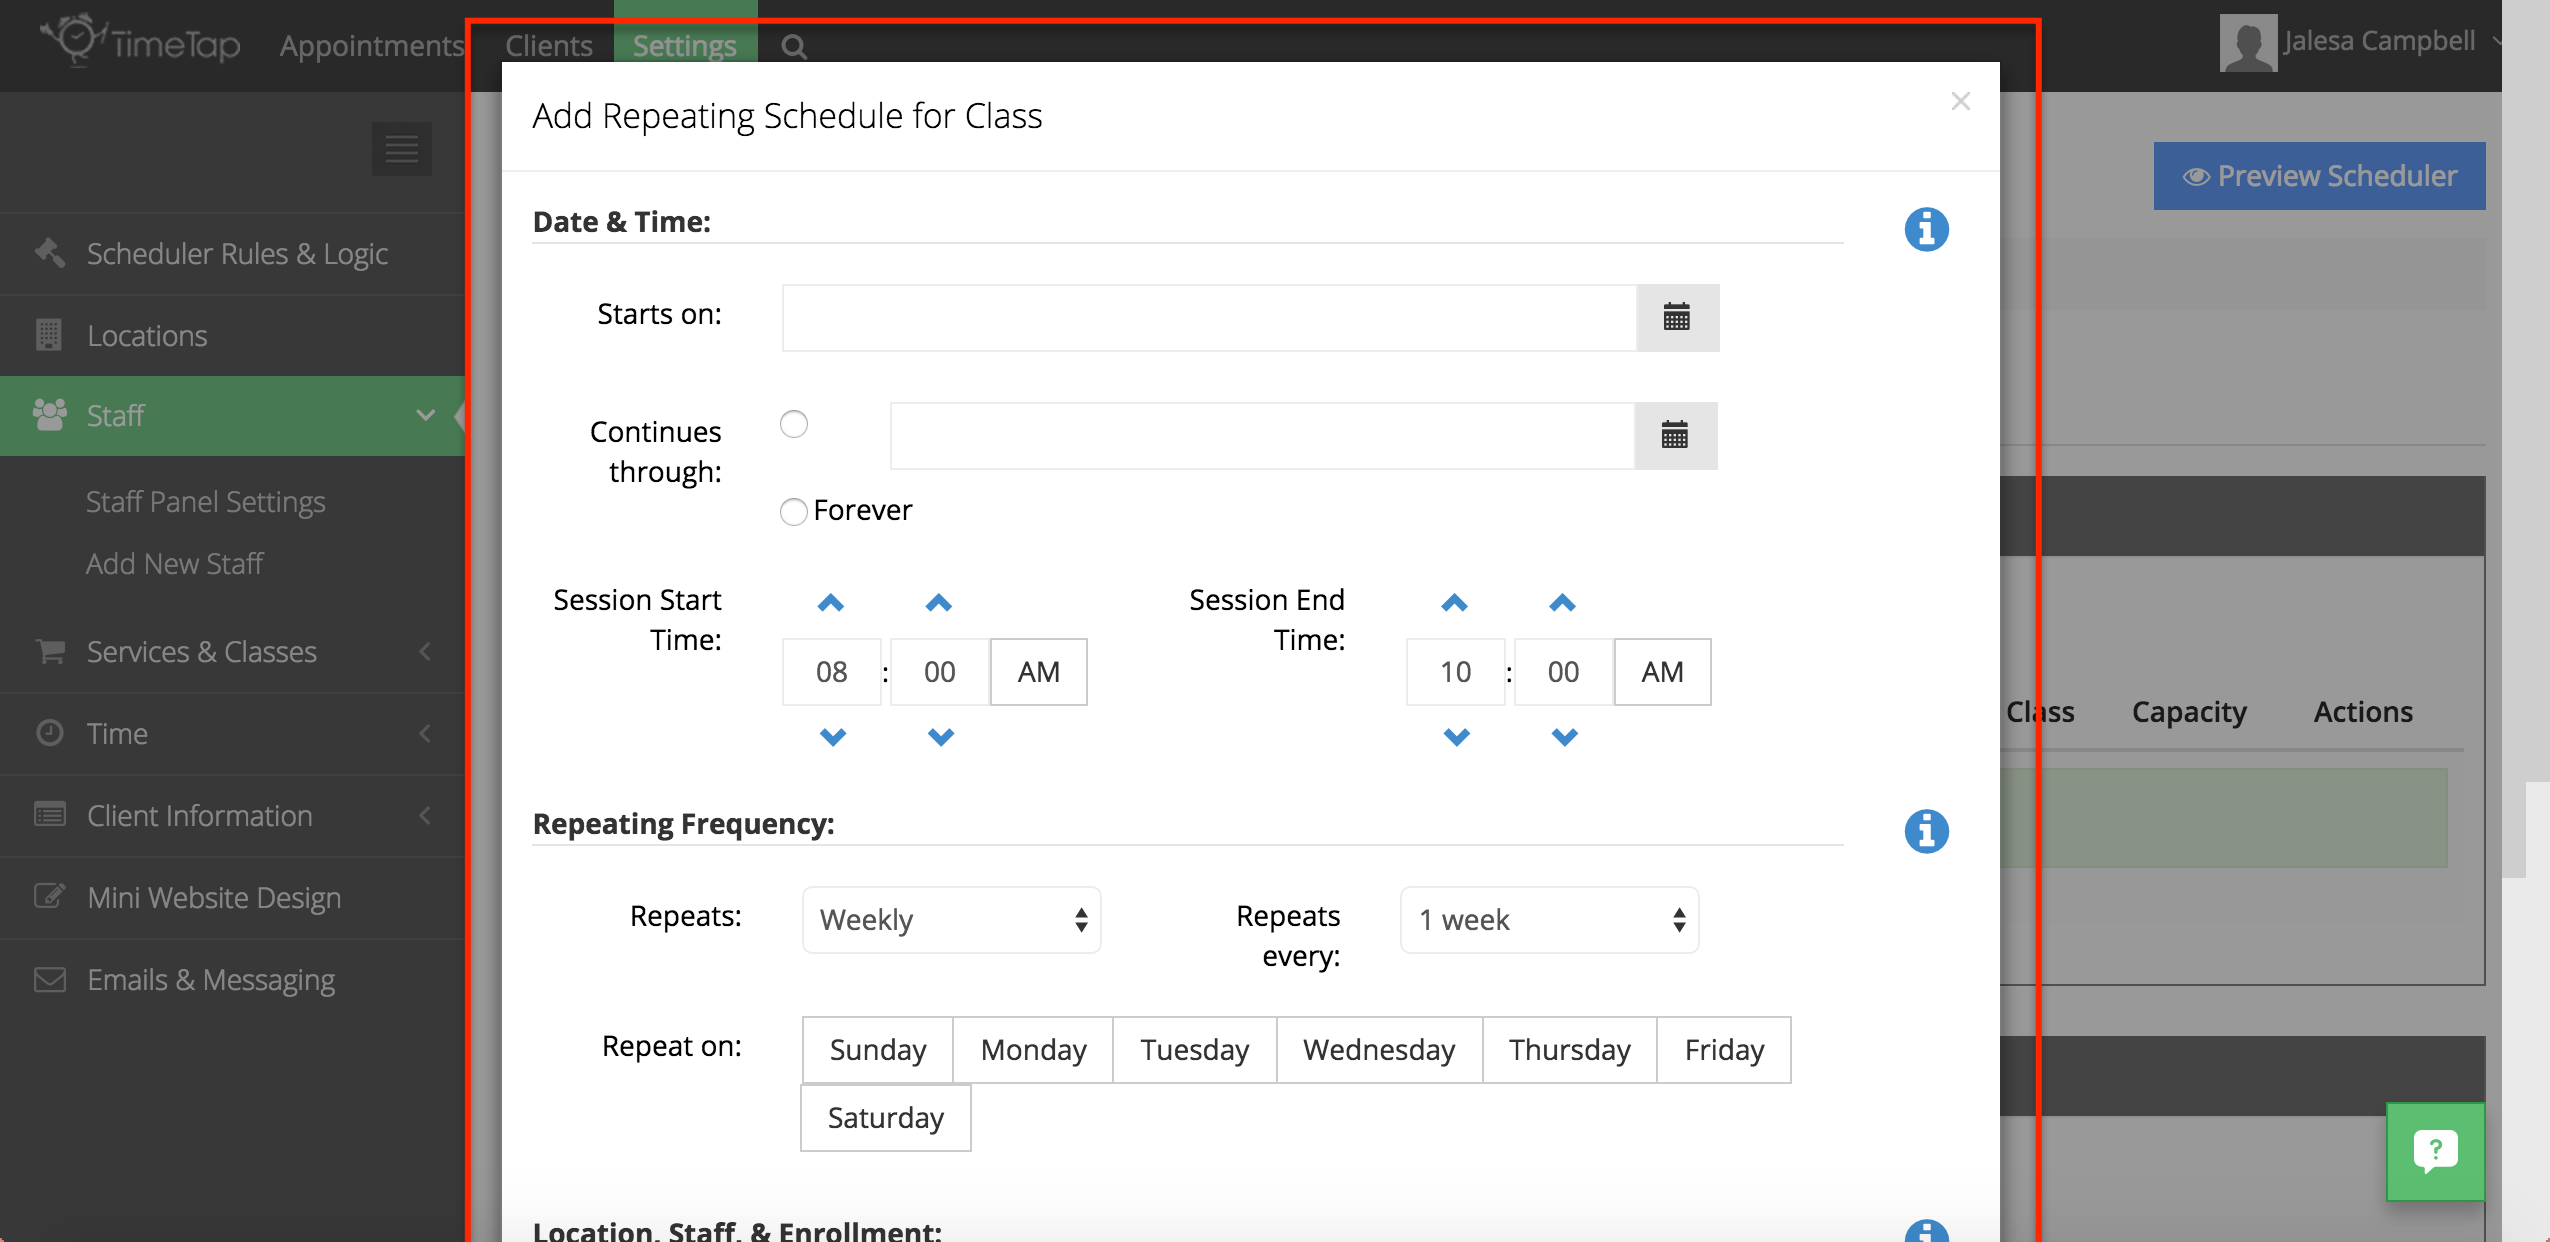
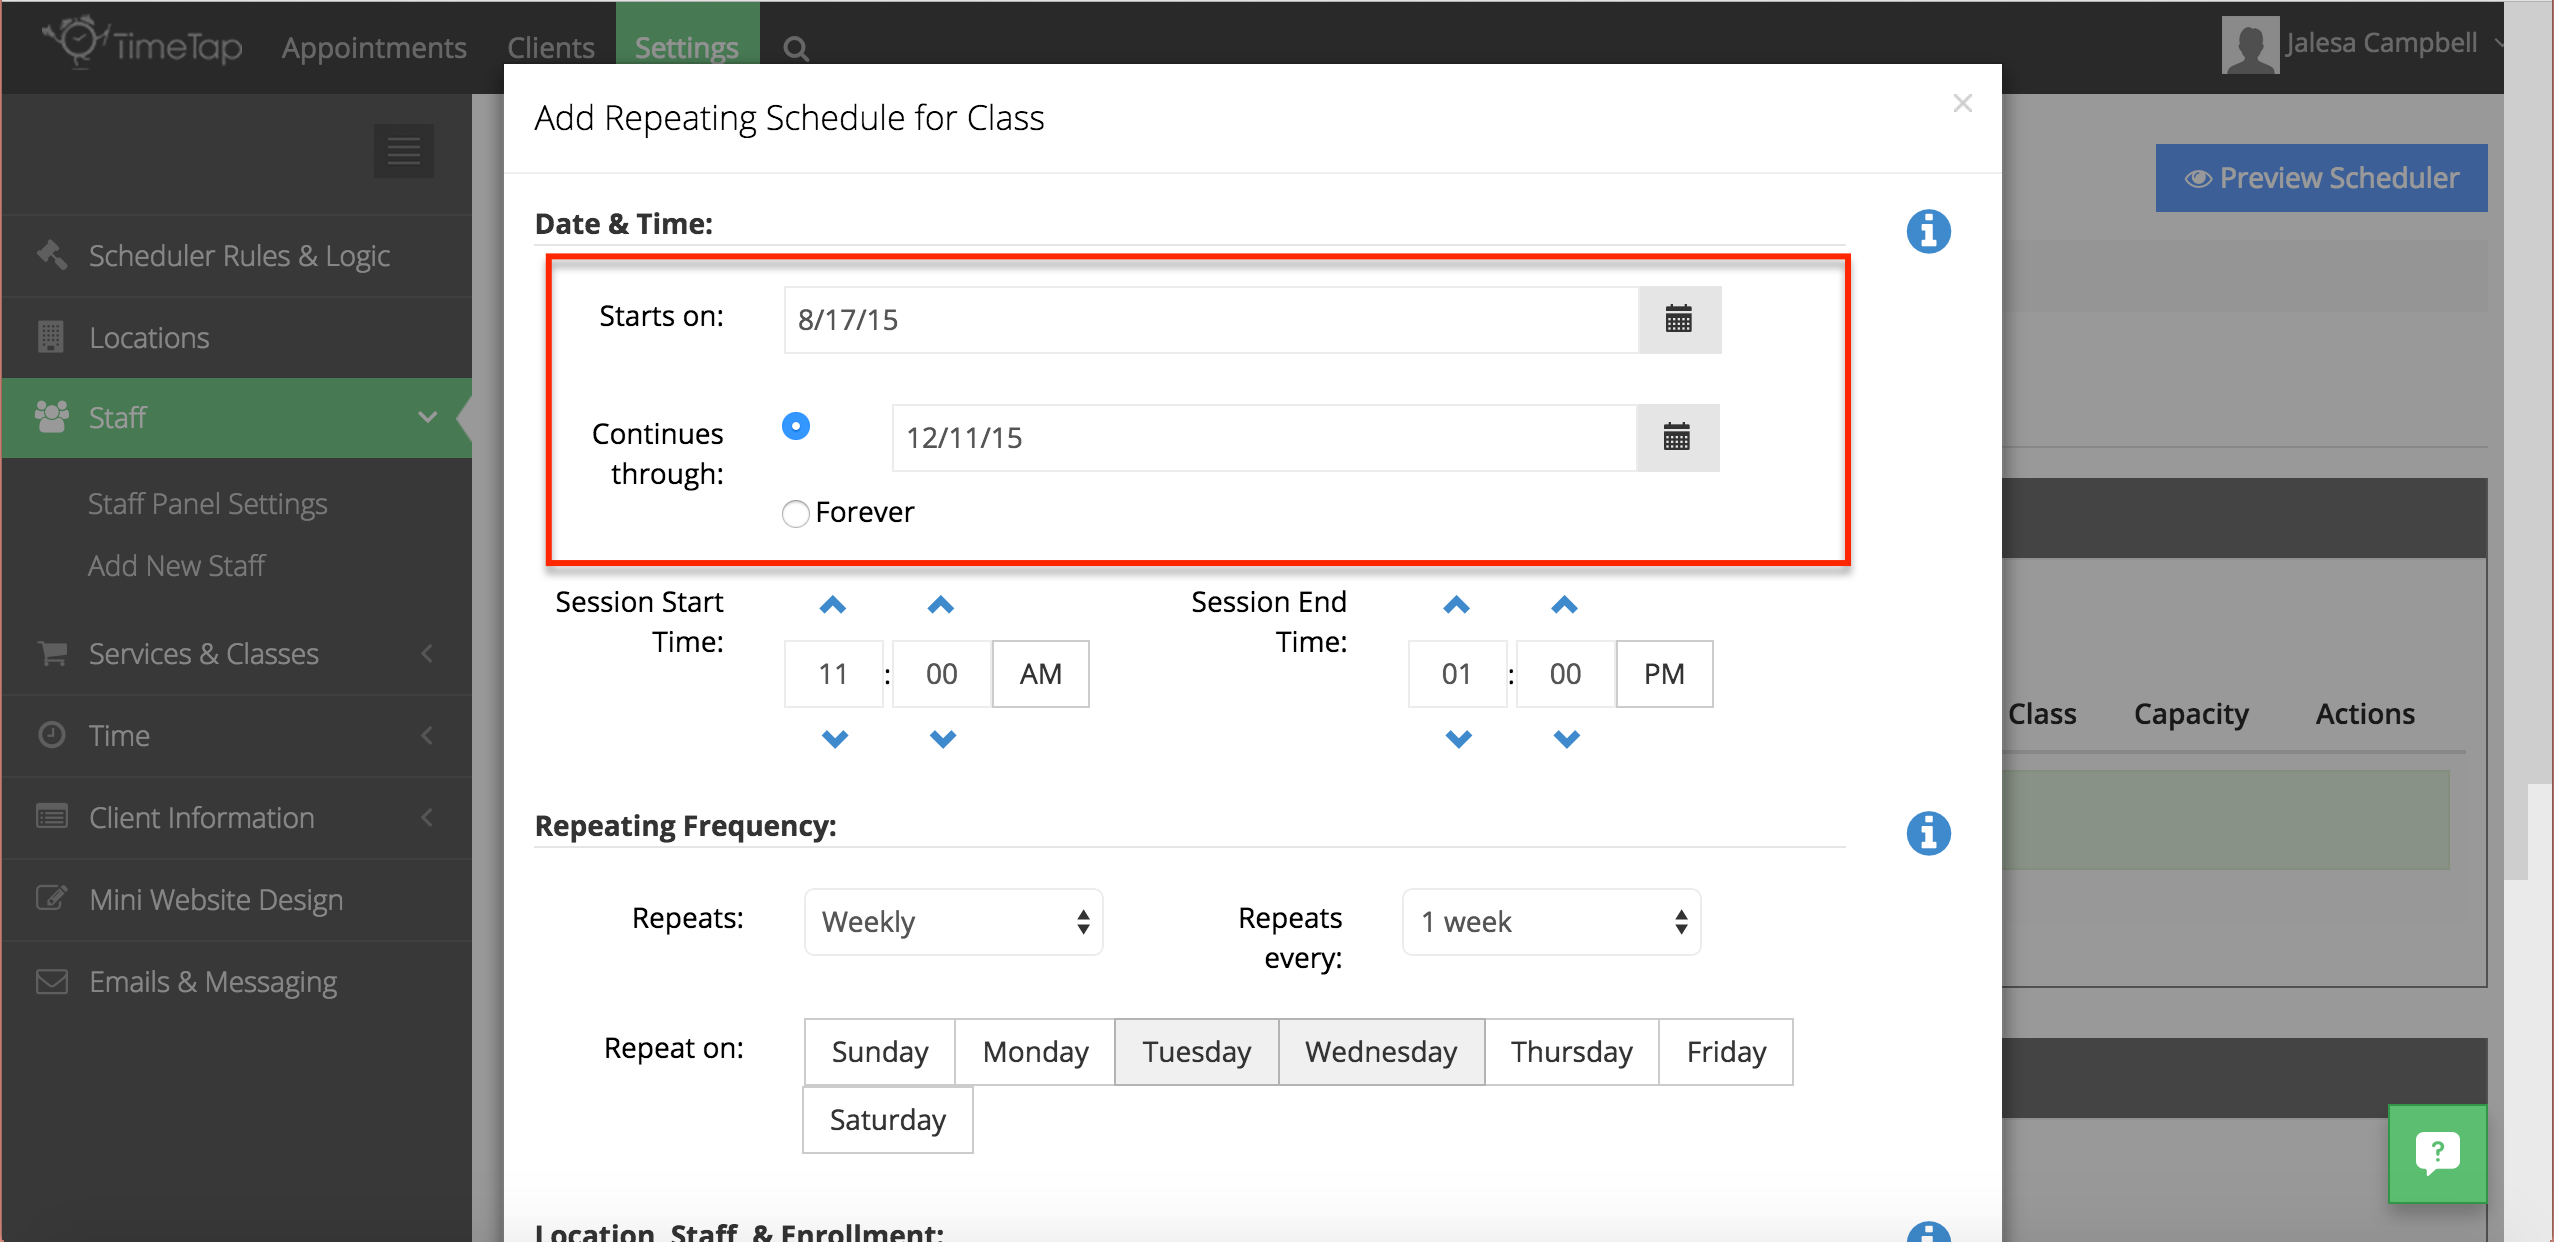
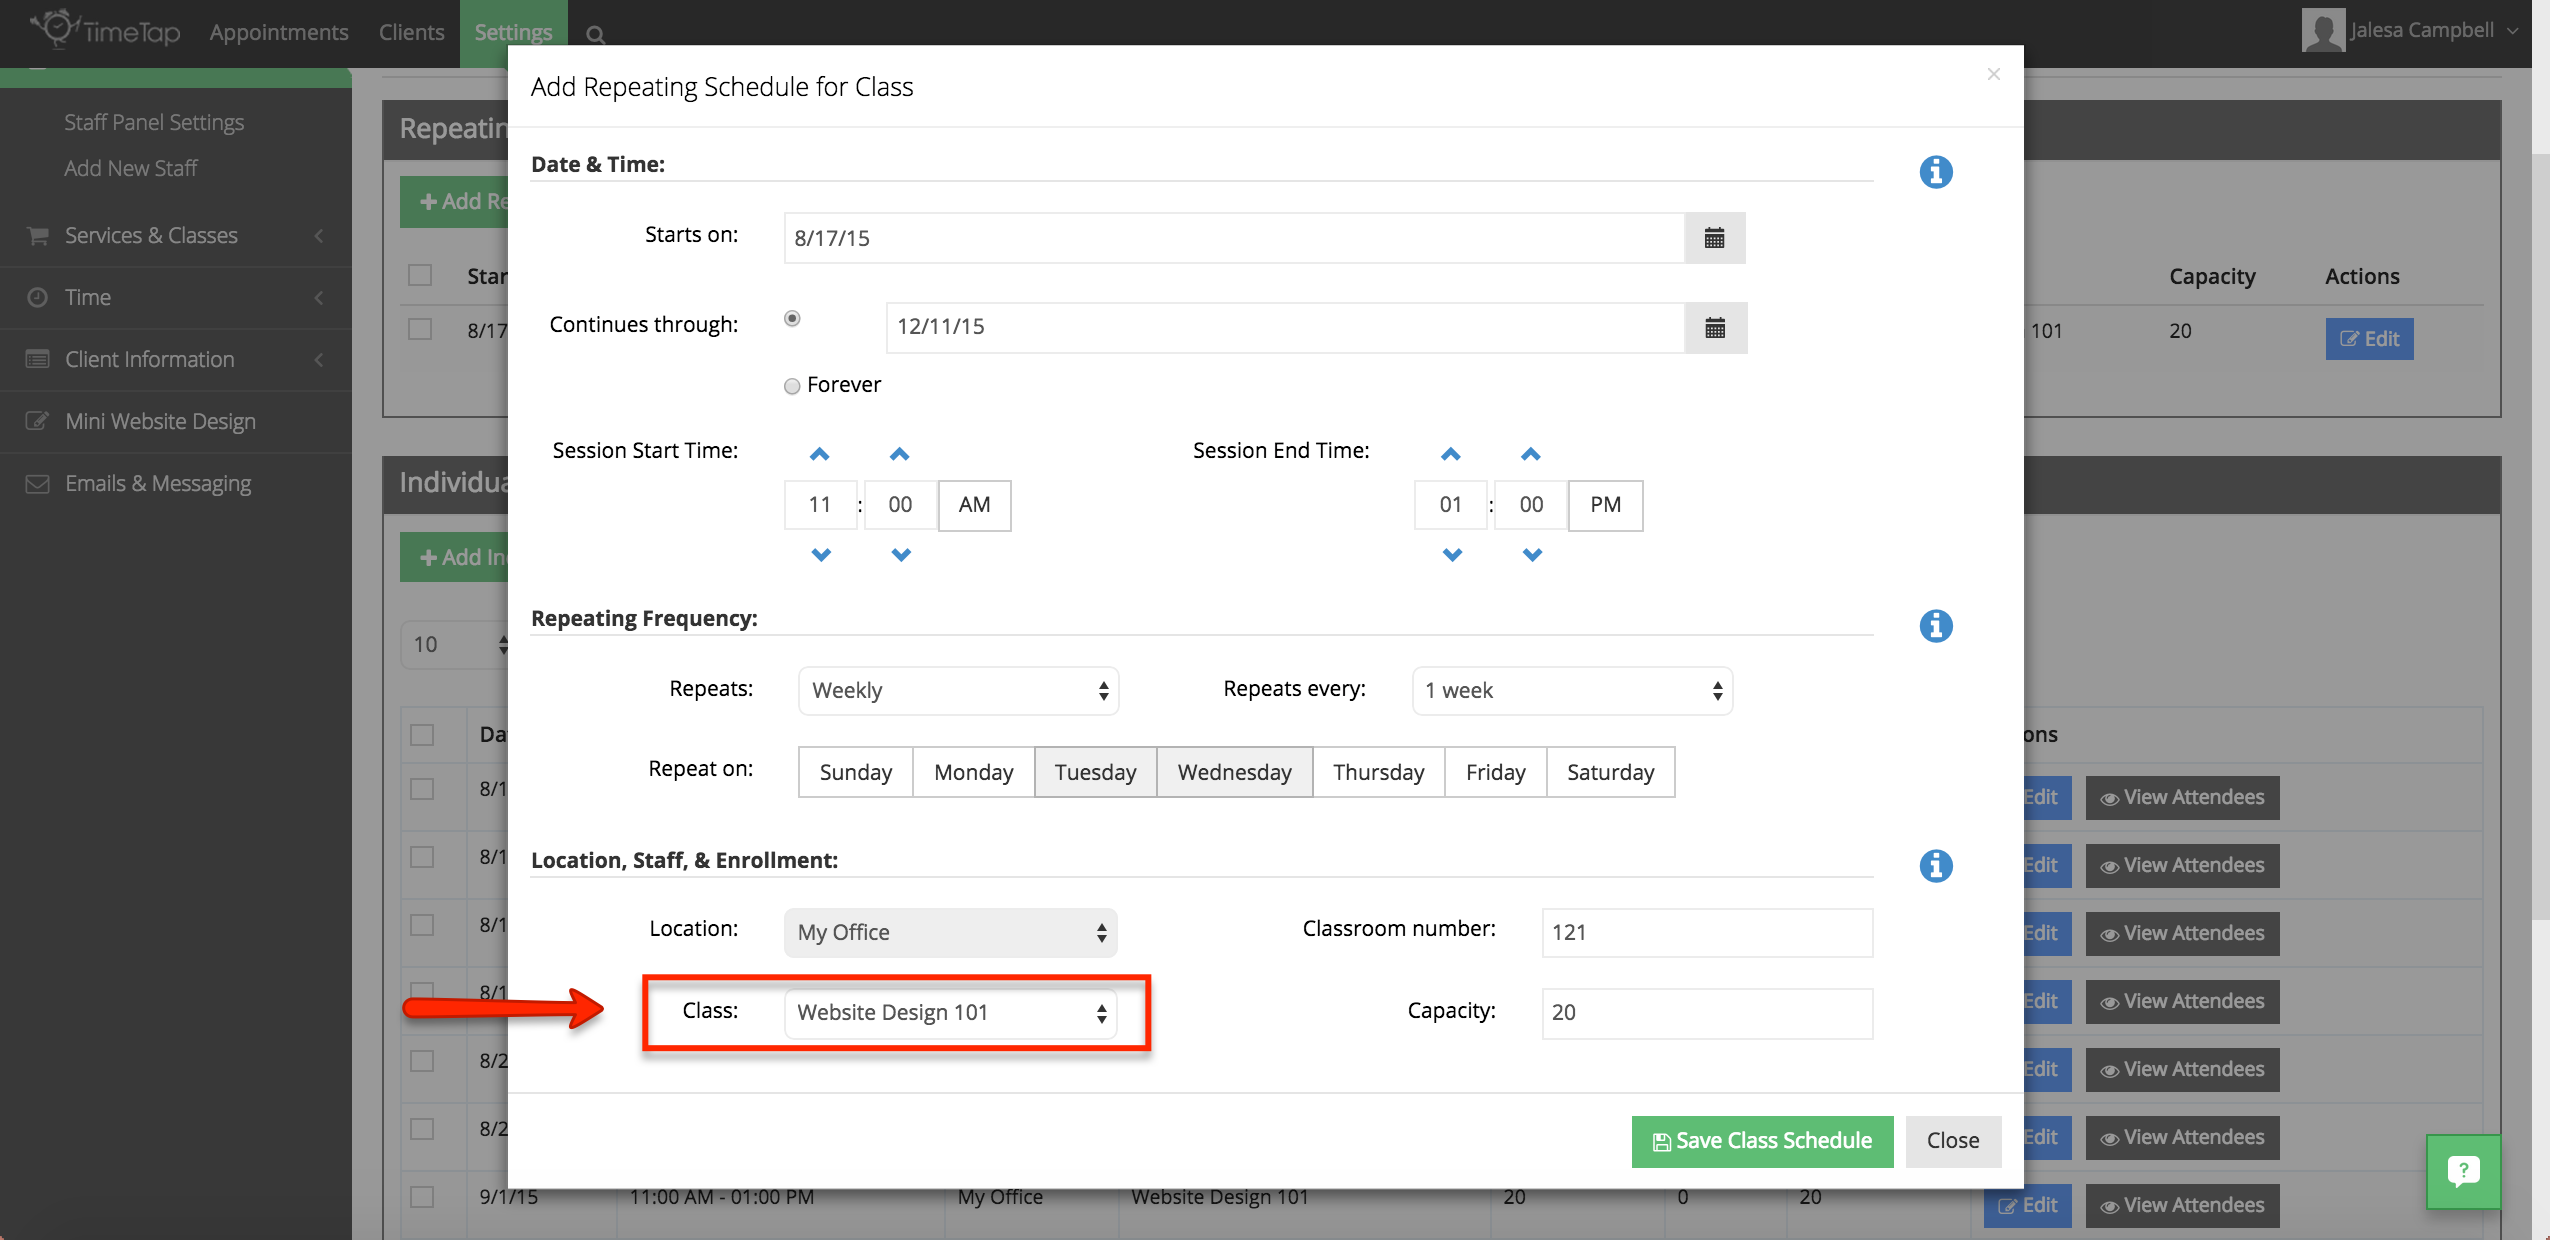
Once in the dialog box, you can edit options for the Date & Time section. As you will see in the photo below, I have chosen August 17, 2015 as the date that my Website Design 101 class will start on, and December 11, 2015 as the date on which it will end. You will also see that I have chosen my session start and end times, a weekly repeating frequency for Tuesdays and Wednesdays, the classroom number, the class name, and the capacity.
*Please note as a difference that you will be selecting the "Class" drop-down menu instead of the "Staff" drop-down menu since you are adding a repeating class schedule from the Staff Profile Page. If you were adding a repeating class schedule from the Class Profile page, you would select the 'Staff' member who would teach the class. Below are two photos that show you the difference between using the Staff Profile page and the Class Profile page when adding a repeating class schedule.

*From the Staff Profile Page (this is the option that you will see)

*From the Class Profile Page

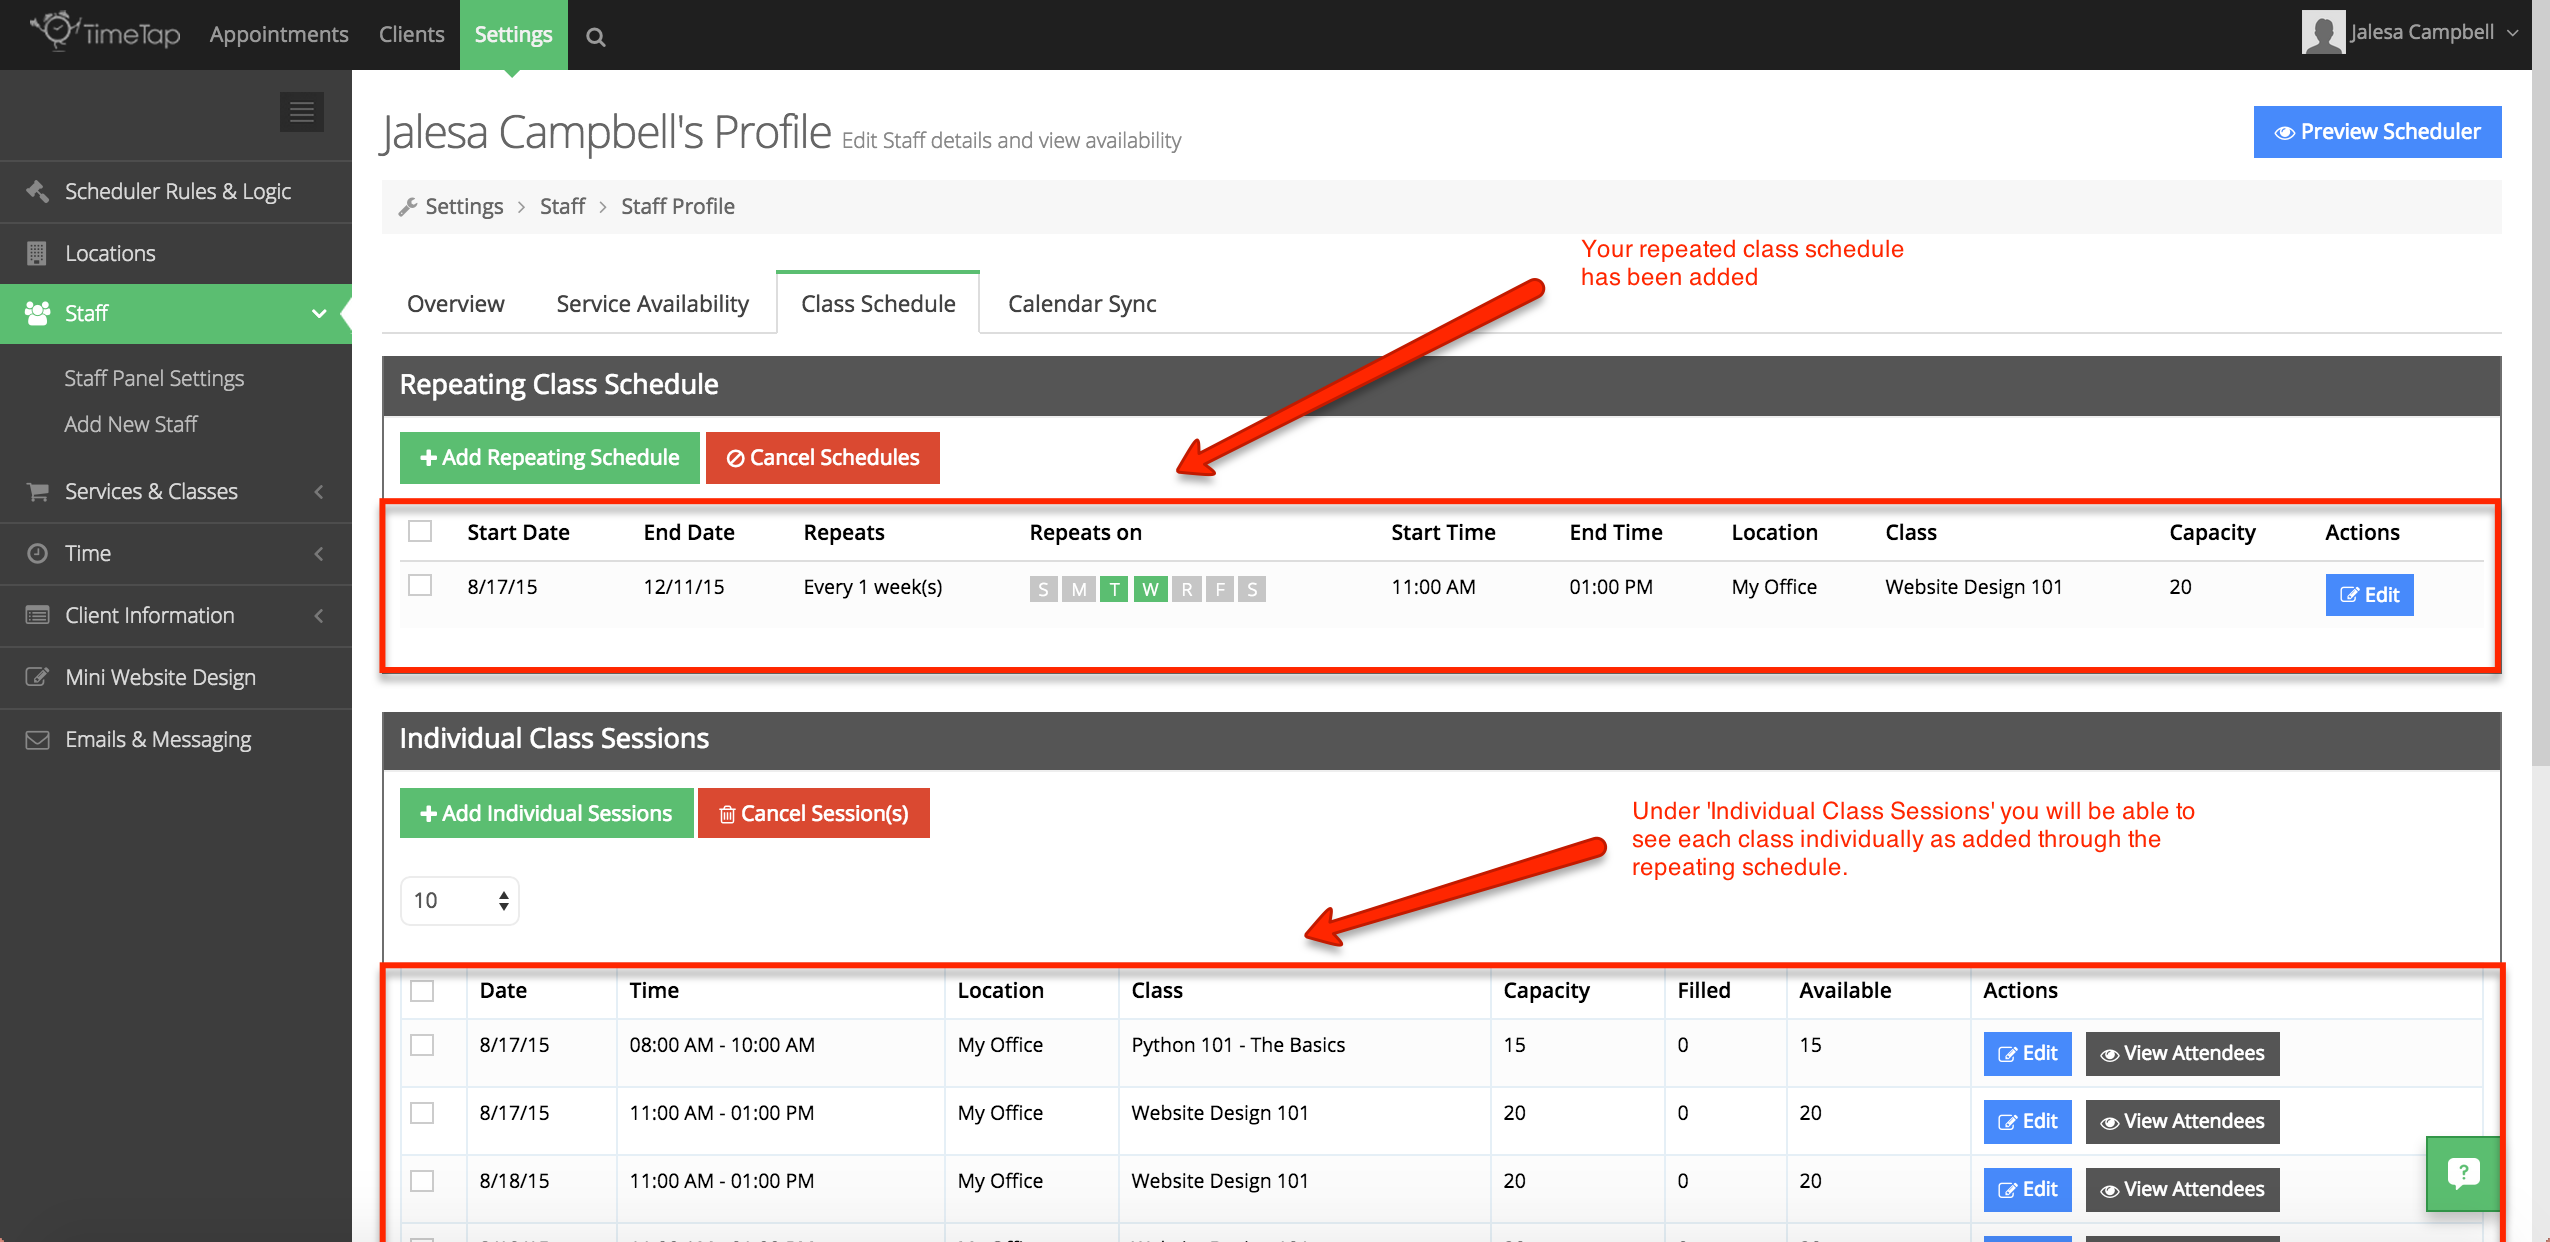
Once you are done adding your repeating class schedule, click on the ‘Save Class Schedule’ button and you will receive a confirmation message. Your new repeating class schedule has been added.
Next, you will learn about the difference in editing your Class Schedule through the Staff Profile page.
If you would like to edit an existing class schedule from the Staff Profile page, click on the blue "Edit" button under the "Actions" column and this will open a dialog box that will allow you to make changes to the date, time, repeating frequency, location, staff, and enrollment of your class.
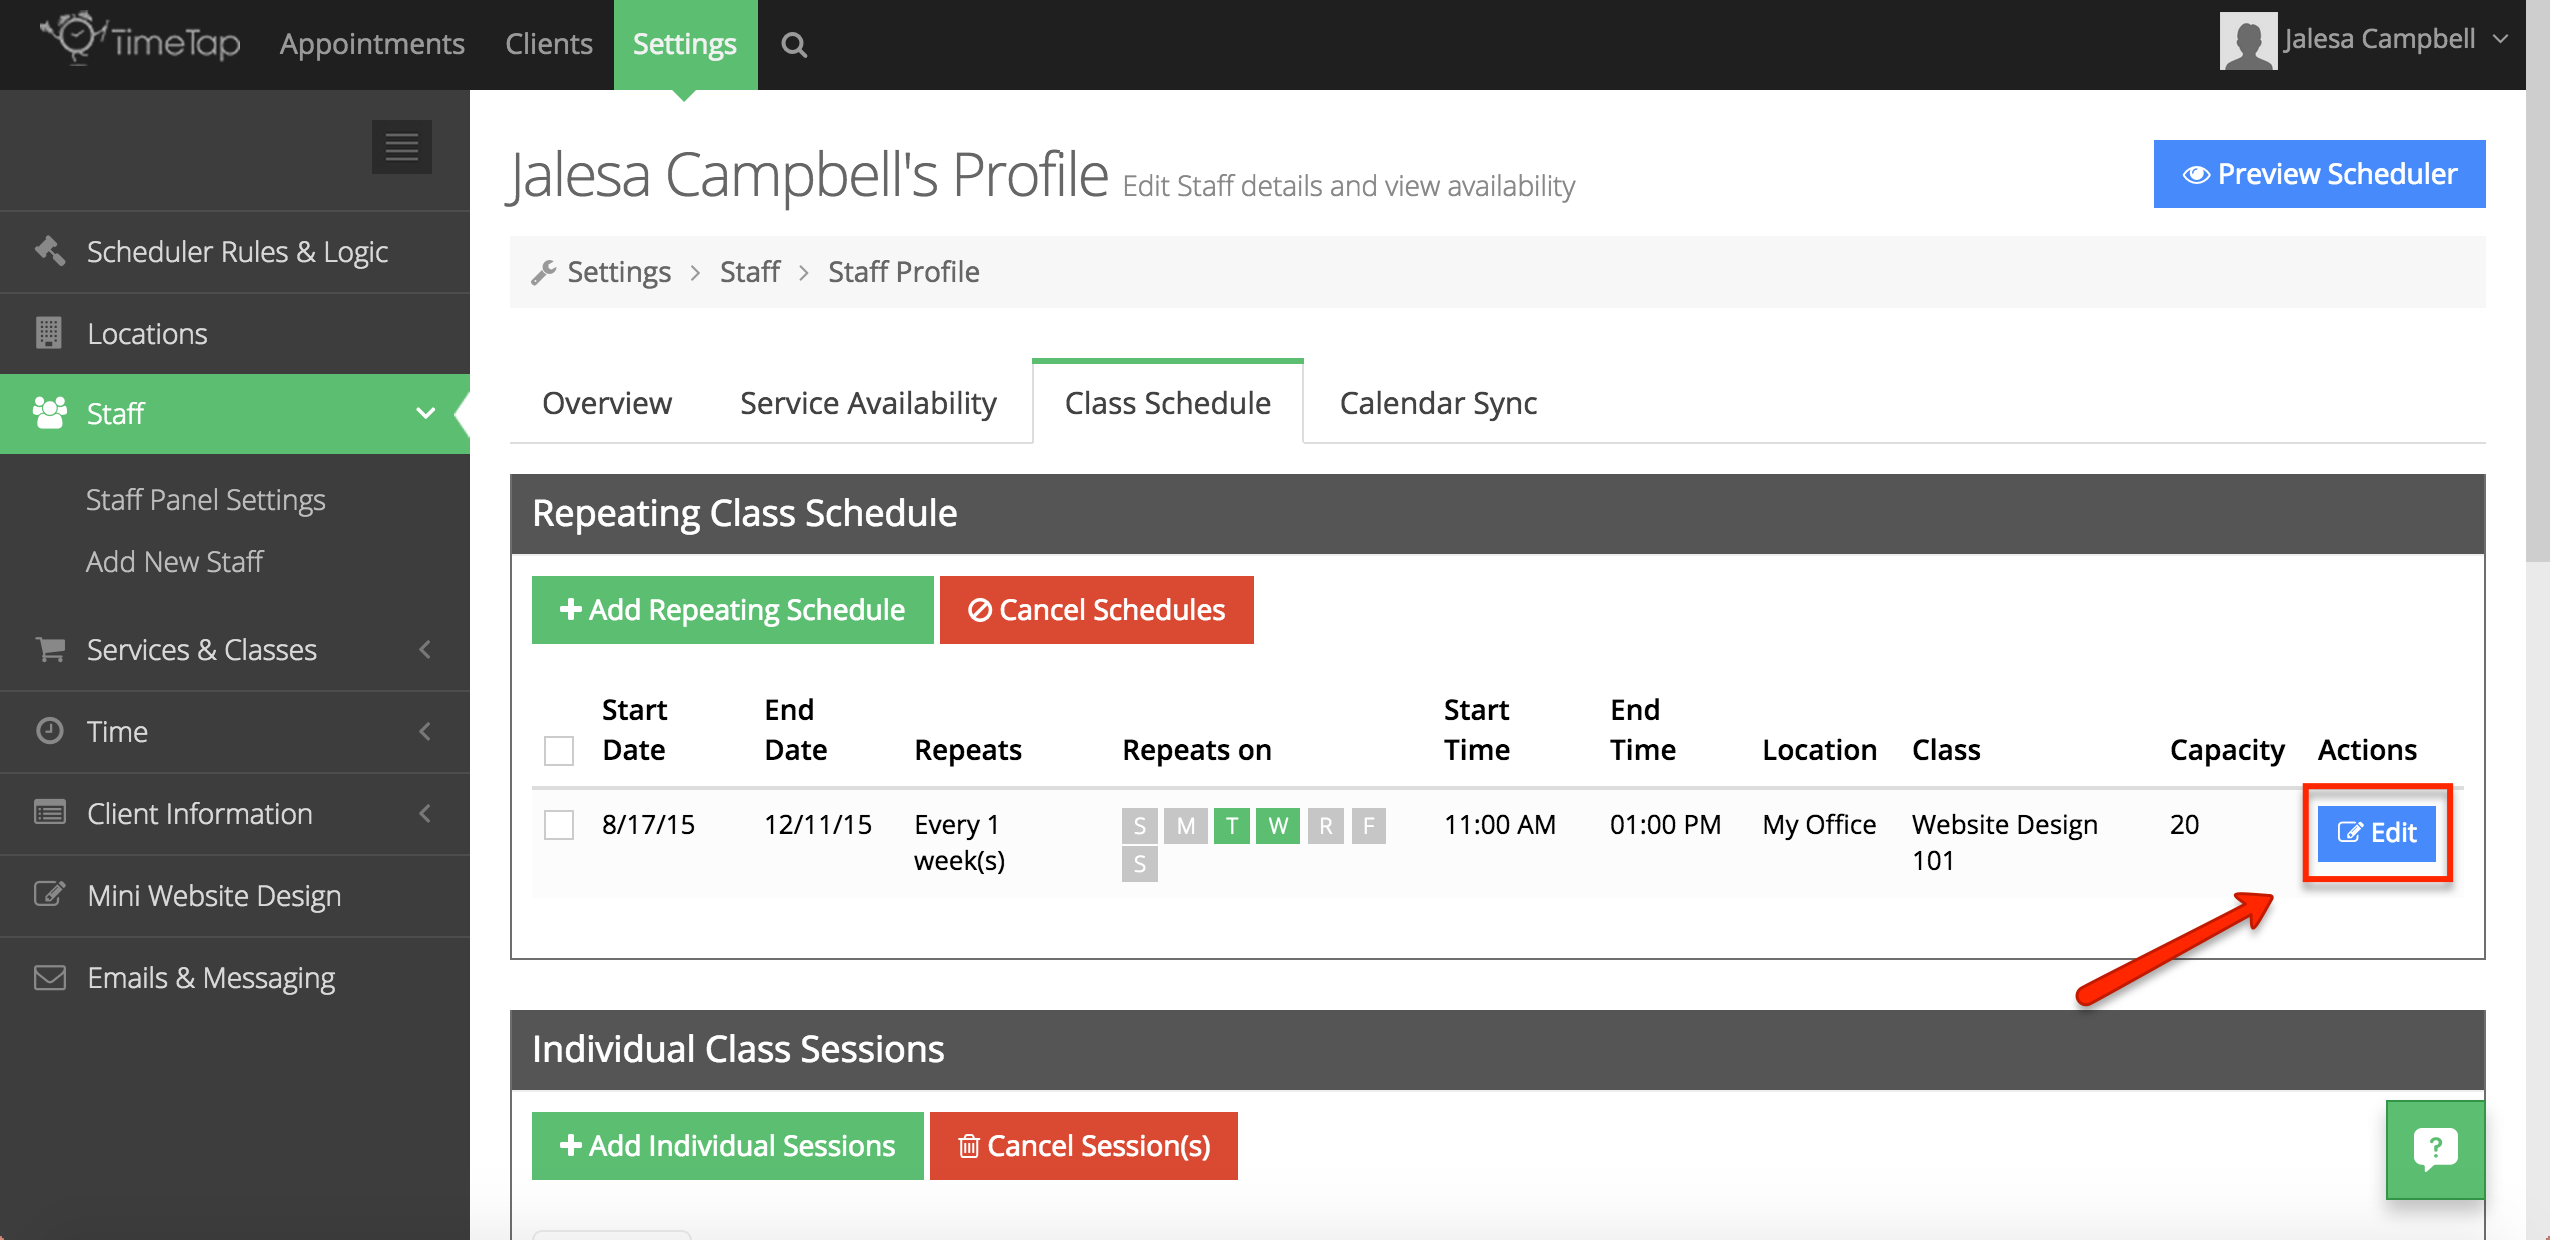
The main difference with editing an existing repeating class schedule from the Staff Profile page is that the "Class" drop-down menu option will be available for editing instead of the "Staff" drop-down menu. You can edit the above-mentioned options for any class that you choose.
For more details on how to edit an existing repeating class schedule, please click the hyperlinked text to be directed to more detailed documentation on that procedure.
Next, you will learn how to add an Individual Class Session from the Staff Profile page.
If you would like to add an Individual Class Session for an ad-hoc type of class, from the Staff Profile page click on the green "Add Individual Sessions" button.
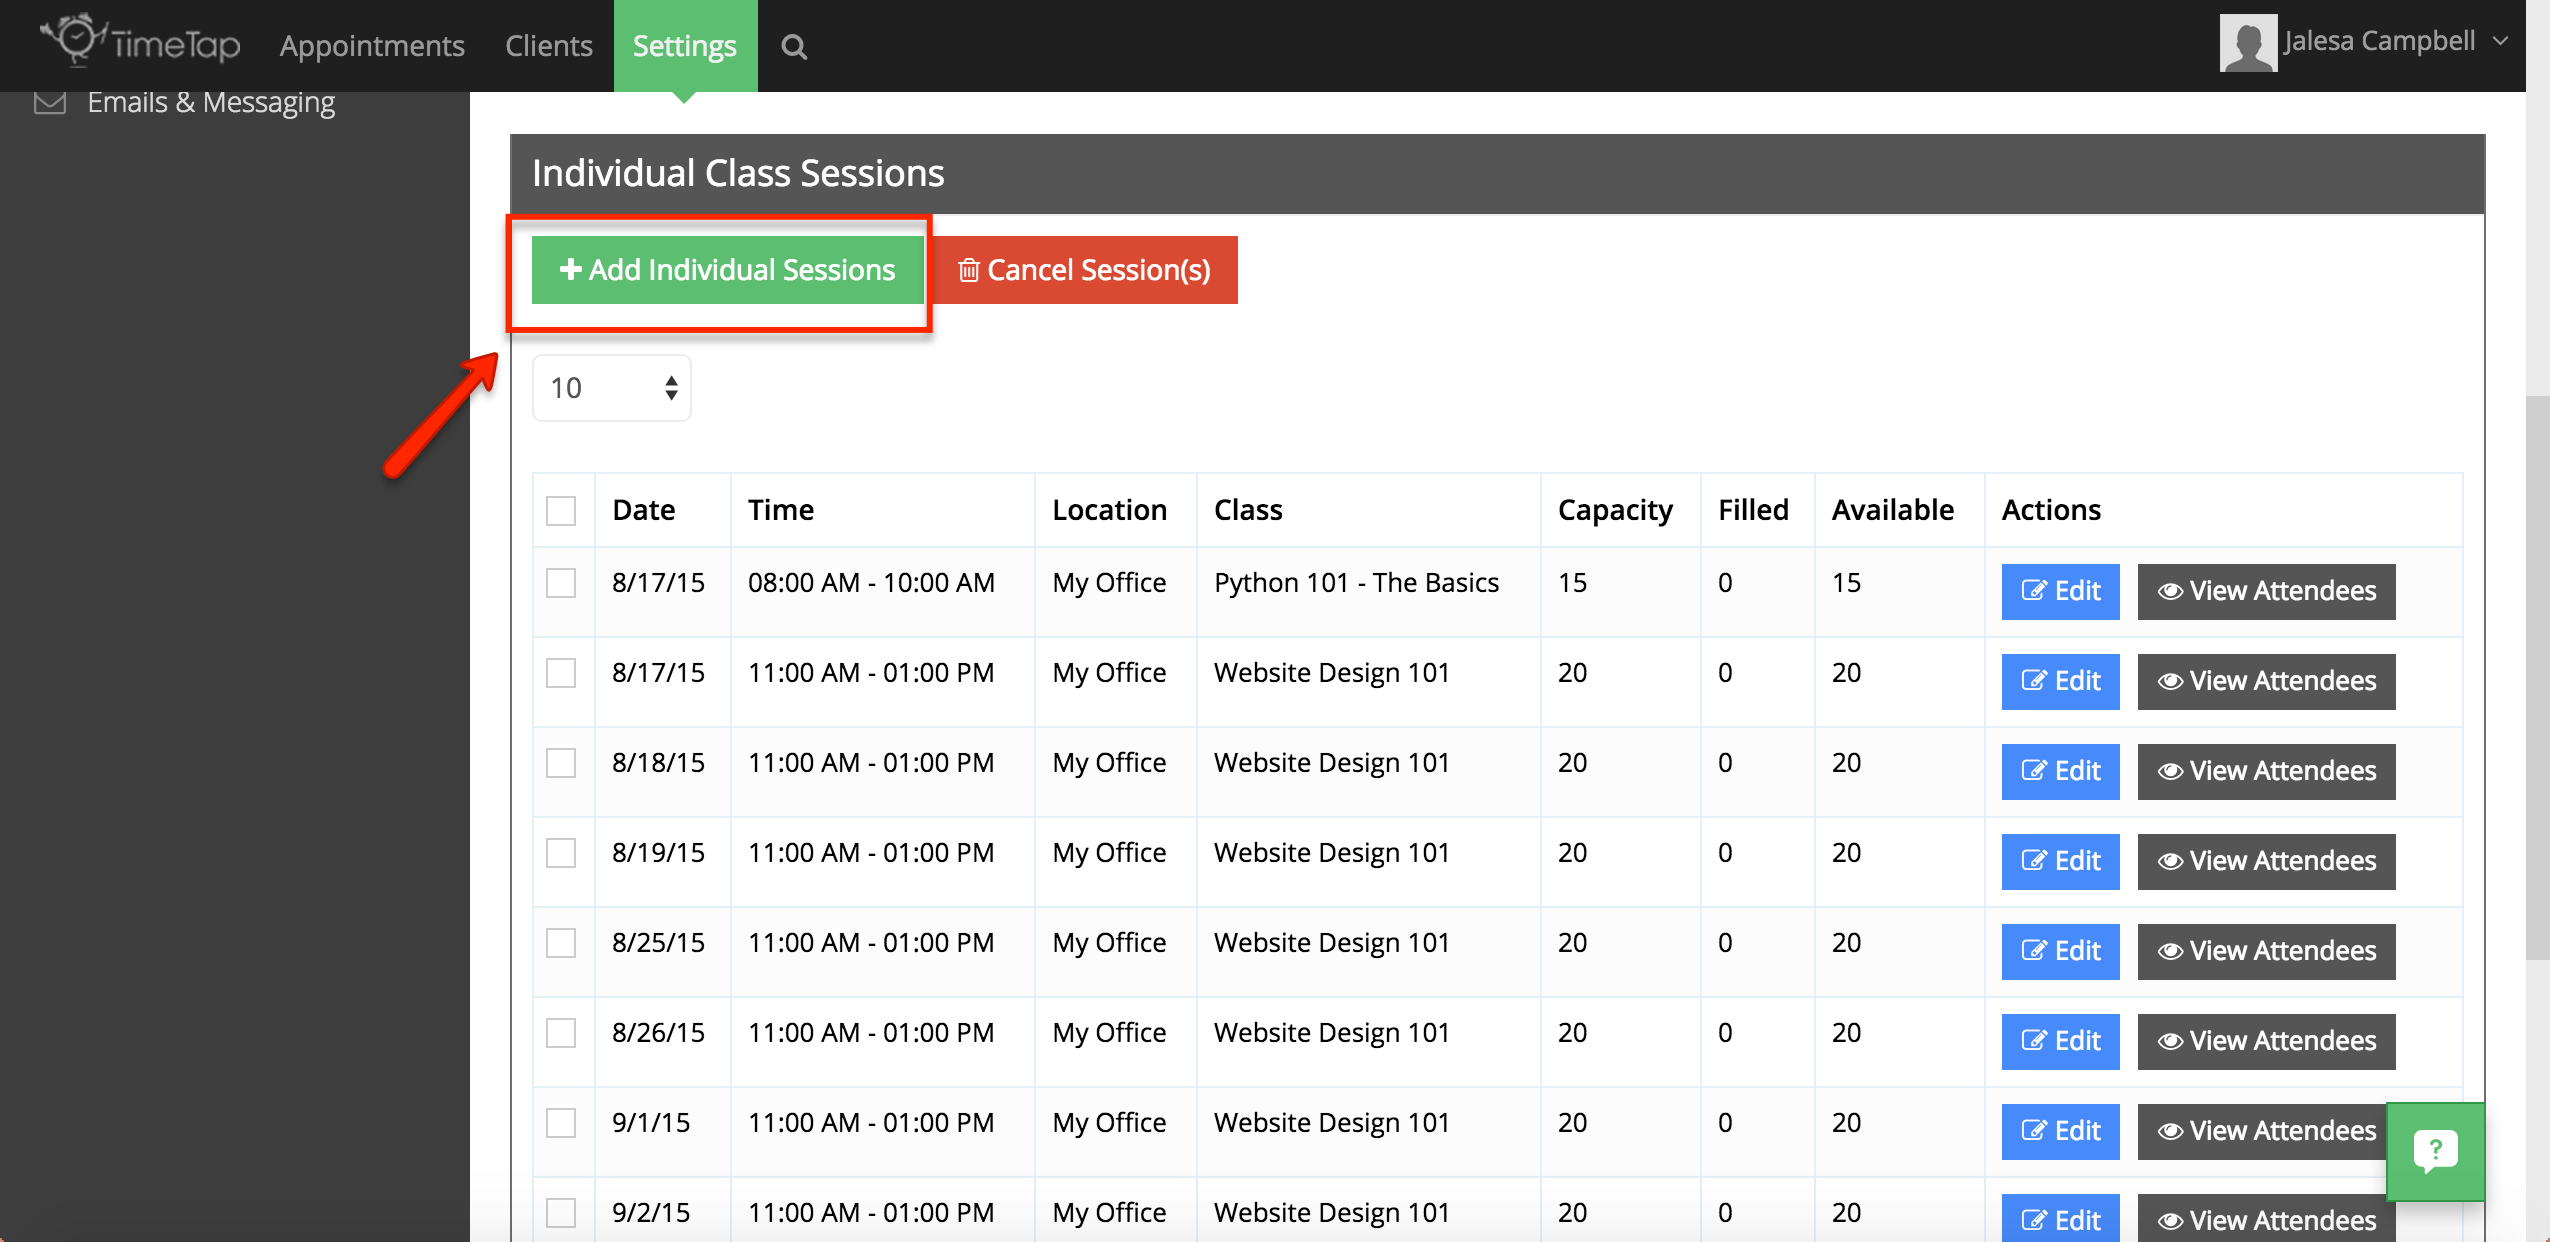
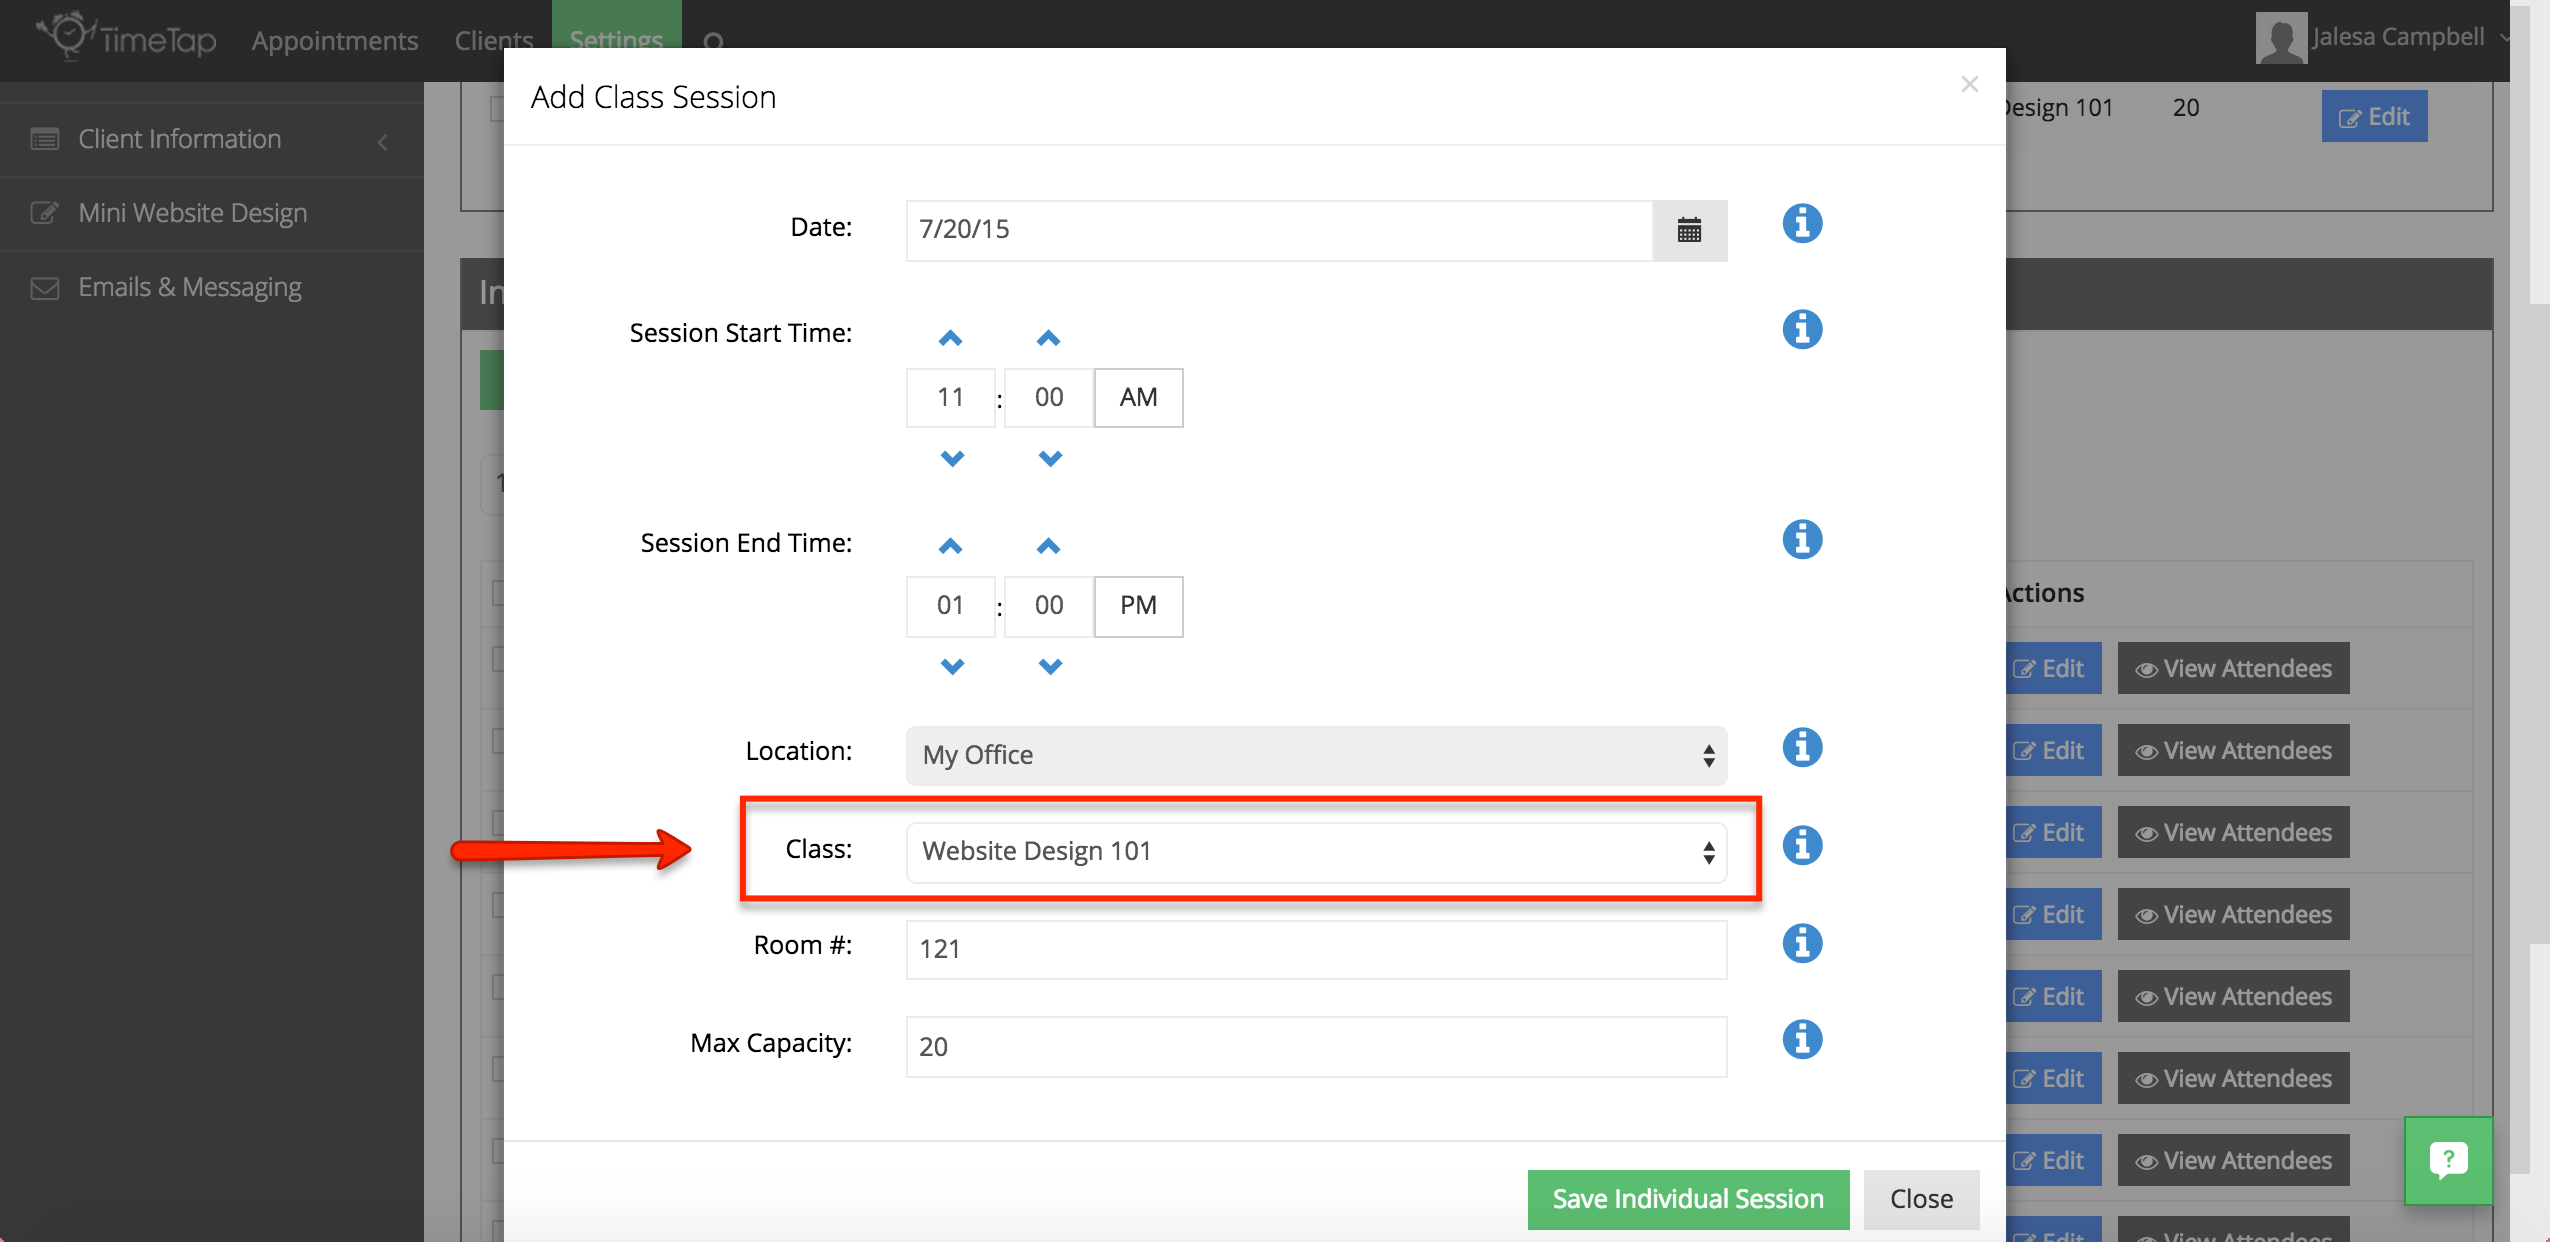
This will open a dialog box that will allow you to choose the date, session start time, session end time, location, class, room number, and max capacity for the class.

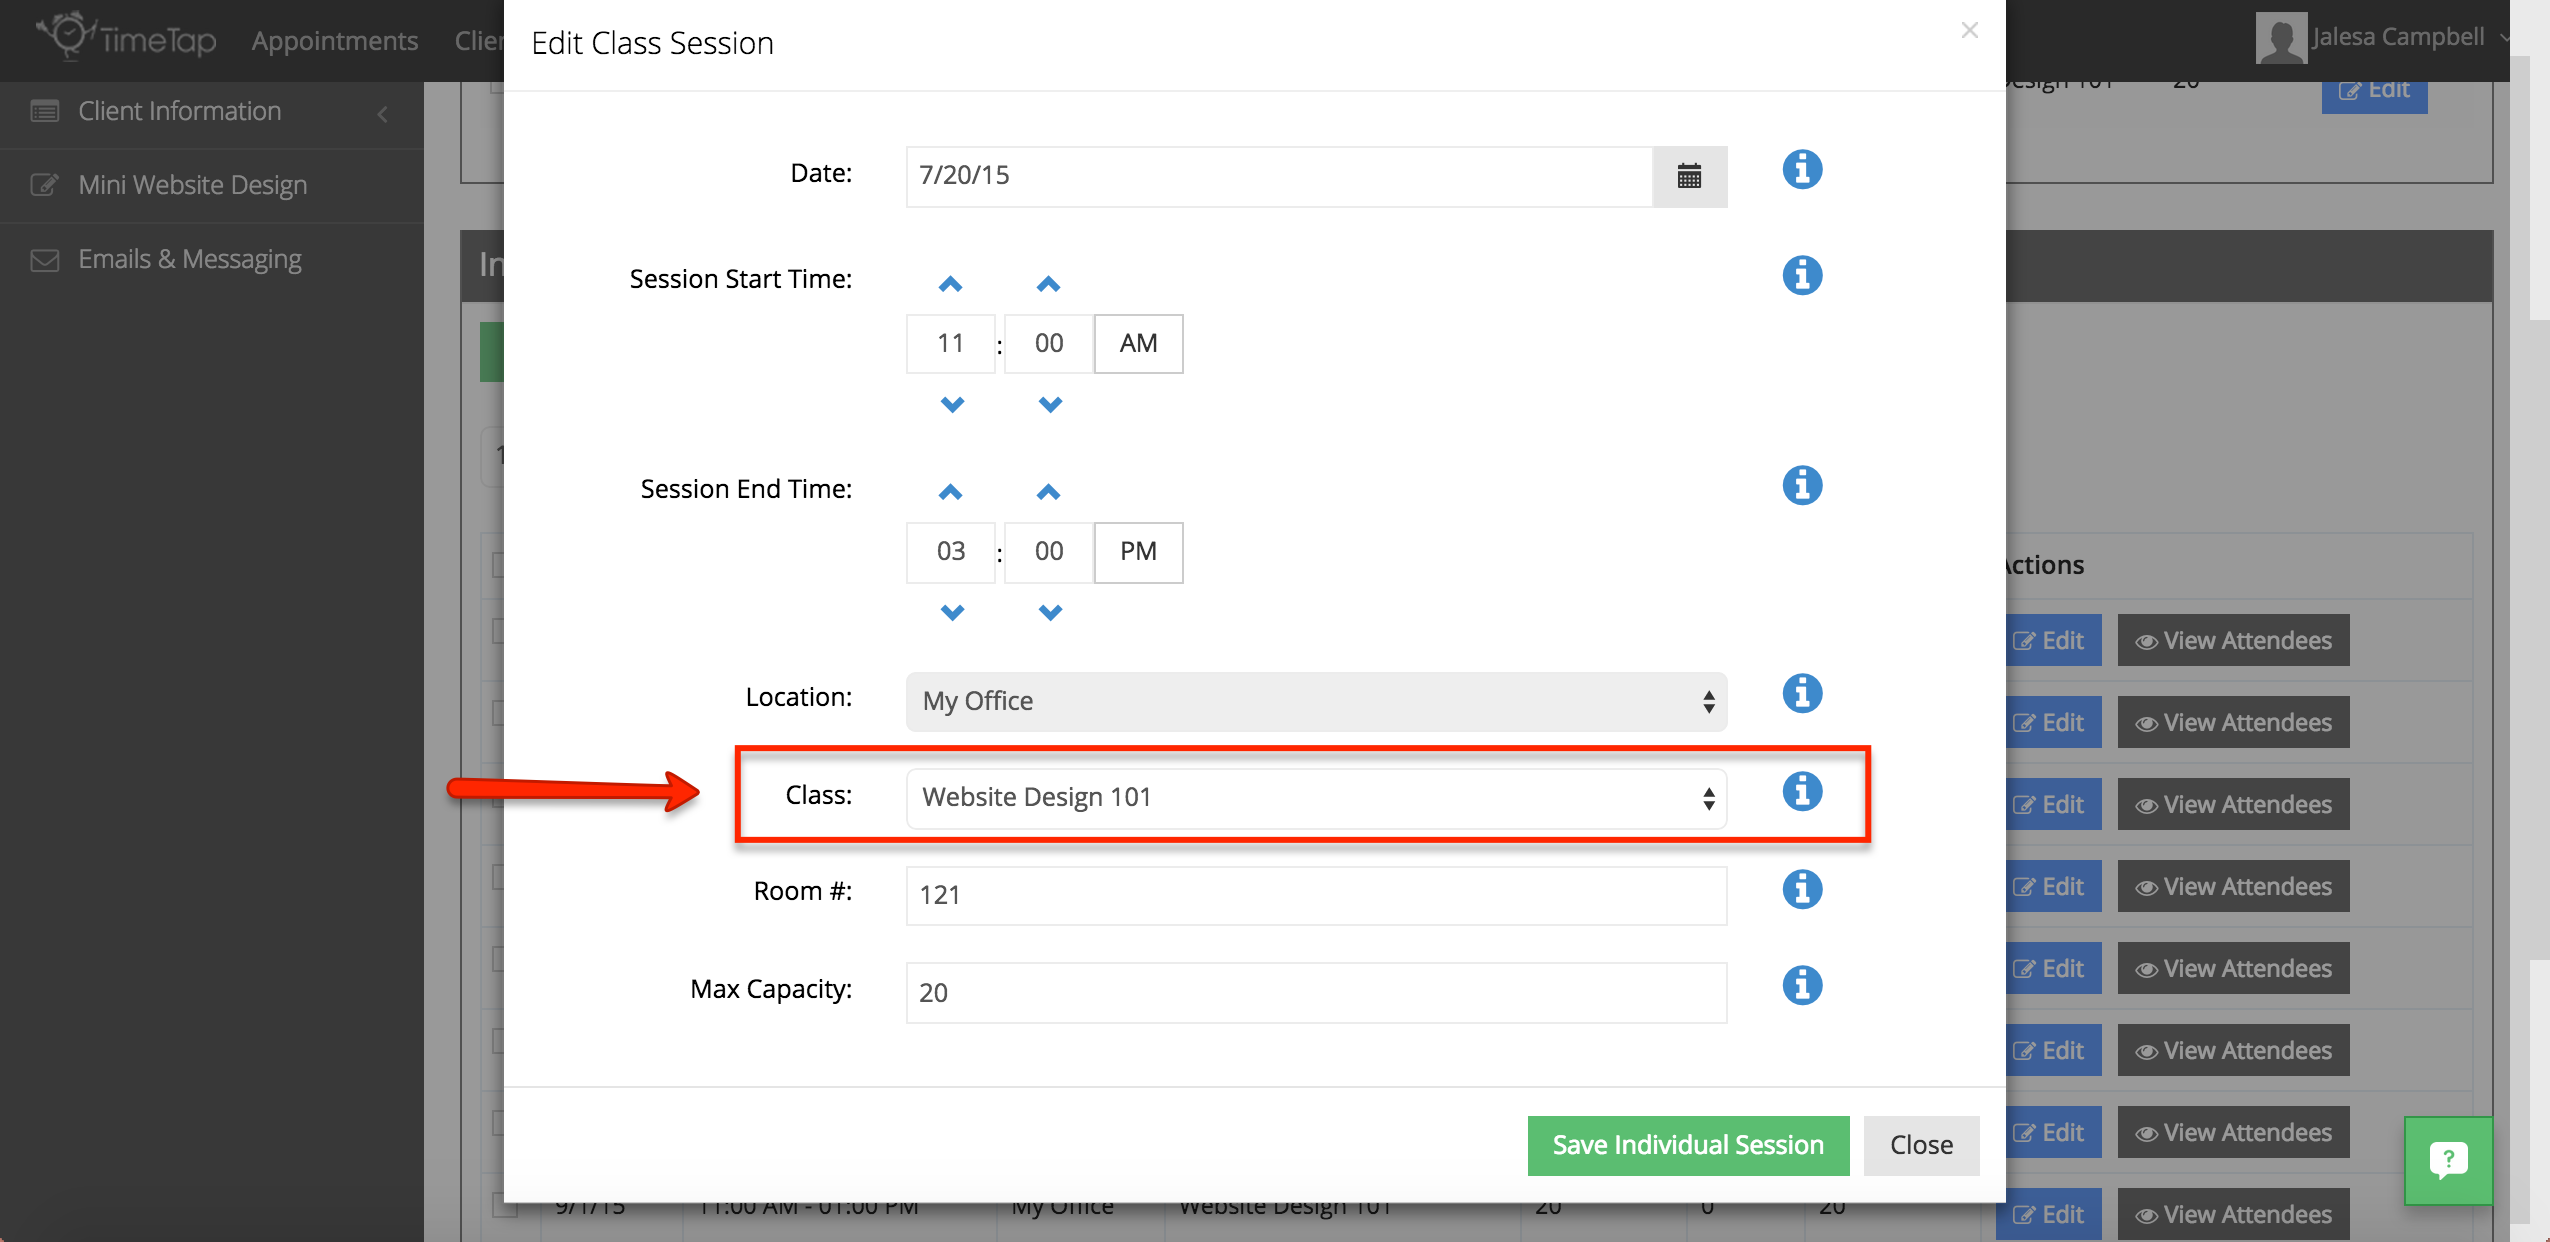
The main difference with adding an individual class session through the Staff Profile page is that you will be able to select the class for which the above-mentioned options can be edited through the "Class" drop-down menu. This differs from the "Staff" drop-down menu that is given when trying to add an individual class session from the Class Profile page. As you will see below, I have chosen the Website Design 101 class as the class that I would like to add an individual session for.
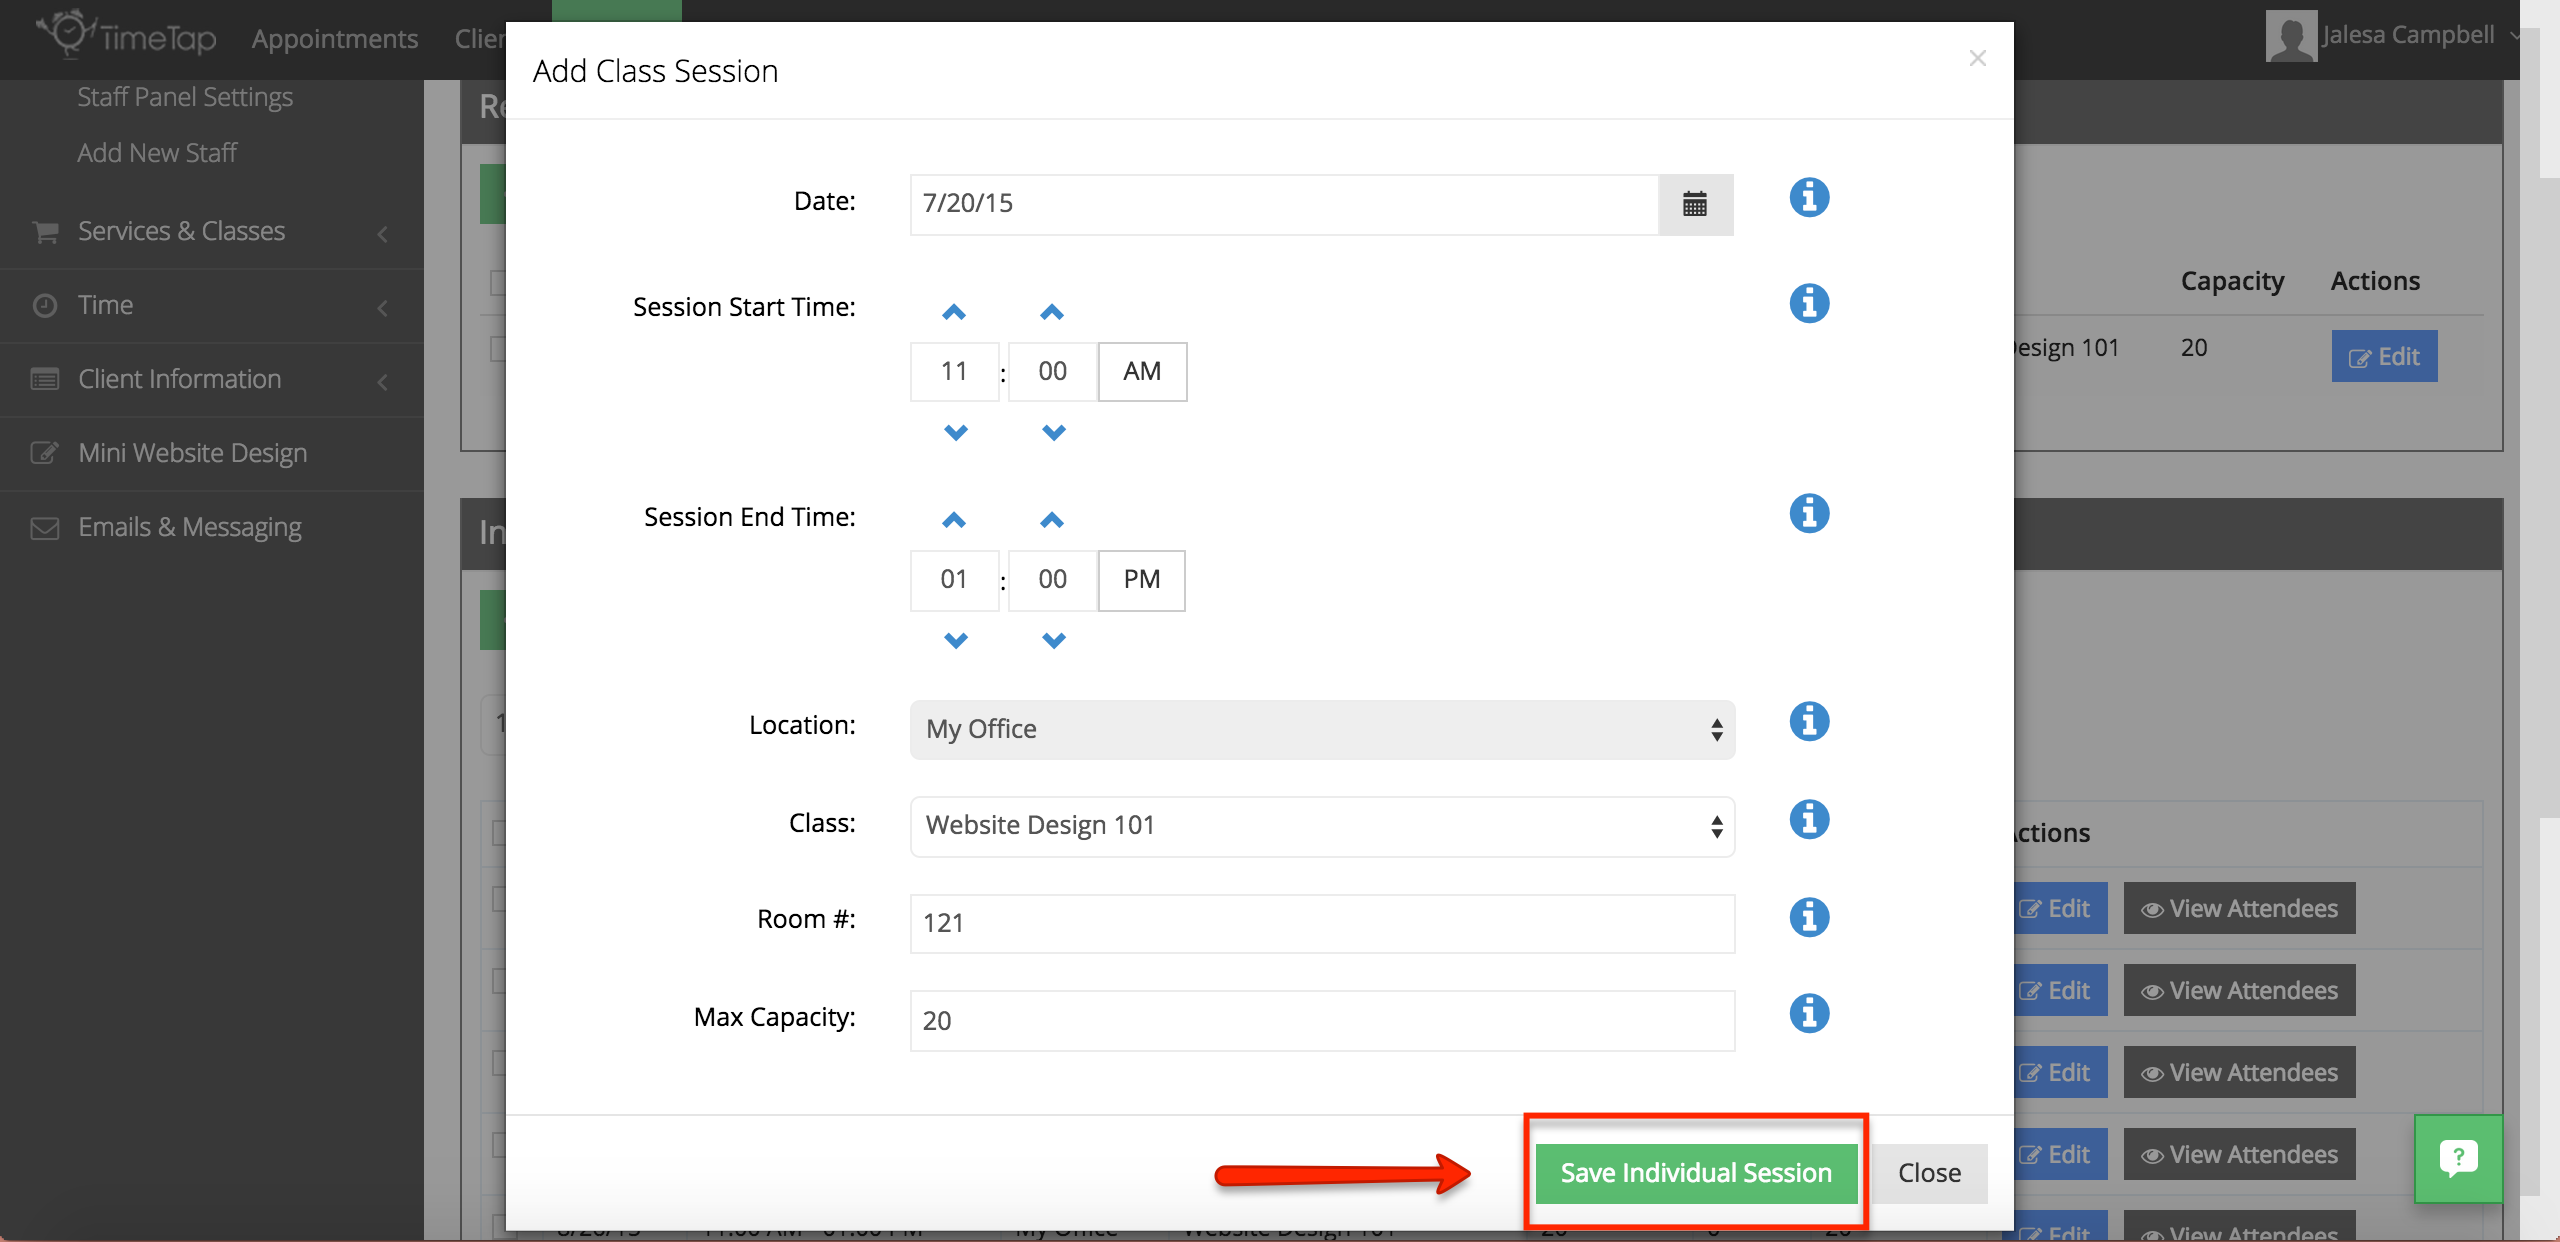
Once you have chosen the class that you would like to add an individual session for, click on the green "Save Individual Session" button and you will receive a confirmation message that your individual class session has been added.
For more details on how to add an individual class session, please click the hyperlinked text to be directed to more detailed documentation on this procedure.
Next, you will learn about editing an existing Individual Class Session from the Staff Profile page.
If you would like to edit an Individual Class Session from the Staff Profile page click on the blue "Edit" button under the "Actions" column.

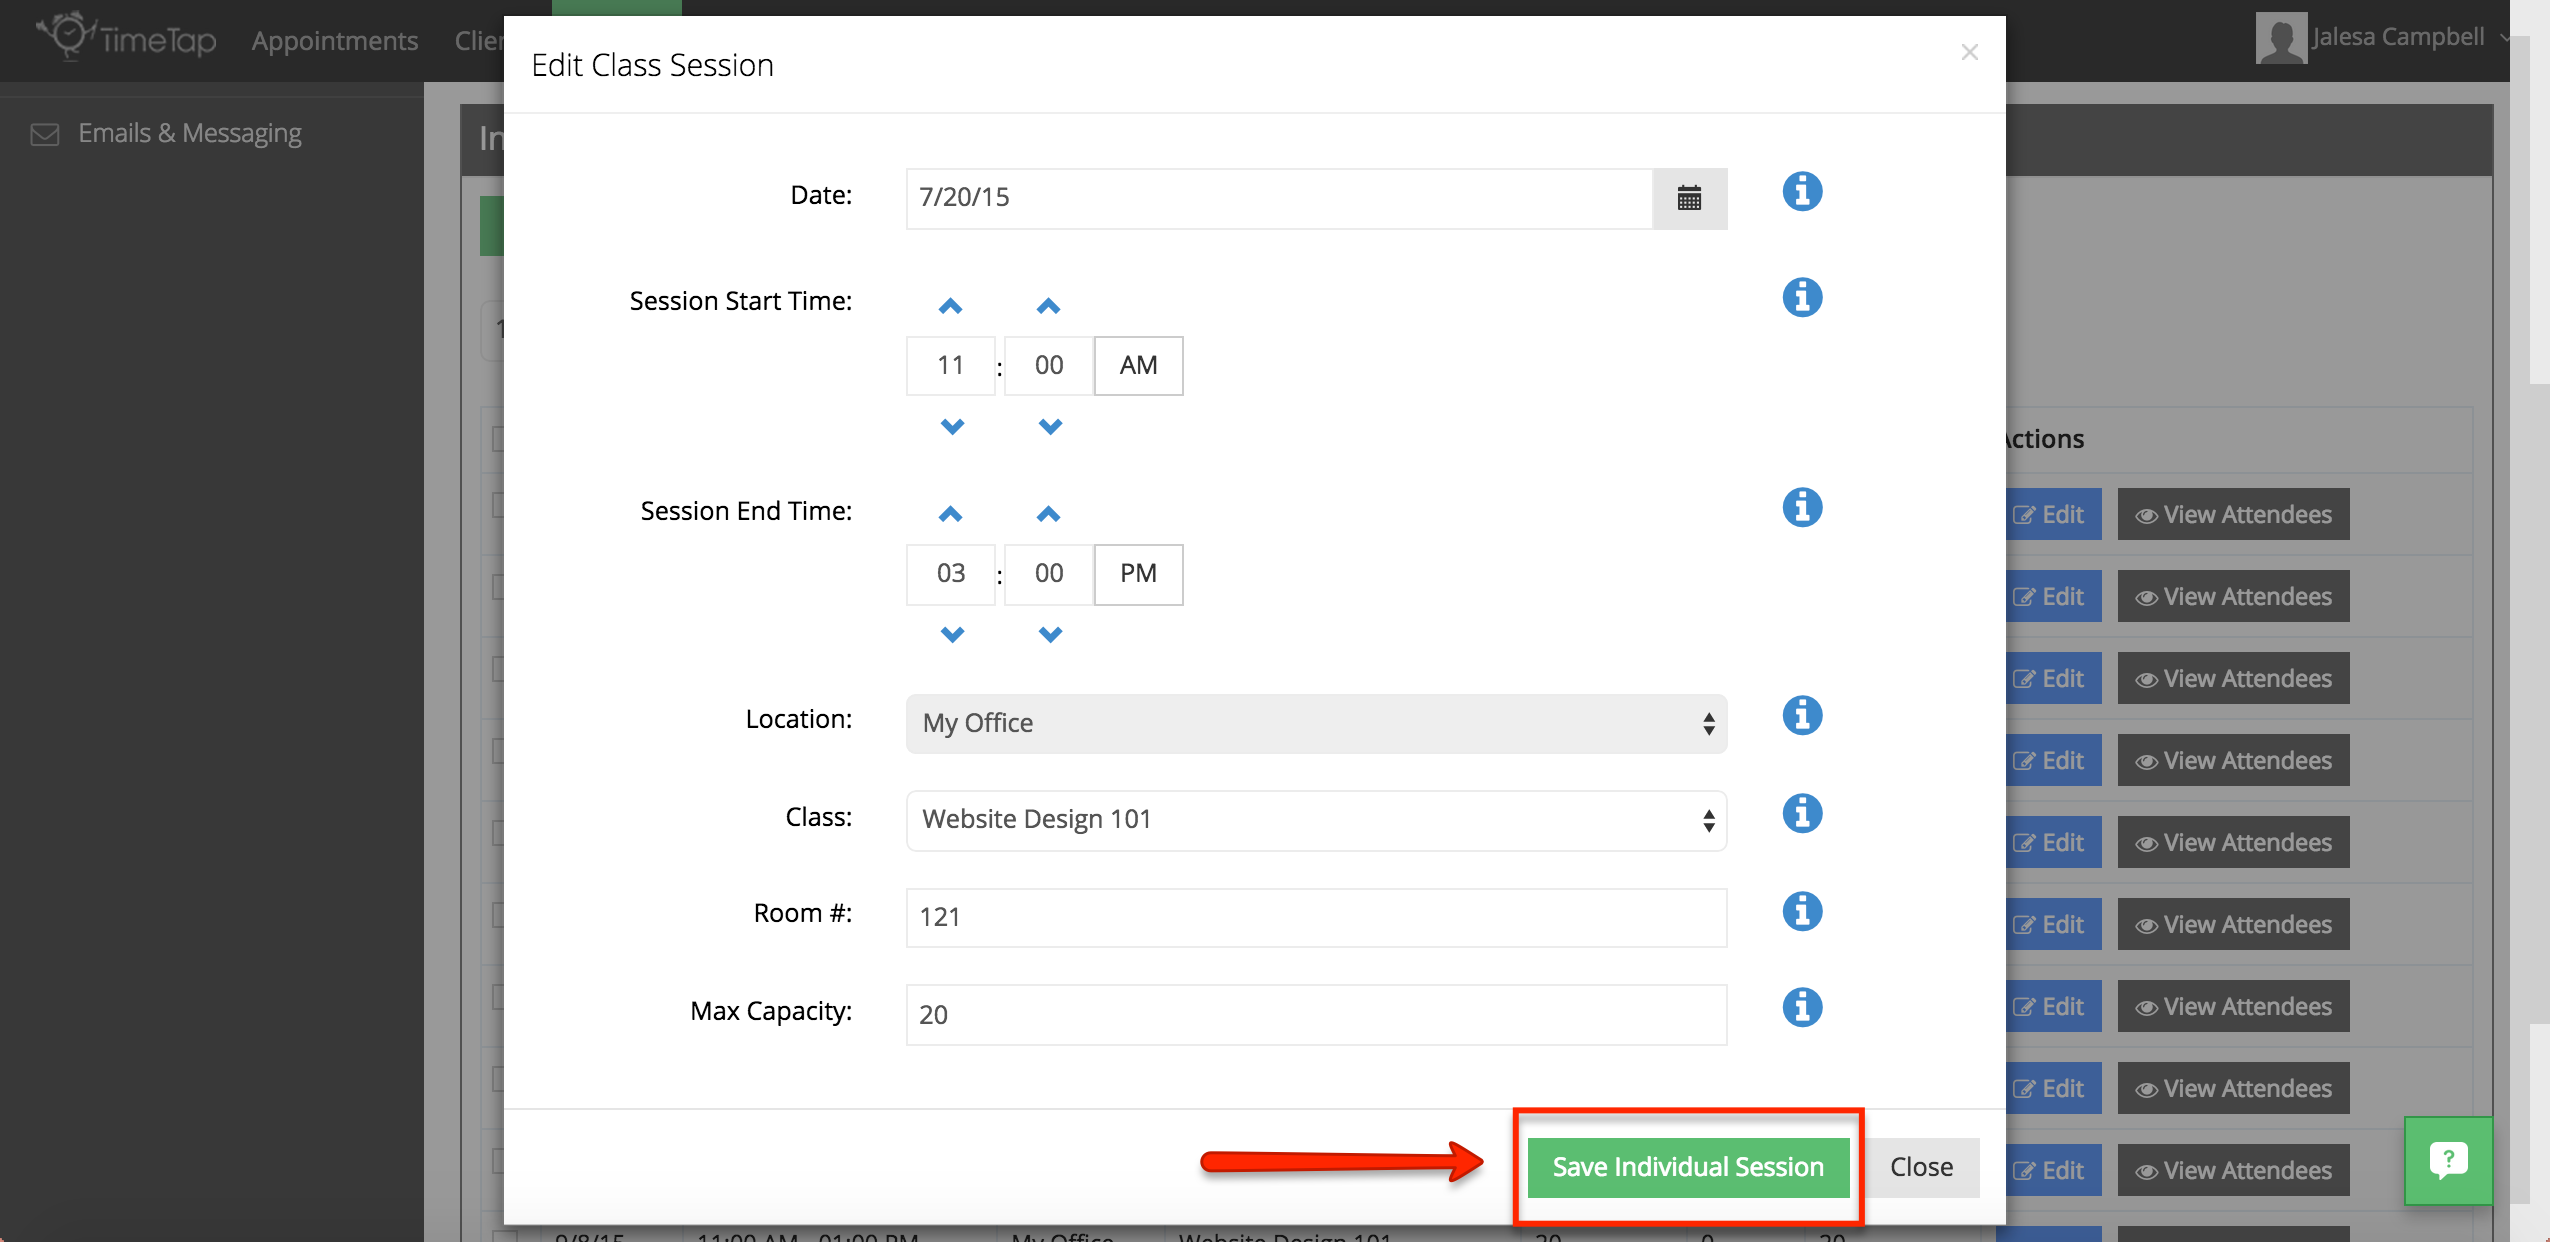
This will open a dialog box that will allow you to make changes to the date, session start time, session end time, location, class, room number, and max capacity for the class. As you will see in the photo below, I have edited the session end time to be 3:00 p.m. for my Website Design 101 class.
As mentioned previously, the main difference with accessing your Class Schedule through the Staff Profile page is that you will be able to select which individual class you would like to edit instead of the staff member.
Once you are done editing the individual class session you have chosen, click on the green "Save Individual Session" button and you will receive a message confirming that your individual session has been updated.
For more details on editing an existing individual class session, please click the hyperlinked text to be directed to more detailed documentation on this procedure.
As the last part of this documentation, you will learn how to cancel an individual class session or repeating class schedule.
Canceling an Individual Class Session
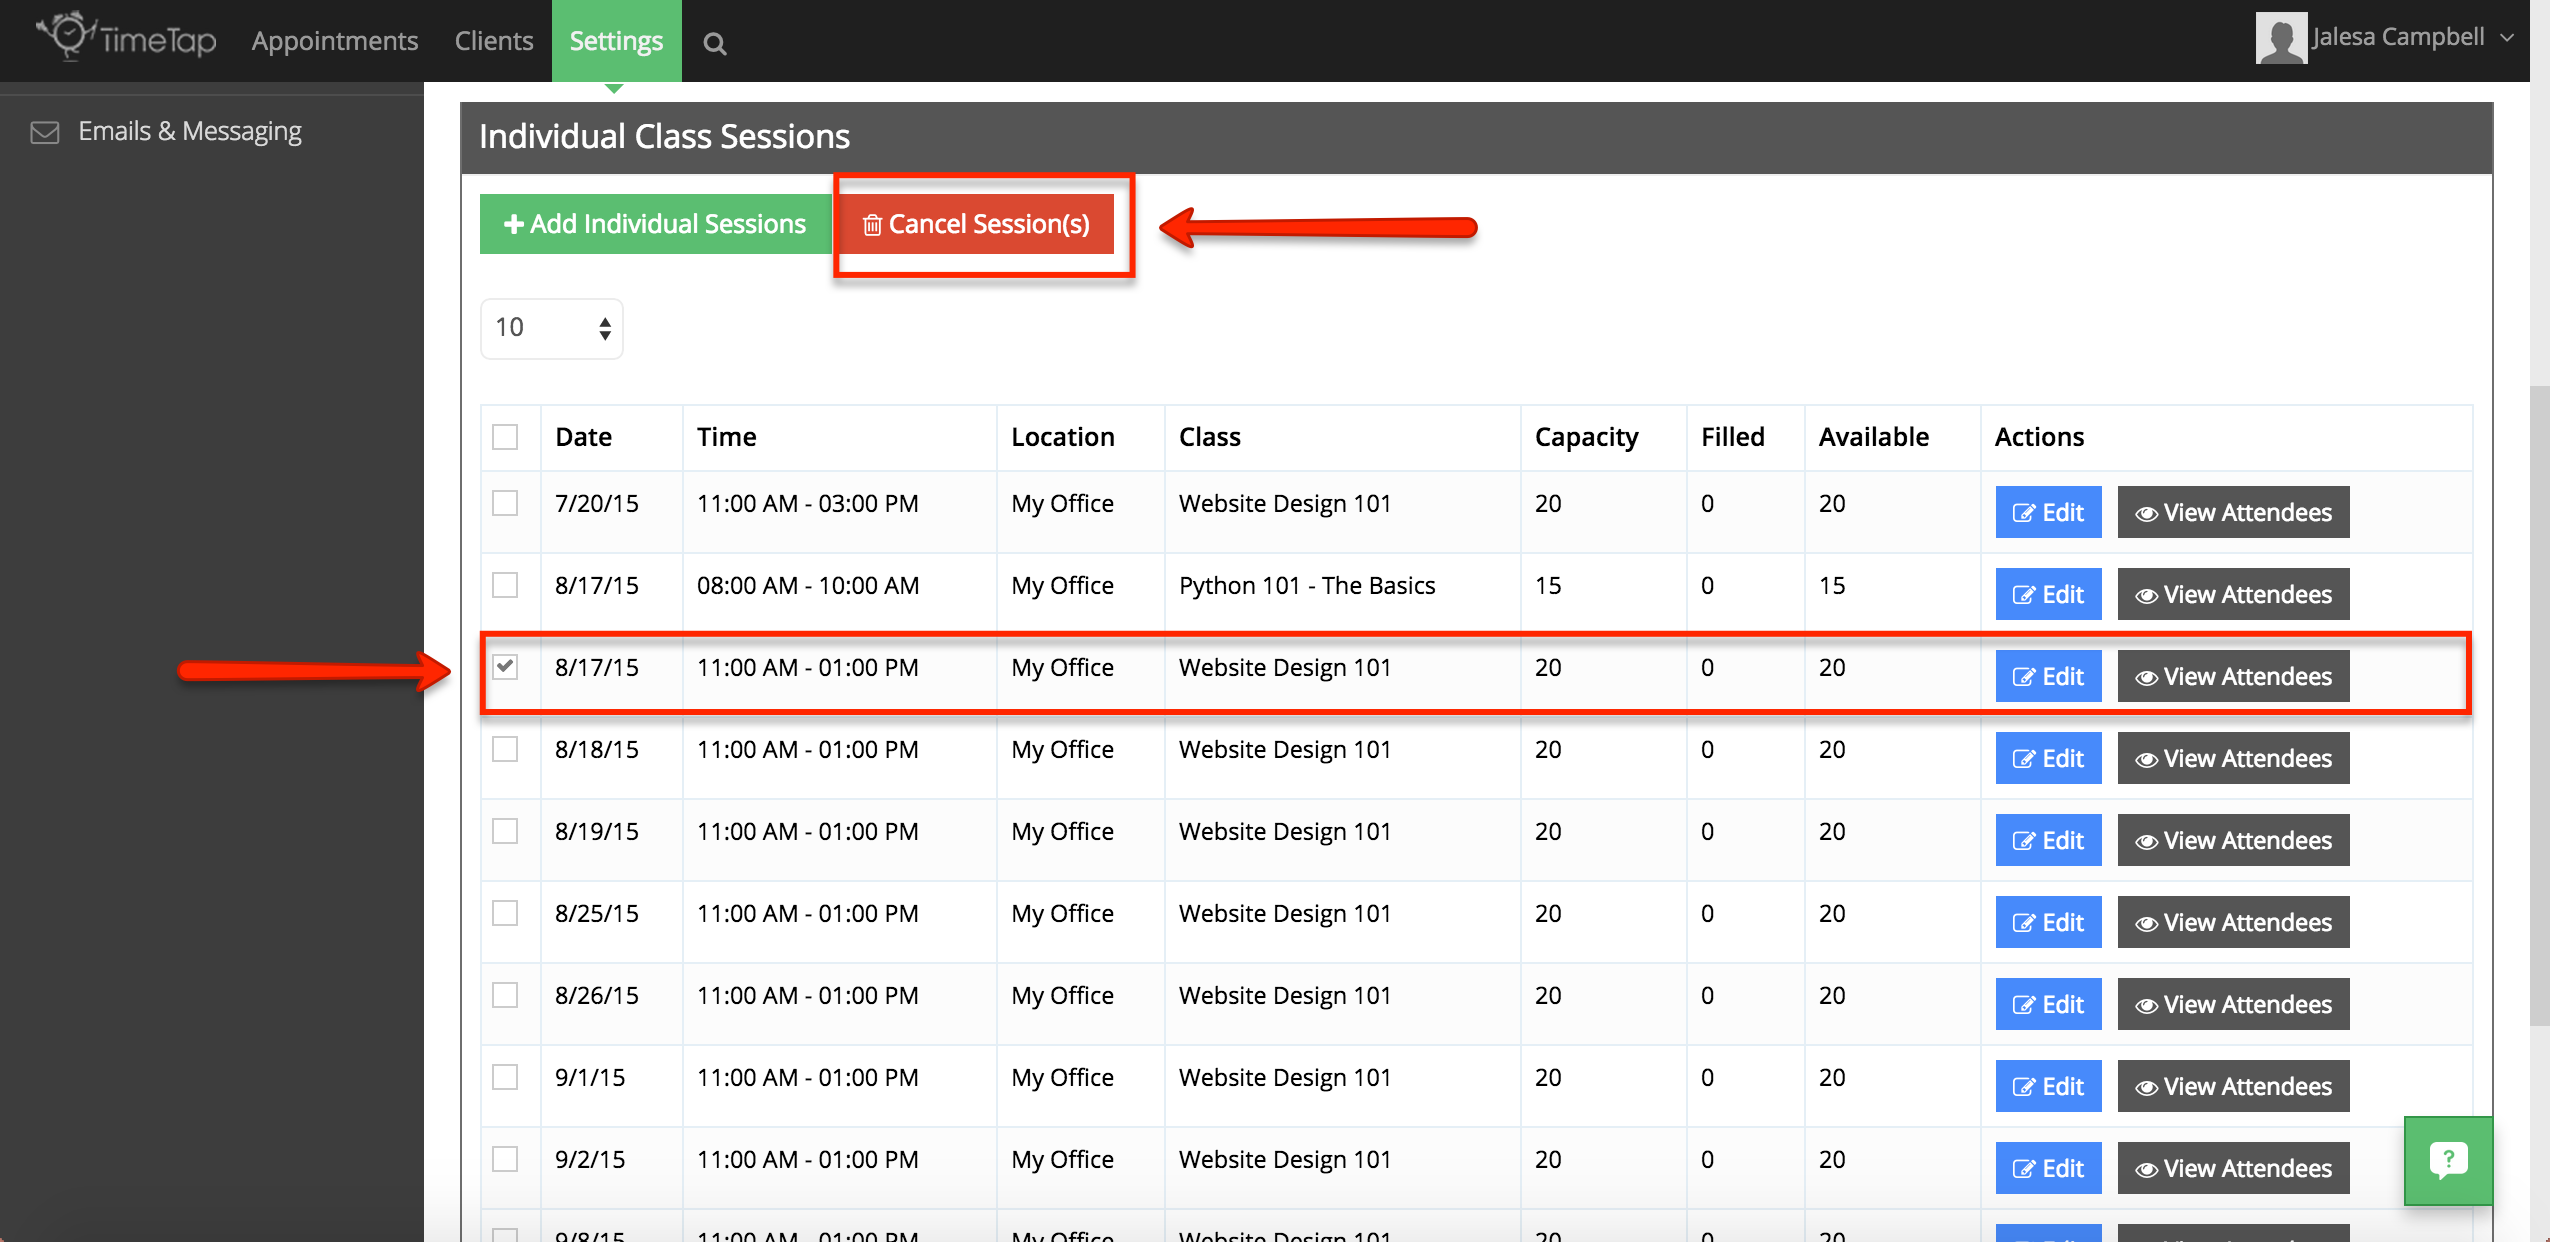
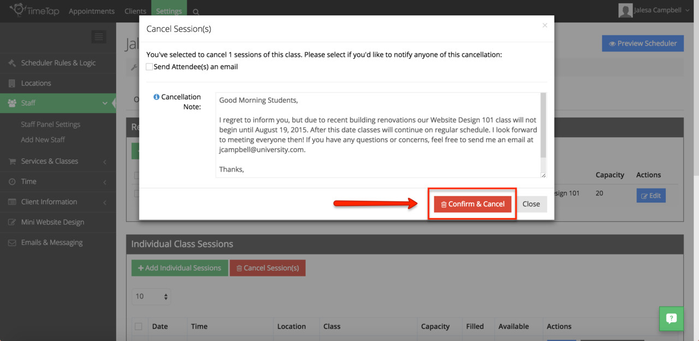
To cancel an individual class session from the Staff Profile page, place a check mark in the small box beside the "Date" for the class session that you would like to cancel and then click on the red "Cancel Session(s)" button.
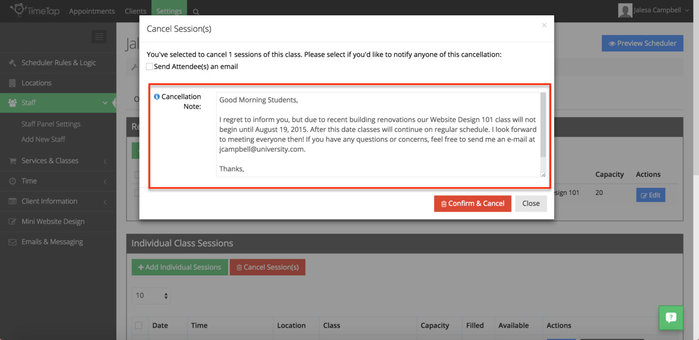
After clicking on the "Cancel Session(s)" button, you will see a dialog box that tells you how many sessions of the class you would like to cancel, and the option to notify the session’s attendees by an email.
![]()
*Please note that if you would like to cancel more than one session at a time, place additional check marks in the small boxes beside the dates for each session.
If you choose to notify the session’s attendees by email, you have the option to add a Cancellation Note. As you will see from the photo below, I have added a cancellation note for the cancellation of the Website Design 101 class scheduled for August 18, 2015.
Once you are ready to cancel your class session, click "Confirm & Cancel" and you will receive a confirmation message that your class session has been marked as cancelled. Under the Class Schedule tab, you will notice that your class session has been removed the Individual Class Sessions section.
Canceling a Repeating Class Schedule
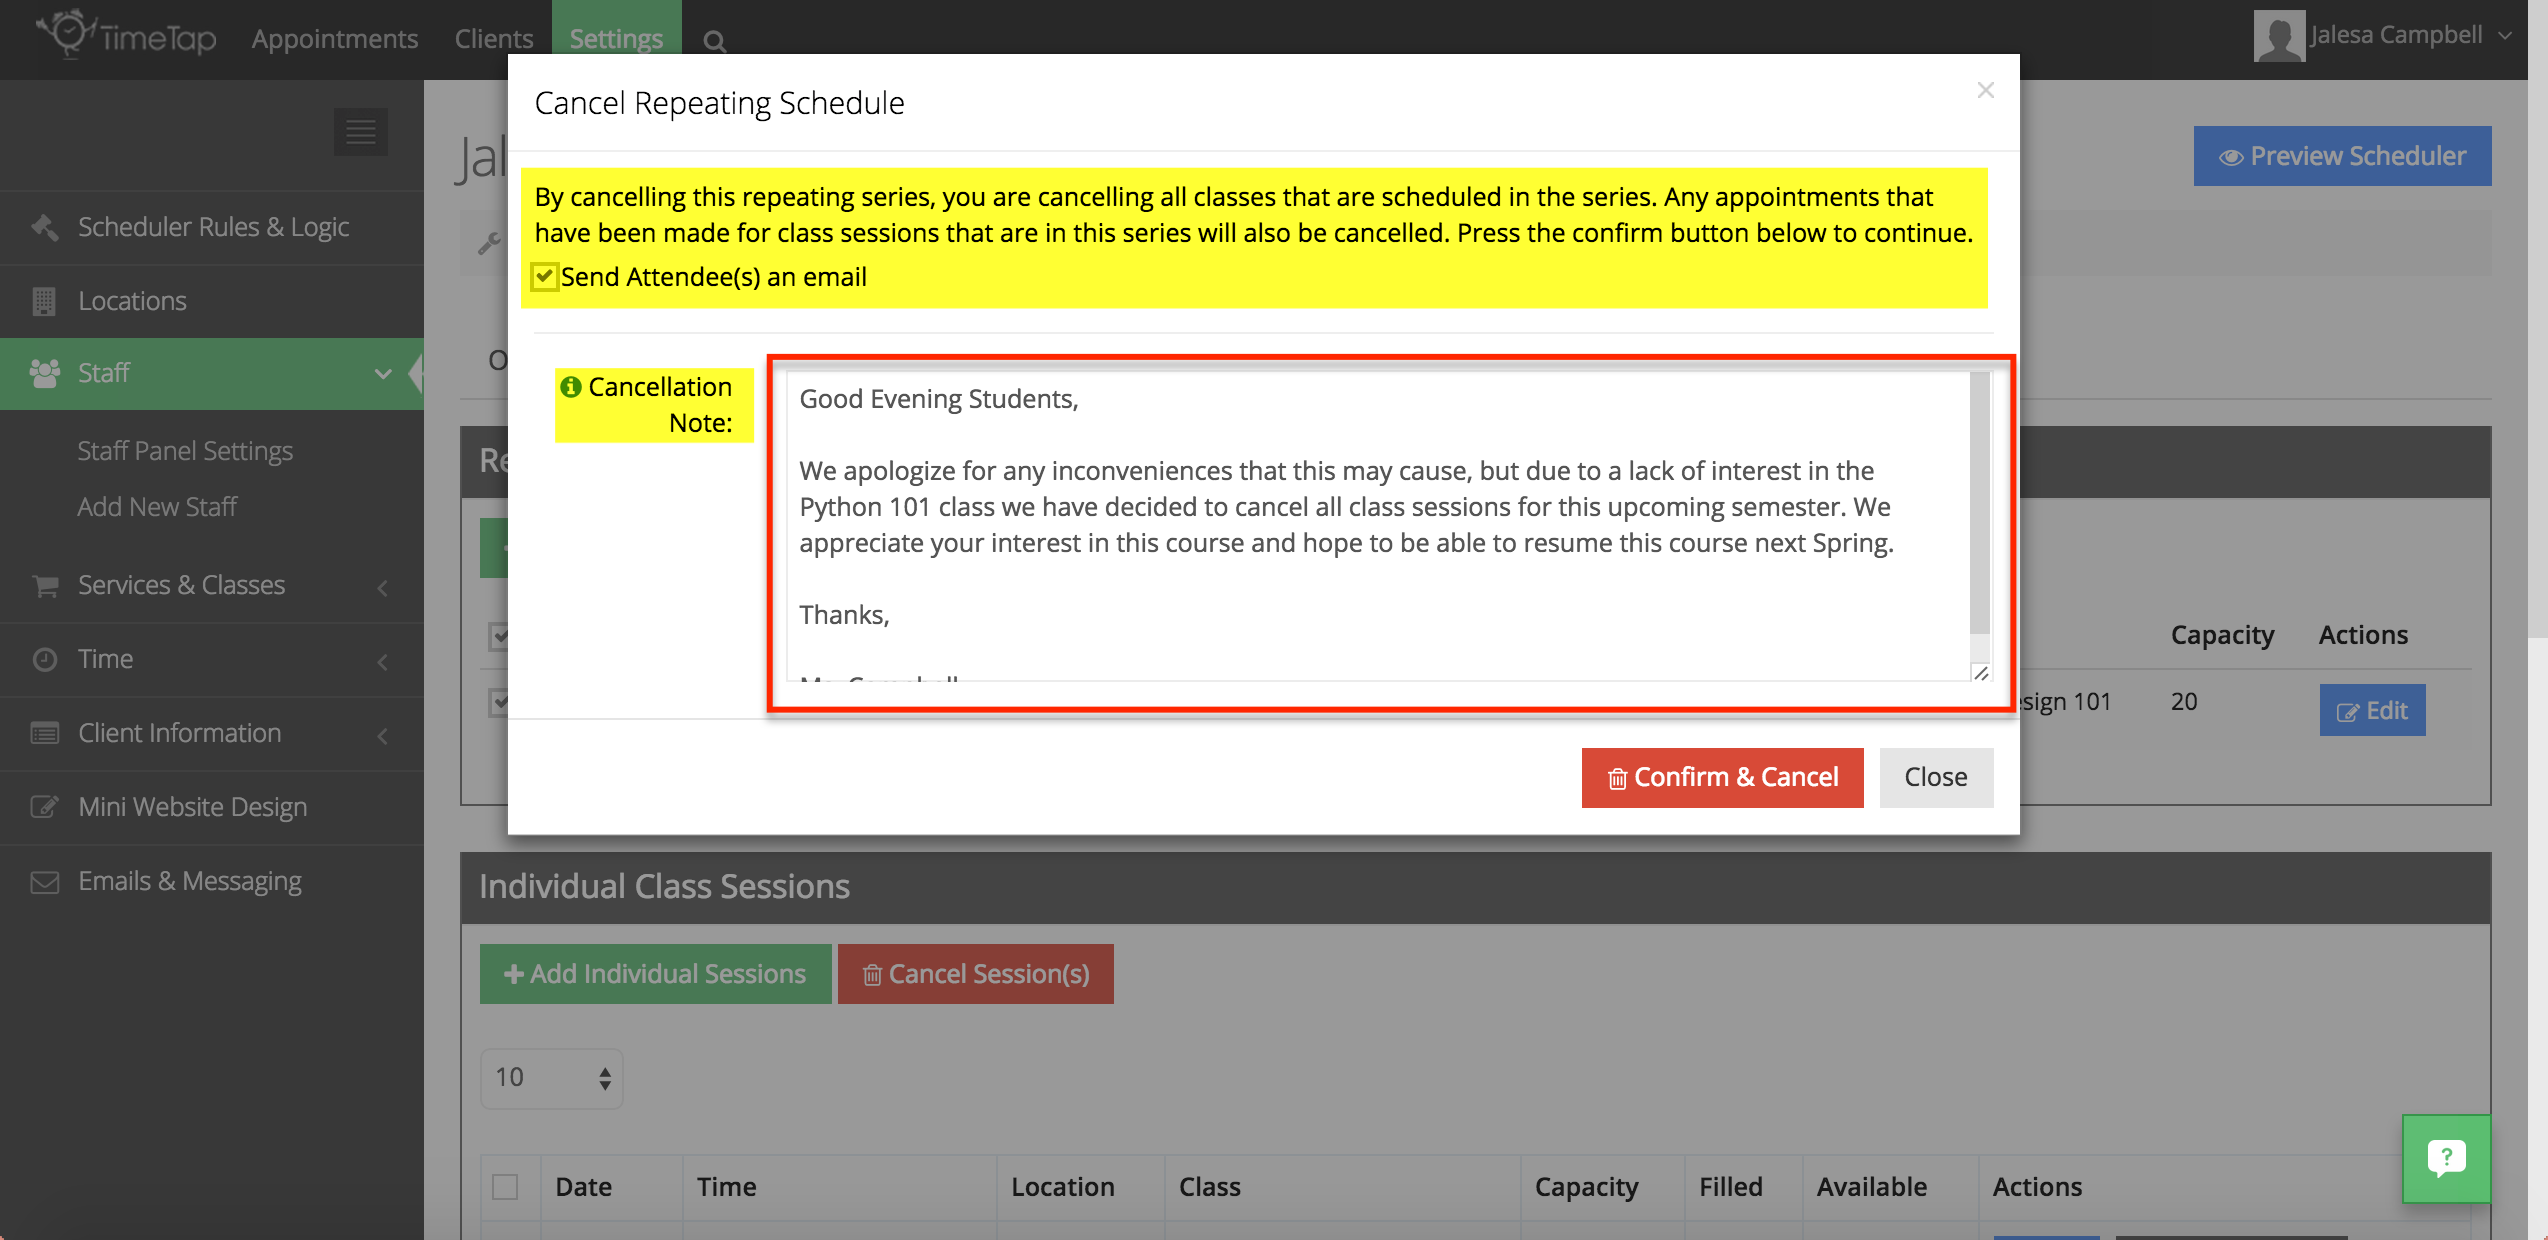
Canceling a repeating class schedule involves a similar process. To cancel a repeating class schedule, place a check mark beside the "Start Date" of the repeating class schedule that you would like to cancel and then click on the red "Cancel Schedules" button.
After clicking on the "Cancel Schedules" button, a dialog box will appear notifying that if you cancel this repeating series of sessions, you will cancel all classes that are scheduled within this series. You are also notified that any appointments made for the class sessions within this series will be cancelled as well. You have the option to send the class’s attendees an email notifying them of the cancellation by placing a check mark in the box beside ‘Send Attendee(s) an email’ and adding a cancellation note. I’ve added a cancellation note for the Python 101 class.
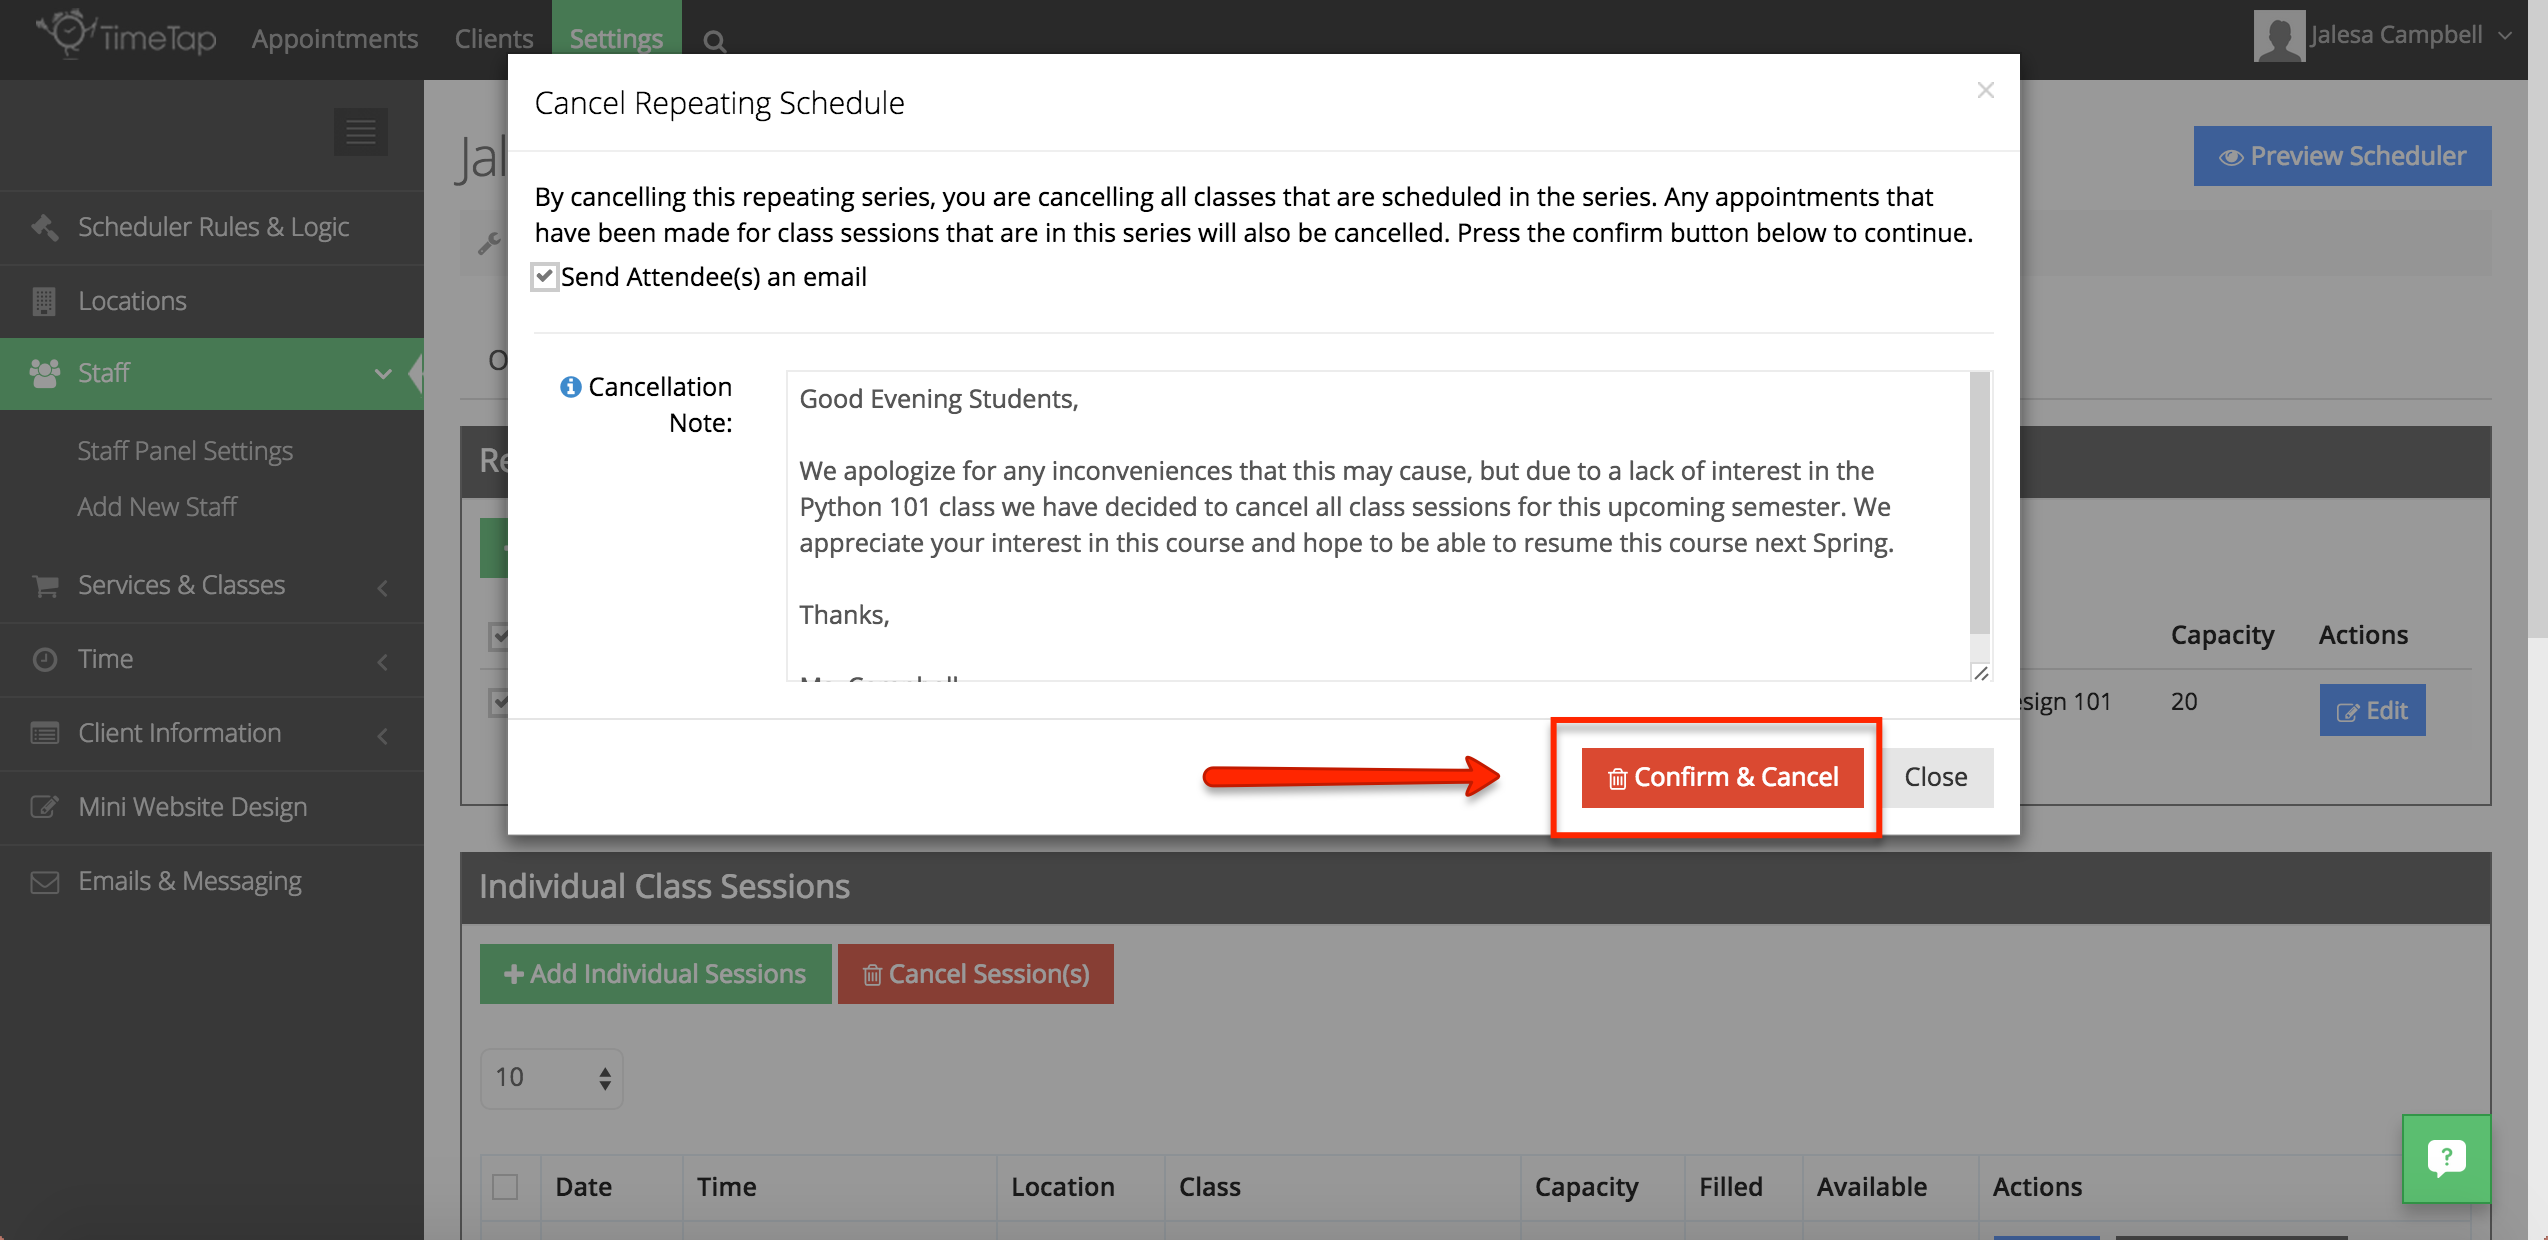
Once you are ready to cancel the series of sessions, click on "Confirm & Cancel" and you will receive a confirmation message that the series of sessions has been marked as cancelled. Under the Class Schedule tab, you will notice that your repeating class schedule has been removed under the Repeating Schedules section.
For more details on canceling an individual class session or repeating class schedule, please click the hyperlinked text to be directed to more detailed documentation on this procedure.
After reading this documentation, if you still find yourself feeling stuck please feel free to contact our support staff. We will be glad to assist you with any queries that you might have.