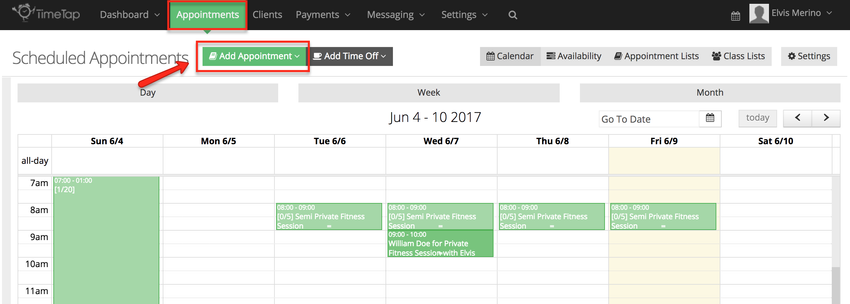
You can always add a new appointment by pressing the "Add Appointment" dropdown button from your Appointments page:

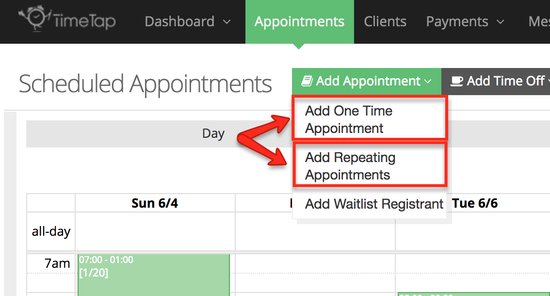
After clicking the green "Add Appointment" button, you'll see you have the option to add either a One Time Appointment or a Repeating Appointment:

From here, I recommend reading our documentation on adding one time appointments and adding repeating appointments to learn how to navigate those individual screens. You'll find links to those documentation pages below:
- Step by step guide on adding a One Time Appointment
- Step by step guide on adding a Repeating Appointment
If you have any questions on adding appointments, you can also contact our support team and we'd be happy to help out.
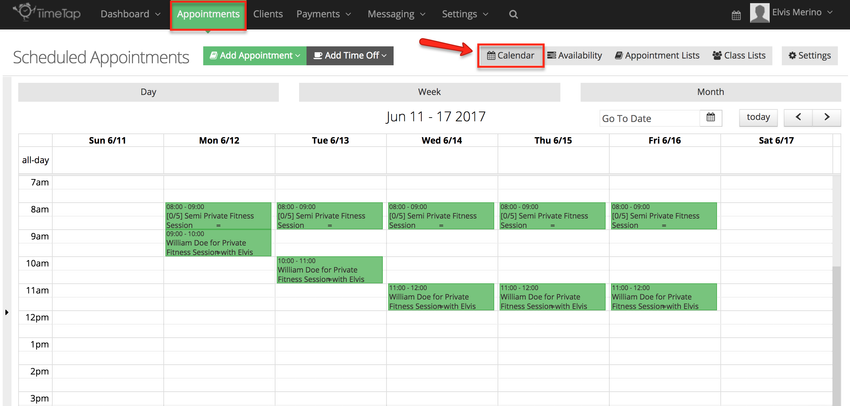
You can also add a one time appointment by scrolling through your calendar and clicking on a blank spot. To do this navigate to the main "Appointments" menu and make sure you have the "Calendar" tab open:

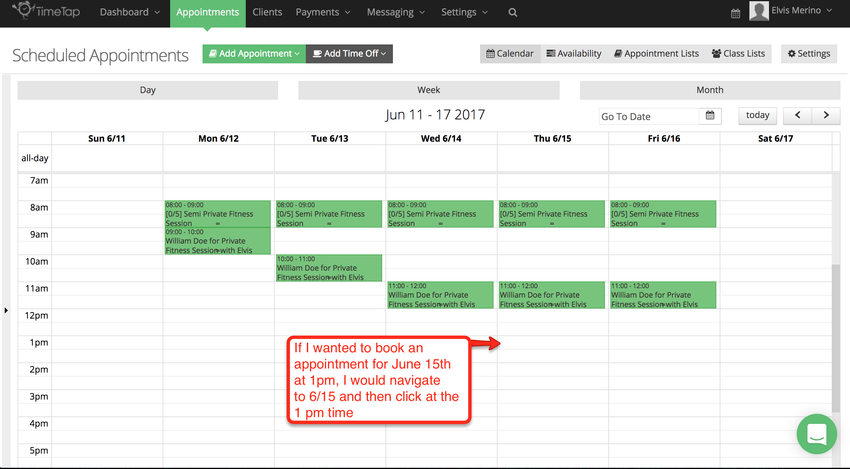
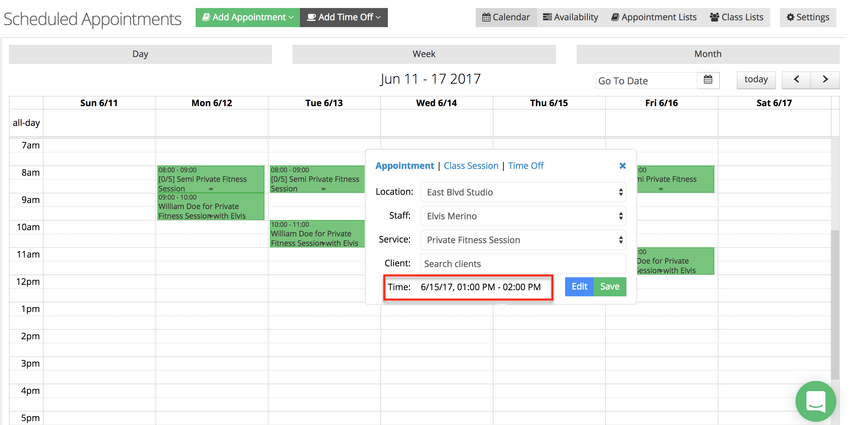
Find the date and time that you want to add an appointment for and click on it:

You
A new window will appear where the time and date you click on will be selected:
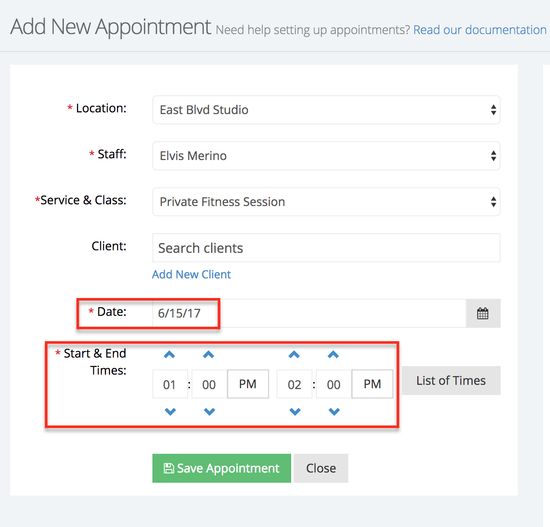
If you were to double click on a free time slot in the calendar, you'll see that when you enter into the Add New Appointment screen that the date and time are pre-filled with your selection from clicking on the calendar. The Add New Appointment screen will allow you to modify the start and end time to your specifications if you need to:

Double clicking on the calendar is just going to get you to the Add One Time Appointment screen. You would need to press the "Add New Appointment" button at the top of the Appointments page to get to the Add Repeating Appointment screen.
If a client is interested in making an appointment for a session for one of your classes, you can add the client as an attendee through the Class Session Details screen for that class.
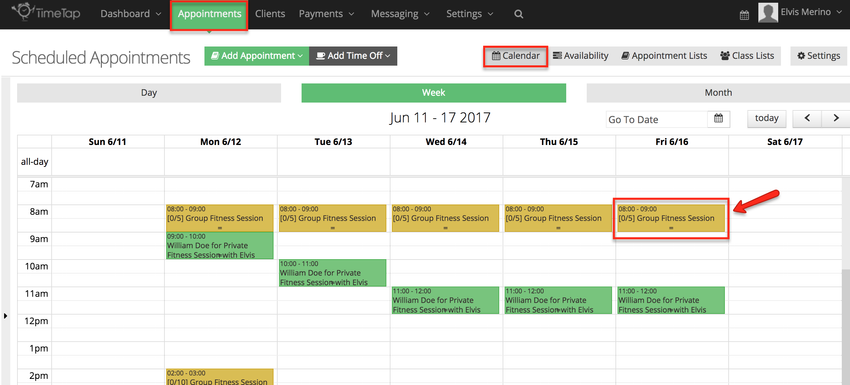
To do this, first navigate to your Class Session Details screen by finding it on your Appointments → Calendar view and clicking on the session that's displayed there:

Clicking :
Once you've clicked on a class session a new window will appear, within this window you will have the option to add an attendee:
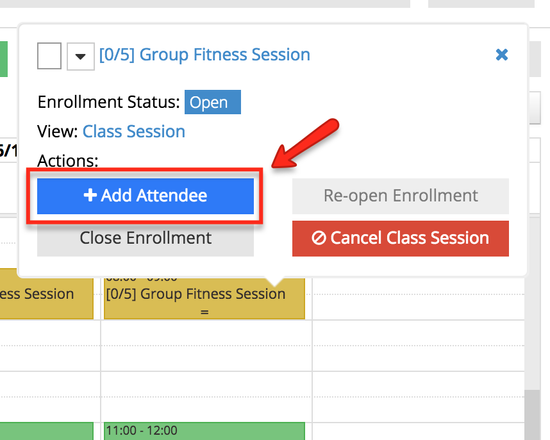
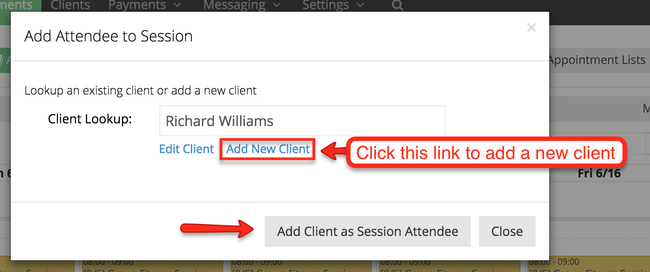
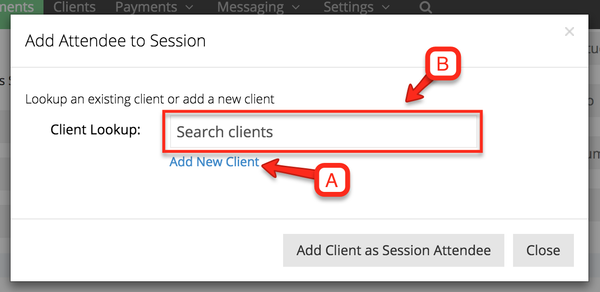
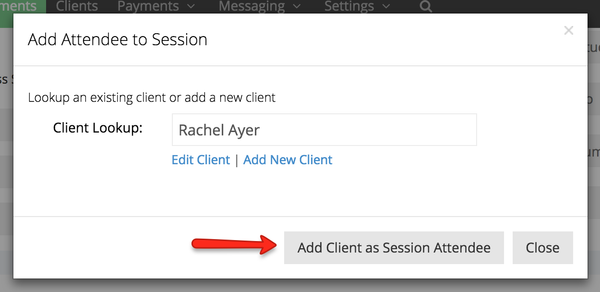
After you have clicked "Add Attendee" a new window will appear where you can search for an existing client by start typing their name in the Client Lookup field or click the Add New Client link to add a new client. Once you have the client's name in the Client Lookup field, click the Add Client as Sessions Attendee:
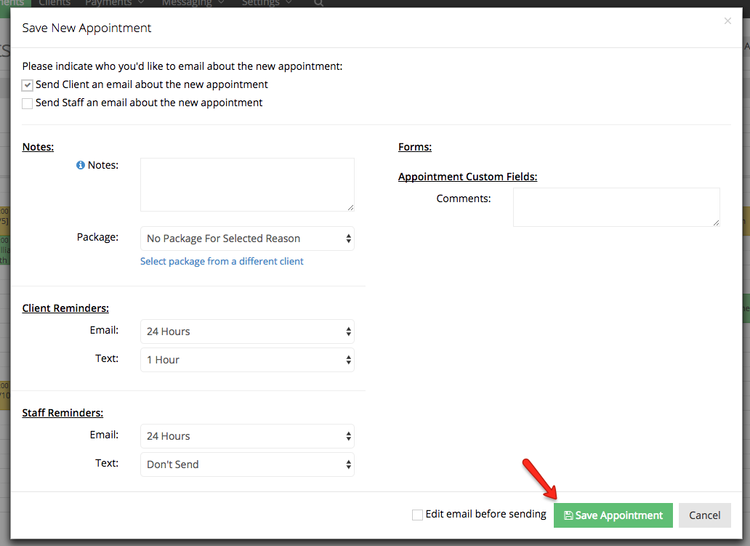
After the client has been added a new window will appear, here you can choose to send email to client/staff, add notes to the appointment, sent when reminder to the client/staff should be sent, and fill out any fields associated with the class. Click Save Appointment to add the client as an attendee to the class:
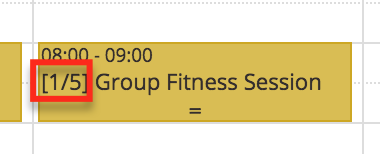
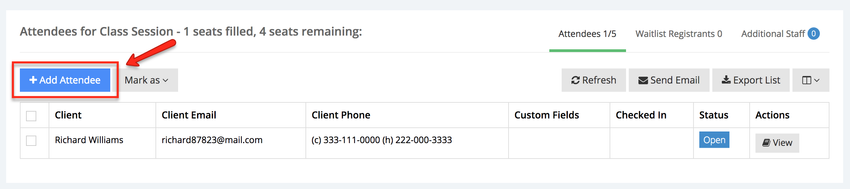
After the client has been added, the total number of attendees will update in the class session:
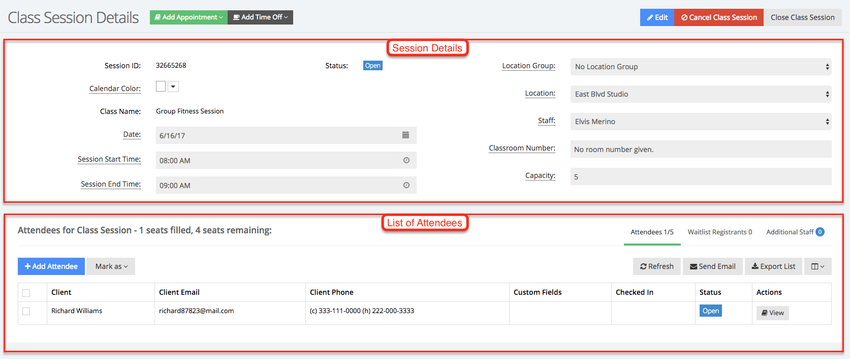
Double clicking on the session on your calendar display will take you to the Class Session Details page for that session. On this page, you'll see the session details laid out on the upper part of the page and any registered clients listed in the table at the bottom:

If you want to add a new client to the class session, simply click the button to "Add Attendee" from the top of the Attendees list section:

This will give you a small window where you can add a new attendee by either (aA) searching through your existing Clients or (bB) adding a new client:

You can also enter in information for any appointment custom fields that your business has created. Once that has all been entered, you'll just press "Add Client as Session Attendee":

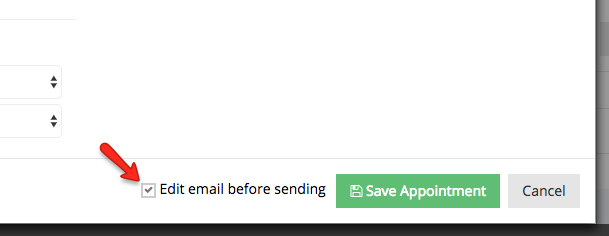
This will bring up a window to ask if you'd like to send out an email to your client about the new appointment. If you check off that you do want to send an email out to your client, then you'll see a small checkbox appear in the bottom where you can indicate if you'd like to edit the email before sending it out:

Once you have the client's name in the Client Lookup field, click the Add Client as Sessions Attendee:
After the client has been added a new window will appear, here you can choose to send email to client/staff, add notes to the appointment, sent when reminder to the client/staff should be sent, and fill out any fields associated with the class. Click Save Appointment to add the client as an attendee to the class::
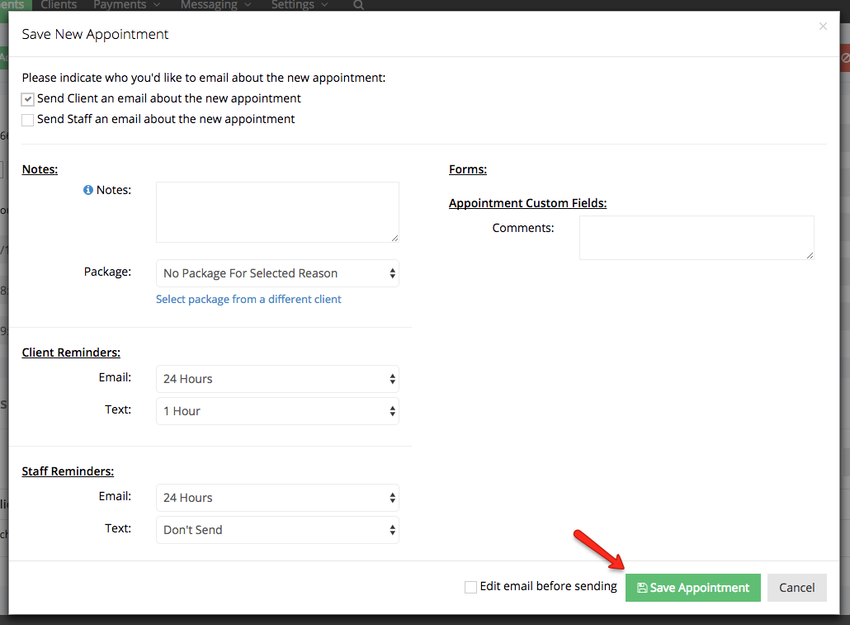
Please note: Edit email before sending is only available for TimeTap Professional and TimeTap Business users.
You chose to Edit the email before sending:
Clicking "Save Appointment" from here will bring up the edit email screen. I can review the email and then press "Send Email":

As soon as I press the "Send Email" button, I'll return back to the Class Session Details screen and I'll see my attendees list has been updated with the new attendee I added to the session:

